Table of Contents
Advertisement
Advertisement
Table of Contents

Related Manuals for Philips PicoPix Micro 2TV PPX360


Summary of Contents for Philips PicoPix Micro 2TV PPX360
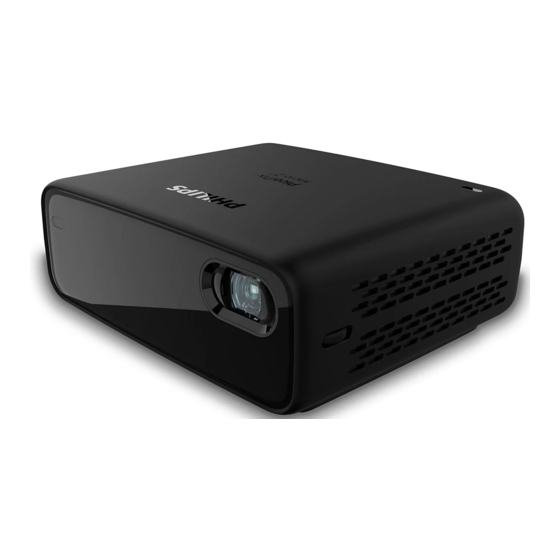
- Page 1 EN User Manual FR Manuel utilisateur DE Bedienungsanleitung ES Manual de usuario PicoPix Micro 2 IT Manuale d’uso NL Gebruiksaanwijzing Portable projector RU Руководство пользователя PPX360 TR Kullanım Kılavuzu Register your product and get support at www.philips.com/support...
- Page 2 User Manual PicoPix Micro 2 Portable projector PPX360 Register your product and get support at www.philips.com/support...
-
Page 3: Table Of Contents
Table of contents Introduction �������������������������������������������������3 8 Other features ������������������������������������� 13 Dear customer ...............3 Listen through external speakers or headphones ..............13 About this user manual ..........3 Charge a USB device ..........14 What’s in the box ............3 Use HDMI ARC function ...........14 Customer service centre ..........3 9 Change settings ����������������������������������14 General safety information ���������������... -
Page 4: Introduction
You can find the support hotline in the warranty Danger of personal injury! card or online: This symbol gives warning of danger Web: www.philips.com/support of personal injury. Physical injury or Mail: philips.projector.eu@screeneo.com damage can result from improper International Phone: +41 215 391 665 handling. -
Page 5: General Safety Information
The product must be repaired by power cable. Have your product checked by an authorised service centre. an authorised service centre. Keep the product away from open flames (e.g. candles). Philips · PicoPix Micro 2... -
Page 6: Power Supply
2 Overview Please find the details of authorised service centres on the warranty card supplied with this product. Rear view Do not remove the type label from this product, as this will void the warranty. Power supply Use only a power adapter which is certified for this product (see Technical data, page 20). -
Page 7: Front View
Volume for volume adjustment. Quick access to Netflix service. Quick access to Prime Video service. Access or exit projector system settings options. Return to a previous menu screen. Philips · PicoPix Micro 2... -
Page 8: Initial Setup
3 Initial setup Access the Android TV home screen. Navigation buttons Notice Navigate menu options. Make sure all devices are disconnected LED indicator from the power outlet before establishing • Each time you press a button on the or changing any connections. remote control, the LED lights up briefly then off. -
Page 9: Prepare The Remote Control
Bluetooth. Pairing can Open the battery compartment. enable the remote control to work in Android TV mode. Insert the supplied batteries (type AAA) with correct polarity (+/-) indicated. Philips · PicoPix Micro 2... -
Page 10: Operation
4 Operation When prompted for pairing, hold down OK and on the remote control for about 10 seconds until the interface shows successful connection. Image setup Make sure the projector is turned on and as close as possible to the remote control. Screen size adjustment Step 2: Select language The projection screen size (or size of images) is... -
Page 11: Using Tripod
An improper ceiling If not in the correct projection orientation, installation may result in accident, injury press to access the settings options or damage. and go to Projection Mode - Rotate Ceiling. Philips · PicoPix Micro 2... -
Page 12: Use Home Screen
5 Use home screen Rear table Place the projector on a table behind the projection screen. A special rear projection The home screen provides direct access to screen is required. Android TV service and setup on the projector. The projector automatically adjusts for the correct projection orientation. -
Page 13: Use Wired Keyboard/Mouse
Only content from the app on the mobile device can be streamed to the projector. Google, Google Play, YouTube, Android TV and other marks are trademarks of Google LLC. Google Assistant is not available in certain languages and countries. Philips · PicoPix Micro 2... -
Page 14: Connect To Playback Devices
8 Other features 7 Connect to playback devices Listen through external Notice speakers or headphones Make sure all devices are disconnected Connect external speakers or headphones to from the power outlet before establishing the projector. With this connection, audio from or changing any connections. -
Page 15: Charge A Usb Device
Go to Device Preferences - Keyboard to access various settings for keyboard. Bluetooth settings Go to Remotes & Accessories to pair the projector with the projector's remote control, or a Bluetooth keyboard/mouse/gamepad. Apps settings Go to Apps to access the following settings. Philips · PicoPix Micro 2... - Page 16 • List downloaded/system/running apps, and Restore default settings memory used by each app Go to Device Preferences - Reset. • Set various permissions for the installed Follow the on-screen instructions to start or apps, e.g. location, contacts, camera, cancel the reset. microphone, phone and SMS, etc.
-
Page 17: Projector System Settings
Color Temperature: Select Warm when the ambient lighting is yellowish. Select Cool when the ambient lighting lighting is bluish. Select User to customize color values in RGB mode. • Volume: Adjust volume of the projector. Philips · PicoPix Micro 2... -
Page 18: Service
• Software Version: Check software version of The latest software of the projector can be this product. found on www.philips.com/support for you to get the best features and support from the projector. Before you update the software of the projector, check the current software version: •... -
Page 19: Troubleshooting
• Check if the correct HDMI input is selected. • Disconnect the HDMI cable or switch off the HDMI device. • Wait three seconds. • Reconnect the HDMI cable or switch on the HDMI device again. Philips · PicoPix Micro 2... - Page 20 Problems Solutions No sound from external HDMI output • On the HDMI output device, set the audio setting device. to Multichannel (Raw data) & Stereo (PCM). No sound when you connect your • Check that the sound is activated on the computer via HDMI cable.
-
Page 21: Appendix
...... 3.5 mm headphone out (analog) Power source Power consumption ....operating: 100 W ............standby: 0.3 W Power supply ....... 100-240V~, 50/60Hz Power adapter ..........DC 12V 3A Battery ..... 12,000mAh (4h in eco mode) Philips · PicoPix Micro 2... -
Page 22: Ce Statement
Connect the equipment into an outlet on a circuit different from that to which the The Declaration of Compliance can be receiver is connected. consulted on the site www.philips.com. • Consult the dealer or an experienced radio/ Limits TV technician for help. -
Page 23: Other Notice
Screeneo Innovation SA/PHILIPS products or Please respect the sorting rules set up locally Screeneo Innovation SA/PHILIPS approved for this kind of waste. - Page 24 Screeneo Innovation SA Route de Lully 5c - 1131 Tolochenaz - Switzerland Philips and the Philips Shield Emblem are registered trademarks of Koninklijke Philips N.V. used under license. Screeneo Innovation SA is the warrantor in relation to the product with which this booklet was packaged.