Table of Contents
Advertisement
© 2020 JVCKENWOOD Corporation
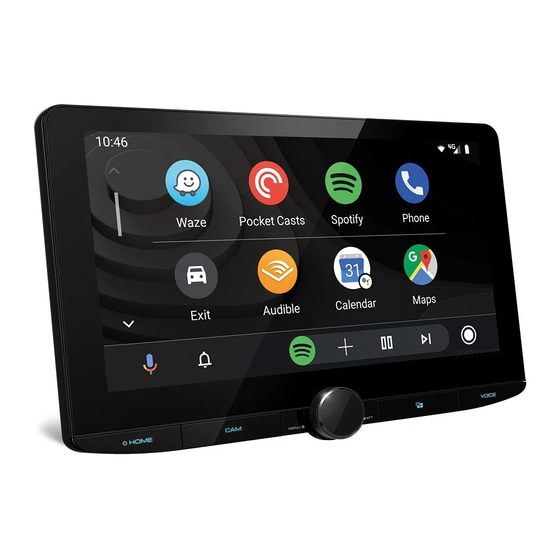
DMX9720XS
DMX9720XDS
MONITOR WITH RECEIVER
INSTRUCTION MANUAL
• Updated information (the latest Instruction Manual, system updates, new
functions, etc.) is available from
<https://www.kenwood.com/cs/ce/>.
• The Instruction manual is subject to change for modification of
specifications and so forth. Be sure to download the latest edition of the
Instruction manual for reference.
<https://manual.kenwood.com/edition/im406/>
Hi-Res Audio logo and Hi-Res Audio
Wireless logo are used under license
from Japan Audio Society.
B5A-3356-00 (M/X/A9)
Advertisement
Table of Contents

Related Manuals for Kenwood DMX9720XS


Summary of Contents for Kenwood DMX9720XS
- Page 1 DMX9720XS DMX9720XDS MONITOR WITH RECEIVER INSTRUCTION MANUAL • Updated information (the latest Instruction Manual, system updates, new functions, etc.) is available from <https://www.kenwood.com/cs/ce/>. • The Instruction manual is subject to change for modification of specifications and so forth. Be sure to download the latest edition of the Instruction manual for reference.
- Page 2 Important Notice on Software EULA Ñ Ñ Software License on This Software License Agreement Product JVCKENWOOD Corporation (hereinafter called “Licensor”) holds either the copyright to the embedded The software embedded in this product comprises a software or the right to sublicense it. This agreement number of independent software components, each of establishes the conditions under which the customer which is copyrighted by JVCKENWOOD Corporation or...
- Page 3 Article 4 (Rights to Licensed Software) Article 11 (Export Control) All rights to Licensed Software and the associated 1. Licensed Software and the associated literature or literature, including copyrights, shall reside with the like may not be exported to places outside the Licensor or Country (including transmission outside the Country the original right holder who has granted the Right...
-
Page 4: Table Of Contents
Contents Before Use iPod/iPhone Precautions ..............6 Preparation ..............26 How to read this manual ......... 6 iPod/iPhone Basic Operation .......27 Search Operation ............28 Basic Operations Radio Functions of the Buttons on the Front Panel ... 7 Turning on the Unit ........... 8 Radio Basic Operation ..........29 Initial Settings .............. - Page 5 Setup Monitor Screen Setup ..........53 Connections & AV Setup ........53 Display & Button Setup ..........55 User Interface Setup ..........56 System Setup .............58 Controlling Audio 3-way speaker system setup ........60 Speaker / X’over setup ..........61 Equalizer Control ............62 Listening Position / DTA .........63 Fader / Balance / Zone Control ......65 Volume Offset ............67 Sound Effect ...............67...
-
Page 6: Before Use
See System Setup For best results while pairing with your (P.58). KENWOOD receiver, please be sure to close any • The Radio Data System feature won’t work in unused applications. areas where the service is not supported by any broadcasting station. -
Page 7: Basic Operations
Basic Operations Basic Operations Functions of the Buttons on the Front Panel Number Name Motion Remote • Receives the remote control signal. Sensor • Displays the HOME screen (P.11). HOME/[ ] • Pressing for 1 second turns the power off. •... -
Page 8: Turning On The Unit
Basic Operations Turning on the Unit Initial Settings Initial SETUP Press the [HOME]/[ ] button. Perform this setup when you use this unit first time. Set each item as follows. h The unit is turned on. ● To turn off the unit: Press the [HOME]/[ ] button for 1 second. - Page 9 Basic Operations ■ [DEMO] Enter a security code with 4 to 8 digit Set the demonstration mode. Default is “ON”. number and touch [Enter]. [3way X'over] ■ Displays the message screen. For details, see 3-way speaker system setup (P.60). Touch [Finish]. Enter the same code again and touch [Enter].
- Page 10 Basic Operations Calendar/clock settings Adjust the date and time manually Touch [Clock] in the System setting menu. Press the [HOME]/[ ] button. Select [Manual]. Touch [ ]. Touch [Time Zone] in the System setting Touch [SETUP]. menu. h SETUP Menu screen appears. Select the time zone.
-
Page 11: Adjusting The Volume
Basic Operations Adjusting the volume HOME screen descriptions You can adjust the volume (0 to 40). Most functions can be performed from the HOME screen. Turn the knob clockwise to increase, and counter-clockwise to decrease. • Widget (P.16) Touch screen operations •... -
Page 12: Popup Menu
Basic Operations Popup menu Turn off the screen Select [Display OFF] on the popup menu. Press the[MENU]/[ATT]button. h Popup menu appears. Touch to display the popup menu. NOTE • Touch the display to turn on the screen. • To display the clock while the screen is off, it is necessary to set "OSD Clock"... - Page 13 Basic Operations Select the playback source *4 Set “VIDEO IN” to “None” in Camera Assignment Settings. (P.49) Press the [HOME]/[ ] button. Put the unit in standby h HOME screen appears. Press the [HOME]/[ ] button. Touch [ h HOME screen appears. From the screen, you can select the following sources and functions.
-
Page 14: Source Control Screen Descriptions
Basic Operations Customize Short-cut source icons Source control screen descriptions You can arrange the positions of the source icons as you like. There are some functions which can be The 4 items placed in bottom line will appear performed from most screens. on the bottom bar in various screens, as the short-cut playback source icons. -
Page 15: List Screen
Basic Operations * For left hand drive vehicles, the left and right Text scroll drawers are swapped. For how to set up the driving position, see User Interface Setup Scrolls the displayed text. (P.56). ] Page scroll You can change pages to display more items by List screen touching [ •... -
Page 16: Widget
Widget Widget Widget Drive Widget Panel You can change the widget. Press the [HOME]/[ ] button. Press the [HOME]/[ ] button. You can change the widget or customize the widget area. Touch the right top corner of the drive widget panel. h The drive widget list appears. -
Page 17: Importing Image Files
See Photo Frame Widget (P.16) and To register an original image (P.56). Preparation • Install the latest version of the "KENWOOD Portal APP" application on your iPhone or Android smartphone. – iPhone: Search for “KENWOOD Portal APP” in the Apple App Store to find and install the Drag the drive widget to right or left. -
Page 18: Apps
APPS APPS Wireless Mirroring Operation Apple CarPlay Operation You can display the same screen of the Apple CarPlay is a smarter, safer way to use Android smartphone on the monitor of the your iPhone in the car. Apple CarPlay takes unit using the Wireless Mirroring function of the things you want to do with iPhone while the Android smartphone. - Page 19 APPS Ñ Select an Apple CarPlay device Wireless connection You can select the iPhone registered in [Device If two or more iPhone compatible with Apple List] and use it as the Apple CarPlay device. CarPlay have been registered, select the See Register the Bluetooth device (P.37).
-
Page 20: Android Auto Operation
APPS Ñ Use Siri Android Auto™ Operation You can activate Siri. Android Auto enables you to use the functions Press the [VOICE] button. of your Android smartphone convenient for driving. You can easily access route guidance, make calls, listen to music, and access convenient functions on the Android smartphone while driving. - Page 21 APPS Ñ Ñ Connect Android smartphone Select an Android smartphone If two or more Android smartphones Wired connection have been registered, select the Android smartphone to be used as the Android Auto Connect an Android smartphone via the source. See Switch the connected device USB terminal.
- Page 22 APPS Ñ Using voice control Press the [VOICE] button. Start speaking. NOTE • When you press and hold the [VOICE] button while inputting voice, you can start over from the beginning. To cancel Press the [VOICE] button. Ñ Switch to the Android Auto screen while listening to another source Press the [...
-
Page 23: Usb
Connecting a USB device USB Basic Operation Most functions can be controlled from the Connect the USB device with the USB source control screen and playback screen. cable. (P.88) NOTE • Set the remote controller mode switch to AUD mode before starting operation, see Switch the operation mode (P.72). - Page 24 Video screen • [DH] : Plays or pauses. • [ ] : Touch to mute or not to mute. • [ ] : Repeats the current track/folder. Each time you touch the key, repeat modes are switched in the following sequence: Folder repeat ( ), Folder repeat ( Repeat all (...
-
Page 25: Search Operation
Ñ Search Operation Link search (Audio file only) You can search for a file of the same artist/ You can search music or video files by the album/genre as that in the current track. following operations. Touch [Link Search]. Touch [1]. Touch the desired tag type. -
Page 26: Ipod/Iphone
Bluetooth device and do the profile setting • Latest compatible list of iPod/iPhone. For details, for the connection beforehand. See Register see www.kenwood.com/cs/ce/ipod/. the Bluetooth device (P.37) and Switch the connected device (P.38). • By connecting your iPod/iPhone to this unit with the iPod connection cable KCA-iP103 (optional •... -
Page 27: Ipod/Iphone Basic Operation
iPod/iPhone iPod/iPhone Basic Operation Play mode indicator/Playing time • D, B, etc.: Current play mode indicator Meanings of individual icons are as follows: NOTE D (play), B (fast forward), A (fast • Set the remote controller mode switch to AUD backward), H (pause). -
Page 28: Search Operation
iPod/iPhone Ñ Search Operation Link search You can search for a file of the same artist/ You can search music files by the following album/genre/composer as that in the current operations. track. Touch [1]. Touch [Link Search]. Touch [S]. Touch the desired tag type. You can select from artists, albums, genres and composers. -
Page 29: Radio
Radio Radio Radio Basic Operation Preset key Recalls the memorized station. Most functions can be controlled from the When touched for 2 seconds, stores the current source control screen. receiving station in memory. To listen to the Radio source, touch [Radio] Indicator Items icon on the source selection screen. -
Page 30: Memory Operation
Radio Memory Operation Selecting Operation Ñ Ñ Auto memory Preset select You can store stations with good reception in You can list and select memorized station. memory automatically. Select a station from the list. Touch desired band key. Touch [AME]. Ñ... -
Page 31: Traffic Information (Fm Only)
Radio Traffic Information (FM only) Radio Setup You can listen and watch the traffic You can set tuner related parameters. information automatically when a traffic Touch [ bulletin starts. However, this feature requires a Radio Data System that includes the TI information. -
Page 32: Digital Radio
Digital Radio Digital Radio (DMX9720XDS) Digital Radio Basic Operation • [E] [F] : Tunes in a ensemble, service, and component. The seek mode switching can be changed. (see Seek mode). Most functions can be controlled from the • [ ] : Touch to mute or not to mute. source control screen. -
Page 33: Storing Service In Preset Memory
Digital Radio Storing Service in Preset Information display Memory Displays the information on the current station: Service Name You can store the current receiving service in Touching [ ] allows you to switch between the memory. Content A, Content B and Content C. Content A: DLS, PTY Genre Select a service you wish to store in Content B: Song Title, Artist Name, Ensemble... -
Page 34: Traffic Information
Digital Radio Traffic Information Touch [Search]. You can listen to and watch traffic information automatically when a traffic bulletin starts. However, this feature requires a Digital Radio that includes TI information. Touch [ ] on the left side of the screen. Touch [TI]. -
Page 35: Digital Radio Setup
Digital Radio Ñ Digital Radio SETUP Announcement setup When the service for which ON is selected You can set Digital Radio related parameters. starts, switches from any source to Announcement to receive it. Touch [ ] on the left side of the screen. Touch [SETUP]. -
Page 36: Bluetooth Control
Bluetooth Control Bluetooth Control Ñ Using the Bluetooth function allows you to use About the smartphone/cell- various functions such as listening to the audio phone and Bluetooth audio file and making/receiving a call. player Information for using This unit conforms to the following Bluetooth specifications: Bluetooth®... -
Page 37: Register The Bluetooth Device
Bluetooth Control Register the Bluetooth device [Android Auto] ■ To connect as Android Auto source. It is necessary to register the Bluetooth audio Touch [ player or smartphone/cell-phone in this unit h Bluetooth pairing waiting dialog before using the Bluetooth function. appears. - Page 38 Bluetooth Control To switch the connected device to a Touch [Yes]. Bluetooth device When data transmission and connection have completed, the Bluetooth connection Touch [Bluetooth] on the Device List icon appears on the screen. screen. NOTE h Bluetooth device list appears. •...
-
Page 39: Bluetooth Setup
Bluetooth Control Touch the device name to check. Touch [Bluetooth] and set to [ON]. See the following section for each setting. • Change the PIN Code (P.39) • Change the device name (P.39) • Change the settings for Hands-Free function, see Hands-Free Setup (P.47). NOTE •... -
Page 40: Playing The Bluetooth Audio Device
Bluetooth basic operation (P.39) KENWOOD Music Mix Control screen Bluetooth audio devices can be switched easily to play music. See KENWOOD Music Mix (P.41). * These items appear only when the audio player which supports AVRCP profile is connected. NOTE •... - Page 41 Touch the desired file or folder. • : Device used normally. When you touch a folder its contents are • : Device used for KENWOOD Music Mix displayed. Touch [ ] (White/dark blue background) Touch the desired item in the content list.
-
Page 42: Using The Hands-Free Unit
Bluetooth Control Using the Hands-Free Unit Select a dialing method. You can use the telephone function by connecting the Bluetooth telephone to this unit. NOTE • While Apple CarPlay or Android Auto is connected, the Bluetooth Hands-Free function and two Bluetooth devices connections cannot be used. - Page 43 Bluetooth Control Call using call records Select the phone number from the list. Touch [ Select the phone number from the list. NOTE • You can sort the phone numbers in the list by last name or first name. For details, see Hands-Free Setup (P.47).
- Page 44 Bluetooth Control Ñ Call by entering a phone number Receive a call Touch [ Touch [ ] to answer a phone call or ] to reject an incoming call. Enter a phone number with number keys. NOTE Touch [ • When shifting the gear to the reverse (R) position and monitoring the picture from the rear view Ñ...
- Page 45 Bluetooth Control Ñ Operations during a call ● Call-waiting When you receive a new call while talking on the phone, you can answer the newly received call by touching [ ]. The current call is put on hold. Each time you touch [ ], the caller will change to the other one.
- Page 46 Bluetooth Control Ñ Ñ Phone number preset Phonebook transfer You can register frequently used phone You can transfer phonebook data from your numbers in this unit. Bluetooth smartphone using PBAP. Touch [ Touch [ Touch [Edit]. Touch [ h Phonebook data transfer starts. NOTE Select where to preset.
-
Page 47: Hands-Free Setup
[First]: Sorts data by the first name. [Last]: Sorts data by the last name. - DMX9720XDS: [First] (Default) - DMX9720XS: [Last] (Default) * Either the auto response time set on this h Connections & AV setting menu appears. unit or the time set on the smartphone/ cell-phone, whichever is shorter takes Touch [TEL SETUP]. -
Page 48: Other External Components
Other External Components Other External Components View Camera Camera off Touch to exit the camera screen. Switching the Guideline * NOTE Touching each time turns on or off the • To connect a camera, see Connecting the guideline. camera (P.90). •... - Page 49 Other External Components Ñ To set up the camera [Rear Camera Message] * ■ [Always display] (Default): Always displays assignment settings the caution message on the rear camera interruption screen. Touch [Camera Assignment Settings] in [Clear after 5 seconds]: Displays the the Camera setting menu.
- Page 50 Other External Components Ñ To adjust the parking Picture quality settings guidelines Switch the picture quality setting. Signal * : “HD”/“NTSC” (Default)/“PAL” NOTE Mirror * : “ON”/“OFF” (Default) • Install the rear view camera in the appropriate position according to the instruction manual *1 Except the [REAR VIEW CAMERA] setting supplied with the rear view camera.
-
Page 51: Use Dashboard Camera
Other External Components Ñ Use Dashboard Camera Display the dashboard camera screen A Dashboard Camera, DRV-N520 (optional accessory), connected to this unit lets you play Press the [MENU]/[ATT] button. video-recorded data and so on. h Popup menu appears. For details, see the instruction manual of Touch [Camera]. -
Page 52: External Audio/Video Players (Av-In)
Other External Components External audio/video players Touch icon. (AV-IN) Connect an external component to the AV Audio input and the Video input terminal. (P.87) Select [AV-IN] as the source. (P.13) Turn on the connected component and start playing the source. •... -
Page 53: Setup
Setup Setup Press the [HOME]/[ ] button. ■ [Backlight]/[Contrast]/[Black]/ [Brightness]/[Colour]/[Tint] Touch [ ]. Adjust each setting. Touch [SETUP]. ■ [Aspect] Select a screen mode. [Full]: Changes the aspect ratio of video and displays video fully on the screen. [Normal]: Displays video at the ratio of 4:3. [Auto]: USB device: Displays video fully (vertically or horizontally) with no ratio change. - Page 54 Setup • If you select HDMI as the main source, files [Device Name] ■ with sampling rates higher than 96 kHz in If you select [ON] for [Bluetooth], you can USB selected as the AV output source are change the Bluetooth device name. skipped.
-
Page 55: Display & Button Setup
Setup Ñ Display & Button Setup Customizing the button color You can set the button illumination color. Press the [HOME]/[ ] button. Touch [Button Illumination Colour] in the Display & Button setting menu. Touch [ ]. Touch the desired color. Touch [SETUP]. -
Page 56: User Interface Setup
“Variable”, this option is fixed to OFF. Select an image. Touch [ To register an original image With “KENWOOD Portal APP” application installed on your iPhone or Android smartphone, you can upload image files to this unit and set an image as the wallpaper image. - Page 57 Setup Ñ Learning function of steering [Parking Assist Display] ■ When the iDatalink (commercially available) remote is connected, you can display information This function is available only when your about obstacles around the car. vehicle is equipped with the electrical steering [ON]: Always displays information.
-
Page 58: System Setup
Setup System Setup Touch [Learning completed]. NOTE You can setup system parameters. • When changing the function already learned, Press the [HOME]/[ ] button. press and hold the button you want to change in step 2 and then touch to select the changed Touch [ ]. - Page 59 Setup Ñ Software Information [Security Code Set] ■ [Security Code Cancellation] ■ You can confirm the software version of this unit. [Security Code Change] ■ You can set up a security code. See Security Touch [Software Information] in the Code Setup (P.9). System setting menu.
-
Page 60: Controlling Audio
Controlling Audio Controlling Audio You can adjust various settings such as audio 3-way speaker system setup balance or subwoofer level. Select the appropriate crossover network Press the [HOME]/[ ] button. mode for the speaker system used (2-way or Touch [ ]. 3-way speaker system). -
Page 61: Speaker / X'over Setup
Controlling Audio Touch the speaker (1) you wish to adjust NOTE and set each parameter (2) as follows. • When the 3-way speaker system is selected, the following functions are disabled. – Front focus of Listening Position / DTA – Fader for Controlling General Audio –... -
Page 62: Equalizer Control
Controlling Audio Equalizer Control When Speaker network is set to 3-way: You can adjust equalizer by selecting the optimized setting for each category. Press the [HOME]/[ ] button. Touch [ ]. Touch [Audio]. h Audio screen appears. ■ [Speaker] Touch [EQ / SW Level]. You can select a speaker type and its size to get the best sound effects. -
Page 63: Listening Position / Dta
Controlling Audio Ñ Save the EQ curve Listening Position / DTA Adjust the EQ curve. Listening Position / DTA allows you to improve the sound field depending on the position of Touch [Memory]. the seat you sit. Listening Position / DTA allows you to set Select where to save. - Page 64 Controlling Audio Ñ Front Focus Position DTA control You can fine-adjust your listening position. You can focus the imaginary sound image on the front of the selected seat. Touch [Adjust]. Touch [Front Focus] in the Position / DTA Touch [Delay]. screen.
-
Page 65: Fader / Balance / Zone Control
Controlling Audio Fader / Balance / Zone Control [Size of the Virtual Sound Field] ■ Adjust the size of sound image to meet your taste. If the sound image is shifted from the Press the [HOME]/[ ] button. front, move it back by [Sound Image LR (Front)] or [Sound Image LR (Rear)]. - Page 66 Controlling Audio Ñ Zone Control NOTE You can select different sources for front and • When the rear source is switched, the audio source that is output at the AV OUTPUT terminal rear positions in the vehicle. is also switched to the same source. Touch [Dual Zone] on the FAD / BAL / •...
-
Page 67: Volume Offset
Controlling Audio Volume Offset Set each parameter as follows. Finely adjust the volume of the current source to minimize the difference in volume between different sources. Press the [HOME]/[ ] button. Touch [ ]. Touch [Audio]. h Audio screen appears. [Bass Boost] ■... -
Page 68: Parametric Equalizer
Controlling Audio Parametric Equalizer About Adjustments If there are unpleasant peaks, you can slide the peaking filter to the left or right and search In addition to the conventional Graphic the frequencies by ear. Studio engineers use Equalizer, this unit has a parametric equalizer, this method to make adjustments quickly and which allows you more precise adjustments. - Page 69 Controlling Audio ● High-Pass Filter ● Peaking Filter Passes signals with frequencies higher than The frequencies in the vicinity of a certain a certain frequency (fc: cutoff frequency) frequency (f0: center frequency) are and attenuates signals with frequencies boosted or attenuated. Use this in the lower than the cutoff frequency.
- Page 70 Controlling Audio Ñ Adjust the Parametric Equalizer EQ point (blue/yellow): EQ points that are not currently being adjusted. Preparation Curve (orange): EQ curve of the speaker currently being adjusted. • Correct the value in “Listening Position” and “Front Focus” before adjusting the parametric equalizer. Curve (blue): Overall EQ curve.
-
Page 71: Audio Setup Memory
Controlling Audio Audio Setup memory When you have finished adjustments, save the results as a preset, and check the effects by switching presets or turning Audio Control settings can be memorized. the Parametric EQ [ON] and [OFF]. The memorized settings can be recalled at any time. -
Page 72: Remote Control
Remote control Remote control This unit can be operated using the remote Functions of the Remote control. control Buttons # CAUTION Ñ Switch the operation mode • Risk of fire or explosion if the battery is replaced by an incorrect type. Ensure to The functions operated from the remote replace only with the same type. - Page 73 Remote control Ñ Ñ Direct search mode Basic Operation Using the remote control, you can jump directly to the desired file, track, chapter, etc. by entering the number corresponding to the content. NOTE • This operation cannot be performed for the USB device and iPod.
- Page 74 Remote control Mode Function Name switch CLEAR − Not used. Switches to the direct search mode. (P.73). DIRECT − AUDIO − Not used. RETURN − Not used. SUBTITLE − Not used. − When a call comes in, answers the call. ANGLE −...
-
Page 75: Connection/Installation
Connection/Installation Connection/Installation This section is for the professional installer. • If the power is not turned ON (“There is an error in the speaker wiring. Please check the For safety’s sake, leave wiring and mounting to connections. ” is displayed), the speaker wire professionals. - Page 76 Connection/Installation Ñ Supplied accessories for installation Cooling fan • Do not press hard on the panel surface when (1 m) installing the unit to the vehicle. Otherwise scars, damage, or failure may result. • Reception may drop if there are metal objects (3 m) near the Bluetooth/Wi-Fi antenna.
- Page 77 Connection/Installation Ñ Installation procedure 1) To prevent a short circuit, remove the key from the ignition and disconnect the ¤ terminal of the battery. 2) Remove the vehicle parts for installing the unit and connecting wires to terminal. (Ø3 x 6 mm) 3) Make the proper input and output wire (Black) connections for each unit.
-
Page 78: Installing The Unit
Connection/Installation Installing the unit Ñ Confirm the installing position of the display unit ● Vehicles cannot be installed It may be possible to install if it can avoid the following by adjustment for slider position and display height. Lever operations are interfered A hazard switch is hidden from a The display unit hits a panel on the such as shift lever, wiper lever,... - Page 79 Connection/Installation Ñ Positioning the slider in Install the bracket for forward position (accessory 0) each side so that its forward projections are aligned with the slots on the main unit. Remove the four screws from the bottom of the main unit. Projection Screw Projection...
- Page 80 Connection/Installation Ñ Ñ Adjusting the display height GPS antenna GPS antenna is installed inside of the car. It Remove the four flat head screws from should be installed as horizontally as possible both sides. to allow easy reception of the GPS satellite signals.
- Page 81 Connection/Installation Ñ Microphone unit • Do not bend or damage the film antenna (accessory 1) Check the installation position of the • It may not be possible to install on some type of microphone (accessory 3). vehicle. 2) Clean the installation surface. •...
- Page 82 Connection/Installation When installing the antenna on the right • Install the amplifier unit (accessory %) above the air bag so that the antenna and the air bag. side Ceramic line (black part) 150 mm Earth sheet * 30 mm Air bag When installing the antenna on the left Front pillar side...
- Page 83 Connection/Installation When installing the antenna on the left 4) Rub the film antenna (accessory $) gently side in the direction of the arrow shown below to firmly stick it to the windscreen. Earth sheet 7) Remove the film covering the earth sheet and attach the earth sheet to the metal part of the vehicle.
- Page 84 Connection/Installation Ñ Installing the main unit Install the display unit (accessory 8) to the main unit. NOTE Main unit • Determine the slider position before installing the main unit. (P.79) The slider position cannot be changed after installing to the vehicle. •...
- Page 85 Connection/Installation NOTE • If the protective cover (accessory =) is not attached, this unit will not turn on. Even if the unit is turned on, the power may be turned off halfway. Be sure to attach the protective cover (accessory Raise the display manually.
- Page 86 Connection/Installation Ñ Connecting wires to terminals Fuse (15A) Speaker impedance: 4-8 Ω White To front left speaker White/Black Gray To front right speaker Gray/Black Green To rear left speaker Connect to the vehicle’s Green/Black Accessory 1 parking brake detection switch harness.
- Page 87 Power amplifier Speaker (optional accessory) Input Accessory ! : Steering remote harness Connect to vehicle’s steering remote harness. Contact your KENWOOD dealer for details. White To mid range left speaker White/Black Accessory 3 : Bluetooth Microphone Gray To mid range right...
- Page 88 Connection/Installation Ñ Connecting a USB device HDMI input Use HDMI cable KCA-HD100 (optional accessory). Accessory 2 (1 m) When you connect the cable to HDMI terminal, USB device remove the fixture. After connecting the cable, put the fixture again. Fixture USB terminal HDMI connector Accessory % : DAB antenna...
- Page 89 Connection/Installation Ñ Ñ Securing the USB extension Connecting an Android cable smartphone Android smartphone Secure the USB extension cable with insulating (with Android Auto) tape or the like so that its connectors are not disconnected. USB cable Accessory 2 (1 m) Ñ...
- Page 90 Connection/Installation Ñ Connecting the camera For HD video, an HD camera is also used as Rear view camera. Left side view camera and For HD video, an HD camera is also used as Right side view camera Front view camera. Front view camera [4] [6] Video input...
-
Page 91: Troubleshooting
Troubleshooting Troubleshooting Ñ Others Problems and Solutions The Touch Sensor Tone doesn’t sound. If any trouble occurs, first check the following The preout jack is being used. table for possible problems. † The Touch Sensor Tone cannot be output from the preout jack. -
Page 92: Error Messages
† Turn the power off and on again. If the “Starting cause of the failure appears as the message on tuner failed. ” message does not disappear, contact the screen. your nearest KENWOOD dealer. There is an error in the speaker wiring. Please Ñ Apple CarPlay check the connections. -
Page 93: Appendix
Appendix Appendix Playable Media and Files You can play various kinds of media and files on this unit. Ñ About files The following audio and video files are supported. ■ Playable Audio files Format Bit rate Sampling frequency Bit count AAC-LC (.m4a) MPEG-2/MPEG-4 AAC LC 8 –... - Page 94 Appendix ■ Limitation on structure of file and folder USB device Maximum number of folder layers Maximum number of files (per folder) Maximum number of folders (per folder) 9999 Maximum number of folders (per device) Unlimited • You can enter a folder name and file name with 255 or fewer single-byte characters. •...
-
Page 95: Specifications
Appendix Specifications ■ Wi-Fi section IEEE Standard ■ Monitor section : 802.11 a/b/g/n/ac Frequency Range Picture Size : Dual Band (2.4GHz/5GHz) : 10.1 inches (diagonal) wide : 223.7 mm (W) × 125.8 mm (H) Channels : Auto (1-11ch)/Auto (149,153,157,161ch) Display System : AAS LCD panel Transfer rates (MAX) Outside Indonesia area... - Page 96 Frequency: Through, 50/60/70/80/90/100/120/150/ ■ AM tuner section 180/220/250/300 Hz 250/300/1k/1.6k/2.5k/4k/5k/6.3k/8k Hz, Frequency Range (step) Through DMX9720XS Slope: -12/-18/-24 dB/Oct. : 531 kHz – 1611 kHz (9 kHz) Low pass filter DMX9720XDS Frequency: 30/40/50/60/70/80/90/100/120/150 Hz, : 531 kHz – 1701 kHz (9 kHz)
- Page 97 Appendix ■ Video section ■ General Color System of External Video Input Operating Voltage : NTSC/PAL : 12 V DC car battery External Audio Max Input Level (mini jack) Installation Dimensions (W × H × D) : 2 V/25 kΩ : 178 ×...
-
Page 98: About This Unit
Appendix About this Unit • The terms HDMI and HDMI High-Definition Multimedia Interface, and the HDMI Logo are trademarks or registered trademarks of HDMI Licensing Administrator, Inc. in the United States and ■ Copyrights other countries. • The Bluetooth® word mark and logos are registered •... - Page 99 Appendix • libFLAC DIRECT, INDIRECT, INCIDENTAL, SPECIAL, EXEMPLARY, Copyright (C) 2000-2009 Josh Coalson OR CONSEQUENTIAL DAMAGES (INCLUDING, BUT Copyright (C) 2011-2013 Xiph.Org Foundation NOT LIMITED TO, PROCUREMENT OF SUBSTITUTE Redistribution and use in source and binary forms, GOODS OR SERVICES; LOSS OF USE, DATA, OR with or without modification, are permitted provided PROFITS;...