Samsung DVD-VR375 User Manual
Dvd & vcr
Hide thumbs
Also See for DVD-VR375:
- Quick setup manual (2 pages) ,
- User manual (86 pages) ,
- User manual (177 pages)

Related Manuals for Samsung DVD-VR375


Summary of Contents for Samsung DVD-VR375
- Page 1 DVD-VR375 DVD & VCR user manual imagine the possibilities Thanks you for purchasing this Samsung product. To receive more complete service, please register your product at www.samsung.com/global/register...
-
Page 2: Getting Started
CAUTIONS Caution : To prevent electric shock, match the wide blade of the plug to wide slot of the socket and fully insert. This product satisfi es FCC regulations when shielded cables and connectors are used to connect the unit to other equipment. -
Page 3: Important Safety Instructions
This DVD Recorder & VCR is designed and manufactured to respond to the Region Management Information. If the Region number of a DVD disc does not correspond to the Region number of this , the DVD Recorder & VCR cannot play the disc. -
Page 4: Handling Cautions
A groundingtype plug has two blades and a third grounding prong. The wide blade or the third prong is provided for your safety. If the provided plug does not fi t into your outlet, consult an electrician for replacement of the obsolete outlet. -
Page 5: Disc Storage
In this case, do not connect the plug to the power outlet and wait for two hours. Then insert the disc and try to play back again. - Page 6 • If you want to record the disc in VR Mode and then record in V Mode, be sure to execute format. Be careful when executing Format because all the recorded data may be lost. You can change the disc mode only one times when the unused DVD-R disc is inserted.
- Page 7 • Many DVD discs are encoded with copy protection. Because of this, you should only connect your DVD Recorder & VCR directly to your TV, not to a VCR. Connecting your recorder to a VCR results in a distorted picture from copy- protected DVD discs.
-
Page 8: Table Of Contents
8_ getting started Warning Precaution General Features Before Reading the User’s Manual How to use the DVD Recorder & VCR Unpacking Description Connecting a set top/cable box or satellite receiver to DVD Recorder & VCR Connecting HDMI/DVI to a TV... - Page 9 RECORDING Recordable discs Recording Mode Unrecordable Video Recording immediately Recording through The DV Input jack Making a One Touch Recording (OTR) Making a Timer Recording Editing the Timer List ERASING the Timer List Basic VCR Recording Check Remaining Time Special Recording Features...
-
Page 10: General Features
High quality digital audio/video recording and playback You can record up to approximately 16-hours of video on a double side 9.4 GB DVD-RAM disc,up to 15- hours on a dual-layer 8.5GB DVD±R disc, and up to 8-hours on a 4.7 GB DVD-RAM/DVD±RW/DVD±R disc, depending on the recording mode. -
Page 11: Before Reading The User's Manual
If a problem occurs, check the Troubleshooting section. (See pages 80~82) Copyright ©2008 Samsung Electronics Co. All rights reserved; No part or whole of this user’s manual may be reproduced or copied without the prior written permission of Samsung Electronics Co. Defi nition English _11... -
Page 12: How To Use The Dvd Recorder & Vcr
This unit can record on the following types of discs. If you want to repeatedly record on the same disc or you want to edit the disc after recording, select a rewritable DVD±RW or DVD-RAM type disc. If you want to save a recording without making any changes, choose a non-rewritable DVD±R. - Page 13 fi nalized. When using a DVD+R disc You should fi nalize the disc to play it on other DVD players. No more editing or recording can be made on the disc once it has been fi nalized.
-
Page 14: Preparing The Remote Control
Connecting the Power Cord After all connections are complete, plug the power cord into a wall outlet. Preparing the Remote Control Installing batteries in the Remote Control 1. Lift the cover at the back of the remote control upward as shown. - Page 15 It is now programmed to operate with the remote control. If several codes are indicated for your television brand, try each one in turn until you fi nd one that works. If you replace the remote control’s batteries, you must set the brand code again.
-
Page 16: Tour Of The Remote Control
SUBTITLE Button Press this to switch the DVD’s subtitle language. ANYKEY Button Press this to set the status of the disc that is being played. REC Button Press this to make a recording on VCR, DVD-RAM/±RW/±R discs. TO DVD DUBBING Button Press this when dubbing from the VCR to the DVD. -
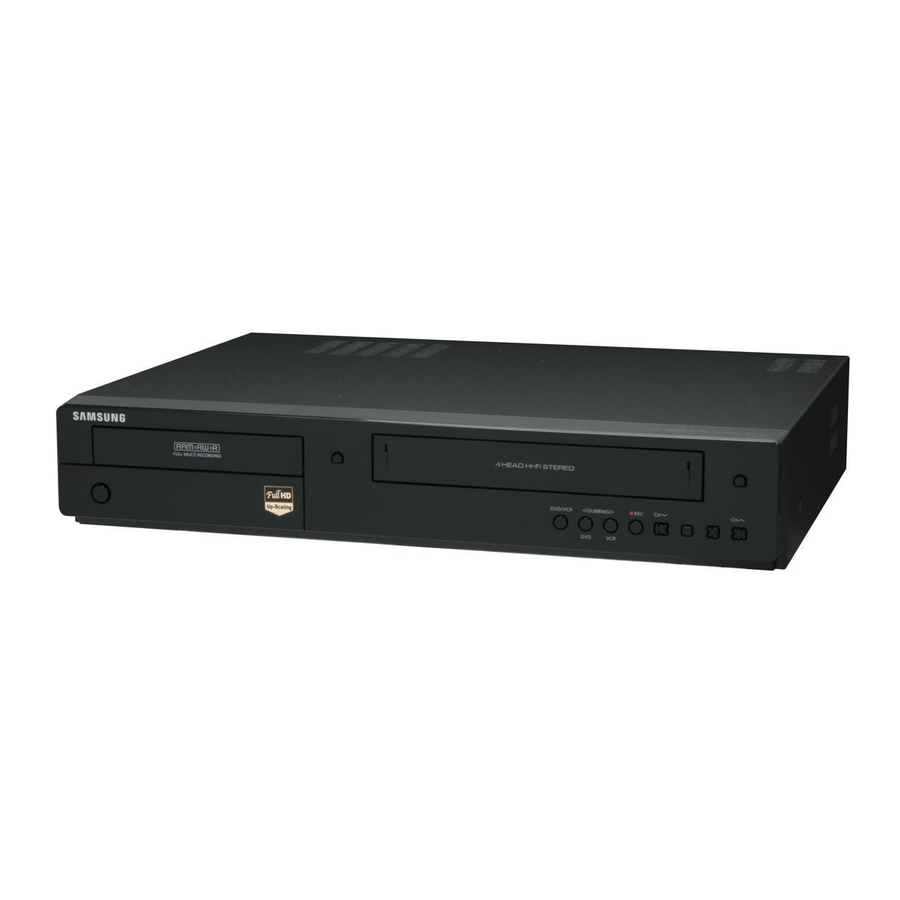
Page 17: Front Panel
FRONT PANEL DISPLAY AUDIO L, R INPUT JACKS (AV 2 IN) VCR DECK PLAY/PAUSE BUTTON DUBBING BUTTON DVD DECK VIDEO INPUT JACK (AV 2 IN) VCR EJECT BUTTON STOP BUTTON DVD/VCR SELECT BUTTON DV INPUT JACK POWER BUTTON English _17... -
Page 18: Front Panel Display
(COMPONENT OUT) AUDIO OUT JACKS (AV OUT) 18_ getting started In Disc Indicator Disc Media Indicator REC Indicator VIDEO INPUT JACK (AV 1 IN) COMPONENT VIDEO OUT JACKS AUDIO INPUT JACKS (AV 1 IN) DVD VIEW Indicator TIMER Indicator STATUS Indicator... - Page 19 With the connection below, you can watch and record your desired channel on the Set top/Cable box or satellite receiver. The DVD-VR375 does not have a TV Tuner , so you must connect a Set top/Cable Box or Satellite receiver to watch or record TV through DVD Recorder & VCR.
- Page 20 1 inch in front of the sensor you found in 2 . Use the double-sided tape to secure the IR Blaster. You must select a Set top/Cable box brand from the table on pages 42~44. If you do not know the brand name, please contact your cable provider. ...
-
Page 21: Connecting Hdmi/Dvi To A Tv
If your TV does not support Dolby digital/DTS, Audio output is not available when you set the Digital output as Bitstream or select DTS On in the Audio setup menu. In this case, set the digital audio output to PCM or DTS Off. - Page 22 HDMI enables you to make a digital video and audio connection with a single cable. Using HDMI, the DVD and VCR player transmits a digital video and audio signal and displays a vivid picture on a TV having an HDMI input jack.
-
Page 23: Connecting The Video Output
Compared to standard interlaced video, progressive scan doubles the amount of video lines fed to your TV, resulting in a clearer, more stable, and fl icker free image than interlaced video. The component output jack of the DVD player can be used for progressive output mode, which is only available with TVs that support progressive scan. -
Page 24: Connecting To A Video Input Jack
This connection outputs the 480i resolution to your TV. • Connect the audio cables(white and red) between the AUDIO OUT jacks on the DVD Recorder & VCR and AUDIO IN jacks on your TV(or AV amplifi er). (See pages 24~25) CONNECTING THE AUDIO CABLE Select one of the Audio connections on the following pages. - Page 25 Connecting to an AV Amplifi er with a Digital Input Jack If your AV amplifi er has a Dolby Digital or DTS decoder and a digital input jack, use this connection. To enjoy Dolby Digital or DTS sound, you will need to set up the audio settings. (See page 32~34) Manufactured under license from Dolby Laboratories.
-
Page 26: Connecting External Devices
& setting up CONNECTING EXTERNAL DEVICES This allows you to connect your DVD Recorder & VCR to other external devices and view or record their outputs. Connecting a VCR, Set top/Cable box, satellite receiver or DVD player to the AV 1 IN Jack Connecting a VCR or external device to AV 1 IN jacks of the DVD Recorder &... -
Page 27: Connecting A Camcorder
Connecting a Camcorder You can record from connected equipment, such as a camcorder by using the AV2 IN or DV IN jacks on front of the DVD Recorder & VCR. Yellow White Check your camcorder's owner's manual to see how to use the camcorder in this mode. -
Page 28: On-Screen Menu Navigation
ON-SCREEN MENU NAVIGATION The on-screen menus allow you to enable or disable various functions on your DVD Recorder & VCR. Press the MENU button to open the on-screen menu and then use the following buttons to navigate through the on screen menus. - Page 29 Press the ◄ ► buttons to select OK, then press the ENTER button. Select whether or not you use the Set Top Box Pass-through, then press the ENTER button. Please refer to page 39. The setup display for clock setting appears.
-
Page 30: System Setup
CLOCK SET This menu is used to set the current time. You need to set the time to use timer recording. With the unit in Stop mode/No Disc mode, press the MENU button. Press the ▲▼ buttons to select Setup, then press ENTER. -
Page 31: Black Level
Resolution (HDMI) This setting is used when the unit is connected by HDMI or DVI to Display devices (TV, Monitor, etc). • 480p : 720 x 480p • 720p : 1280 x 720p • 1080i : 1920 x 1080i •... -
Page 32: Progressive Scan
Receiver Connections" on page 25. If you connect a component that does not accept the selected audio signal, a loud noise (or no sound) will come out from the speakers, and may affect your ears or cause speaker damage. 32_ system setup... - Page 33 Off : Select this when the recorder is connected to an audio component without a built-in DTS decoder. Downmix (DVDs only) Switches the method for mixing down to two channels when you play a DVD which has rear sound elements (channels) or is recorded in Dolby Digital format. •...
- Page 34 Select “Stereo 2” or “Mix” if you have added a second audio channel when recording with your camcorder. AV Audio Input When recording from equipment connected to the AV input jacks to a DVD disc in this recorder, select AV input audio. •...
-
Page 35: Setting Up The Features
You can create up to 99 chapters. Format DVD-RW When inserting a unused DVD-RW disc, you can select a recording format (VR mode or Video mode) according to your needs(Please refer to page 6). • VR : Automatically formats the disc in VR mode •... - Page 36 The length of Recording is different according to recording mode. (see page 58) When the EZ Record is set to 'On', a DVD-RW disc will be formatted to V mode automatically, even if you select the VR mode in the Format DVD-RW option. Anynet+(HDMI CEC) Anynet+ is a function that can be used to operate the recorder using a Samsung TV remote control, by connecting the DVD Recorder &...
-
Page 37: Setting Up The Options
If you play a DVD when the TV power is off, the TV will power On. If you turn the TV off, the DVD Recorder & VCR will power off automatically. (When the DVD recorder & VCR is recording, it can't be powered off.) ... -
Page 38: Setting Up The Parental
SETTING UP THE PARENTAL The Parental function works in conjunction with DVDs that have been assigned a rating, which helps you control the types of DVDs that your family watches. There are up to 8 rating levels on a disc. -
Page 39: Changing The Password
Enter your new password again using the number buttons on the remote control. STB Pass-Through If you select STB Pass-Through "On", you can watch the output (that is connected through AV1) of the Set top/Cable box or satellite receiver using all outputs when the Recorder is powered off. -
Page 40: Auto Play
Press the ▲▼ buttons to select VCR Function, then press the ENTER button. Press the ▲▼ buttons to select the desired VCR option below, then press the ENTER button. Press the ▲▼ buttons to select the desired item, then press the ENTER button. -
Page 41: Set Top/Cable Box Control
SET TOP/CABLE BOX CONTROL If you have your Set top/Cable box or satellite receiver connected as shown on page 19, it can be controlled after setting up this menu. With the unit in Stop mode/No Disc mode, press the MENU button. - Page 42 SET TOP/CABLE BOX/SATELLITE RECEIVER BRAND CODE TABLE Set top/Cable box brand Set top/Cable box brand Code number 0003, 0011, 0017, 0008, 0014, 0007, 0001, 0013, 0206, 0047, Accuphase 0237, 0033 0003, 0013, 0047, 0001, 0011, 0017, 0014, 0206, 0007...
- Page 43 0764, 1316, 1315, 1314 Nexus 0770 Northcoast 0671, 0314 Nova Vision 0277, 0008 Novabeam 0277 Novaplex 0618, 0277, 0017, 0008 0156, 0070, 0203, 0063, 0400, 0012, 0618, 0022, 0637, 0010, 0044 0019, 0007, 0303, 0248, 0017 Omega 0015 Omniview 0371 Optimus 0021 0008,0237,0277,0477,0877,...
- Page 44 Recording TV broadcasts is possible via Connection to Set top/Cable or Satellite receiver. If using STB Pass-Though, connect the Set top/Cable box or satellite receiver into the DVD Recorder & VCR's AV1 IN jacks. 44_ system setup Satellite receiver brand...
- Page 45 If "Mode 1" does not work, try "Mode 2." If your Set top/Cable box or satellite receiver does not respond to either setting, contact the manufacturer of the Set top/Cable box or satellite receiver. 12:00 AM Set Top Box Control...
-
Page 46: Region Code (Dvd-Video Only)
Both the DVD Recorder & VCR and the discs are coded by region. These regional codes must match in order for the disc to play. If the codes do not match, the disc will not play. The Region Number for this DVD Recorder &... -
Page 47: Disc Types That Can Be Played
DISC TYPES THAT CAN BE PLAYED Disc Types Disc Logo DVD-VIDEO AUDIO-CD JPEG DVD-RAM DVD-RW DVD-R DVD+RW DVD+R Recorded Disc Shape or minute content Single sided(5”) VIDEO Double sided(5”) Single sided(3.5”) AUDIO Double sided(3.5”) Single sided(5”) AUDIO Single sided(3.5”) Single sided(5”) JPEG Image Single sided(3.5”) -
Page 48: Discs That Cannot Be Played
Press the PLAY button to start playback. • Power on the unit with the PLAY button if you wish to automatically play a disc in the recorder while it is powered off. Press the STOP button to stop playback. -
Page 49: Using The Disc Menu And Title Menu
For DVD-RAM/DVD±RW/DVD±R Discs Title List Press the TITLE LIST button. The Title List is simply a list of titles on a disc. If a title is deleted, that title cannot be played again. Playlist (DVD-RAM/-RW(VR)/-R(VR)) Press the PLAY LIST button. A playlist is a custom-made list of titles. When one playlist is played, only the titles within the playlist will play and then stop. -
Page 50: Skipping Chapters Or Tracks
During the playback, press F.ADV/SKIP button to skip ahead exactly 30 seconds. SLOW MOTION PLAY/STEP MOTION PLAY Slow Motion Play During Pause mode, press the SEARCH ◄◄ or ►► button on the remote control for more than 1 second. • Each time you press the ►► button : ... -
Page 51: Selecting The Audio Language
Then, press the ENTER button. This may not work for some discs. When an audio CD (CDDA) or an MP3 disc is inserted, according to the disc type, the information display may not be appear. ... -
Page 52: Selecting The Subtitle Language
This function is disc-dependent, and may not work on all DVDs. This function does not work when a DVD has not been recorded with a multi-camera angle system. To make the sub-menu disappear, press the ANYKEY or RETURN button again. -
Page 53: Playing Back An Audio Cd (Cd-Da)/Mp
Insert an audio CD (CD-DA) into the disc tray. • The audio CD menu appears and the tracks (songs) are played automatically. Press the ▲▼ buttons to select the track (song) you want to hear, and then press the ENTER button. Audio CD(CD-DA) Screen Elements Music ) Surround : Off Q TRACK01.CD... -
Page 54: Playing An Mp3 Disc
• The menu is displayed Press the ▲▼ buttons to select Music, then press the ENTER button. Press the ▲▼ buttons to select the track you want to hear, and then press the ENTER button. MP3 Screen Elements Music Q SONG01.MP3 q♫... -
Page 55: Special Vcr Playback Features
FPS/Review In Play mode, press Forward ( • Picture Search - Press and release repeatedly to advance the tape forward or backward at 2, 3, 5, 7 times normal speed. • Jet Search - Press and hold to advance the tape forward or backward at 7 times normal speed. -
Page 56: Slow Motion
Variable Search System Each time you record a cassette on this DVD Recorder & VCR, an index is automatically marked on the tape when recording is started.The Search function allows you to fast-forward or rewind to a specifi c index and start playback from that point. -
Page 57: Recordable Discs
This section explains various DVD recording methods. This unit can record on various types of discs. Before recording, read the following instructions and select the disc type according to your preference. RECORDABLE DISCS This recorder can record on the following discs. -
Page 58: Recording Formats
Simple editing (erasing titles/changing title name). RECORDING MODE With the unit in Stop mode, select one of eight recording modes by pressing the REC SPEED button repeatedly for the desired recording time and picture quality. In general, picture quality improves as the recording time decreases. -
Page 59: Unrecordable Video
TV broadcasts that contain copy control signals may have one of the following three signal types, Copy-Free, Copy-Once and Copy-Never. If you want to record a copy-once type program, use a DVD-RW with CPRM in VR Mode or DVD-RAM discs. ('O' : Supported, '-' : Not Supported) -
Page 60: Before You Start
Press the REC SPEED button repeatedly to select the recording Speed (quality). → HQ → HSP → SP → LSP → ESP → LP → EP → SLP When your DVD Recorder & VCR is in the Stop mode, set the operation mode of your external devices to play mode. -
Page 61: Recording Through The Dv Input Jack
Up to 99 titles can be recorded onto a DVD-RAM/-RW/-R disc, up to 49 titles onto a DVD+RW/+R disc. If the power interrupted due to power failure or other reasons, the title being recorded will not be saved onto the disc. ... -
Page 62: Making A Timer Recording
Continue press the REC button to add recording time in preset increments up to 8 hours. → 0:30 → 1:00 → 1:30 → 2:00 → 2:30 → 3:00 → 3:30 → 4:00 → 4:30 → 5:00 → 5:30 → 6:00 → 6:30 → 7:00 → 7:30 → 8:00 → Normal •... - Page 63 This function is selected only one mode in HQ, HSP, SP, LSP, ESP, LP, EP and SLP modes and you can use this mode for timer recording.
-
Page 64: Editing The Timer List
The timer recording time may differ from the set time depending on disc status and overall timer recording status (for example, recording times overlapping, or when the previous recording ends within 3 minutes before the start time of the next recording.) EDITING THE TIMER LIST Follow these directions to edit the timer record list. -
Page 65: Basic Vcr Recording
4 hours by pressing the ● (REC) button repeatedly. Be sure your videotape has a Record Safety Tab. If the tab is missing, you can cover the opening with a small piece of tape. ... -
Page 66: Check Remaining Time
(Current deck status, recording speed, remaining time, input channel, current time.) SPECIAL RECORDING FEATURES While a recording is in progress, you can watch a DVD or VCR. (for example, you can watch VCR playback while recording from a DVD and vice-versa) Watch a different media during recording You can watch a DVD during VCR recording or watch a Video tape during DVD recording. -
Page 67: Dubbing From Dvd To Vcr
Dubbing function is not allowed in progressive scan mode. You can record VCR in a state of HDMI connected. But you cannot dubbing from the DVD to VCR. Dubbing from VCR to DVD With the unit in Stop mode, press the MENU button in stop mode. -
Page 68: Dv/D8 Dubbing
DV/D8 DUBBING Before DV Dubbing, connect the DV output jack of camcorder to the DV input jack of DVD Recorder & VCR using a DV cable. With the unit in Stop mode, press the MENU button in stop mode. -
Page 69: Playing The Title List
The Title List screen is displayed. Press the ▲▼ buttons to select a Title, then press the ENTER button. Press the ▲▼ buttons to select Play to play the title list, then press the ENTER button. The selected title will be played back. -
Page 70: Basic Editing (Title List)
BASIC EDITING (TITLE LIST) Changing the Name of a Title (Title Name) Follow these instructions to rename a title list name, i.e., to edit the title of a recorded program. Press the TITLE LIST button. The Title List screen is displayed. - Page 71 ‘Do you want to erase "No.01"? (If you have created a Playlist or Dubbing list with this title. part of that playlist or Dubbing list will also be erased.)’ is displayed. DVD-RW(Video mode),DVD+RW, DVD±R : Since a Playlist is not present, the message ‘Do you want to erase "No.01"?’...
- Page 72 You can also erase chapters from a Playlist title. If you erase an original title used in a Playlist, that Playlist is also erased. Erasing a section of a Title (A-B Erase) Follow these instructions to erase a section of a Title List entry.
-
Page 73: Creating A Playlist
Press the ◄► buttons to select Yes, then press the ENTER button. The Title Name screen is displayed. Follow steps 3 to 5 of Changing the Name of a Title (page 70) to complete renaming. The divided title appears in the Title List with the new name. -
Page 74: Playing Titles In The Playlist
Depending on the kind of disc, the displayed screen may be slightly different. A disc that is recorded on this unit cannot be displayed playlist menu if EZ Record set to "On". Playing Titles in the Playlist Follow these instructions to play the playlist titles. -
Page 75: Deleting A Playlist Title From The Playlist
Changing the Name of a Playlist Follow these instructions to rename a playlist title, i.e. to edit the title of a playlist title. Press the TITLE LIST button with the disc stopped, then press the PLAY LIST button. The Edit Playlist screen is displayed. -
Page 76: Editing The Disc Name
Depending on the kind of disc, the displayed screen may be different. Disc Protection Disc Protect allows you to protect your discs from being formatted or deleted due to unintended operations. With the unit in Stop mode, press the MENU button. -
Page 77: Formatting A Disc
Press the ◄► buttons to select OK, then press the ENTER button. The disc is formatted. You can change the disc mode only one time when the unused DVD-R disc is inserted. DVD-VR and DVD-V modes are compatible with the following disc types. DISC... -
Page 78: Finalizing A Disc
Finalizing a Disc After you record titles onto a DVD-RW/DVD±R disc with your DVD Recorder & VCR, it needs to be fi nalized before it can be played back on external devices. With the unit in Stop mode, press the MENU button. -
Page 79: Disc Information
With the unit in Stop mode, press the MENU button. Press the ▲▼ buttons to select Disc Setting, then press the ENTER button. Press the ▲▼ button to select Erase All Titles, then press the ENTER button. • You will be prompted with the confi rmation message 'Do you want to erase all title lists?'. - Page 80 • If a program is copy protected, you cannot record it. • Press and hold the CH./CH,( I❮❮ / ❯❯I ) button on the front panel of your unit for more than 10 seconds with no disc, and then press the POWER OFF/ON button.
-
Page 81: Troubleshooting (Dvd)
Check whether you selected the correct digital output in the Audio Output Options menu. Did you move your DVD Recorder & VCR suddenly from a cold place to a warm place? In this case, do not connect the plug to the power outlet and wait for two hours. -
Page 82: Troubleshooting (Vcr)
• Check that the power plug is connected to a wall outlet. • Have you pressed the POWER button? • A video cassette can only be inserted with the window side up and the safety tab facing you. • Re-check the recording start/stop time settings and the current time •... - Page 83 EXPLANATION/SOLUTION • You can’t record the video since it is protected by copyright. • The disc you are using is protected. To record on this disc or use this function, cancel the disc protection function. Refer to page 76. • The disc does not match the regional code for your area and cannot be played on this device.
- Page 84 Use the disc after formatting. • When operating, errors happen. Turn off the device. (To turn off, press and hold the power button on the front of the device for 10 seconds.) After turning off, press the Open button and remove the disc from the device.
-
Page 85: Specifications
Recording Quality Video S/N Ratio Audio S/N Ratio Audio frequency characteristics Audio Output For DVD discs, audio signals recorded at 96kHz sampling frequency are converted into and output at 48kHz. Disc Type Analog Audio Output Digital Audio Output 120V AC, 60Hz 25 Watts 9.7 lb... - Page 86 (90 days Parts and Labor for Commercial Use) This limited warranty begins on the original date of purchase, and is valid only on products purchased and used in the United States. To receive warranty service, the purchaser must contact SAMSUNG for problem determination and service procedures.
- Page 87 Contact SAMSUNG WORLD WIDE If you have any questions or comments relating to Samsung products, please contact the SAMSUNG customer care center. Region Country CANADA North America MEXICO U.S.A ARGENTINE BRAZIL CHILE NICARAGUA HONDURAS COSTA RICA ECUADOR EL SALVADOR Latin America...
- Page 88 HEADQUARTERS 105 Challenger Road, Ridgefield Park, N.J.07660-0511 TEL: 1-800-SAMSUNG SERVICE DIVISION 400 Valley Road, Suite 201 Mount Arlington, NJ 07856 1-800-SAMSUNG (726-7864) www.samsung.com Code No. AK68-01613A-01...