
Related Manuals for Samsung ML-3310ND


Summary of Contents for Samsung ML-3310ND
- Page 1 User’s Guide Basic imagine the possibilities This guide provides information concerning installation, basic operation and troubleshooting on windows. ML-330x Series ML-331x Series ML-371x Series...
-
Page 2: Table Of Contents
Contents 1. Introduction Key benefits Features by models Useful to know About this user’s guide Safety information Machine overview Control panel overview Turning on the machine Installing the driver locally Reinstalling the driver 2. Menu overview and basic setup Menu overview Printing a demo page Changing the display language Media and tray... - Page 3 Regulatory information Copyright...
-
Page 4: Introduction
1. Introduction This chapter provides information you need to know before using the machine. • Key benefits • Features by models • Useful to know • About this user’s guide • Safety information • Machine overview • Control panel overview •... -
Page 5: Key Benefits
- For duplex printing, 17 ppm (A4) or 18 ppm (Letter). Convenience • Samsung Easy Printer Manager and Samsung Printer Status (or Smart Panel) are a program that monitors and informs you of the machine’s status and allows you to customize the machine’s settings (see Advanced Guide). - Page 6 Key benefits Wide range of functionality and application support • Supports various paper sizes (see "Print media specifications" on page 85). • Print watermark: You can customize your documents with words, such as “Confidential” (see Advanced Guide). • Print posters: The text and pictures of each page of your document are magnified and printed across the multiple sheets of paper and can then be taped together to form a poster (see Advanced Guide).
-
Page 7: Features By Models
TX wired LAN Network Interface 802.11b/g/n wireless LAN IPv6 Eco printing Wi-Fi Protected Setup™ (WPS) Duplex (2-sided) printing Samsung Easy Printer Manager Memory Tray 2 (520 sheets) SyncThru™ Web Service ( ●: Included, ○: Optional, Blank: Not available) ML-331xD ML-331xND ML-371xD ●... -
Page 8: Useful To Know
• Select your machine as your default machine in your Windows. Where can I purchase accessories or supplies? • Inquire at a Samsung distributor or your retailer. • Visit www.samsung.com/supplies. Select your country/ region to view product service information. The status LED flashes or remains constantly on. -
Page 9: About This User's Guide
About this user’s guide This user's guide provides information for your basic understanding of the machine as well as detailed steps to explain machine usage. • Read the safety information before using the machine. • If you have a problem using the machine, refer to the troubleshooting chapter. -
Page 10: Safety Information
Safety information These warnings and precautions are included to prevent injury to you and others, and to prevent any potential damage to your machine. Be sure to read and understand all of these instructions before using the machine. After reading this section, keep it in a safe place for future reference. - Page 11 Safety information Do not remove the plug by pulling on the cord; do not handle the plug with wet hands. This could result in electric shock or fire. Caution During an electrical storm or for a period of non- operation, remove the power plug from the electrical outlet.
- Page 12 Safety information Do not block or push objects into the ventilation opening. This could result in elevated component temperatures which can cause damage or fire. Be care when replacing paper or removing jammed paper. New paper has sharp edges and can cause painful cuts. When printing large quantities, the bottom part of the paper output area may get hot.
- Page 13 Safety information Do not place the machine on an unstable surface. The machine could fall, causing injury or machine damage. The machine should be connected to the power level which is specified on the label. If you are unsure and want to check the power level you are using, contact the electrical utility company.
- Page 14 • Fuser units should only be repaired by a certified service technician. Repair by non-certified technicians could result in fire or electric shock. The machine should only be repaired by a Samsung service technician. Keep cleaning supplies away from children.
- Page 15 Safety information 1. Introduction When toner gets on your clothing, do not use hot water to wash it. Hot water sets toner into fabric. Use cold water.
-
Page 16: Machine Overview
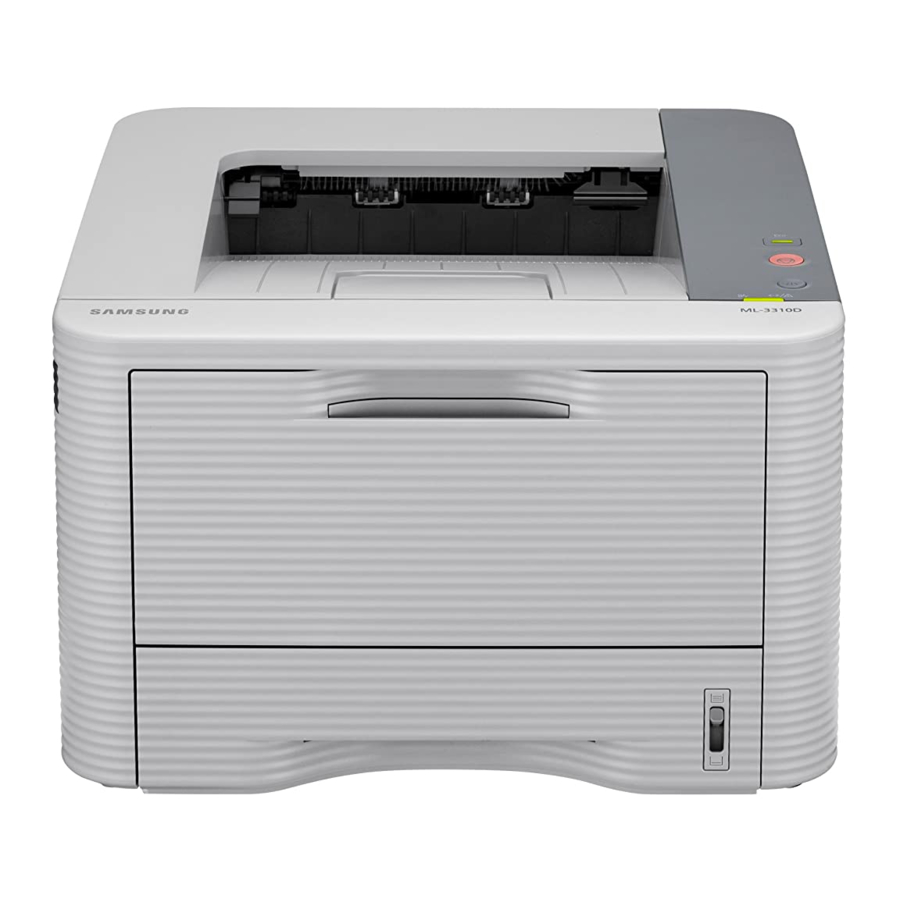
Machine overview 1. Introduction Accessories Power cord Quick installation guide Software CD Misc. accessories a. The software CD contains the printer driver and applications. b. Miscellaneous accessories included with your machine may vary by country of purchase and specific model. - Page 17 Machine overview Front view • This illustration may differ from your machine depending on its model. • Some features and optional goods may not be available depending on model or country. 1 Output tray 4 Front cover 2 Control panel 5 Paper level indicator Control board cover Tray 2...
- Page 18 Machine overview Rear view • This illustration may differ from your machine depending on its model. • Some features and optional goods may not be available depending on model or country. 1 Network port 3 IEEE 1284 parallel connector 2 USB port 4 Power-switch Power receptacle Duplex unit...
-
Page 19: Control Panel Overview
Control panel overview This control panel may differ from your machine depending on its model. There are various types of control panels. Type A Enters eco mode to reduce toner consumption and paper usage (see "Eco options" on page 47). LED) Stops an operation at any time and there are more functions. - Page 20 Control panel overview Type B Shows the current status and Display prompts during an operation. Enters menu mode and scrolls (Menu) through the available menus. Confirms the selection on the display. (Back) (Cancel) (Power) LED) Arrows 1. Introduction Sends you back to the upper menu level.
- Page 21 Control panel overview Type C Shows the current status and prompts Display during an operation. Enters menu mode and scrolls through (Menu) the available menus. Confirms the selection on the display. Sends you back to the upper menu (Back) level. (Cancel) (Power) LED)
-
Page 22: Turning On The Machine
Turning on the machine Connect the machine to the electricity supply first. Turn the switch on if the machine has a power switch. Press the (Power) button, then release. 1. Introduction... -
Page 23: Installing The Driver Locally
Installing the driver locally A locally connected machine is a machine directly attached to your computer using the cable. If your machine is attached to a network, skip the following steps below and go on to installing a network connected machine’s driver (see Advanced Guide). •... -
Page 24: Reinstalling The Driver
From the Start menu, select Programs or All Programs > Samsung Printers > your printer driver name > Uninstall. Follow the instructions in the installation window. Insert the software CD into your CD-ROM drive and install the driver again (see "Installing the driver locally"... -
Page 25: Menu Overview And Basic Setup
2. Menu overview and basic setup After installation is complete, you may want to set the machine’s default settings. Refer to the next section if you would like to set or change values. This chapter provides information about the overall menu structure and the basic setup options. -
Page 26: Menu Overview
Menu overview The control panel provides access to various menus to set up the machine or use the machine’s functions. • These menus can be accessed by pressing button. Press the arrows until the needed menu item appears and press OK. •... -
Page 27: Menu Overview
Menu overview Items Resolution Graphic Darken Text Language Power Save Wakeup Event Altitude Adj. Auto CR System Setup Job Timeout Maintenance Toner Save Eco Setup Clear Setting Emulation Type Emulation Setup Options Network Custom Management a. You can start applications. You need to register the application from the SyncThru™... -
Page 28: Menu Overview
Printing a demo page Print a demo page to make sure that the machine is operating correctly. Press (Menu) button on the control panel. Press Information > OK > Demo Page > OK. Press Print? > Yes > OK. A demo page prints out. If your machine does not have a display screen, press and hold (Cancel) button for about 5 seconds until the status... -
Page 29: Changing The Display Language
Changing the display language To change the language that is displayed on the control panel, follow these steps: For models that do not have the display screen on the control panel, this feature is not applicable. Press (Menu) button on the control panel. Press System Setup >... -
Page 30: Media And Tray
• Using print media that does not meet these specifications may cause problems or require repairs. Such repairs are not covered by Samsung’s warranty or service agreements. • Make sure not to use the inkjet photo paper with this machine. - Page 31 Media and tray Paper quantity indicator shows the amount of paper in the tray. 1 Full 2 Empty 2. Menu overview and basic setup Loading paper in the tray/ optional tray Pull out the paper tray. Flex or fan the edge of the paper stack to separate the pages before loading papers.
- Page 32 Media and tray Slide the paper length guide until it lightly touches the end of the paper stack. Squeeze the paper width guide and slide it to the edge of the paper stack without causing it to bend. 2. Menu overview and basic setup •...
- Page 33 Media and tray The settings set from the machine driver override the settings on the control panel. a To print from an application, open an application and start the print menu. b Open Printing Preferences (see "Opening printing preferences" on page 19). c Press the Paper tab in Printing Preferences, and select an appropriate paper type.
- Page 34 Media and tray Open the multi-purpose tray and unfold the multi-purpose tray extension, as shown. Adjust the multi-purpose tray paper width guides to the width of the paper. 2. Menu overview and basic setup Flex or fan the edge of the paper stack to separate the pages before loading paper.
- Page 35 Media and tray The settings set from the machine’s driver override the settings on the control panel. a To print from an application, open an application and start the print menu. b Open Printing Preferences (see "Opening printing preferences" on page 19). c Press the Paper tab in Printing Preferences and select an appropriate paper type.
- Page 36 Media and tray Optional Types Tray 1 tray Thicker Thin Bond Color CardStock Labels Transparency Envelope Preprinted Cotton Recycled Archive ( ?: Included, Blank: Not available) Envelope Printing successfully on envelopes depends upon the quality of the envelopes. To print an envelope, place it as shown in the following figure. Multi-purpose tray If envelopes are printed out with wrinkles, crease, or black bold lines, open the rear cover and pull down the pressure lever on the right...
- Page 37 Media and tray • When selecting envelopes, consider the following factors: Weight: should not exceed 90 g/m occur. Construction: should lie flat with less than 6 mm curl and should not contain air. Condition: should not be wrinkled, nicked, nor damaged. Temperature: should resist the heat and pressure of the machine during operation.
- Page 38 Media and tray Transparency To avoid damaging the machine, use only transparencies designed for use in laser printers. • Must withstand the machine’s fusing temperature. • Place them on a flat surface after removing them from the machine. • Do not leave unused transparencies in the paper tray for long. Dust and dirt may accumulate on them, resulting in spotty printing.
- Page 39 Media and tray Arrangement: Only use labels with no exposed backing between them. Labels can peel off sheets that have spaces between the labels, causing serious jams. Curl: Must lie flat with no more than 13 mm of curl in any direction.
-
Page 40: Preprinted Paper
Media and tray Preprinted paper When loading preprinted paper, the printed side should be facing up with an uncurled edge at the front. If you experience problems with paper feeding, turn the paper around. Note that print quality is not guaranteed. -
Page 41: Basic Printing
Basic printing Printing If you are a Macintosh, Linux, or Unix OS user, refer to the Advanced Guide. The following Printing Preferences window is for Notepad in Windows 7. Open the document you want to print. Select Print from the File menu. Select your machine from the Select Printer list. - Page 42 Basic printing Canceling a print job If the print job is waiting in the print queue or print spooler, cancel the job as follows: • You can access this window by simply double-clicking the machine icon ( ) in the Windows task bar. •...
- Page 43 Using a favorite setting The Presets option, which is visible on each preferences tab except for the Samsung tab, allows you to save the current preferences for future use. To save a Presets item, follow these steps: 2.
- Page 44 Basic printing Change the settings as needed on each tab. Enter a name for the item in the Presets input box. Click (Add). When you save Presets, all current driver settings are saved. Select more options and click added to the Presets you made. To use a saved setting, select it from the Presets drop-down list.
- Page 45 Basic printing Press (Menu) button on the control panel. Press System Setup > OK > Eco Setup > OK. Press OK select the mode you want. • Default Mode: Select this to turn on or off the eco mode. (Duplex (long edge)/Toner save/2-up/Skip blank pages) Off: Set the eco mode off.
- Page 46 Basic printing ► Result simulator Result Simulator shows the results of reduced emission of carbon dioxide, used electricity, and the amount of saved paper in accordance with the settings you selected. • The results are calculated on the basis that the total number of printed paper is one hundred without a blank page when the eco mode is disabled.
-
Page 47: Maintenance
3. Maintenance This chapter provides information about purchasing supplies, accessories and maintenance parts available for your machine. • Ordering supplies and accessories • Available supplies • Available accessories • Available maintenance parts • Redistributing toner • Replacing the toner cartridge •... -
Page 48: Ordering Supplies And Accessories
Available accessories may differ from country to country. Contact your sales representatives to obtain the list of available supplies, and maintenance parts. To order Samsung-authorized supplies, accessories, and maintenance parts, contact your local Samsung dealer or the retailer where you purchased your machine. You can also visit www.samsung.com/supplies, and then select your country/region to obtain the contact information for service. -
Page 49: Available Supplies
Samsung does not recommend using non-genuine Samsung toner cartridge such as refilled or remanufactured toner. Samsung cannot guarantee non-genuine Samsung toner cartridge's quality. Service or repair required as a result of using non-genuine Samsung toner cartridges will not be covered under the machine’s warranty. -
Page 50: Available Accessories
Available accessories You can purchase and install accessories to enhance your machine’s performance and capacity. Some features and optional goods may not be available depending on models or countries (see "Features by models" on page 7). Accessory Extends your machine’s memory capacity. Memory module If you are experiencing frequent paper supply problems, you can attach an additional tray. -
Page 51: Available Maintenance Parts
Available maintenance parts To purchase maintenance parts, contact the source where you bought the machine. Replacing maintenance parts can be performed only by an authorized service provider, dealer, or the retailer where you bought the machine. The warranty does not cover the replacement of any maintenance parts once it has reached its “Average yield”. -
Page 52: Redistributing Toner
Redistributing toner When the toner cartridge is near the end of its life: • White streaks or light printing occurs and/or density variation side to side. • The Status LED blinks red. If this happens, you can temporarily improve print quality by redistributing the remaining toner in the cartridge. - Page 53 Redistributing toner Hold the toner cartridge by the handle and slowly insert the cartridge into the opening in the machine. Close the front cover. Ensure that the cover is securely closed. 3. Maintenance...
-
Page 54: Replacing The Toner Cartridge
Replacing the toner cartridge Click this link to open an animation about replacing a toner cartridge. When a toner cartridge has reached the end of life, the machine will stop printing. Open the front cover and pull the toner cartridge out. Remove the new toner cartridge from its bag. - Page 55 Replacing the toner cartridge Hold the toner cartridge by the handle and slowly insert the cartridge into the opening in the machine. Close the front cover. Make sure that the cover is securely closed. 3. Maintenance...
-
Page 56: Upgrading A Memory Module
Upgrading a memory module Your machine has a dual in-line memory module (DIMM). Use this memory module slot to install additional memory. Order information is provided for additional memory module. (See "Available accessories" on page 52.) Installing a memory module Turn the machine off and unplug all cables from the machine. - Page 57 Upgrading a memory module Replace the control board cover. Reconnect the power cord and machine cable and turn the machine on. 3. Maintenance...
-
Page 58: Monitoring The Supplies Life
Monitoring the supplies life To view the supply life indicators, follow the steps below: Press (Menu) on the control panel. Press System Setup > OK > Maintenance > OK. Press Supplies Info > OK. Press OK to select the option you want. For models that do not support the display screen on the control panel, this feature is not applicable. -
Page 59: Setting The Toner Low Alert
Setting the toner low alert If the amount of toner in the cartridge is low, a message or LED informing the user to change the toner cartridge appears. You can set the option for whether or not this message or LED appears. Press (Menu) on the control panel. -
Page 60: Cleaning The Machine
Cleaning the machine If printing quality problems occur or if you use your machine in a dusty enviroment, you need to clean your machine regularly to keep it in the best printing condition and use your machine longer. • Cleaning the cabinet of the machine with cleaning materials containing large amounts of alcohol, solvents, or other strong substances can discolor or distort the cabinet. - Page 61 Cleaning the machine • To prevent damage to the toner cartridge, do not expose it to light for more than a few minutes. Cover it with a piece of paper, if necessary. • Do not touch the green surface underside of the toner cartridge.
- Page 62 Cleaning the machine Cleaning the pickup roller Turn the machine off and unplug the power cord. Wait for the machine to cool down. Pull out tray 1. Clean the pickup roller with a soft, lint-free cloth. Insert the tray back into the machine. 3.
-
Page 63: Troubleshooting
4. Troubleshooting This chapter gives helpful information for what to do if you encounter an error. • Tips for avoiding paper jams • Clearing paper jams • Understanding the status LED • Understanding display messages This chapter gives helpful information for what to do if you encounter an error. -
Page 64: Tips For Avoiding Paper Jams
Tips for avoiding paper jams By selecting the correct media types, most paper jams can be avoided. To avoid paper jams, refer to the following guidelines: • Ensure that the adjustable guides are positioned correctly (see "Tray overview" on page 32). •... -
Page 65: Clearing Paper Jams
Clearing paper jams To avoid tearing the paper, pull the jammed paper out slowly and gently. In tray 1 Click this link to open an animation about clearing a jam. Open and close the front cover. The jammed paper is automatically ejected from the machine. - Page 66 Clearing paper jams Remove the jammed paper by gently pulling it straight out. If the paper does not move when you pull, or if you do not see the paper in this area, check the fuser area around the toner cartridge (see "Inside the machine"...
- Page 67 Clearing paper jams Pull tray 1 half-way out. Pull the paper straight up and out. Insert the trays back into the machine. Printing automatically resumes. In the multi-purpose tray Click this link to open an animation about clearing a jam. If the paper is not feeding properly, pull the paper out of the machine.
-
Page 68: Clearing Paper Jams
Clearing paper jams Open the front cover and pull the toner cartridge out. Remove the jammed paper by gently pulling it straight out. Replace the toner cartridge and close the front cover. Printing automatically resumes. In the exit area Click this link to open an animation about clearing a jam. Open and close the front cover. - Page 69 Clearing paper jams If you do not see the jammed paper or if there is any resistance when you pull, stop and go to the next step. Open the rear cover. Remove the jammed paper as shown in the following figure. Close the rear cover.
- Page 70 Clearing paper jams If the paper does not come out with the duplex unit, remove the paper from the bottom of the machine. If you still do not see the paper, go to the next step. Insert the duplex unit into the machine. Open the rear cover.
-
Page 71: Understanding The Status Led
• To resolve the error, look at the error message and its instructions from the troubleshooting part. • You also can resolve the error with the guideline from the computers’s Samsung Printer Status or Smart Panel program window. • If the problem persists, call a service representative. - Page 72 Understanding the status LED Status LED Status Blinking Green Blinking (Status LED) The machine is off-line. • When the backlight slowly blinks, the machine is receiving data from the computer. • When the backlight blinks rapidly, the machine is printing data. •...
- Page 73 Understanding the status LED a. Estimated cartridge life means the expected or estimated toner cartridge life, which indicates the average capacity of print-outs and is designed pursuant to ISO/ IEC 19752. The number of pages may be affected by operating environment, printing interval, graphics, media type and media size. Some amount of toner may remain in the cartridge even when red LED is on and the printer stops printing.
-
Page 74: Understanding Display Messages
Understanding display messages Messages appear on the control panel display to indicate the machine’s status or errors. Refer to the tables below to understand the messages’ and their meaning, and correct the problem, if necessary. Checking display messages • If a message is not in the table, reboot the power and try the printing job again. - Page 75 Meaning Install Toner A toner cartridge is not installed. The toner cartridge you have installed is not for Compatible your machine. Toner cartridge Suggested solutions Install a toner cartridge. Install a Samsung-genuine toner cartridge, designed for your machine. 4. Troubleshooting...
- Page 76 Samsung toner cartridge's quality. Service or repair required as a result of using non- genuine Samsung toner cartridges will not be covered under the machine warranty. • If the machine stops printing, replace the toner cartridge (See "Replacing the toner cartridge"...
-
Page 77: Understanding Display Messages
Understanding display messages Tray-related messages Message Meaning There is no paper in Paper Empty tray 1. in Tray 1 There is no paper in Paper Empty tray 2. in Tray 2 There is no paper in the multi-purpose Paper Empty tray. - Page 78 Understanding display messages Network-related messages Message Meaning The network IP Network address you have set is Problem being used by IP Conflict someone else. Fail to authenticate. 802.1x Network Error Misc. messages Message Meaning The front cover or rear Door Open cover is not securely Close it latched.
-
Page 79: Appendix
5. Appendix This chapter provides product specifications and information concerning applicable regulations. • Specifications • Regulatory information • Copyright... -
Page 80: Specifications
Specifications General specifications The specification values listed below are subject to change without notice. See www.samsung.com/printer for possible changes in information. Items Dimension Width x Length x Height Weight Machine with consumables Ready mode Noise Level Print mode Operation Temperature... - Page 81 Specifications Items 110 volt models Power rating 220 volt models Average operating mode Power consumption Ready mode Power save mode Power off mode Module Wireless a. Sound Pressure Level, ISO 7779. Configuration tested: basic machine installation, A4 paper, simplex printing. b.
- Page 82 Specifications Print media specifications Type Size Letter 216 x 279 mm (8.5 x 11 inches) Legal 216 x 356 mm (8.5 x 14 inches) US Folio 216 x 330 mm (8.5 x 13 inches) 210 x 297 mm (8.27 x 11.69 inches) Oficio 216 x 343 mm (8.5 x 13.5 inches) Plain paper...
-
Page 83: Specifications
Specifications Type Size Envelope 98 x 191 mm (3.87 x 7.5 inches) Monarch Envelope No. 105 x 241 mm (4.12 x 9.5 inches) Envelope Envelope DL 110 x 220 mm (4.33 x 8.66 inches) Envelope C5 162 x 229 mm (6.38 x 9.02 inches) Envelope C6 114 x 162 mm (4.49 x 6.38 inches) Refer to the... - Page 84 Specifications Type Size Letter, Legal, Refer to the Plain paper section US Folio, A4, Labels JIS B5, ISO B5, Executive, A5 Letter, Legal, Refer to the Plain paper section US Folio, A4, Card stock JIS B5, ISO B5, Executive, A5 Refer to the Refer to the Plain paper section Bond paper...
- Page 85 Specifications System requirements Microsoft® Windows® Operating system Windows® 2000 Intel® Pentium® II 400 MHz (Pentium III 933 MHz) Windows® XP Intel® Pentium® III 933 MHz (Pentium IV 1 GHz) Windows Server® 2003 Intel® Pentium® III 933 MHz (Pentium IV 1 GHz) Windows Server®...
- Page 86 Specifications • Windows Terminal Services is compatible with your machine. • For Windows 2000, Services Pack 4 or higher is required. Macintosh Operating system • Intel® processors • PowerPC G4/ G5 Mac OS X 10.3 ~ 10.4 • Intel® processors Mac OS X 10.5 •...
- Page 87 Specifications Linux Items Fedora 4 ~ 12 (32/ 64 bit) OpenSuSE® 10.2, 10.3, 11.0, 11.1, 11.2 (32/64 bit) SuSE 10.0, 10.1 (32 bit) Ubuntu 5.04, 5.10, 6.04, 6.10, 7.04, 7.10, 8.04, 8.10, 9.04, 9.10 (32/64 bit) Operating system Mandriva 2005, 2006, 2007, 2008, 2009, 2009.1 (32/64 bit) Debian 4.0, 5.0 (32/64 bit) Redhat®...
- Page 88 Specifications Items Free HDD space Up to 100 MB Network environment Network and wireless models only (see "Features by models" on page 7) You need to set up the network protocols on the machine to use it as your network machine. The following table shows the network environments supported by the machine.
- Page 89 Specifications Items • TCP/IPv4 • DHCP, BOOTP • DNS, WINS, Bonjour, SLP, UPnP Network protocols • Standard TCP/IP Printing (RAW), LPR, IPP, WSD • SNMPv 1/2/3, HTTP (S), IPSec • TCP/IPv6 (DHCP, DNS, RAW, LPR, SNMPv 1/2/3, HTTP (S), IPSec) •...
-
Page 90: Regulatory Information
Regulatory information This machine is designed for a normal work environment and certified with several regulatory statements. Laser safety statement The printer is certified in the U.S. to conform to the requirements of DHHS 21 CFR, chapter 1 Subchapter J for Class I(1) laser products, and elsewhere is certified as a Class I laser product conforming to the requirements of IEC 60825-1 : 2007. - Page 91 Regulatory information Ozone safety This product's ozone emission rate is under 0.1 ppm. Because ozone is heavier than air, keep the product in a place with good ventilation. Power saver This printer contains advanced energy conservation technology that reduces power consumption when it is not in active use.
- Page 92 The United States of America only Dispose unwanted electronics through an approved recycler. To find the nearest recycling location, go to our website:www.samsung.com/recyclingdirect Or call, (877) 278 - 0799 Radio frequency emissions FCC information to the user This device complies with Part 15 of the FCC Rules. Operation is subject to the following two conditions: •...
-
Page 93: Canadian Radio Interference Regulations
Regulatory information This equipment has been tested and found to comply with the limits for a Class B digital device, pursuant to Part 15 of the FCC Rules. These limits are designed to provide reasonable protection against harmful interference in a residential installation. This equipment generates, uses and can radiate radio frequency energy and, if not installed and used in accordance with the instructions, may cause harmful interference to radio communications. - Page 94 Regulatory information The FCC has set a general guideline of 20 cm (8 inches) separation between the device and the body, for use of a wireless device near the body (this does not include extremities). This device should be used more than 20 cm (8 inches) from the body when wireless devices are on.
- Page 95 Regulatory information Russia only Germany only Turkey only Replacing the fitted plug (for UK only) Important The mains lead for this machine is fitted with a standard (BS 1363) 13 amp plug and has a 13 amp fuse. When you change or examine the fuse, you must re-fit the correct 13 amp fuse.
- Page 96 Declaration of conformity (European countries) Approvals and Certifications Hereby, Samsung Electronics, declares that this [ML- 371xDW] is in compliance with the essential requirements and other relevant provisions of R&TTE Directive 1999/5/EC. Hereby, Samsung Electronics, declares that this [ML-330x...
- Page 97 EC Certification Certification to 1999/5/EC Radio Equipment & Telecommunications Terminal Equipment Directive (FAX) This Samsung product has been self-certified by Samsung for pan- European single terminal connection to the analogue public switched telephone network (PSTN) in accordance with Directive 1999/5/EC. The product has been designed to work with the national...
- Page 98 Regulatory information EEA/EFTA countries No limitations at this time Regulatory compliance statements Wireless guidance Low power, Radio LAN type devices (radio frequency (RF) wireless communication devices), operating in the 2.4 GHz/5 GHz Band, may be present (embedded) in your printer system. The following section is a general overview of considerations while operating a wireless device.
- Page 99 Regulatory information 5. Appendix In environments where the risk of interference to other Israel only devices or services is harmful or perceived as harmful, the option to use a wireless device may be restricted or eliminated. Airports, Hospitals, and Oxygen or flammable gas laden atmospheres are limited examples where use of wireless devices may be restricted or eliminated.
- Page 100 Regulatory information 5. Appendix China only...
- Page 101 This user’s guide is provided for information purposes only. All information included herein is subject to change without notice. Samsung Electronics is not responsible for any direct or indirect damages, arising from or related to use of this user’s guide.
- Page 102 Index accessories ordering cleaning inside outside pickup roller cleaning a machine control panel convention default settings tray setting display screen eco button eco printing error message favorites settings, for printing features print media feature front view general icons clearing paper tips for avoiding paper jams Linux system requirements...
- Page 103 output support preprinted paper setting the paper size setting the paper type special media transparency Printing printing printing a document Windows rear view regulatiory information safety information symbols specifications print media stop button supplies available supplies monitoring the supplies life ordering replacing toner cartridge toner cartridge...
- Page 104 User’s Guide Advanced imagine the possibilities This guide provides information about installation, advanced configuration, operation and troubleshooting on various OS environments. Some features may not be available depending on model or country. ML-330x Series ML-331x Series ML-371x Series...
- Page 105 Contents 1. Software installation Installation for Macintosh Reinstallation for Macintosh Installation for Linux Reinstallation for Linux 2. Using a network-connected machine Useful network programs Wired network setup Installing driver over the network IPv6 configuration Wireless network setup 3. Useful setting menus Information Layout Paper...
- Page 106 Contents 6. Troubleshooting Paper feeding problems Power and cable connecting problems Printing problems Printing quality problems Operating system problems Contact SAMSUNG worldwide Glossary...
-
Page 107: Software Installation
1. Software installation This chapter provides instructions for installing essential and helpful software for use in an environment where the machine is connected via a cable. A locally connected machine is a machine directly attached to your computer using the cable. -
Page 108: Installation For Macintosh
Installation for Macintosh Make sure that the machine is connected to your computer and powered on. Insert the supplied software CD into your CD-ROM drive. Double-click the CD-ROM icon that appears on your Macintosh desktop. Double-click the MAC_Installer folder > Installer OS X icon. Enter the password and click OK. - Page 109 Installation for Macintosh For Mac OS X 10.3, if Auto Select does not work properly, select Samsung in Printer Model and your machine name in Model Name. • For Mac OS X 10.4, if Auto Select does not work properly, select Samsung in Print Using and your machine name in Model.
-
Page 110: Reinstallation For Macintosh
Reinstallation for Macintosh If the printer driver does not work properly, uninstall the driver and reinstall it. Make sure that the machine is connected to your computer and powered on. Insert the supplied software CD into your CD-ROM drive. Double-click the CD-ROM icon that appears on your Macintosh desktop. -
Page 111: Installation For Linux
Installation for Linux You need to download Linux software packages from the Samsung website to install the printer software (http://www.samsung.com/ printer). Installing the Unified Linux Driver Make sure that the machine is connected to your computer and powered on. When the Administrator Login window appears, type “root”... - Page 112 You must log in as a super user (root) to install the machine software. If you are not a super user, ask your system administrator. From the Samsung website, download the Printer Settings Utility package to your computer. Right-click the Printer Settings Utility package and extract the package.
-
Page 113: Reinstallation For Linux
If you are not a super user, ask your system administrator. Click the icon at the bottom of the desktop. When the Terminal screen appears, type in the following. [root@localhost root]#cd /opt/Samsung/mfp/uninstall/ [root@localhost uninstall]#./uninstall.sh Click Uninstall. Click Next. Click Finish. -
Page 114: Using A Network-Connected Machine
2. Using a network-connected machine This chapter gives you step-by-step instructions for setting up a network connected machine and software. • Useful network programs • Wired network setup • Installing driver over the network • IPv6 configuration • Wireless network setup... -
Page 115: Useful Network Programs
Useful network programs There are several programs available to setup the network settings easily in a network environment. For the network administrator especially, managing several machines on the network is possible. Before using the programs below, set the IP address first. SyncThru™... -
Page 116: Wired Network Setup
Wired network setup You must set up the network protocols on your machine to use it on your network. You can use network after connecting network cable to a corresponding port on your machine. • For models that do not have the display screen on the control panel, use the SyncThru™... - Page 117 Wired network setup Turn on the machine. From the Windows Start menu, select All Programs > Samsung Printers > SetIP > SetIP. Click the icon (third from left) in the SetIP window to open the TCP/IP configuration window. Enter the machine’s new information into the configuration window as follows.
- Page 118 Before using the SetIP program, disable the computer firewall from System Preferences or Administrator. The following instructions may vary from your model or operating systems. Open /opt/Samsung/mfp/share/utils/. Double-click the SetIPApplet.html file. Click to open the TCP/IP configuration window. Enter the machine’s new information into the configuration window.
- Page 119 Wired network setup 2. Using a network-connected machine The machine will automatically print the Network Configuration Report.
-
Page 120: Installing Driver Over The Network
Installing driver over the network Windows Make sure that the machine is connected to the network and powered on. Also, your machine’s IP address should have been set (see "Setting IP address" on page 13). If the “Found New Hardware Wizard” appears during the installation procedure, click Cancel to close the window. - Page 121 Installing driver over the network • Direct Input The Direct Input allows you to search for a specific machine on the network. - Search by IP address: Enter the IP address or the host name. Then click Next. To verify your machine’s IP address, print a network configuration report (see "Printing a network configuration report"...
- Page 122 Installing driver over the network Click Agree to agree to the license agreement. Select Easy Install and click Install. Easy Install is recommended for most users. All components necessary for machine operations will be installed. If you select Custom Install, you can choose individual components to install.
- Page 123 Installing driver over the network For Mac OS X 10.3, if Auto Select does not work properly, select Samsung in Printer Model and your machine name in Model Name. • For Mac OS X 10.4, if Auto Select does not work properly, select Samsung in Print Using and your machine name in Model.
- Page 124 UNIX printer driver package from the Samsung website. Installing the UNIX printer driver package The installation procedure is common for all variants of UNIX OS mentioned. From the Samsung website, download and unpack the UNIX Printer Driver package to your computer. Acquire root privileges. su - Copy the appropriate driver archive to the target UNIX computer.
- Page 125 Installing driver over the network See administration guide of your UNIX OS for details. Unpack the UNIX printer driver package archive. For example, on IBM AIX uses the following commands. cd /tmp gzip –dc /cdrom/unix/packages/aix_power/ aix_power.tar.gz | tar –xvf – The “binaries”...
- Page 126 Installing driver over the network d Execute the “. /install –d” command to uninstall the whole package. e To verify removal results, execute the “. /install –c” command. To re-install it, use the command “. /install” to reinstall the binaries. Setting up the printer To add the printer to your UNIX system, run ‘installprinter’...
-
Page 127: Ipv6 Configuration
IPv6 configuration IPv6 is supported properly only in Windows Vista or higher. If the IPv6 network seems to not be working, set all the network setting to the factory defaults and try again using Clear Setting (see "Network" on page 64). In the IPv6 network environment, follow the next procedure to use the IPv6 address. -
Page 128: Manual Address Configuration
IPv6 configuration Setting IPv6 addresses The machine supports the following IPv6 addresses for network printing and managements. • Link-local Address: Self-configured local IPv6 address (Address starts with FE80). • Stateless Address: Automatically configured IPv6 address by a network router. • Stateful Address: IPv6 address configured by a DHCPv6 server. - Page 129 IPv6 configuration Using SyncThru™ Web Service Start a web browser, such as Internet Explorer, that supports IPv6 addressing as a URL. Select one of the IPv6 addresses (Link-local Address, Stateless Address, Stateful Address, Manual Address) from Network Configuration Report (see "Printing a network configuration report"...
-
Page 130: Wireless Network Setup
Wireless network setup Make sure your machine supports a wireless network. Wireless network may not be available depending on the model. Getting started Understanding your network type Typically, you can only have one connection between your computer and the machine at a time. Infrastructure mode This is an environment generally used for homes and SOHOs (Small Office/ Home Office). -
Page 131: From The Computer
Wireless network setup From the computer From the computer, we recommend using a USB cable with the program provided in the supplied software CD. See "Setup using Windows" on page 34. • With a USB cable: You can simply set up a wireless network using the program on the supplied software CD. - Page 132 Wireless network setup Choosing your type There are two methods available to connect your machine to a wireless network using the (WPS) button on the control panel. The Push Button Configuration (PBC) method allows you to connect your machine to a wireless network by pressing both the (WPS) button on the control panel of your machine and the WPS (PBC) button on a Wi-Fi Protected Setup™...
- Page 133 Wireless network setup ► Connecting in PIN mode Press and hold the (WPS) button on the control panel for more than 2 seconds. The eight-digit PIN appears on the display. You need to enter the eight-digit PIN within two minutes to the computer which is connected to the access point (or wireless router).
- Page 134 Wireless network setup ► Connecting in PIN mode The network configuration report, including PIN, must be printed. In ready mode, press and hold the button on the control panel for about 5 seconds. You can find your machine’s PIN number. Press and hold the (WPS) button on the control panel for more than 4 seconds until the status LED stays on.
- Page 135 Wireless network setup Disconnecting from a network To disconnect the wireless network connection, press the button on the control panel for more than two seconds. • When the Wi-Fi network is in idle mode: The machine is immediately disconnected from the wireless network, and the WPS LED is off.
- Page 136 Wireless network setup According to the network you selected, the WLAN security encryption type will be WEP or WPA. • In case of WEP, press the Open System or SharedKey. Open System: Authentication is not used, and Encryption may or may not be used, depending on the need for data security.
- Page 137 Wireless Setting program without CD. From the Start menu, select Programs or All Programs > Samsung Printers > your printer driver name > Wireless Setting Program. Access point via USB cable ►...
- Page 138 Wireless network setup Insert the supplied software CD into your CD-ROM drive. Select the Wireless Setting and Installation option. • Install Now: If you have already set up the wireless network, click this button to install the machine’s driver to use the wireless network machine.
- Page 139 Wireless network setup • Encryption: Select the encryption (None, WEP64, WEP128, TKIP, AES, TKIP AES). • Network Key: Enter the encryption network key value. • Confirm Network Key: Confirm the encryption network key value. • WEP Key Index: If you are using WEP Encryption, select the appropriate WEP Key Index.
- Page 140 Wireless network setup The window shows the wireless network settings and checks if the settings are correct. Click Next. • For the DHCP method If the IP address assignment method is DHCP, check if DHCP is shown in the window. If it shows Static, click Change TCP/IP to change the assignment method to DHCP.
- Page 141 If the test page prints out correctly, click Yes. If not, click No to reprint it. To register as a user of the machine in order to receive information from Samsung, click On-line Registration. Click Finish. Ad hoc via USB cable...
- Page 142 After searching the wireless networks, a list of wireless networks your machine has searched appears. If you want to use the Samsung default ad hoc setting, select the last wireless network on the list, Network Name(SSID) is portthru and Signal is Printer Self Network.
- Page 143 Wireless network setup 2. Using a network-connected machine The window showing the wireless network setting appears. Check the settings and click Next.
- Page 144 Wireless network setup Before entering the IP address for the machine, you must know the computer’s network configuration information. If the computer’s network configuration is set to DHCP, the wireless network setting should also be DHCP. Likewise, if the computer’s network configuration is set to Static, the wireless network setting should also be Static.
- Page 145 If the test page prints out correctly, click Yes. If not, click No to reprint it. To register as a user of the machine in order to receive information from Samsung, click On-line Registration. Click Finish. 2. Using a network-connected machine...
- Page 146 Wireless network setup Enter the password and click OK. Click Continue. Read the license agreement and click Continue. Click Agree to agree to the license agreement. Click Continue. Select Easy Install and click Install. Easy Install is recommended for most users. All components necessary for machine operations will be installed.
- Page 147 Wireless network setup The wireless network security window appears when the access point has security setting. The wireless network security window appears. The window may differ according to its security mode: WEP or WPA. • WEP Select Open System or Shared Key for the authentication and enter the WEP security key.
- Page 148 Wireless network setup Subnet Mask: 255.255.0.0 (Use the computer’s subnet mask.) Gateway: 169.254.133.1 The wireless network connects according to the network configuration. When the wireless network settings are completed, disconnect the USB cable between the computer and machine. Follow the instructions on the screen to complete the installation.
- Page 149 After searching the wireless networks, a list of wireless networks your machine has searched appears. If you want to use the Samsung default ad hoc setting, select the last wireless network on the list, which Network Name(SSID) is portthru and Signal is Printer Self Network.
- Page 150 Wireless network setup The wireless network security window appears when the ad hoc network has security setting. The wireless network security window appears. Select Open System or Shared Key for the authentication and click Next. • WEP (Wired Equivalent Privacy) is a security protocol preventing unauthorized access to your wireless network.
- Page 151 Wireless network setup Before entering the IP address for the machine, you must know the computer’s network configuration information. If the computer’s network configuration is set to DHCP, the wireless network setting should also be DHCP. Likewise, if the computer’s network configuration is set to Static, the wireless network setting should also be Static.
- Page 152 Wireless network setup • After completing the wireless network connection, you need to install a machine driver to print from an application (See "Installing driver over the network" on page 17). • See your network administrator, or the person that set up your wireless network, for information about your network configuration.
- Page 153 Wireless network setup Check whether or not the network cable is connected to the machine. If not, connect the machine with a standard network cable. Start a web browser such as Internet Explorer, Safari or Firefox and enter your machine’s new IP address in the browser window.
- Page 154 Wireless network setup Click Next. If the wireless security setting window appears, enter the registered password (network key) and click Next. The confirmation window appears, please check your wireless setup. If the setup is right, click Apply. Disconnect the network cable (standard or network). Your machine should then start communicating wirelessly with the network.
- Page 155 Wireless network setup • The machine does not support a wireless network. Check the machine's user's guide included on the software CD supplied with your machine and prepare a wireless network machine. ► Connecting Failure - Not Found SSID • The machine is unable to search the network name (SSID) you have selected or entered.
-
Page 156: Other Problems
Wireless network setup ▪ Subnet Mask: 255.255.0.0 Then, the machine’s network information should be as below: ▪ IP address: 169.254.133.43 ▪ Subnet Mask: 255.255.0.0 (Use the computer’s subnet mask.) ▪ Gateway: 169.254.133.1 Other problems If problems occur while using the machine on a network, check the following: For information on the access point (or wireless router), refer to its own user's guide. - Page 157 Windows Vista, you might need to set the wireless connection setting every time you use the wireless machine. • You cannot use Infrastructure mode and Ad hoc mode at the same time for Samsung wireless network machines. • The machine is within the range of the wireless network. •...
- Page 158 3. Useful setting menus This chapter explains how to browse the current status of your machine, and the method of setting for advanced machine setup. • Information • Layout • Paper • Graphic • System setup • Emulation • Network •...
-
Page 159: Useful Setting Menus
Information Item Prints the menu map which shows the layout Menu Map and current settings of this machine. Prints a report on the machine's overall Configuration configuration. Supplies Info. Prints supplies’ information page. Prints the demo page to check whether your Demo Page machine is printing properly or not. -
Page 160: Layout
Layout Item Description Selects the direction in which information is Orientation printed on a page. • Simplex Margin: Sets the margin for one- sided printing. • Duplex: Sets the margin for double-sided printing. Common Margin • Binding: When printing on both sides of the paper, side A's margin closest to the binding will be the same as side B's margin closest to the binding. -
Page 161: Paper
Paper Item Description Copies Selects the number of copies. • Paper Size: Selects the default paper size. MP Tray / • Paper Type: Selects the paper type currently [Tray<x>] loaded in the tray. Paper Source Sets from which tray to use paper. When you select any other value except Auto from Paper Source and the selected tray is empty, you can set the machine to automatically... -
Page 162: Graphic
Graphic Item Description Specifies the number of dots printed per inch Resolution (dpi). The higher the setting, the sharper printed characters and graphics. Darken Text Prints text darker than on a normal document. (Clear Text) Lightens or darkens the print on the page. The Darkness Normal setting usually produces the best result. -
Page 163: System Setup
System setup Item Description Date & Time Sets the date and time. Selects the format for displaying time between Clock Mode 12 hr and 24 hr. • Off: Prints in normal mode. • Single Form: Prints all page using the first form. - Page 164 System setup Item Description Allows you to append the required carriage Auto CR return to each line feed, which is useful for Unix or DOS users. When there is no input for a certain period of time, the machine cancels the current job. You Job Timeout can set the amount of time the machine will wait before canceling the job.
- Page 165 System setup Item Description Exports data stored on a USB memory stick to the Export Setting machine. Activating this mode extends the life of your toner cartridge and reduces your cost per page Toner Save beyond what one would experience in the normal mode, but it reduces print quality.
-
Page 166: Emulation
Emulation Item Description The machine language defines how the Emulation Type computer communicates with the machine. Sets the detailed settings for the selected Setup emulation type. 3. Useful setting menus... -
Page 167: Network
Network Option Description Selects the appropriate protocol and configure parameters to use the network environment. TCP/IP (IPv4) There are lots of parameters to be set. If you are not sure, leave as is, or consult the network administrator. Selects this option to use the network TCP/IP (IPv6) environment through IPv6 (see "IPv6 configuration"... -
Page 168: Admin Setup
Admin setup Item Description Sets the password to access the Admin Setup Password menu. Select On to use this option and enter the Protect password. Change Changes the machine’s password for accessing the Password Admin Setup. • Clean Fuser: Cleans the fuser by printing a sheet. -
Page 169: Special Features
4. Special features This chapter explains special printing features. • Altitude adjustment • Changing the font setting • Changing the default print settings • Setting your machine as a default machine • Using advanced print features • Using Direct Printing Utility (Windows only) •... -
Page 170: Altitude Adjustment
Altitude adjustment Print quality is affected by atmospheric pressure, which is determined by the height of the machine above sea level. The following information will guide you on how to set your machine for the best print quality. Before you set the altitude value, determine the altitude where you are. -
Page 171: Changing The Font Setting
Changing the font setting Your machine has preset the font for your region or country. If you want to change the font or set the font for special condition, such as the DOS environment, you can change the font setting from Device Settings or Emulation section. -
Page 172: Changing The Default Print Settings
Changing the default print settings Click the Windows Start menu. For Windows Server 2000, select Settings > Printers. • For Windows XP/Server 2003, select Printer and Faxes. • For Windows Server 2008/Vista, select Control Panel > Hardware and Sound > Printers. •... -
Page 173: Setting Your Machine As A Default Machine
Setting your machine as a default machine Click the Windows Start menu. For Windows Server 2000, select Settings > Printers. • For Windows XP/Server 2003, select Printer and Faxes. • For Windows Server 2008/Vista, select Control Panel > Hardware and Sound > Printers. •... -
Page 174: Using Advanced Print Features
Using advanced print features XPS printer driver: used to print XPS file format. • The XPS printer driver can be installed only on Windows Vista OS or higher. • You can install the XPS printer driver when you insert the software CD into your CD-ROM drive. - Page 175 Using advanced print features Understanding special printer features You can use advanced printing features when using your machine. To take advantage of the printer features provided by your printer driver, click Properties or Preferences in the application’s Print window to change the print settings. The machine name, that appears in the printer properties window may differ depending on the machine in use. Item Multiple Pages per Side Selects the number of pages to print on a single sheet of paper.
- Page 176 Using advanced print features Item Prints your document on both sides of a sheet of paper and arranges the pages so that the paper can be folded in half after printing to produce a booklet. If you want to make a booklet, you need to print on Letter, Legal, A4, US Folio, or Oficio sized print media. Booklet Printing The Booklet Printing option is not available for all paper sizes.
- Page 177 Using advanced print features Item • Printer Default: If you select this option, this feature is determined by the settings you have selected on the control panel of the machine. This option is available only when you use the PCL/XPS printer driver. •...
- Page 178 Using advanced print features Item Watermark a To change the print settings from your software application, access Printing Preferences. b Click the Advanced tab, select Edit from the Watermark drop-down list. The Edit Watermarks window appears. (Creating a watermark) c Enter a text message in the Watermark Message box. You can enter up to 256 characters.
- Page 179 Using advanced print features Item This option is available only when you use the PCL printer driver. An overlay is text and/or images stored in the computer hard disk drive (HDD) as a special file format that can be printed on any document. Overlays are often used to take the place of letterhead paper. Rather than using preprinted letterhead, you can create an overlay containing exactly the same information that is currently on your letterhead.
- Page 180 Using advanced print features Item Overlay a Click the Advanced tab. b Select the desired overlay from the Text drop-down list. (Using a page overlay) c If the overlay file you want does not appear in the Text drop-down list, select Edit... from the list and click Load. Select the overlay file you want to use.
- Page 181 Using advanced print features Item • This feature is available only if you have installed the optional hard disk or set the Ram Disk. To set the • Some menus may not appear on the display depending on options or models. If so, it is not applicable •...
-
Page 182: Using Direct Printing Utility (Windows Only)
Printing There are several ways you can print using the Direct Printing Utility. From the Start menu select Programs or All Programs > Samsung Printers > Direct Printing Utility > Direct Printing Utility. The Direct Printing Utility window appears. Select your machine from the Select Printer drop-down list and click Browse. - Page 183 Using Direct Printing Utility (Windows only) Using the right-click menu Right-click on the PDF file to print and select Direct Printing. The Direct Printing Utility window appears with the PDF file is added. Select the machine to use. Customize the machine settings. Click Print.
-
Page 184: Using Memory/Hard Drive Features
Using memory/hard drive features Some menus may not appear on the display depending on options or models. If so, it is not applicable to your machine. From the printer driver After installing the optional memory, you can use advanced printing features, such as proofing a job and specifying of printing a private job in the Print window. - Page 185 Using memory/hard drive features 4. Special features After installing the hard drive, you can also print the predefined document templates from the Form Menu.
-
Page 186: Macintosh Printing
Macintosh printing Some features may not be available depending on models or options. It means that the features are not supported. Printing a document When you print with a Macintosh, you need to check the printer driver settings in each application you use. Follow the steps below to print from a Macintosh: Open the document to print. - Page 187 Macintosh printing Click Print. The machine prints the selected number of pages to print on one sheet of paper. Printing on both sides of the paper Some features may not be available depending on models or options. It means that the features are not supported. Before printing in the duplex mode, decide on which edge you will be binding your finished document.
-
Page 188: Linux Printing
Linux printing Some features may not be available depending on models or options. It means that the features are not supported. Printing from applications There are a lot of Linux applications that allow you to print using Common UNIX Printing System (CUPS). You can print on your machine from any such application. - Page 189 Linux printing The Printing window appears, allowing you to monitor the status of your print job. To abort the current job, click Cancel. Printing files You can print many different types of files on your machine using the standard CUPS, directly from the command line interface. The CUPS lpr utility allows you to do that, but the driver’s package replaces the standard lpr tool by a much more user-friendly LPR GUI program.
- Page 190 • Jobs: Shows the list of print jobs. Click Cancel job to cancel the selected job and select the Show completed jobs check box to see previous jobs on the job list. • Classes: Shows the class that your machine is in. Click Add to Class to add your machine to a specific class or click Remove from Class to remove the machine from the selected class.
-
Page 191: Unix Printing
Unix printing Unix printing Some features may not be available depending on models or options. It means that the features are not supported. Proceeding the print job After installing the printer, choose any of the image, text, PS or HPGL files to print. -
Page 192: Margins Tab
Unix printing • Orientation: Select the direction in which information is printed on a page. • Duplex: Print on both sides of paper to save paper. Automatic/manual duplex printing may not be available depending on models. You can alternatively use the lpr printing system or other applications for odd-even printing. -
Page 193: Maintenance
5. Maintenance This chapter introduces management tools provided to help you make full use of your machine. It also provides information for maintaining the toner cartridge. • Storing the toner cartridge • Tips for moving & storing your machine • Useful management tools... -
Page 194: Storing The Toner Cartridge
Never manually rotate the drum, especially in the reverse direction; this can cause internal damage and toner spillage. Toner cartridge usage Samsung Electronics does not recommend or approve the use of non-Samsung brand toner cartridges in your printer including generic, store brand, refilled, or remanufactured toner cartridges. - Page 195 Storing the toner cartridge Samsung’s printer warranty does not cover damage to the machine caused by the use of a refilled, remanufactured, or non-Samsung brand toner cartridges. Estimated cartridge life Estimated cartridge life (the life of the toner cartridge yield) depends on the amount of toner that print jobs require.
-
Page 196: Tips For Moving & Storing Your Machine
Tips for moving & storing your machine • When moving the machine, do not tilt or turn it upside down. Otherwise, the inside of the machine may be contaminated by toner, which can cause damage to the machine or reduce print quality. -
Page 197: Useful Management Tools
Windows Internet Explorer pages more easily, than when you use an ordinary program. Click Start > All programs > Samsung Printers > Samsung AnyWeb Print > Download the latest version to link to the website where the tool is available for download. -
Page 198: Information Tab
► Maintenance tab This tab allows you to maintain your machine by upgrading firmware and setting contact information for sending emails. You can also connect to Samsung website or download drivers by selecting the Link menu. • Firmware Upgrade: Upgrade your machine’s firmware. - Page 199 Useful management tools • Link: Shows links to useful sites where you can download or check information. E-mail notification setup You can receive emails about your machine’s status by setting this option. By setting information such as IP address, host name, e-mail address and SMTP server information, the machine status (toner cartridge shortage or machine error) will be sent to a certain person's e-mail automatically.
- Page 200 Samsung Easy Printer Manager. Understanding Samsung Easy Printer Manager To open the program: Select Start > Programs or All Programs > Samsung Printers > Samsung Easy Printer Manager > Samsung Easy Printer Manager. The Samsung Easy Printer Manager interface is comprised of various...
-
Page 201: Advanced Settings User Interface Overview
Useful management tools Printer This area gives you general information about Information your machine. You can check information, such as the machine’s model name, IP address (or Port name), and machine status. User’s Guide button: This button opens Troubleshooting Guide when an error occurs. - Page 202 SyncThru™ or CounThru™ admin software. Using Samsung Printer Status (Windows only) The Samsung Printer Status is a program that monitors and informs you of the machine status. • The Samsung Printer Status window and its contents shown in this user’s guide may differ depending on the...
- Page 203 For Macintosh, Smart Panel is installed automatically when you install the machine software. For Linux, you can download Smart Panel from the Samsung website (see "Installing the Smart Panel" on page 8). • The Smart Panel window and its contents shown in this user’s guide may differ depending on the machine or...
- Page 204 Opening Unified Driver Configurator Double-click the Unified Driver Configurator on the desktop. You can also click the Startup Menu icon and select Samsung Unified Driver > Unified Driver Configurator. Click each button on the left to switch to the corresponding configuration window.
- Page 205 Useful management tools To use the on screen help, click Help. After changing the configurations, click Exit to close the Unified Driver Configurator. Printers configuration Printers configuration has the two tabs: Printers and Classes. ► Printers tab View the current system’s printer configuration by clicking on the machine icon button on the left side of the Unified Driver Configurator window.
-
Page 206: Ports Configuration
Useful management tools • Set as Default: Sets the current selected machine as a default machine. • Stop/Start: Stops/starts the machine. • Test: Allows you to print a test page to ensure the machine is working properly. • Properties: Allows you to view and change the printer’s properties. - Page 207 Useful management tools Switches to Ports configuration. Shows all of the available ports. Shows the port type, device connected to the port, and status. • Refresh: Renews the available ports list. • Release port: Releases the selected port. 5. Maintenance...
- Page 208 6. Troubleshooting This chapter gives helpful information for what to do if you encounter an error. • Paper feeding problems • Power and cable connecting problems • Printing problems • Printing quality problems • Operating system problems...
-
Page 209: Troubleshooting
Paper feeding problems Condition Paper jams during printing. Paper sticks together. Multiple sheets of paper do not feed. Different types of paper may be stacked in the tray. Load paper of only one type, size, and weight. Paper does not feed into the machine. -
Page 210: Power And Cable Connecting Problems
Power and cable connecting problems Click this link to open an animation about solving power problems. Condition The machine is not receiving power, or the connection cable between the computer and the machine is not connected properly. • Connect the machine to the electricity supply first and press the panel. -
Page 211: Printing Problems
Printing problems Condition The machine does not The machine is not receiving power. print. The machine is not selected as the default machine. Check the machine for the following: • The front cover is not closed. Close the front cover. •... - Page 212 Printing problems Condition The machine does not The printer driver may be incorrectly print. installed. The machine is malfunctioning. The document size is so big that the hard disk space of the computer is insufficient to access the print job. The output tray is full.
- Page 213 Printing problems Condition The machine prints, The machine cable is loose or defective. but the text is wrong, garbled, or incomplete. The wrong printer driver was selected. The software application is malfunctioning. The operating system is malfunctioning. If you are in a DOS environment, the font setting for your machine may be set incorrectly.
- Page 214 Printing problems Condition The machine does not Incompatibility between the PDF file and print PDF files the Acrobat products. correctly. Some parts of graphics, text, or illustrations are missing. The print quality of The resolution of the photo is very low. photos is not good.
-
Page 215: Printing Quality Problems
Printing quality problems If the inside of the machine is dirty or paper has been loaded improperly, there might be a reduction in print quality. See the table below to clear the problem. Condition Light or faded print • If a vertical white streak or faded area appears on the page, the toner supply is low. Install a new toner cartridge. •... - Page 216 Printing quality problems Condition Toner specks • The paper may not meet specifications; for example, the paper may be too moist or rough. • The transfer roller may be dirty. Clean the inside of your machine. • The paper path may need cleaning. Contact a service representative. Dropouts If faded areas, generally rounded, occur randomly on the page: •...
- Page 217 Printing quality problems Condition Vertical lines If black vertical streaks appear on the page: • The surface (drum part) of the toner cartridge inside the machine has probably been scratched. Remove the toner cartridge and install a new one. If white vertical streaks appear on the page: •...
- Page 218 Printing quality problems Condition Vertical repetitive defects If marks repeatedly appear on the printed side of the page at even intervals: • The toner cartridge may be damaged. If you still have the same problem, remove the toner cartridge and, install a new one.
- Page 219 Printing quality problems Condition Misformed characters • If characters are improperly formed and producing hollow images, the paper stock may be too slick. Try different paper. Page skew • Ensure that the paper is loaded properly. • Check the paper type and quality. •...
- Page 220 Printing quality problems Condition Wrinkles or creases • Ensure that the paper is loaded properly. • Check the paper type and quality. • Turn the stack of paper over in the tray. Also try rotating the paper 180° in the tray. Back of printouts are dirty •...
- Page 221 Printing quality problems Condition Loose toner • Clean the inside of the machine. • Check the paper type and quality. • Remove the toner cartridge and then, install a new one. If the problem persists, the machine may require repair. Contact a service representative. Character voids Character voids are white areas within parts of characters that should be solid black: •...
- Page 222 Printing quality problems Condition Curl If the printed paper is curled or paper does not feed into the machine: • Turn the stack of paper over in the tray. Also try rotating the paper 180° in the tray. • Change the printer’s paper option and try again. Go to Printing Preferences, click the Paper tab, and set type to Thin.
-
Page 223: Operating System Problems
Operating system problems Common Windows problems Condition “File in Use” message Exit all software applications. Remove all software from the startup group, then restart Windows. Reinstall the appears during printer driver. installation. “General Protection Close all other applications, reboot Windows and try printing again. Fault”, “Exception OE”, “Spool 32”, or “Illegal Operation”... - Page 224 Operating system problems Common Macintosh problems Condition The machine does not print PDF files correctly. Some parts of graphics, text, or illustrations are missing. The document has printed, but the print job has not disappeared from the spooler in Mac OS X10.3.2. Some letters are not displayed normally during cover page printing.
- Page 225 Operating system problems Common Linux problems Condition The machine does not • Check if the printer driver is installed in your system. Open Unified Driver Configurator and switch to the Printers tab in the Printers configuration window to look at the list of available machines. Make sure that print.
- Page 226 Operating system problems Refer to the Linux User’s Guide that came with your computer for further information on Linux error messages. Common PostScript problems The following situations are PS language specific and may occur when several printer languages are used. Problem The PostScript file cannot The PostScript driver may not be installed...
-
Page 227: Contact Samsung Worldwide
Contact SAMSUNG worldwide If you have any comments or questions regarding Samsung products, contact the Samsung customer care center. Country/Region Customer Care Center ALBANIA 42 27 5755 ARGENTINE 0800-333-3733 ARMENIA 0-800-05-555 AUSTRALIA 1300 362 603 0810-SAMSUNG (7267864, € AUSTRIA 0.07/min) - Page 228 Contact SAMSUNG worldwide Country/Region Customer Care Center FRANCE 01 48 63 00 00 01805 - SAMSUNG (726- GERMANY 7864 € 0,14/min) GEORGIA 8-800-555-555 IT and Mobile : 80111- SAMSUNG (80111 7267864) from land line, local charge/ from mobile, 210 6897691...
- Page 229 MEXICO 7864) MOLDOVA 00-800-500-55-500 MONTENEGRO 020 405 888 MOROCCO 080 100 2255 NIGERIA 080-SAMSUNG(726-7864) 0900-SAMSUNG (0900- NETHERLANDS 7267864) (€ 0,10/min) 0800 SAMSUNG (0800 726 NEW ZEALAND 786) NICARAGUA 00-1800-5077267 NORWAY 815-56 480 OMAN 800-SAMSUNG (726-7864) PANAMA 800-7267 PERU 0-800-777-08 Web Site Country/Region www.samsung.com...
- Page 230 Country/Region Customer Care Center SINGAPORE 1800-SAMSUNG (726-7864) www.samsung.com SLOVAKIA 0800-SAMSUNG (726-7864) www.samsung.com SOUTH AFRICA 0860 SAMSUNG (726-7864) 902-1-SAMSUNG(902 172 SPAIN 678) SWEDEN 0771 726 7864 (SAMSUNG) 0848-SAMSUNG (7267864, CHF 0.08/min) SWITZERLAND TADJIKISTAN 8-10-800-500-55-500 TAIWAN 0800-329-999 1800-29-3232 THAILAND 02-689-3232 TRINIDAD &...
-
Page 231: Access Point
Glossary The following glossary helps you get familiar with the product by understanding the terminologies commonly used with printing as well as mentioned in this user’s guide. 802.11 802.11 is a set of standards for wireless local area network (WLAN) communication, developed by the IEEE LAN/MAN Standards Committee (IEEE 802). -
Page 232: Control Panel
Glossary BOOTP Bootstrap Protocol. A network protocol used by a network client to obtain its IP address automatically. This is usually done in the bootstrap process of computers or operating systems running on them. The BOOTP servers assign the IP address from a pool of addresses to each client. - Page 233 Glossary DHCP A Dynamic Host Configuration Protocol (DHCP) is a client-server networking protocol. A DHCP server provides configuration parameters specific to the DHCP client host requesting, generally, information required by the client host to participate on an IP network. DHCP also provides a mechanism for allocation of IP addresses to client hosts.
-
Page 234: Duty Cycle
Glossary Duty Cycle Duty cycle is the page quantity which does not affect printer performance for a month. Generally the printer has the lifespan limitation such as pages per year. The lifespan means the average capacity of print-outs, usually within the warranty period. For example, if the duty cycle is 48,000 pages per month assuming 20 working days, a printer limits 2,400 pages a day. -
Page 235: Fuser Unit
Glossary Fuser Unit The part of a laser printer that fuses the toner onto the print media. It consists of a heat roller and a pressure roller. After toner is transferred onto the paper, the fuser unit applies heat and pressure to ensure that the toner stays on the paper permanently, which is why paper is warm when it comes out of a laser printer. - Page 236 Glossary IP address An Internet Protocol (IP) address is a unique number that devices use in order to identify and communicate with each other on a network utilizing the Internet Protocol standard. The Images Per Minute (IPM) is a way of measuring the speed of a printer.
-
Page 237: Mac Address
Glossary ITU-T No. 1 chart Standardized test chart published by ITU-T for document facsimile transmissions. JBIG Joint Bi-level Image Experts Group (JBIG) is an image compression standard with no loss of accuracy or quality, which was designed for compression of binary images, particularly for faxes, but can also be used on other images. - Page 238 Glossary Modified Huffman (MH) is a compression method for decreasing the amount of data that needs to be transmitted between the fax machines to transfer the image recommended by ITU-T T.4. MH is a codebook-based run-length encoding scheme optimized to efficiently compress white space.
-
Page 239: Printer Driver
Glossary Open Systems Interconnection (OSI) is a model developed by the International Organization for Standardization (ISO) for communications. OSI offers a standard, modular approach to network design that divides the required set of complex functions into manageable, self-contained, functional layers. The layers are, from top to bottom, Application, Presentation, Session, Transport, Network, Data Link and Physical. - Page 240 Glossary Pages Per Minute (PPM) is a method of measurement for determining how fast a printer works, meaning the number of pages a printer can produce in one minute. PRN file An interface for a device driver, this allows software to interact with the device driver using standard input/output system calls, which simplifies many tasks.
-
Page 241: Subnet Mask
Glossary SMTP Simple Mail Transfer Protocol (SMTP) is the standard for e-mail transmissions across the Internet. SMTP is a relatively simple, text- based protocol, where one or more recipients of a message are specified, and then the message text is transferred. It is a client- server protocol, where the client transmits an email message to the server. -
Page 242: Toner Cartridge
Glossary Toner Cartridge A kind of bottle or container used in a machine like a printer which contains toner. Toner is a powder used in laser printers and photocopiers, which forms the text and images on the printed paper. Toner can be fused by by a combination of heat/pressure from the fuser, causing it to bind to the fibers in the paper. - Page 243 Glossary Wired Equivalent Privacy (WEP) is a security protocol specified in IEEE 802.11 to provide the same level of security as that of a wired LAN. WEP provides security by encrypting data over radio so that it is protected as it is transmitted from one end point to another. Windows Imaging Architecture (WIA) is an imaging architecture that is originally introduced in Windows Me and Windows XP.
- Page 244 Index Changing direct printing utility driver installation Unix features machine features font setting general settings glossary LCD display browsing the machine status Linux common Linux problems driver installation for network connected 20 driver installation for USB cable connected driver reinstallation for USB cable connected printer properties printing unifled driver configurator...
- Page 245 SetIP program special print features supplies estimated toner cartridge life SyncThru Web Service general information toner cartridge estimated life handling instructions non-Samsung and refilled storing UNIX driver installation for network connected 21 printing USB cable driver installation driver reinstallation using help...