Samsung HT-TX22 Instruction Manual
Digital home cinema system
Hide thumbs
Also See for HT-TX22:
- Instruction manual (35 pages) ,
- Manual de instrucciones (34 pages) ,
- Instruction manual (34 pages)

Related Manuals for Samsung HT-TX22


Summary of Contents for Samsung HT-TX22
- Page 1 Instruction Manual DIGITAL HOME CINEMA SYSTEM HT-X20 HT-TX22 HT-TX25 THIS APPLIANCE IS MANUFACTURED BY: AH68-01964P COMPACT DIGITAL VIDEO AH68-01660E REV: 01...
-
Page 2: Safety Warnings
Safety Warnings This symbol indicates that dangerous voltage which CAUTION can cause electric shock is present inside this unit. RISK OF ELECTRIC SHOCK. DO NOT OPEN This symbol alerts you to important operating and maintenance instructions accompanying the unit. TO REDUCE THE RISK OF ELECTRIC SHOCK, DO NOT REMOVE REAR COVER. -
Page 3: Table Of Contents
The HT-X20/HT-TX22/HT-TX25 automatically shuts itself off after 20 minutes in Stop mode. Customized TV Screen Display The HT-X20/HT-TX22/HT-TX25 allows you to select your favorite image during JPEG of DVD or VCD playback and set it as your background wallpaper. Contents... -
Page 4: Notes On Discs
Notes on Discs DVD (Digital Versatile Disc) offers fantastic audio and video, thanks to Dolby Digital surround sound and MPEG-2 video compression technology. Now you can enjoy these realistic effects in the home, as if you were in a movie theater or concert hall. -
Page 5: Description
Description Front Panel 1. Disc Tray 6. Volume Control 2. Stop () button 7. USB Connector 3. MIC 1, MIC 2 8. Power ( ) button 4. Play/Pause ( ) button 9. Standby indicator 5. MIC VOLUME Control 10. Open/Close button Display 1. -
Page 6: Remote Control
Description (Con’t) Remote Control Insert Remote Batteries 1. DVD RECEIVER button 2. TV button 3. POWER button 4. Number (0~9) buttons 5. REMAIN button 6. STEP button 7. Tuning Preset/CD Skip buttons 8. VOLUME button 9. MENU button 10. INFO button PL II EFFECT button PL II MODE button 13. -
Page 7: Connecting The Speakers
Connecting the Speakers Before moving or installing the product, be sure to turn off the power and disconnect the power cord. Position of the DVD Player Selecting the Listening Position Place it on a stand or cabinet shelf, or under the TV stand. •... -
Page 8: Speaker Installation
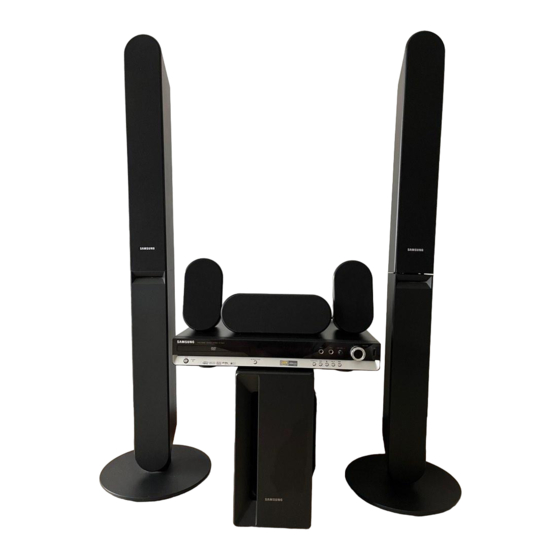
Rear Speaker (R) Subwoofer Speaker Installation (Con’t) With the HT-TX22 front speakers and HT-TX25 front/rear speakers, you have the option of installing the speakers on Stands, or directly to the Stand Base. Speaker Components Front Speaker (L) How to Install the Speaker on the Stand... -
Page 9: Connecting The Optional Wireless Receiving Amplifi Er
Connecting the Optional Wireless Receiving Amplifi er To connect the rear speakers wirelessly, you have to purchase the wireless receiving module and TX card from your Samsung retailer. When you have Purchased the Wireless Receiving Module (SWA-3000) HT-X20 Front Speaker (R) -
Page 10: Connecting The Video Out To Your Tv
Connecting the Optional Wireless Receiving Amplifi er Resetting the Wireless Receiving Module Reset the system if a communication failure occurs, or if the Link indicator (blue LED) on the wireless receiver does not light up and the <REAR CHECK> message blinks on the main unit's display. Reset the system while the main unit and the wireless receiver module (SWA-3000) are in Power Standby mode. -
Page 11: P.scan (Progressive Scan) Function
P.SCAN Function (Progressive Scan) Unlike regular Interlace Scan, in which two fi elds of picture information alternate to create the entire picture (odd scan lines, then even scan lines), Progressive Scan uses one fi eld of information (all lines displayed in one pass) to create a clear and detailed picture without visible scan lines. -
Page 12: Connecting The Fm Antenna
Connecting the FM Antenna FM Antenna (supplied) Connect the FM antenna supplied to the FM 75Ω COAXIAL Jack. Slowly move the antenna wire around until you fi nd a location where reception is good, then fasten it to a wall or other rigid surface. •... -
Page 13: Before Using Your Home Theater
Before Using Your Home Theater To Operate your Samsung TV and the Home Theater with the HT-X20/HT-TX22/HT-TX25's Remote Control The DVD Home Theater's remote can be used to control Samsung TVs. Plug the main unit's power cord into the AC power supply. -
Page 14: Mp3/Wma-Cd Playback
MP3/WMA-CD Playback Data CDs (CD-R, CD-RW) encoded in MP3/WMA format can be played. Place the MP3/WMA disc on the disc tray. The MP3/WMA menu screen will appear and playback will start. The appearance of the menu depends on the MP3/WMA disc. ... -
Page 15: Divx Playback
DivX Playback DivX The functions on this page apply to DivX disc playback. Skip Forward/Back During playback, press the #,$ button. Goes to the next fi le whenever you press the $ button, if there are over 2 fi les in the disk. ... -
Page 16: Using The Playback Function
Using the Playback Function Displaying Disc Information You can view disc playback information on the TV screen. Press the INFO button. Each time the button is pressed, the display changes as follows: The information Display disappears from the screen JPEG DivX The information... -
Page 17: Skipping Scenes/Songs
Using the Playback Function Skipping Scenes/Songs Press the #,$ button. Each time the button is pressed during playback, the previous or next chapter, track or directory (fi le) will be played. You cannot skip chapters consecutively. TITLE 01/05 CHAPTER 002/045 ... -
Page 18: To Select A Repeat Playback Mode In The Disc Information Screen
Using the Playback Function To Select a Repeat Playback Mode in the Disc Information Screen Press the INFO button twice. Press the Cursor ► button to move to REPEAT PLAYBACK ( Press the Cursor ▼ button to select the desired Repeat Playback mode. ... -
Page 19: Angle Function
Using the Playback Function Angle Function This function allows you to view the same scene in different angles. Press the INFO button. Press the Cursor ► button to move to ANGLE ( Press the Cursor ▲ , ▼ button or numeric buttons to select the desired angle. ... -
Page 20: Moving Directly To A Scene/Song
Using the Playback Function Moving Directly to a Scene/Song Press the INFO button. Press the Cursor ▲,▼ button or numeric buttons to select the desired title/track ( ) and then press the ENTER button. Press the Cursor ◄,► button to move to Chapter ( Press the Cursor ▲,▼... -
Page 21: Playing Media Files Using The Usb Host Feature
Playing Media Files using the USB Host Feature You can enjoy media fi les such as pictures, movies and music saved in an MP3 player, USB memory or digital camera in high quality video with 5.1 channel home theater sound by connecting the storage device to the USB port of the home theater. Connect the USB device to the USB port on the front of the unit. -
Page 22: Settings
Settings Setting the Language OSD(On-Screen Display) language is set to English by default. In Stop mode, press the MENU button. Press the Cursor ▼ button to move to <Setup> and then press the ENTER button. Select <LANGUAGE> and then press the ENTER button. Press the Cursor ▲,▼... -
Page 23: Setting Parental Controls (Rating Level)
This selects one of the 3 wallpaper screens Press the MENU button to exit the setup screen. • ORIGINAL : Select this to set the Samsung Logo image as your wallpaper. • USER : Select this to set the desired image as your wallpaper. -
Page 24: Divx (R) Registration
Settings (Con’t) DivX (R) registration Please use the Registration code to register this player with the DivX (R) video on demand format. To learn more, go to www.divx.com/vod. Setting the Speaker Mode Signal outputs and frequency responses from the speakers will automatically be adjusted according to your speaker confi... -
Page 25: Setting The Test Tone
Settings (Con’t) Setting the Test Tone Use the Test Tone feature to check the speaker connections. In Stop mode, press the MENU button. Press the Cursor ▼ button to move to <Audio> and then press the ENTER button. Press the Cursor ▼ button to move to <TEST TONE> and then press the ENTER button. -
Page 26: Setting The Drc (Dynamic Range Compression)
Settings (Con’t) Setting the DRC (Dynamic Range Compression) This feature balances the range between the loudest and quietest sounds. You can use this function to enjoy Dolby Digital sound when watching movies at low volume at night. In Stop mode, press the MENU button. Press the Cursor ▼... -
Page 27: Dolby Pro Logic Ii Mode
Settings (Con’t) Dolby Pro Logic II Mode You can select the desired Dolby Pro Logic II audio mode. Press the PL II MODE button. Each time the button is pressed, the mode changes as follows. PRO LOGIC II • MUSIC : When listening to music, you can experience sound effects as if you are listening to the actual performance. -
Page 28: Listening To Radio
Listening to Radio Remote Control Press the TUNER button to select the FM band. Tune in to the desired station. Automatic Tuning 1 : When the #,$ button is pressed, a preset broadcast station is selected. Automatic Tuning 2 : Press the and hold .,, button to automatically search for active broadcasting stations. -
Page 29: About Rds Broadcasting
About RDS broadcasting Using the RDS (Radio Data System) to receive FM stations RDS allows FM stations to send an additional signal along with their regular program signals. For example, the stations send their station names, as well as information about what type of program they broadcast, such as sports or music, etc. When tuned to an FM station which provides the RDS service, the RDS indicator lights up on the display. -
Page 30: Convenient Functions
Also, some operations may not be possible depending on your brand of TV. • If you do not set the remote control with the code for your brand of TV, the remote control will work on a Samsung TV by default. -
Page 31: Troubleshooting
Refer to the chart below when this unit does not function properly. If the problem you are experiencing is not listed below or if the instruction below does not help, turn off the unit, disconnect the power cord, and contact the nearest authorized dealer or Samsung Electronics Service Center. Brand... -
Page 32: Cautions On Handling And Storing Discs
Troubleshooting (Con’t) Symptom • Is the TV power on? Disc is rotating but no • Are the video cables connected properly? picture is produced. Picture quality is poor and • Is the disc dirty or damaged? picture is shaking. •... -
Page 33: Language Code List
Pentax Digital Camera Optio-S50 Pentax Digital Camera YP-53 Optio 33LF Pentax Digital Camera Optio MX Pentax Digital Camera Digimax-420 Samsung Digital Camera Digimax-400 Samsung Digital Camera Sora PDR-T30 Toshiba Digital Camera Coolpix 5900 Nikon Digital Camera Coolpix S1 Nikon Digital Camera... -
Page 34: Specifi Cations
90 x 168 x 95 mm Dimensions (W x H x D) Center 250 x 90 x 95 mm Front/Rear 0.6 kg/0.5 kg Weights Center 0.7 kg HT-TX22 Speaker system Front/Center/Rear speaker Impedance 3Ω x 5 Frequency range 140Hz-20 kHz Output sound pressure level 86dB/W/M... - Page 35 Contact SAMSUNG WORLD WIDE If you have any questions or comments relating to Samsung products, please contact the SAMSUNG customer care centre. Region Country Customer Care Center Web Site...