LG WT7060C Series Owner's Manual
Hide thumbs
Also See for WT7060C Series:
- Owner's manual (77 pages) ,
- Technical manual (183 pages) ,
- Owner's manual (52 pages)

Related Manuals for LG WT7060C Series


Summary of Contents for LG WT7060C Series
- Page 1 OWNER'S MANUAL OWNER'S MANUAL WT730 C* WT7060C* WT7100C* WT7800C* WT7250C* WT7880H*A WT7300C* WT7900H*A www.lg.com MFL6826706 Copyright © 2019 - 2020 LG Electronics Inc. All Rights Reserved. Rev.12_080320...
- Page 2 IMPORTANT SAFETY INSTRUCTIONS LG SmartThinQ Application (For the product that contains the wireless LAN module) Smart Diagnosis™ Function Parts Accessories Regular Cleaning Cleaning the Water Inlet Filters Tools Needed Care in Cold Climates Product Specifications Choosing the Proper Location Unpacking and Removing Shipping Material...
- Page 3 SAFETY INSTRUCTIONS READ ALL INSTRUCTIONS BEFORE USE We have provided many important safety messages in this manual and on your appliance. Always read and follow all safety messages. This is the safety alert symbol. This symbol alerts you to potential hazards that can kill or injure you and others. All safety messages will follow the safety alert symbol and either the word WARNING or CAUTION.
- Page 4 Use this appliance only for its intended purpose. If the product has been submerged in water, sitting in standing water, or waterlogged, do not come in contact with the product and immediately contact an LG Electronics customer information center for instructions before resuming use.
- Page 5 SAFETY INSTRUCTIONS If the electrical supply cord is damaged, it must only be replaced by the manufacturer or its service agent or a similar qualified person in order to avoid a hazard. Do not put oily or greasy clothing, candles or flammable materials on top of the appliance. Keep the area underneath and around your appliances free of combustible materials (lint, paper, rags, etc.), gasoline, chemicals and other flammable vapors and liquids.
- Page 6 SAFETY INSTRUCTIONS Do not place objects on top of the appliance. Turn off the water faucets and unplug the appliance if the appliance is to be left for an extended period of time, such as during vacations. ALWAYS follow the fabric care instructions supplied by the garment manufacturer. Use fabric softeners or products to eliminate static only as recommended by the manufacturer.
- Page 7 For your safety and for extended product life, use only authorized components. The manufacturer is not responsible for product malfunction, property damage, or bodily injury caused by the use of separately purchased unauthorized components, parts, or non-LG products.
- Page 8 INSTALLATION Pliers Flat-blade Level Screwdriver The appearance and specifications listed in this manual may vary due to constant product improvements. WT7800C* WT7060C* WT7250C* WT7305C* WT7880H*A WT7100C* WT7300C* WT7900H*A 120 VAC @ 60 Hz 20 - 120 psi (138 - 827 kPa) 27"...
- Page 9 INSTALLATION The washer must be installed on firm flooring to minimize vibration during the spin cycle. Concrete flooring is best, but a wood floor is sufficient, Install the washer on a solid floor that is strong and provided it is built to FHA standards. rigid enough to support the weight of the washer, even when fully loaded, without flexing or bouncing.
- Page 10 INSTALLATION To prevent damage, do not remove the foam block containing the owner’s manual, parts, and laundry product samples from the washer tub until Unpack all shipping materials from the washer for the washer is in the final location. proper operation and inspect it for shipping damage. Failure to remove shipping materials can cause excessive noise and vibration.
- Page 11 2/3 turn with pliers. Connect the Contact an LG Customer Information Center for blue hose to a cold water faucet and the red hose assistance in buying hoses.
- Page 12 INSTALLATION If the water valves and drain are built into the wall, fasten the drain hose to one of the water hoses Connect the drain hose to either a standpipe or with the tie strap provided (ribbed side on inside). laundry tub.
- Page 13 INSTALLATION To check if the washer is level from side to side, place a level on the back edge of the lid (door). minimize vibration, noise, and unwanted movement, To check if the washer is level from front to back, the floor must be a level, solid surface.
- Page 14 INSTALLATION Check if the washer is properly installed and run a test cycle. The washer should be plugged into a 120-VAC, 60 Hz grounded 3-prong outlet. Plug in the washer. Make sure the tub is empty. Do not load anything in the tub for this test.
- Page 15 OPERATION Turn the cycle selector knob or press the cycle buttons repeatedly until the desired cycle is selected. The preset wash temperature, spin speed, soil level and option settings for that cycle are shown. Pressing the button without To reduce the risk of fire, electric shock, or injury selecting a cycle will cause the Normal cycle to to persons, read the SAFETY INSTRUCTIONS begin immediately.
- Page 16 OPERATION Bulky items should be placed as far down in the tub as possible for optimal results. Always place buoyant items at the bottom of the tub. The washer will automatically detect the load size. Because of the high efficiency wash system, the water level The washer can be fully loaded, but the tub may not completely cover the load.
- Page 17 OPERATION This manual contains an abbreviated Operation section. For the complete Operation section, scan the QR code below or visit: https://us.smartthinq.com/ images/pdfmanual/TL_TD_EN.pdf • Sorting Laundry Adding Cleaning Products Control Panel Wash Cycles Cycle Guide Cycle Modifier Buttons Option Buttons • •...
- Page 18 SMART FUNCTIONS application allows you to communicate with the appliance using a Check the distance between the appliance smartphone. and the wireless router (Wi-Fi network). • If the distance between the appliance and the wireless router is too far, the signal Communicate with the appliance from a strength becomes weak.
- Page 19 SMART FUNCTIONS • If the appliance is having trouble connecting to the Wi-Fi network, it may be too far from the router. Purchase a Wi-Fi repeater (range extender) to improve the Wi-Fi signal strength. Use a smartphone to control your appliance remotely.
- Page 20 LCW-004 LG Electronics will also provide open source code 2412 to 2472 MHz to you on CD-ROM for a charge covering the cost of performing such distribution (such as the cost of IEEE 802.11b: 17.82 dBm...
- Page 21 SMART FUNCTIONS Follow the instructions below to use the audible diagnosis method. • Launch the application and select feature in the menu. Follow the instructions for audible diagnosis provided in the application. Press the button to turn on the appliance. •...
- Page 22 MAINTENANCE Unplug the washer before cleaning to avoid the risk of electric shock. Failure to follow this warning can cause serious injury, fire, electric shock, or death. Do not use volatile substances (benzene, paint thinner, alcohol, acetone, etc.), abrasive cleaners, or detergents with strong chemical components when cleaning the washer.
- Page 23 MAINTENANCE Never load laundry while using Tub Clean. The Detergent and fabric softener may build up in the laundry may be damaged or contaminated with dispenser drawer. Remove the drawer and inserts cleaning products. Make sure to run the Tub Clean and check for buildup once or twice a month.
- Page 24 MAINTENANCE Bleach may build up on the bleach dispenser cover. Check for buildup and clean the cover once or twice a month. The cover cannot be separated from the dispenser. Clean the cover using a brush and warm water. If using a lime scale remover, follow the manufacturer’s instructions.
- Page 25 MAINTENANCE Turn off the faucets connected with the water lines. If the washer will not be used for an extended period of time and is in an area that could be exposed to freezing temperatures, perform the following steps to Pour hot water on the frozen faucets to thaw the protect the washer from damage.
- Page 26 TROUBLESHOOTING The washer is equipped with an automatic error-monitoring system to detect and diagnose problems at an early stage. If the washer does not function properly or does not function at all, check the following before you call for service. Normal Operation Normal Operation Normal Operation...
- Page 27 TROUBLESHOOTING Check hoses and connectors for leaks, cracks and splits. Check and tighten hose connections. The washer pumps out water very rapidly. Check for water backing up out of the drain pipe during drain. If water is seen coming out of the drain, check for proper drain hose installation and check for restrictions in the drain.
- Page 28 TROUBLESHOOTING This is normal. The washer adjusts cycle time automatically to provide optimal results for the selected cycle. The time remaining shown in the display is only an estimate. Actual time may vary. Make sure that detergent and additives are put into the correct dispenser compartments.
- Page 29 TROUBLESHOOTING Make sure the inlet filters on the fill valves are not clogged. Refer to the filter cleaning instructions. Check that inlet hoses are not kinked or clogged. This is a High-Efficiency (HE) washer. As a result, the water level settings for this washer may be different than for conventional washers.
- Page 30 TROUBLESHOOTING Always remove items from the washer as soon as the cycle is complete. The washer can be fully loaded, but the tub should not be tightly packed with items. The lid (door) of the washer should close easily. Hot water rinse can set wrinkles in garments. Check the inlet hose connections.
- Page 31 TROUBLESHOOTING Delete your home Wi-Fi network and begin the registration process again. Turn off the on your smartphone before registering the appliance. The wireless network name (SSID) should be a combination of English letters and numbers. (Do not use special characters.) Only a 2.4 GHz router frequency is supported.
- Page 32 TROUBLESHOOTING The automatic attempt to rebalance the load was not successful. The cycle has been paused to allow the load to be manually adjusted. Small loads may need additional items to be added to allow the washer to balance the load. The load may have heavy items loaded with lighter items.
- Page 33 TROUBLESHOOTING Close the lid (door) and press button. After starting a cycle, it may take a few moments before the tub begins to turn or spin. The washer will not spin unless the lid (door) is locked. If the error persists once the lid (door) is closed and the button is pressed, call for service.
- Page 34 Should your LG Washer fail due to a defect in materials or workmanship under normal home use, during the warranty period set forth below, LG will at its option repair or replace the product. This limited warranty is valid only to the original retail purchaser of the product and applies only when purchased and used within the United States, including U.S.
- Page 35 In the event you intend to commence an arbitration proceeding, you must first notify LG in writing at least 30 days in advance of initiating the arbitration by sending a letter to LG at LG Electronics, USA, Inc. Attn: Legal Department- Arbitration 1...
- Page 36 You may opt out of this dispute resolution procedure. If you opt out, neither you nor LG can require the other to participate in an arbitration proceeding. To opt out, you must send notice to LG no later than 30 calendar days from the date of the first consumer purchaser’s purchase of the product by either: (i) sending an e-mail to...
- Page 37 LIMITED WARRANTY 37 . s l Carton Remove coins or foreign objects t ’ Reinstall the drain hose . y l u l i l l i f l l i f Clean the inlet valve filter or l l a l n i t l i f Cold water...
- Page 38 38 MEMO...
- Page 39 WT7060C* WT730 C* WT7100C* WT7800C* WT7250C* WT7880H*A WT7300C* WT7900H*A www.lg.com...
- Page 40 INSTRUCCIONES IMPORTANTES DE Aplicación LG SmartThinQ SEGURIDAD (Para el producto que contiene el módulo de conexión inalámbrica LAN) Función Smart Diagnosis ™ (Diagnóstico Inteligente) Partes Accesorios Limpieza regular Limpieza de los filtros de entrada de agua Cuidado en climas fríos...
- Page 41 INSTRUCCIONES DE SEGURIDAD LEA TODAS LAS INSTRUCCIONES ANTES DE UTILIZAR Tanto en este manual como en el equipo, hemos proporcionado muchos mensajes de seguridad importantes. Siempre debe leer y respetar todos los mensajes de seguridad. Este es el símbolo de alerta de seguridad. Este símbolo le advierte sobre posibles riesgos que pueden ocasionar lesiones o la muerte a usted o a otros.
- Page 42 Centro de información al cliente de LG Electronics para recibir instrucciones antes de reanudar el uso. Bajo ciertas condiciones, podría producirse gas hidrógeno en un sistema de agua caliente que no ha sido utilizado por dos semanas o más.
- Page 43 INSTRUCCIONES DE SEGURIDAD Si se daña el cable de electricidad, solo el fabricante está autorizado para reemplazarlo, o bien su agente de servicio técnico o una persona de calificación similar para prevenir riesgos. No coloque prendas aceitosas o grasosas, candelas o materiales inflamables encima del artefacto. Mantenga el área debajo de los artefactos y sus alrededores libre de materiales combustibles (pelusa, papel, trapos, etc.), gasolina, productos químicos y otros vapores o líquidos inflamables.
- Page 44 INSTRUCCIONES DE SEGURIDAD No coloque ningún objeto encima del artefacto. Cierre las llaves de agua y desconecte el artefacto si este no será usado por un periodo de tiempo prolongado, por ejemplo, durante las vacaciones. SIEMPRE siga las instrucciones para cuidado de los tejidos suministradas por el fabricante. Use suavizantes o productos para eliminar la electricidad estática solamente según las recomendaciones del fabricante.
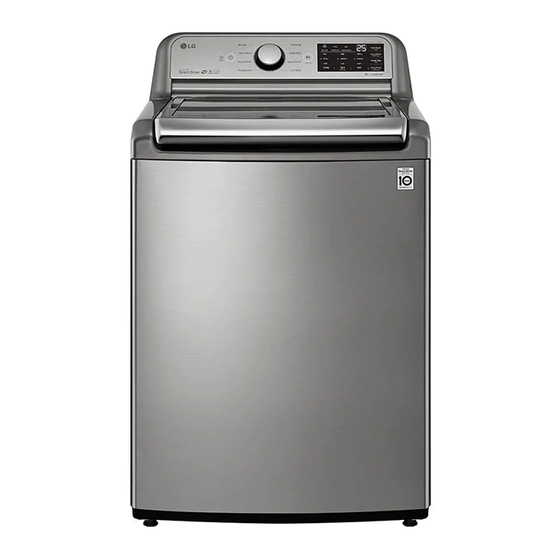
- Page 45 DESCRIPCIÓN GENERAL DEL PRODUCTO Dispensador de Detergente Cuba Panel de control Entradas de Agua Compartimiento de Tapa (puerta) Patas de nivelación Cable de Alimentación blanqueador líquido Manguera de Drenaje Correa Mangueras de Agua Caliente y Fría Las ilustraciones en esta guía pueden diferir de los componentes y accesorios reales, los cuales están sujetos a cambios sin previo aviso por parte del fabricante a fin de introducir mejoras en el producto.
- Page 46 INSTALACIÓN Pinzas Destornillador de hoja Nivel plana La apariencia y las especificaciones detalladas en este manual podrían variar debido a mejoras constantes en el producto. WT7800C* WT7250C* WT7305C* WT7060C* WT7880H*A Modelo WT7100C* WT7300C* WT7900H*A 120 V CA, 60 Hz 20 – 120 psi (138 - 827 kPa) 27”...
- Page 47 INSTALACIÓN minimizar la vibración que se produce durante el centrifugado. Los pisos de concreto son los más Instale la lavadora sobre un piso sólido que sea resistente y rígido para soportar el peso de la lavadora, siempre y cuando esté construido conforme a las incluso cuando esta se encuentre completamente normas de la FHA.
- Page 48 INSTALACIÓN Para evitar daños, no remueva del tambor el bloque de espuma que contiene el manual del usuario, las partes, y las muestras de productos de limpieza Desempaque todo el material de transporte de la hasta que la lavadora se encuentre en su ubicación lavadora para su operación y verifique que no hayan final.
- Page 49 Conecte la manguera azul a una llave de agua fría y Contacte al Centro de Información al Cliente de LG la manguera roja a una llave de agua caliente. para asistencia en la compra de mangueras.
- Page 50 INSTALACIÓN Si las válvulas de agua y de drenaje están incorporadas a la pared, abroche la manguera de drenaje a una de las mangueras de agua con la La manguera de drenaje puede ser instalada utilizando correa suministrada (lado corrugado en el interior). un tubo independiente o un lavabo.
- Page 51 INSTALACIÓN Para verificar que la lavadora esté nivelada de lado a lado, colóque un nivel en el borde trasero de la tapa Para minimizar el ruido, la vibración, y los movimientos (puerta). no deseados, la lavadora debe ser instalada en una Para verificar que la lavadora esté...
- Page 52 INSTALACIÓN Verifique que la lavadora esté correctamente instalada y ejecute un ciclo de prueba. La lavadora debe conectarse a un tomacorriente de 120 V CA, 60 Hz de 3 clavijas con conexión a tierra. Asegúrese de que la tina esté vacía. No cargue nada Conecte la lavadora.
- Page 53 FUNCIONAMIENTO Gire la perilla selectora de ciclos o presione los botones de ciclo repetidamente hasta que el ciclo deseado se haya seleccionado. Se muestra la temperatura de lavado, velocidad de centrifugado, nivel de suciedad y ajustes de opciones predeterminados para ese ciclo. Para reducir el riesgo de incendios, descargas Presionar el botón sin haber...
- Page 54 FUNCIONAMIENTO Los artículos voluminosos deben colocarse hasta abajo del tambor para obtener resultados óptimos. Siempre coloque artículos boyantes al fondo del tambor. La lavadora detectará automáticamente el tamaño de la carga. Debido al sistema de alta eficiencia de lavado, el nivel de agua podría no cubrir completamente la carga.
- Page 55 FUNCIONAMIENTO Este manual contiene una sección de Operación abreviada. Para la sección de operación completa, Si el aparato utiliza un eje vertical alto en el tambor, siga estas instrucciones al cargar la lavadora. us.smartthinq.com/images/pdfmanual/TL_TD_SP.pdf • o i c o i c a t i s Clasificación de prendas Agregado de productos de limpieza...
- Page 56 FUNCIONES INTELIGENTES • Si usted cambia su router inalámbrico, le permite comunicarse proveedor de servicios de internet o contraseña, • o i c o i c o i c a t i s a t i s e r p e r p •...
- Page 57 FUNCIONES INTELIGENTES • icono f en Google Play • con redes Wi-Fi de 2,4 GHz. Contacte a su Siga las instrucciones para descargar e instalar la proveedor de servicios de internet o verifique el manual del enrutador inalámbrico para revisar la frecuencia de su red.
- Page 58 . solucionar problemas de su aparato. Por la presente, LG Electronics declara que el tipo de equipamiento de radio de la lavadora se ajusta • Por motivos no atribuibles a negligencias de a la Directiva 2014/53/EU.
- Page 59 FUNCIONES INTELIGENTES • durante 3 segundos o más mientras usted situado. junto al logo hasta que la transferencia de datos haya finalizado. • haya finalizado. Se mostrará el tiempo restante para la transferencia de datos. • y seleccione las instrucciones que se proporcionan en la •...
- Page 60 MANTENIMIENTO Desconecte la lavadora antes de limpiar para evitar el riesgo de descargas eléctricas. El incumplimiento de esta advertencia puede causar lesiones graves, incendios, descargas eléctricas o la muerte. No utilice sustancias volátiles (benceno, disolvente, alcohol, acetona, etc.), limpiadores abrasivos, o detergentes con componentes químicos fuertes al limpiar la lavadora.
- Page 61 MANTENIMIENTO Nunca cargue la lavadora mientra utiliza la Limpieza Puede que se acumule detergente y suavizante en la del Tambor. El lavado podría dañarse o contaminarse bandeja del dispensador. Remueva la bandeja y los con productos de limpieza. Asegúrese de correr el ciclo insertos y revise si hay acumulación una o dos veces al Limpieza del Tambor únicamente cuando el tambor esté...
- Page 62 MANTENIMIENTO Puede que se acumule blanqueador en la cubierta del dispensador. Revise que no sea así y limpie la cubierta una o dos veces al mes. La cubierta no puede separarse del dispensador. Límpiela utilizando un cepillo y agua tibia. Si utiliza un removedor de cal, siga las instrucciones del fabricante.
- Page 63 MANTENIMIENTO Cierre las llaves conectadas a las líneas de Si la lavadora no va a ser utilizada por un período suministro de agua. prolongado y se encuentra en una zona en la que puede quedar expuesta a temperaturas bajo cero, siga los pasos a continuación para protegerla de daños.
- Page 64 SOLUCIÓN DE PROBLEMAS La lavadora está equipada con un sistema automático de detección de errores para detectar y diagnosticar problemas en una etapa temprana. Si la lavadora no funciona correctamente o no funciona en absoluto, compruebe lo siguiente antes de llamar al servicio técnico. Funcionamiento normal Funcionamiento normal Funcionamiento normal...
- Page 65 SOLUCIÓN DE PROBLEMAS Revise que no hayan fugas, rajaduras o fracturas en las mangueras y los conectores. Compruebe y apriete las conexiones de las mangueras. La lavadora bombea agua a mucha velocidad. Verifique si el agua vuelve de la tubería de desagüe durante el desagote.
- Page 66 SOLUCIÓN DE PROBLEMAS Esto es normal. La lavadora automáticamente ajusta el tiempo del ciclo a fin de lograr resultados óptimos con el ciclo seleccionado. El tiempo restante que aparece en la pantalla es solo una estimación. El tiempo real puede variar. Asegúrese de colocar el detergente y los aditivos en los compartimientos correctos del dispensador.
- Page 67 SOLUCIÓN DE PROBLEMAS Asegúrese de que los filtros de entrada en las válvulas de llenado no estén obstruidos. Consulte las instrucciones de limpieza de los filtros. Asegúrese de que las mangueras de entrada no se encuentren retorcidas ni obstruidas. Esta es una lavadora de alta eficiencia (HE). Por lo tanto, las configuraciones de los niveles de agua para esta lavadora pueden ser diferentes a las de las lavadoras convencionales.
- Page 68 SOLUCIÓN DE PROBLEMAS Siempre retire las prendas de la lavadora tan pronto como termine el ciclo. La lavadora puede llenarse por completo, pero el tambor no debe quedar demasiado lleno de artículos. La tapa (puerta) de la lavadora debe cerrar facilmente.
- Page 69 SOLUCIÓN DE PROBLEMAS Borre su red Wi-Fi doméstica e inicie el proceso de registro de nuevo. Desactive los en su teléfono inteligente previo a registrar el electrodoméstico. El nombre de la red inalámbrica (SSID) debe ser una combinación de letras y números. (No utilice símbolos especiales) Sólo se admite una frecuencia de enrutador de 2.4 GHz.
- Page 70 SOLUCIÓN DE PROBLEMAS El intento automático para volver a equilibrar la carga no tuvo éxito. El ciclo se pausa para permitirle que acomode la carga de forma manual. Cargas muy pequeñas pueden necesitar que se añadan artículos adicionales para permitir a la lavadora balancear la carga.
- Page 71 SOLUCIÓN DE PROBLEMAS Cierre la tapa (puerta) y presione el botón . Luego de iniciar el ciclo puede que tome unos momentos antes de que la tina empiece a girar. La lavadora no girará a menos que la tapa (puerta) esté bloqueada.
- Page 72 GARANTÍA LIMITADA Si su lavadora LG fallara debido a defectos de materiales o de fabricación en el uso doméstico normal, durante el período de garantía que se establece a continuación, LG tendrá la opción de reparar o reemplazar el producto. Esta garantía limitada solo es válida para el comprador minorista original del producto y será...
- Page 73 Si usted y LG no pueden resolver la disputa dentro de 30 días, cualquiera de las partes puede proceder a presentar una demanda de arbitraje.
- Page 74 Para excluirse usted debe enviar una notificación a LG, en un lapso de hasta 30 días continuos, contados a partir de la fecha de la primera compra del consumidor del (a) su nombre y dirección;...
- Page 75 GARANTÍA LIMITADA 37 Remueva los materiales de ó i Soporte de Base de ó t Remueva monedas u objetos extraños de la lavadora previo a Reinstale correctamente la o l l e l l e l l Limpie el filtro de la válvula de entrada o vuelva a instalar las Filtro de á...
- Page 76 LG Customer Information Cen ter For inquiries or comments, visit or call: 1-800-243-0000 U.S.A. Register your product Online! www.lg.com...
- Page 77 : The part should not contain prohibited substances(Pb,Cd H g,Cr+6,PBB,PBDE) Revised agitator text, deleted "Type 1" bleach cap, fixed font issues DR COMPLETED a nd de t a ils should comply with LG standard of LG(63)-A-5501-34. 2020/0 / S.A.Park EHBK 2020/0 / S.A.Park...