Table of Contents
Advertisement
Advertisement
Table of Contents

Related Manuals for Yamaha SU10


Summary of Contents for Yamaha SU10
- Page 1 Owner’s Manual...
- Page 2 If these corrective measures do not produce satisfactory results, please contact the your local retailer authorized to distribute this type of product. If you can not locate the appropriate retailer, please contact Yamaha Corporation of America, Elec- tronic Service Division, 6600 Orangethorpe Ave, Buena Park, CA 90620 * The above statements apply ONLY to those products distributed by Yamaha Corporation of America or its subsidiaries.
- Page 3 This Product should be used only with the components sup- plied or; a cart, rack, or stand that is recommended by Yamaha. If a cart, etc., is used, please observe all safety markings and instructions that accompany the accessory product.
- Page 4 The SU10 Stereo Digital Sampler is a compact, easy-to-use stereo phrase sampler offering high sound quality, a unique ribbon controller, excellent loop capability, and a host of other distinctive editing and performance features. The SU10 is ideal for up-and-coming DJs, “desktop musicians,” and all others interested in experi- encing the world of electronic digital sampling.
- Page 5 Special “External” functions Use your SU10 as an effects box for applying a realtime scratch or filter effect to feed-through line input. MIDI support Drive your SU10 from a remote sequencer, keyboard, or computer; or use your SU10 to drive a remote device.
-
Page 6: Table Of Contents
1 About This Manual ... 1 Notations ... 1 2 Precautions ... 2 3 Basic Concepts ... 3 What is the SU10? ... 3 Operating Modes ... 3 Samples ... 4 How a Sample is Made ... 4 Banks and Pads ... 5 External Modes ... - Page 7 9 UTILITY Mode ... 54 Introduction ... 54 General Procedure ... 54 Recording Setup [Rec] ... 55 MIDI Setup [MIDI] ... 56 MIDI Channel [MIDICh] ... 56 MIDI Device Number [DevNum] ... 56 Local Control [Local] ... 57 Ribbon Number [RbnNum] . 57 Initialize Note Table [NoteTbInit?] ...
-
Page 8: About This Manual
Before starting to use your SU10, please be certain to read through the precau- tions on page 2 for information that will help you avoid data loss and equipment damage. -
Page 9: Precautions
This message indicates that the SU10 is writing to nonvolatile memory. Switching power off at this time may result in loss of all data in the SU10. In some cases this message may last for more than 10 seconds: this does not indicate a problem. -
Page 10: Basic Concepts
SU10. What is the SU10? The SU10 combines the functions of a digital stereo phrase sampler with a variety of add-on features that significantly enhance its effectiveness in a performance environment. In addition to basic recording, edit, and playback capabilities, this compact unit includes special play functions, a touch-driven ribbon controller, and two “external”... -
Page 11: Samples
Samples The SU10 stores up to 48 samples. A sample is a digital recording of an acoustic waveform (or two waveforms, if stereo), together with playback parameters that determine how the sound is played: the type of loop applied, the direction of playback, the start and end points, and so on. -
Page 12: Banks And Pads
Banks and Pads You play the SU10 samples by pressing buttons, or pads . The SU10 has twelve pads. Because the SU10 can store up to 48 samples, however, it also has four banks. -
Page 13: External Modes
Time MIDI The SU10 provides both MIDI IN and MIDI OUT capability. You can use these features to back up or reload your data; to download selected samples to synthe- sizers, computers, or other samplers in MIDI standard dump format; to drive the SU10 from a remote device;... -
Page 14: Controls, Connectors, And Lcd
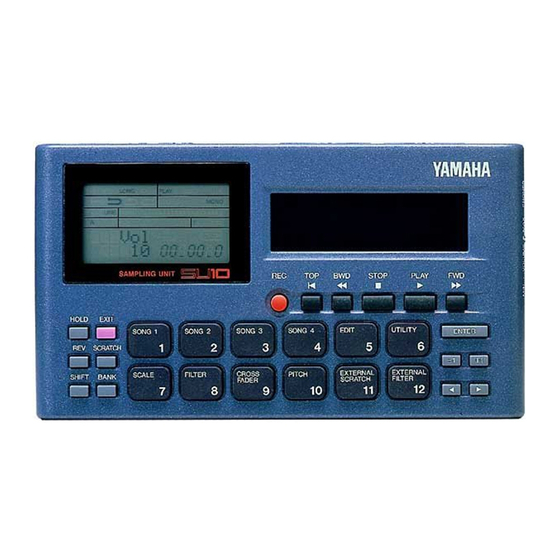
SU10. Finally, you can use the ribbon during EDIT operation to change pad volume and start, loop, and end point settings. - Page 15 To set this function ON, hold down the pad and press [HOLD]. Controls, Connectors, and LCD Selects a song for creation or replay. Sets the SU10 into EDIT mode. Sets the SU10 into UTILITY mode. Sets playback function to SCALE, FILTER, or CROSSFADER.
- Page 16 [SCRATCH] and press the pad for the sample you want to scratch. E [BANK] The SU10 provides four pad banks (Banks A to D), each capable of storing up to 12 samples. Press the [BANK] button to change the bank setting (A B C D A...) The LCD always indicates the currently selected bank.
-
Page 17: Rear Panel
2 LINE INPUT miniphone jack Inputs an analog stereo signal from an external device such as a CD player. 3 MIDI IN/OUT Standard MIDI connectors. You use these connectors to link your SU10 to other MIDI devices. 4 MIC INPUT miniphone jack Accepts input from a dynamic or powered condenser-type microphone. -
Page 18: Right Side
Right Side 1 VOLUME slider Adjusts the output volume to the PHONES and LINE OUTPUT connectors. 2 Headphone jack Stereo miniphone jack; connects to stereo headphones. Screen Display The LCD consists of various compartments, each displaying a different type of information. - Page 19 ON when MIDI message is coming in. TIME: ON during recording. TEMPO: ON during loop editing. REC: ON when SU10 is recording (or standing by to record) a sample or song. B Meter display During sample record: Recordable time (to nearest 0.1 sec.) During song play:...
-
Page 20: Supplying Power And Connecting Up
Supplying Power and Connecting Up Supplying Power Your SU10 can run through an AC/DC adaptor or on batteries. If you connect up both at the same time, the SU10 will run from the adaptor. Using the adaptor Please be sure to use a Yamaha PA-3B or PA-1B adaptor only. Use of a different adaptor type may result in electric shock or device damage. -
Page 21: Connecting Up The Su10
PLAY-mode operation left; the message will repeat intermittently until batteries are exhausted. The message then changes to Battry End!, and the SU10 shuts down until you replace the batteries or connect an AC adapter. - Page 22 To control SU10 playback from an external keyboard: MIDI OUT MIDI keyboard (CBX-K1, etc.) To back up all SU10 data to an external data filer (bulk dump): MIDI OUT SAMPLING UNIT SU10 Powered speakers MIDI IN SAMPLING UNIT SU10 MIDI IN MIDI Data Filer (MDF2, etc.)
-
Page 23: Playback
For information about edit settings, refer to Chapter 8. This chapter assumes that you have not made any changes to your SU10’s factory settings, and that the demo samples and song are still in place. If you have made changes, playback operation may be somewhat different than described. -
Page 24: Basic Sample Playback
Basic Sample Playback Your SU10 stores up to 48 samples: four banks of 12 samples each. The following procedure shows how to replay these samples. Select the bank by pressing the [BANK] button. -
Page 25: Special Play Features I
The number of samples that can be played together at one time is referred to as the polyphony. The SU10 can play a maximum of four monaural samples at once, although the number drops if you select HI sampling grade or use the scale, scratch, filter, or crossfade features. If you try playing too many samples at once, certain samples drop out. -
Page 26: Reverse
Remember that there is a limit to the number of samples you can play at one time. When you attempt to play too many samples, the SU10 will always force off non-held samples before it forces off held samples. - Page 27 • SCALE play is available only when the sampling grade is set to LONG or EXLG. If you try to select this feature while the grade is HI or STD, the SU10 briefly displays the Change Grd! message, then resumes normal PLAY mode. For information about sampling grades and how to change them, see page 55.
-
Page 28: Special Features Ii: Ribbon Controller
You can also use it to play a special “scratchpad” during sample play. Finally, you use the ribbon as an effect controller for the SU10’s special “external” modes. (For information about external modes, see pages 29 to 30.) Pitch Play Be sure that the SU10 is in PLAY mode. -
Page 29: Filter Play
This feature applies a filter to samples and songs, with the ribbon providing dy- namic control of the filter cutoff frequency. You select the filter type and reso- nance directly from within the filter-play function: the SU10 will remember the settings when you terminate filter play, then restore them when you return. The selected settings apply to all samples and songs. - Page 30 • FILTER play is available only when the sampling grade is set to LONG or EXLG. If you try to select this feature while the grade is HI or STD, the SU10 briefly displays the Change Grd! message, then resumes normal PLAY mode. For information about sampling grades and how to change them, see page 55.
-
Page 31: Scratchpad
With the SU10 in PLAY mode, hold down [SCRATCH] and press the pad con- taining the data section you want to use. -
Page 32: Crossfade
This feature allows you to mix your sample and song output with a realtime acous- tic signal received at the LINE INPUT or MIC INPUT jack. The SU10 outputs the mixing result over LINE OUTPUT. Once you have selected crossfade play, you can control the mix ratio dynamically by touching or rubbing the ribbon. -
Page 33: About Polyphony
If you attempt to exceed the polyphony limit, the SU10 automatically forces off a playing sample to accommodate your new pad input. Specifically, the SU10 will switch off the oldest playing sample that is not in HOLD state; or, if all samples are in HOLD, then the oldest of these. -
Page 34: Playing A Song
Playing a Song Your SU10 can memorize and replay up to four songs . Each song is an arbitrary sample playback sequence that you have recorded into memory. The LCD always indicates the number of the currently selected song. When playing a song, you can choose to have the song play once only, or else repeat indefinitely until stopped. - Page 35 (as indicated by the time meter) may vary according to where you started the replay. • The SU10’s polyphony determines the maximum number of sounds that can play out at once. Playing a song with FILTER or SCRATCH, or at HI sampling grade, may cause some of its sounds to drop out.
-
Page 36: External Performance Modes
External-mode indicator SCRATCH symbol Feed a sound signal through the SU10. Use the [+1] or [-1] button to adjust the volume as necessary; the LCD indicates the current volume. Now try alternately scratching and then releasing the ribbon. Listen to the type of effect you get. -
Page 37: External Filter
External Filter This mode applies filtering to realtime input as it feeds through the SU10. You use pads 1 to 4 to select or change the filter type, and pads 7 to 9 to select or change the resonance. You use the ribbon to dynamically change the filter cutoff fre- quency. -
Page 38: Recording Samples, And Creating Songs
Entering REC Mode and Selecting the Pad Check that the SU10 is in PLAY mode, then press [REC] to enter RECORDING mode. The LCD displays the REC indicator and prompts you to select the pad to be recorded. The LCD’s meter area indicates the available recording time. -
Page 39: Setting The Recording Parameters
To select, press [BANK] to choose the desired bank, then press the appropriate pad or press [+1] or [–1] as necessary. When you are sure that you have selected the correct pad, press [ENTER]. The LCD displays the Gain parameter setting. The GAIN indication on the third line of the LCD indicates the input level. - Page 40 RECORDING PARAMETERS Sets the gain applied to the input signal. Press [–1] or [+1] to adjust the Gain: gain setting while inputting a signal similar to the signal you plan to record. (You may first need to change the setting of the Input param- eter to match your input source;...
- Page 41 Input: Selects whether the SU10 takes its input from the LINE IN jack or the MIC INPUT jack (Line or Mic). You cannot use both inputs together;...
-
Page 42: Starting/Stopping The Recording
For hints about song creation, refer to the “Creating Effective Songs” on page 37. • The SU10 has 4000 words (8KB) of dedicated song memory, sufficient for about 1000 pad and button on/off events. The LCD indicates the amount of remaining memory as recording pro- ceeds. -
Page 43: Procedure
(if any) will “undelete” itself and be recovered. To end the recording and return to PLAY mode, press [STOP]. If you run out of song memory, the SU10 ends the recording automatically, displays the Memory Full! message for about one second, then returns you to PLAY mode. - Page 44 Planning ahead will help you create more effective songs and avoid unanticipated problems. Note the following general precautions. Do not include samples that you intend to edit or delete later. The sound of the song will change if you edit or delete any of the samples that it uses. If you plan to accompany the song with normal pad play or MIDI-controlled pad play: •...
-
Page 45: Editing
Editing Introduction This SU10 offers you a variety of ways to edit your samples to control the way they play back. For example, you can choose: • Which portion of the sample plays out • The direction of play (forward or reverse) •... -
Page 46: Basic Procedure
If you select a pad that is in a locked bank, the LCD briefly displays the Locked Bank! message. Move to the appropriate edit function. The SU10 begins from the first edit parameter — the loop-mode setting. If loop mode is currently set to “One-Shot,” for example, the LCD will look something like this. - Page 47 But you must be careful to press the correct pad. If you press a different pad, the SU10 stops editing of the current sample and offers to switch to your new selection. Note that the LCD does not indicate the sample that is currently being edited; you must remember this yourself.
-
Page 48: Edit Parameters And Operations
Edit Parameters and Operations LOOP MODE [LpMode] Purpose: Sets the playback direction and loop method. Values: OShot, WLoop, Ploop, RShot, RLoop Press [+1], [–1] To set: Explanation • OShot (One Shot) The sample plays once through, from Start Point to End Point, then stops. Start point Actual wave start •... - Page 49 • PLoop (Partial Loop) The sample plays one through from Start Point to End Point, then jumps back to the Loop Point. The section from the Loop Point to the End Point then plays out repeatedly. Start point Actual wave start Note that it is possible to set the Loop Point to an earlier position than the Start Point.
-
Page 50: Sounding Mode [Sdmode]
If Sounding Mode is set to “Trigger,” the sample will not loop. • The Start Point, Loop Point, and End Point can all be changed by editing, as described below. The loop length must be at least 128; the SU10 will not permit you to set loops shorter than this. -
Page 51: Pad Volume [Padvol]
• Trggr (Trigger-driven) Pressing the pad (or sending a MIDI Note On) causes the sample to play once through, from Start Point to End Point. The sample does not loop. (But if Loop Mode is set to RLoop or RShot the sample will play in reverse.) Pressing the pad again (or sending another MIDI Note On) while play is in progress causes playback to start over. -
Page 52: Midi Note Number [Note#]
It is possible to have a MIDI Note On message drive a sample in reverse. To use this feature, you must first set the SU10’s “program” to 2 (by sending a MIDI Program Change message carrying program number 01h). Once you have done this, any Note-On message with a velocity of 110 or above will drive the corresponding sample in reverse —... -
Page 53: Start Point [Stpnt]
Start Point changes. Also if loop mode is Whole Loop or Reverse Loop, the SU10 will display the TEMPO indicator and current tempo at the bottom right of the LCD. The tempo value will change as you adjust the START point. -
Page 54: Loop Point [Lppnt]
During editing, the SU10 displays the TEMPO indicator and current tempo at the bottom right of the LCD. The tempo value will change as you adjust the setting. -
Page 55: Copy [Copyto ?]
Also if loop mode is Whole Loop, Partial Loop, or Reverse Loop, the SU10 will display the TEMPO indicator and current tempo at the bottom right of the LCD. The tempo value will change as you adjust the setting. Refer to the “About TEMPO”... -
Page 56: Move [Moveto ?]
Press [ENTER] to execute the copy. If the copy is allowed, the SU10 begins execution and displays the Keep PwrOn message. Do not switch off power while this message is on the screen. If your destination pad is in a locked bank, the LCD briefly displays the Locked Bank! message, then waits for you to select another destination. -
Page 57: Split [Spltto ?]
Press [ENTER]. The LCD displays a confirmation Prompt. Mov x x y y ? Press [ENTER] to execute the move. If the move is possible, the SU10 begins execution and displays the Keep PwrOn message. Do not switch off power while this message is on the screen. - Page 58 Press [ENTER]. The LCD displays a confirmation prompt. Spl x x y y ? Press [ENTER] to execute. If splitting is possible, the SU10 begins execution and displays the Keep PwrOn message. Do not switch off power while this message is on the screen.
-
Page 59: Compact [Compct ?]
Sure? To execute, press [ENTER] again. If you do not want to execute, press [EXIT] instead. The SU10 returns to Step 1 above. The SU10 begins execution and displays the Keep PwrOn message. Do not switch off power while this message is on the screen. When execution is completed, the LCD briefly displays the Complete message, then returns to the same prompt display shown in Step 1 above. -
Page 60: Delete [Delete ?]
Sure? To execute, press [ENTER] again. If you do not want to execute deletion, press [EXIT] instead. The SU10 returns to Step 1 above. The SU10 begins execution and displays the Keep PwrOn message. Do not switch off power while this message is on the screen. When execution is finished, the LCD briefly displays the Complete message, then returns the Which Pad? prompt. -
Page 61: Utility Mode
UTILITY Mode Introduction You use UTILITY mode to make various system settings and to perform system management and MIDI-related operations. The mode comprises seven utilities, as follows. Name Function Set recording parameters. Set MIDI parameters. MIDI Send/receive bulk dump. Bulk Execute a sample dump. -
Page 62: Recording Setup [Rec]
Exlg). In general, you will want to use the same grade that was used at recording, since use of a different grade will change the pitch. Note that a setting of “Hi” reduces the SU10 polyphony and disables use of FILTER, CROSSFADE, PITCH, SCALE, and SCRATCH features, while a setting of “Std”... -
Page 63: Midi Setup [Midi]
-20% to 10%, settable in 1% increments. • Input: Selects whether the SU10 takes its input from the LINE IN jack or the MIC INPUT jack (Line or Mic). You will need to set the appropriate value if you are using the CROSSFADE, EXTERNAL FILTER, or EXTER- NAL SCRATCH feature. -
Page 64: Local Control [Local]
On, Off Explanation This setting selects whether the SU10 pads control SU10 playback. You can use both the SU10 pads and remote MIDI messages to control playback. Off Local playback is controlled exclusively by MIDI messages received from external devices. -
Page 65: Clear Note Table [Notetbclr?]
(described above) or the EDIT mode’s MIDI NOTE NUMBER function (page 45). Bulk Dump [Bulk] You use this utility to dump (save) all SU10 sample and song data to an external device, or to reload data from an external device. The utility also lets you select the packet interval for outgoing dumps. -
Page 66: Receiving [Dump Rcv?]
This is the utility you use to back up your SU10 data. To save all data to floppy disk, for example, you would connect the MIDI OUT connector to the MIDI IN of a Yamaha MDF2 MIDI Data Filer or equivalent, then dump from the SU10 to the MDF2. -
Page 67: Sending [Dump Send?]
The SU10 displays the confirmation query Send OK? Press [ENTER] to begin sending. The SU10 sends the first part of the dump, then pauses and displays the mes- sage Next OK? When you are ready to proceed, press [ENTER]. The SU10 will subsequently stop and display this message two more times. - Page 68 Dumping To or From a Yamaha MDF2, QY300, or QS300 To dump to an MDF2: Set the MDF2 to Seq mode. ( Do not set to MDR mode.) Set the SU10’s Intrvl value to “Short”. At the MDF2, press REC + START/STOP to begin recording.
-
Page 69: Sample Dump
To load from an MDF2: Set the MDF2 to Seq mode. ( Do not set to MDR mode.) At the SU10, move to the Dump Rcv? screen and press [ENTER] twice to begin receiving. At the MDF2, press the START/STOP button to begin playback. -
Page 70: Song Deletion [Song]
UTILITY menu. • The SU10 sends a sample identification along with the data. If the pad is monaural, the ID is equal to the pad number: ID 1 identifies pad A1, ID 2 identifies pad A2, ID 48 identifies pad D12. -
Page 71: Lock [Lock]
Spe- cifically, the SU10 does not allow you to edit or delete any sample within a locked bank, and will not allow you to overwrite a locked song. -
Page 72: Deleting Data Only [Init Data?]
The SU10 displays the Keep PwrOn message and begins the operation. Do not switch off power while this message is on the screen. When initialization is finished, the SU10 displays the Complete message, then returns you to the UTILITY menu. - Page 73 System default values are as follows. Gain Grade Pitch Format Input Source Recording Trigger Default Loop Mode = Whole Loop MIDI Channel Device Number Local Control Ribbon No. MIDI Note Table Bulk Interval Locks Volume UTILITY Mode = Long = 0% = Stereo = Line = Manual...
-
Page 74: Troubleshooting
This chapter offers some simple advice that may help you solve problems you experience with your SU10. If the SU10 does not seem to operate properly and the information in this chapter does not help, please consult your Yamaha dealer or one of the Yamaha distributors listed at the back of this manual for assistance. - Page 75 Problem Sound is distorted Can’t play samples to- gether Change Grd! message appears. SONGS Song content has changed. Troubleshooting Possible Cause • Is replay volume exceeding the clip level? Try pressing [–1] to lower the digital volume. Note that reducing the level with the volume slider will not correct this problem.
- Page 76 • Delete one or more pads. ( • • Check that the MIDI channel setting on the SU10 and the external device match. ( • Check the MIDI Note Number settings. (a) If you have cleared the Note Table, all note num- ber settings have been deleted.
- Page 77 Problem MIDI input does not drive SU10 sound as ex- pected. Troubleshooting Possible Cause • Check sounding-mode (SdMode) settings for each sample. ( page 43.) • Check the MIDI Note Number settings.
-
Page 78: A Error And Warning Messages
Error and Warning Messages This section describes the causes and responses for each of the SU10 error and warning message. Warning messages Locked Data! Locked Bank! Locked Song! [Cause] You attempted to execute an operation that would delete data from a pro- tected area. -
Page 79: Midi Errors
MIDI Errors Time Out! [Cause] Data flow stopped during reception of bulk dump, so the SU10 terminated the operation. All internal pad and song data are now lost. [Response] Try the dump again. If this fails, reinitialize the entire system (go to the INIT utility and execute Init All). -
Page 80: Memory-Related Errors
[Response] The SU10 does its best to repair the problem, but it is possible that you will lose some songs or samples. If you find that the data loss is considerable, you should clear all remaining data and reinitialize the system (go to the INIT utility and execute Init All). -
Page 81: Specifications
Specifications 1. Main Specifications Features • Compact low-cost sampling module. (Same size as VHS cassette) • Special playback features unprecedented for this price range: REVERSE, SCALE, PITCH, others. • Touch-driven ribbon controller controls any one of various effects; excellent for realtime performance applications. -
Page 82: Input Level
3. Display 4. Panel 12 pads Ribbon controller [HOLD], [REV], [SHIFT], [EXIT], [SCRATCH], [BANK],[ENTER], [+1], [–1], [<], [>], [REC], [TOP], [BWD], [STOP], [PLAY], [FWD] Volume slider (for output volume) Power switch 5. Connectors MIDI IN MIDI OUT HEADPHONES (stereo mini jack) LINE OUT L/R (stereo mini jack) LINE IN L/R (stereo mini jack) MIC IN L/R (stereo mini jack) -
Page 83: Included Accessories
9. Dimensions (W 32.2 (mm) [6.61 4.09 1.27 (inches)] 10. Weight 0.4kg (0.88lb.) 11. Included accessories Owner’s manual (this manual) Two sample CDs (Demo music features samples from Time+Space sample CDs. See the enclosed Yamaha Soundshow CD for more information.) Specifications... -
Page 85: Midi Implementation Chart
AC adaptor ... 13 AltGrp ... 44 Backup ... 60 Bank ... 5 BANK key ... 9 Battery ... 13 BPF ... 24 Bulk Dump ... 58 Receiving ... 59 Sending ... 60 BWD ... 8 Compact ... 52 Copy ... 48 CROSSFADER ... - Page 86 Mic ... 34 MIC INPUT ... 10 MIDI ... 6 MIDI channel ... 56 MIDI device number ... 56 MIDI note number ... 45 MIDI note table ... 57 Mnual ... 34 Mono ... 34 Move ... 49 Note ... 43 Oshot ...
- Page 87 For details of products, please contact your nearest Yamaha or the authorized distributor listed below. Pour plus de détails sur les produits, veuillez- vous adresser à Yamaha ou au distributeur le plus proche de vous figurant dans la liste sui- vante. NORTH AMERICA CANADA Yamaha Canada Music Ltd.
- Page 88 11/F., Silvercord Tower 1, 30 Canton Road, Tsimshatsui, Kowloon, Hong Kong Tel: 730-1098 INDONESIA PT. Yamaha Music Indonesia (Distributor) PT. Nusantik Gedung Yamaha Music Center, Jalan Jend. Gatot Subroto Kav. 4, Jakarta 12930, Indonesia Tel: 21-520-2577 HEAD OFFICE SY09 KOREA...
- Page 89 M.D.G., EMI Division, ©Yamaha Corporation 1995 VU37290 601CRIT15.2-02B0 Printed in Japan...