Table of Contents
Advertisement
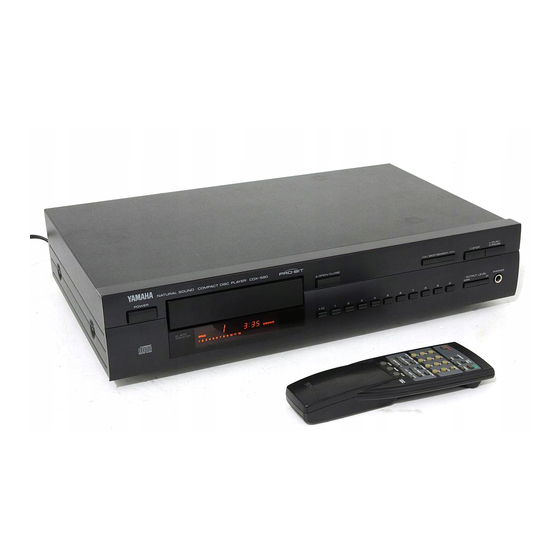
Lecteur de disque audionumérique de la série "Natural Sound"
Thank you for selecting this YAMAHA Compact Disc Player.
Nous vous remercions d'avoir porté votre choix sur ce lecteur de disque
OWNER'S MANUAL
FEATURES
•
Random Access Programmable Play
•
Random-Sequence Play
•
Single Track/Entire Disc Repeat Play
•
Automatic Spacing Capability
•
Automatic Programming for Recording to
Tape
•
Automatic Peak Level Searching Capability
•
CD Synchronized Recording with a
Compatible YAMAHA Tape Deck
•
Display Brightness Changing Capability
•
Remote Control Capability
CDX-890 and CDX-590 only
•
Optical and Coaxial Digital Outputs
CDX-490 only
•
Optical Digital Output
CONTENTS
Safety Instructions ............................................... 2
Connections ......................................................... 4
Identification of Components ............................... 6
Basic Operation ................................................... 8
Random-Sequence Play .................................... 12
Repeat Play ....................................................... 12
Program Play ..................................................... 13
Index Search ...................................................... 14
Track Programming for Recording to Tape ....... 15
CD Synchronized Recording ............................. 19
Transmitter ......................................................... 20
Notes about Handling Compact Discs ............... 20
Troubleshooting.................................................. 21
Specifications..................................................... 22
CDX-890/590/490
Natural Sound Compact Disc Player
MODE D'EMPLOI
CARACTERISTIQUES
•
•
•
•
•
•
•
•
•
CDX-890 et CDX-590 seulement
•
CDX-490 seulement
•
TABLE DES MATIERES
Attention ............................................................. 23
Connexions ......................................................... 24
Identification des composants ............................ 26
Fonctionnement de base .................................... 28
Lecture en séquence aléatoire ........................... 32
Lecture repetée .................................................. 32
Lecture programmée .......................................... 33
Recherche d'index .............................................. 34
Programmation des plages pour
enregistrement sur bande .................................... 35
Enregistrement synchronise d'un
disque audionumérique ........................................39
Remarques concernant la télécommande .......... 40
Remarques concernant la manipulation des disques ... 40
Dépistage de pannes .......................................... 41
Caractéristiques techniques ............................... 42
Lecture programmable à accès direct
Lecture en séquence aléatoire
Lecture répétée de plage unique/disque entier
Fonction d'espacement automatique
Programmation automatique de pour
l'enregistrement
Fonction de recherche automatique du niveau
de crête
Enregistrement synchronisé de disque
audionumérique avec un magnétophone à
cassettes compatible YAMAHA
Fonction de modification de luminosité de
l'affichage
Fonctionnement par télécommande
Sorties numériques optiques et coaxiales
Sortie numérique optique
Advertisement
Table of Contents

Related Manuals for Yamaha CDX- 590


Summary of Contents for Yamaha CDX- 590
-
Page 1: Table Of Contents
Lecteur de disque audionumérique de la série “Natural Sound” Thank you for selecting this YAMAHA Compact Disc Player. Nous vous remercions d’avoir porté votre choix sur ce lecteur de disque OWNER’S MANUAL FEATURES • Random Access Programmable Play • Random-Sequence Play •... -
Page 2: Safety Instructions
– and, most importantly, without affecting your sensitive hearing. Since hearing damage from loud sounds is often undetectable until it is too late, YAMAHA and the Electronic Industries Association’s Consumer Electronics Group recommend you to avoid prolonged IMPORTANT! Please record the serial number of this unit in the space below. - Page 3 This product, when installed as indicated in the instructions contained in this manual, meets FCC requirements. Modifications not expressly approved by Yamaha may void your authority, granted by the FCC, to use the product. 2. IMPORTANT : When connecting this product to accessories and/or another product use only high quality shielded cables.
-
Page 4: Connections
• Before making any connections, switch OFF the power to the unit and the amplifier or other component. • Connections should be made to the correct input terminals of the amplifier or other component. CDX-890 LINE OUT VARIABLE FIXED Connection cord (included) CDX-590 LINE OUT... - Page 5 CDX-490 LINE OUT DIGITAL OPTICAL Connection cord (included) Choose one of the ways listed below to connect this unit to your amplifier. When the LINE OUT (analog) terminals of this unit are used ( • Be sure that the left (“L”) and right (“R”) LINE OUT terminals are connected to the corresponding (left and right) terminals of the amplifier or other component.
-
Page 6: Identification Of Components
IDENTIFICATION OF COMPONENTS ) indicates the page number on which the control part is best described. FRONT PANEL * The control functions on the main unit and on the remote control transmitter are virtually identical, with the exceptions below. CDX-890 POWER switch (p. -
Page 7: Remote Control Transmitter
) indicates the page number on which the control part is best described. REMOTE CONTROL TRANSMITTER TAPE button (p. 15) SYNCHRO button (p. 19) PEAK button (p. 18) SPACE button (p. 10) Numeric buttons (p. 9) REPEAT button (p. 12) OUTPUT LEVEL button (p. -
Page 8: Basic Operation
This manual describes how to operate this unit by using the remote control transmitter. To operate this unit on the front panel, use the corresponding buttons on the front panel. POWER Turn the power on. POWER Load a disc. OPEN/ CLOSE Display information at disc play 3 4 5 6 7 8 9 10 11 12... -
Page 9: To Play A Desired Track On The Disc
To stop play temporarily PAUSE To resume play, press the PAUSE button again (or press the PLAY button). * The PLAY/PAUSE button on the front panel can also be used to stop play temporarily or to resume play. DIRECT PLAY Select a desired track using the numeric button. - Page 10 To advance or reverse play rapidly (MANUAL SEARCH) To advance rapidly SEARCH To reverse rapidly SEARCH Automatic spacing If you record a disc onto tape with an insufficient time space between tracks, the tape deck will not be able to perform blank search operations on the tape correctly.
-
Page 11: Changing Brightness Of The Display
Changing brightness of the display CDX-890, CDX-590 You can change the brightness of the display (or turn off the illumination) by pressing the DIMMER button. During play Normal illumination “OFF” * While the display illumination is off, the AUTO DISPLAY OFF indicator on the front panel is illuminated. -
Page 12: Random-Sequence Play
RANDOM-SEQUENCE PLAY You can have the unit play the tracks on a disc in a random sequence selected by the unit’s microcomputer. To perform random-sequence play RANDOM To cancel random-sequence play RANDOM You can play any desired track or the entire disc repeatedly by pressing the REPEAT button. The repeat play mode will change whenever you press the REPEAT button. -
Page 13: Program Play
You can enjoy listening to your favorite tracks in any desired order by programming tracks. As many as 25 tracks can be programmed in sequence. Stop the unit. STOP PROG PROGRAM Display information during programming PROGRAM TOTAL PROGRAM TOTAL 1 2 3 4 5 Shows the program number for the track to be programmed next. -
Page 14: Index Search
To stop program play Press the STOP button. The first programmed track number will be displayed. To resume play, press the PLAY button. Play will begin from the beginning of the program. To cancel a program sequence There are several methods, as described below. •... -
Page 15: Track Programming For Recording To Tape
TRACK PROGRAMMING FOR RECORDING TO TAPE This convenient feature can be used to program tracks on a disc for recording to tape. By only memorizing the tape’s total possible recording time, the unit will automatically program tracks or help you to program tracks so they will fit onto the tape with the least amount of unrecorded space remaining at each end of the tape. - Page 16 Manual tape-programming This is for recording desired tracks in any desired order onto a tape. Follow steps 1 – 4 on page 15. PROG Program desired tracks (to be recorded on side A) in any desired order. * Programmed track numbers light up on the display. You can select a track which can be programmed for the remaining time of (the side of) the tape from track numbers flashing on the display, but you cannot select a...
- Page 17 Random sequential tape-programming The unit will automatically program tracks in random sequential order for recording to tape. Follow steps 1 – 4 on page 15. RANDOM * The unit will automatically program tracks for side A and side B separately considering the tape’s total time. Begin recording on the tape deck and press the PLAY button on this unit at the same time.
-
Page 18: Automatic Searching For The Peak Level On A Disc
Automatic searching for the peak level on a disc This convenient feature automatically searches a disc for a part where the source level peaks, and next plays the part repeatedly. For recording to tape, this feature is very helpful to adjust the recording level on the tape deck. Stop the unit. -
Page 19: Cd Synchronized Recording
This unit can make a tape deck’s recording synchronized with CD play automatically. With this function, you can record a CD on tape very easily and more precisely. This recording method needs a YAMAHA tape deck compatible with this function. (Refer to the tape deck’s operation manual to know whether it is compatible or not.) * This unit and the tape deck must be placed close to each other so that both of them can receive the signals from this unit’s... -
Page 20: Notes About The Remote Control Transmitter
NOTES ABOUT THE REMOTE CONTROL TRANSMITTER Battery installation Battery replacement If you find that the remote control transmitter must be used closer to the main unit, the batteries are weak. Replace both batteries with new ones. Notes • Use only AA, R6, UM-3 batteries for replacement. •... -
Page 21: Troubleshooting
If the unit fails to operate normally, check the following points to determine whether the fault can be corrected by the simple measures suggested. If it cannot be corrected, or if the fault is not listed in the SYMPTOM column, disconnect the power cord and contact your authorized YAMAHA dealer or service center for help. SYMPTOM The player does not switch ON when the POWER switch is pressed. -
Page 22: Specifications
SPECIFICATIONS AUDIO SECTION Frequency response < > CDX-890 ... 2 Hz < > CDX-590, CDX-490 ... 2 Hz Harmonic distortion + noise (1 kHz) < > CDX-890 ... 0.002% or less < > CDX-590 ... 0.0025% or less < > CDX-490 ... - Page 23 YAMAHA ELECTRONIQUE FRANCE S.A. RUE AMBROISE CROIZAT BP70 CROISSY-BEAUBOURG 77312 MARNE-LA-VALLEE CEDEX02, FRANCE YAMAHA ELECTRONICS (UK) LTD. YAMAHA HOUSE, 200 RICKMANSWORTH ROAD WATFORD, HERTS WD1 7JS, ENGLAND YAMAHA SCANDINAVIA A.B. J A WETTERGRENS GATA 1, BOX 30053, 400 43 VÄSTRA FRÖLUNDA, SWEDEN VT98480 Printed in Malaysia YAMAHA MUSIC AUSTRALIA PTY, LTD.