Table of Contents
Advertisement
Advertisement
Chapters
Table of Contents

Related Manuals for Philips ADD6910


Summary of Contents for Philips ADD6910
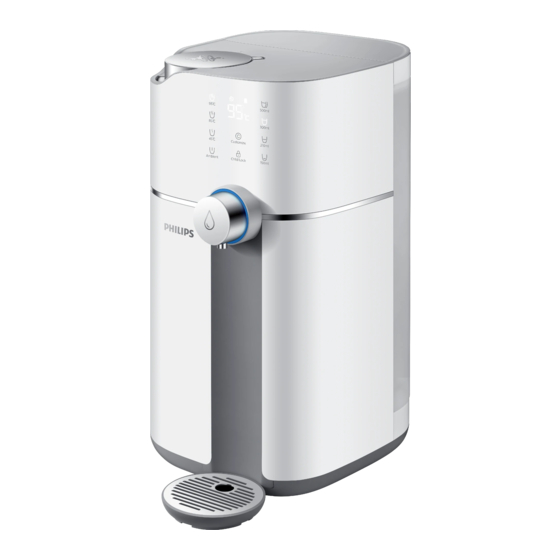
- Page 1 淨水器 Water Puri er RO純淨飲水機 RO Dispenser ADD6910 使用說明書 1-10 User Manual 11-20...
-
Page 2: Table Of Contents
繁體中文 目錄 產品功能 濾芯更換 主要技術參數 故障診斷 結構示意圖 產品保修服務指南 操作與顯示介面 裝箱清單 安裝步驟 使用說明 注意事項 日常保養... - Page 3 產品功能 感謝您購買我們的產品。 本品爲多功能臺面式淨飲機。 通過即時制熱技術, 在幾秒鐘內能達到您想要的 水溫, 可方便地用於製作各類飲品。 機身內附有一體複合濾芯, 通過有效的過濾系統及UV殺菌功能, 可 清除自來水中99.999%的細菌和病毒, 99.9%的重金屬、 農藥殘留及餘氯*。 主要技術參數 ADD6910 產品名稱 220 V – 240 V 額定電壓 額定總功率 2200 W 2100 W 加熱功率 2000 L 濾芯額定總淨水量 適用水源 本地自來水 0 – 0.06 MPa 進水壓力 5 – 38℃...
-
Page 4: 結構示意圖
結構示意圖 原水箱蓋 一體複合濾芯 濾芯蓋 淨水箱 (外觀不可見) 原水箱 顯示面板 出水鍵 出水燈 出水嘴 電源線 單向閥 接水盤 操作與顯示介面 UV-LED殺菌指示燈 濾芯壽命指示燈 500ml 95℃ 85℃ 300ml 水溫鍵** 水量鍵*** 45℃ Customize 210ml Ambient 150ml Child lock 換水指示燈 童鎖鍵 定制按鍵 濾水指示燈 **出水溫度可能存在±3℃的溫度 差,***水量可能存在±10%的容量 差, 實際出水水溫及水量可能受使用環境及當地水質影響,會存在偏差。... -
Page 5: 安裝步驟
安裝步驟 (1)安裝淨水機 ·請將機器放置在陰涼、 通風、 穩固的平面上, 遠離熱源; ·打開原水箱蓋, 向上提出原水箱, 往原水箱注清水後裝回機器, 並蓋好原水箱蓋; ·把電源線插頭插入電源插座, 機器發出 “嘀” 聲並且點亮顯示面板, 表示機器進入工作狀態。 (2)首次使用 ·首次使用時, 需觀察機器在使用過程中產品內部是否有水流出或周邊積水, 機器內部是否有異常聲音、 焦糊味、 煙等, 如發現上述情況請斷開電源連接並與售後人員聯繫。 ·首次使用或長期未使用時, 應裝滿水箱, 在濾水完成後使用一鍵排空功能, 即長按 “ ” (85° C鍵) 和 “ ” (300ml鍵)3秒, 如此反復操作兩次。 ·注意: 為防止乾燒, 機器首次通電取熱水時, 將先取出一段常溫水, 再取出熱水。 使用說明... - Page 6 ·智慧記憶取水: 取水過程若中途手動停止出水, 此時 “ ” (定制按鍵) 閃爍, 若10秒內點擊 “ ” (定制按鍵) , 則 “ ” (定制按鍵)常亮並記 95℃ 500ml 憶當前水溫和已出水水量; “ ” (定制按鍵)常亮時, 點擊 “ ” (童鎖 85℃ 300ml 鍵) (常溫水自動解鎖) 及出水鍵後, 可取出記憶水溫水量的淨水; 若10 45℃ Customize 210ml 秒內未點擊 “ ” (定制按鍵) , 則不記憶本次水溫和水量。 在正常使用 Ambient 150ml 中,...
-
Page 7: 注意事項
(6)冬季模式 ·當原水的水溫低於10℃時, 機器可設置冬季模式。 45℃ Customize 210ml ·長按 “ ” (常溫水鍵)3秒, 再按取水鍵, 可取25℃淨水, 僅限單次操作。 Ambient Child Lock 150ml (7)抑菌功能 ·開機殺菌: 機器每次通電時, UV -LED殺菌模組開始工作1小時後自動關閉。 ·自動殺菌: 通電1小時後, 機器每隔50分鐘殺菌10分鐘。 ·當UV-LED殺菌模組工作時 “ ” (UV-LED指示燈)常亮; 當UV-LED殺 菌模組不工作時 “ ” (UV-LED指示燈)熄滅。 (8)休眠模式 · 1分鐘內沒有任何操作, 機器進入休眠狀態; ·機器在休眠狀態中, 除 “ ”... -
Page 8: 日常保養
·應將本産品放置在穩固、 平坦、 水平的表面上; · 本機器應放置於室內陰涼乾燥的地方, 避免陽光直射, 擺放位置不應靠近暖氣設備、 電熱產品或其他高 溫場所; ·機器擺放位置不得處於會出現或有可能出現可燃性氣體洩露的場所; ·切勿用濕手插拔電源插頭, 以免引發觸電危險; ·請勿自行拆卸、 改裝機器或在機器上放置重物, 以免損壞淨水機; ·長時間不使用機器, 務必斷開電源, 排空原水箱和淨水箱的水; · 本機器進水溫度要求5-38℃, 進水溫度超過38℃時, 會損壞濾芯, 使濾芯失效; 進水溫度低於5℃時, 可能造成凍結, 引起機器原配件破裂; · 本機器僅適用於室內安裝與使用, 必須使用可靠接地的插座; ·初次使用或長期停用後, 需反復放水幾次清洗, 清洗完畢後, 方可使用; · 本機器的維修保養需使用指定的部件或配件; ·嚴禁使用汽油等有機溶劑擦拭本機外殼, 確需清潔時, 應斷電後用濕抹布輕擦本產品表面; ·倘若發生故障, 應立即關掉電源, 切勿將有缺陷的機器置於工作狀態; ·隨著產品的升級,... -
Page 9: 濾芯更換
濾芯更換 請根據顯示幕濾芯壽命提示或建議更換週期更換濾芯。 新的濾芯可從經授權的經銷商處或服務中心獲 得, 其供應型號為: ADD550。 名稱 型號 建議更換週期 ADD550 1年 一體複合濾芯(MAX) 僅可使用原裝飛利浦濾芯進行更換。 (1)濾芯壽命顯示 “ ” (濾芯壽命指示燈)顔色代表濾芯剩餘壽命概況, 藍色時, 表示濾芯 剩餘壽命大於10%, 紫色時, 表示濾芯剩餘壽命小於10%; 紅色時, 表示濾 芯剩餘壽命小於7天或壽命到期。 (2)濾芯更換步驟 ·拔出電源。 ·按下濾芯蓋旋鈕, 濾芯蓋彈出。 ·將需要更換的濾芯逆時針旋轉至開鎖位置並提出。 ·將新的濾芯塞進機器並順時針旋入至鎖上位置, 然後蓋上濾芯蓋。 ·恢復機器電源, 長按 “ ” (常溫水鍵)和 “ ” (150ml鍵)鍵3秒鐘時間(樂音提示3聲) 重置濾芯壽命計算器,... -
Page 10: 故障診斷
故障診斷 故障現象 故障可能的原因 解決方案 機器未通電 檢查電源連接是否正常 按鍵未觸摸到位 重新觸摸按鍵進行取水操作 不能取常 檢查顯示介面是否提示 “ ” (換水指示燈), 如果 溫水 “ ” (換水指示燈)閃爍請提出原水箱進行換水, 淨水箱(非原水箱)缺水 然後等待濾水完成後再進行取水操作 機器處於 “乾燒警報” 狀態中 先取用幾次常溫水, 再取其他溫度的熱水 不能取熱水 等待片刻, 當 “ ” (濾水指示燈)常亮或熄滅顯 淨水箱(非原水箱)缺水 示時即可正常取熱水 原水箱蓋未合攏 檢查原水箱蓋是否合攏到位 請提出原水箱進行換水, 然後觀察濾水時是否 原水箱水位處於低水位狀態 機器不濾水 有異常聲音 原水箱未安裝到位... -
Page 11: 產品功能 1
會自動解除, EH消失 原水溫度探測器異常 聯繫售後維修人員 加熱體溫度探測器異常 聯繫售後維修人員 TDS探測器異常 聯繫售後維修人員 取300ml常溫水, 如仍然無法解除警報, 請聯繫 售後維修人員 溢水警報 檢查原水箱座的單向閥是否到位, 如不到位, 用 小頂針將單向閥調整歸位或聯繫售後人員更換 單向閥 通訊警報 聯繫售後維修人員 産品保修服務指南 從購買日期起, 產品擁有兩年保固期。 如果您需要更多資訊, 請瀏覽網站: www.philips.com/welcome. 在購買日期後起計兩年內, 凡經本公司特約維修站人員確認爲正常使用情況下, 因製作工藝或原配件造 成之損壞, 您都將獲得免費保修服務。 此免費服務不包括需時常更換的易耗零配件(凈水器濾芯、 凈水壺濾芯、 活性炭、 樹脂、 超濾膜片等) 、 輔助裝置、 運輸費及維修人員上門服務費。 維修時請攜同購買憑證正本方爲有效。... -
Page 12: 主要技術參數 1
以下情況將不能獲得免費服務 1. 使用不當引起的人爲損壞, 例如接入不適當配件、 不適當之安裝、 不依說明書使用、 錯 使用或疏忽而 造成損壞等。 2. 因運輸及其他意外而造成之損壞。 3. 非經本公司認可之維修和改裝。 4. 其他因不可抗力 (如自然災害、 電壓異常等)造成的損壞。 5. 一般家庭以外使用(如工業、 商業用等)而造成的損壞。 6. 正常使用引起的產品老化, 磨損等, 但不影響產品的正常使用。 該說明作爲在規定期限及條件之內進行免費維修的宣貫, 並不限制消費者的法定權利。 裝箱清單 主機 接水盤 使用說明書 快速入門指南 清潔刷... - Page 13 請保留此說明書以便查閱...
-
Page 14: Main Technical Speci Cations
English CONTENTS Product introduction Filter cartridge change Main technical speci cations Trouble shooting Product overview Guarantee & Service User interface Packing list Installation Usage instruction Precautions Routine maintenance... -
Page 15: Product Introduction
RO ltration system and UV-LED guarantee cleanness of water by removing up to 99.999% bacteria and virus, 99.9% heavy metal, pesticides and chlorine*. 2 Main technical speci cations Product model ADD6910 Rated voltage 220 V – 240 V ~ Total rated power... -
Page 16: Product Overview
3 Product overview Raw water tank cover All-in-one RO lter Filter cover Inner water tank for the ltered water (inside the dispenser) Raw water tank Display panel Water extraction button Extraction indicator light Nozzle Power cord Check valve Water drain 4 User interface Indicator of UV-LED sterilization Indicator of lter lifetime... -
Page 17: Installation
5 Installation (1)Set-up · Please put the dispenser on a cool, well-ventilated and stable place. Keep away from heat. · Take out the raw water tank and ll it with water. Install it back to the dispenser and cover the lid. ·... - Page 18 · Customization: If the extraction process is stopped in halfway, press the “ ” (Customize button) and the dispenser will 95℃ 500ml memorize the water temperature and volume extracted at this time. The dispenser will go back to standby mode if no button is 85℃...
-
Page 19: Precautions
(6)Winter mode · When the raw water temperature is lower than 10℃, winter mode 45℃ Customize 210ml can be set. Ambient Child Lock 150ml · Long press “ ”(Ambient water) for 3 seconds, and then tap the water extraction icon to get 25℃ ltered water, and this operation is only valid for a single use. -
Page 20: Routine Maintenance
· The dispenser should be placed in indoor where is cool and well-ventilated. Keep away from direct sunlight, heating elements, or anywhere is hot. · The dispenser shall not be placed in place that may have in ammable gas leakage. ·... -
Page 21: Filter Cartridge Change
Suggested Replacement Cycle All-in-one RO lter (MAX) ADD550 1 year Only the original Philips lter cartridge can be used for replacement. (1)Indicator of lter lifetime The color of “ ” (Indicator of lter lifetime) shows the remaining lifetime for the lter cartridge as follows:... -
Page 22: Trouble Shooting
10 Trouble shooting Error Causes Solutions The product is not connected Check if the dispenser is well connected with with the power supply power supply Press the water extraction button again Button is not pressed properly Cannot extract ambient water “... -
Page 23: Guarantee & Service
11 Guarantee & Service This dispenser includes a two-year warranty from the date of purchase. If you need more information, please visit: www.philips.com/welcome. Within two years from the date of purchase, you will receive free warranty service for any damage caused by the manufacturing process or components under normal operation con rmed by our maintenance service. -
Page 24: Packing List
You cannot receive free warranty service under the following conditions: 1. Damage by improper operation, such as improper components connection, improper installation, deprived of manual use, mis-operation. 2. Negligence and damage because of transportation or other accident. 3. Maintenance and modi cation without approval. 4. - Page 25 Please keep this user manual for future reference.
- Page 26 Speci cations are subject to change without notice © 2019 AquaShield All rights reserved. The Philips trademark and the Philips Shield Emblem are registered trademarks of Koninklijke Philips N.V. used under license. This product has been manufactured by and is sold under the responsibility of Shanghai AquaShield Health Technology Company Limited and Shanghai AquaShield Health Technology Company Limited is the warrantor in relation to this product.