
Related Manuals for Acer A1P1901 Series


Summary of Contents for Acer A1P1901 Series
- Page 1 Acer DLP Projector B250i/L350R/LK-F20i/ A1P1901 Series User's Guide Copyright © 2020. Acer Incorporated. All Rights Reserved. Acer Projector User's Guide Original Issue: 02/2020...
- Page 2 Serial number: ___________________________________ Date of purchase: ________________________________ Place of purchase: ________________________________ Acer and the Acer logo are registered trademarks of Acer Incorporated. Other companies' product names or trademarks are used herein for identification purposes only and belong to their respective companies.
-
Page 3: Information For Your Safety And Comfort
Information for Your Safety and Comfort Read these instructions carefully. Keep this document for future reference. Follow all warnings and instructions marked on the product. Turning the product off before cleaning Unplug this product from the wall outlet before cleaning. Do not use liquid cleaners or aerosol cleaners. -
Page 4: Using Electrical Power
• To avoid damage of internal components and to prevent battery leakage, do not place the product on a vibrating surface. • Never use it under sporting, exercising, or any vibrating environment which will probably cause unexpected short current or damage rotor devices. -
Page 5: Product Servicing
Product servicing Do not attempt to service this product yourself, as opening or removing covers may expose you to dangerous voltage points or other risks. Refer all servicing to qualified service personnel. Unplug this product from the wall outlet and refer servicing to qualified service personnel when: •... - Page 6 • Locations where the altitudes are higher than 10000 feet. • Unplug immediately if there is something wrong with your projector. Do not operate if smoke, strange noise or odor comes out of your projector. It might cause fire or electric shock. In this case, unplug immediately and contact your dealer.
-
Page 7: Disposal Instructions
Do not throw this electronic device into the trash when discarding. To minimize pollution and ensure utmost protection of the global environment, please recycle. For more information on the Waste from Electrical and Electronics Equipment (WEEE) regulations, visit http://www.acer-group.com/public/ Sustainability/index.htm... -
Page 8: First Thing First
viii First Thing First Usage Notes • Turn off the product before cleaning. • Use a soft cloth moistened with mild detergent to clean the display housing. • Disconnect the power plug from AC outlet if the product is not being used for a long period of time. - Page 9 Information for Your Safety and Comfort First Thing First viii Usage Notes viii Precautions viii Introduction Product Features Package Overview Projector Overview Projector Outlook Control Panel Remote Control Layout Getting Started Connecting the Projector Turning the Projector On/Off Turning On the Projector Turning Off the Projector Adjusting the Projected Image Adjusting the Height of the Projected Image...
-
Page 10: Product Features
Compact size projector facilitates business purposes and home entertainment • Versatile display modes enable optimum performance in any situation • Acer EcoProjection Technology delivers Intelligent power management approach and physical efficiency improvement • Advanced keystone correction delivers optimum presentations •... -
Page 11: Package Overview
This projector comes with all the items shown below. Check to make sure you have them all. Contact your dealer immediately if any thing is missing. Projector Power cord Power adaptor Wireless dongle (UWA5) HDMI cable Acer Projector Multi-media (CD-ROM) User’s guide (CD-ROM) Quick start guide Remote control Batteries Carrying case... -
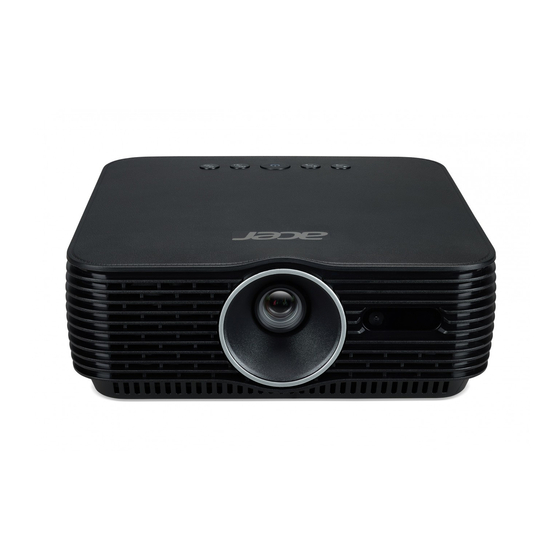
Page 12: Projector Overview
Projector Overview Projector Outlook Front/upper side Description Description Speakers Remote control receiver Projection lens Tripod mounting hole Tilt adjusting wheels Power button Auto focus receiver Control panel Rear side Description Description Power socket USB-C connector Audio output connector USB-A (service) Audio input connector USB-A (for wireless dongle) HDMI connector... -
Page 13: Control Panel
Control Panel Function Description Decreases the volume when the Onscreen Display (Volume down) (OSD) menu is off. Selects items or makes adjustments to your selection (Left) when the OSD is on. Increases the volume when the OSD is off. (Volume up) Selects items or makes adjustments to your selection (Right) when the OSD is on. -
Page 14: Remote Control Layout
Remote Control Layout Model No: B-1201 MC.JRK11.003 Function Description Infrared transmitter Sends signals to the projector. POWER Refer to the "Turning the Projector On/Off" section. ENTER Confirms your selection. Four Selects items or makes adjustments to your selection. directional selection keys Adjusts the focus when the focus pattern appears. -
Page 15: Getting Started
Getting Started Connecting the Projector Smart device Video output Speakers Note: Connector interface is subject to model's specifications. Description Description Power cord USB Type-C cable Audio cable HDMI cable Wireless dongle USB drive Note: To ensure the projector works well with your computer, please make sure the timing of the display mode is compatible with the projector. -
Page 16: Turning The Projector On/Off
Turning the Projector On/Off Turning On the Projector Ensure that the power cord and signal cable are securely connected. The Power LED will light red. Turn on the projector by pressing (POWER) on the control panel or remote control, and the Power indicator LED will turn blue. See "User Controls"... -
Page 17: Turning Off The Projector
Turning Off the Projector To turn the projector off, press the power button. A confirmation message appears. Confirm to proceed if you wish to turn the projector off. The LED Power indicator will turn solid red to indicate standby mode. It is now safe to unplug the power cord. -
Page 18: Adjusting The Height Of The Projected Image
Adjusting the Projected Image Adjusting the Height of the Projected Image The projector is equipped with two elevator feet for adjusting the image height. To raise the image: Use the front Tilt adjusting wheel to raise the image to the desired height and angle. -
Page 19: How To Get A Preferred Image Size By Adjusting Distance And Zoom
How to Get a Preferred Image Size by Adjusting Distance and Zoom The table below shows how to achieve a desired image size by adjusting either the position or the zoom ring. To obtain an image size of 70" set the projector at a distance 1.9 m from the screen. -
Page 20: User Controls
User Controls Home screen The home screen provides a variety of settings such as selecting an input signal, playing multi-media files from different kinds of storage devices, and projecting contents from your smart devices. Basic home screen operations After turning on the projector, the home screen displays. to select an item in the home screen. - Page 21 Multimedia: allows you to browse media files stored in USB disk via the USB A connector. Note: The above modes/functions require additional menu operations or app. See Acer Projector Multi-media (CD-ROM) for details. • HDMI: chooses HDMI source input via the HDMI connector.
-
Page 22: Onscreen Display (Osd) Menus
Onscreen Display (OSD) Menus The projector has multilingual Onscreen Display (OSD) menus that allow you to make image adjustments and change a variety of settings. Using the OSD menus • To open the OSD menu, use to select "Settings" in the home screen. - Page 23 Setting • Enable WiFi: The default value is "On". Choose "On" to enable the WiFi connection. • Reset: Choosing "OK" returns the display parameters on this menu to the factory default settings. Advanced WiFi • Internet: Displays the available AP list. Select one AP router to connect for Internet access.
- Page 24 Do not turn off the projector while the firmware is updating. • USB: Go to Acer Worldwide website and select “Drivers and Manuals” from “Support” or “Service”. Download new firmware files by one Firmware compressed file.
- Page 25 Display Mode There are many factory presets optimized for various types of images. • Bright: For brightness optimization. • Standard: For common environment. • Video: For playing video in a dark environment. • Game: For game content. • Football: For sport picture. •...
- Page 26 Color Temperature Adjusts the color temperature. • High/Middle/Low: At higher color temperatures, the screen looks colder; at lower color temperatures, the screen looks warmer. • User: Adjusts the red, green, blue, cyan, yellow and magenta colors. - R Gain/G Gain/B Gain: Adjusts the color balance at or near the white point.
- Page 27 4 Corner Correction Manually adjusts the shape and size of an image that is unevenly rectangular on all sides. Press select the corner that you wish to adjust. Press four directional selection keys to adjust the image shape. Please adjust 4-corner correction separately for each aspect ratio, and its memory is allowed to save 4 sets of settings only.
- Page 28 Choosing "Yes" returns the display parameters on all Reset All menus to the factory default settings. Note: "HDMI Color Range" and "HDMI Scan Info" are only available when the input signal is HDMI. Note: Supported 3D signal timings: Signal Supported timing source Side by Side Half Top and Bottom...
-
Page 29: Troubleshooting
Appendices Troubleshooting If you experience a problem with your Acer projector, refer to the following troubleshooting guide. If the problem persists, please contact your local reseller or service center. Image Problems and Solutions Problem Solution No image appears • Make sure all the cables are correctly connected as onscreen described in the "Getting Started"... - Page 30 Partial, scrolling • For an incorrectly displayed image: or incorrectly • Follow the steps for item 2 (above) to adjust displayed image the resolution of your computer. (For notebooks) • Press the toggle output settings. Example: [Fn]+[F4], Compaq [Fn]+[F4], Dell [Fn]+[F8], Gateway [Fn]+[F4], IBM [Fn]+[F7], HP [Fn]+[F4], NEC [Fn]+[F3], Toshiba [Fn]+[F5] •...
-
Page 31: Problems With The Projector
Image has slanted • If possible, reposition the projector so that it is sides centered on the screen and below the bottom of the screen. • Select "Setting" from the home screen to open the OSD menu. Go to "Advanced Setting" > "Keystone" >... -
Page 32: Led & Alarm Definition Listing
LED & Alarm Definition Listing LED Messages Message Power LED Blue Standby (Power cord plugged in) Power on Light retry Quick flashing Firmware download Flashing Flashing Error (Thermal failure) Quick flashing Error (Fan lock failure) Quick flashing Quick flashing Error (Panel controller system fail) Quick flashing Turning off (Cooling completed) Error (Standby) -
Page 33: Specifications
Specifications The specifications below are subject to change without notice. For final specs, please refer to Acer's marketing documentation. Projection system ™ Resolution 1080p Computer compatibility Refer to the "Compatibility Modes" section for more information. Displayable colors 16.7 million colors Weight Approximate 1.45 kg (3.2 lbs.) - Page 34 I/O connectors B250i/L350R/LK-F20i Power socket USB A (Wireless Dongle) USB Type A (Service) AUDIO IN AUDIO OUT HDMI USB Type C * Design and specifications are subject to change without notice.
-
Page 35: Compatibility Modes
Compatibility Modes HDMI - PC Signal H.Frequency Mode Resolution V.Frequency [Hz] [KHz] VGA_60 59.939 31.468 VGA_72 72.808 37.86 VGA_75 640 x 480 37.5 VGA_85 85.008 43.269 VGA_120 119.517 61.91 SVGA_56 56.25 35.156 SVGA_60 60.315 37.878 SVGA_72 72.186 48.076 800 x 600 SVGA_75 46.875 SVGA_85... - Page 36 WXGA_60 59.87 47.776 WXGA_75 1280 x 768 74.892 60.288 WXGA_85 84.837 68.633 WXGA_60 1280 x 720 WXGA_120 1280 x 720 119.857 92.889 WXGA_60 1280 x 800 59.81 49.702 WXGA_120-RB 1280 x 800 119.908 101.562 WXGA+_60 1440 x 900 59.887 55.934 WXGA+_60 1920 x 1200 59.95...
- Page 37 1024 x 768 XGA_60 48.36 1280 x 960 SXGA- 1600 x 1200 UXGA_60 59.87 74.54 1680 x 1050 WSXGA+ 59.95 65.29 146.25 16:10 1920 x1080 56.25 148.5 16:9 1920 x1080 67.5 148.5 16:9...
-
Page 38: Regulations And Safety Notices
Regulations and safety notices FCC notice This device has been tested and found to comply with the limits for a Class B digital device pursuant to Part 15 of the FCC rules. These limits are designed to provide reasonable protection against harmful interference in a residential installation. -
Page 39: Remarque À L'intention Des Utilisateurs Canadiens
Cet appareil numérique de la classe B est conforme a la norme NMB-003 du Canada. Declaration of Conformity for EU countries Acer hereby, declares that this projector series is in compliance with the essential requirements and other relevant provisions of Directive 1999/5/EC. Compliant with Russian/Ukraine/Belarus regulatory certification... -
Page 40: List Of Applicable Countries
List of applicable countries This device must be used in strict accordance with the regulations and constraints in the country of use. For further information, please contact a local office in the country of use. Please see http://ec.europa.eu/enterprise/rtte/implem.htm for the latest country list. -
Page 41: Declaration Of Conformity
B250i/L350R/LK-F20i Marketing Name: We, Acer Incorporated, hereby declare under our sole responsibility that the product described above is in conformity with the relevant Union harmonization legislations as below Directive and following harmonized standards and/or other relevant standards have been applied:... -
Page 42: Federal Communications Commission Declaration Of Conformity
Acer America Corporation 333 West San Carlos St., Suite 1500 San Jose, CA 95110 U. S. A. Tel: 254-298-4000 Fax: 254-298-4147 www.acer.com Federal Communications Commission Declaration of Conformity This device complies with Part 15 of the FCC Rules. Operation is subject to the following two conditions: (1) this device may not cause harmful interference, and (2) this device must accept any interference received, including interference that may cause undesired operation.