Table of Contents
Advertisement
Advertisement
Table of Contents

Related Manuals for Bosch RADION Life Safety


Summary of Contents for Bosch RADION Life Safety
- Page 1 RADION Life Safety RFSM2‑A, RFHT‑A, RFCO‑A Installation manual...
-
Page 3: Table Of Contents
RADION Life Safety Table of contents | en Table of contents Introduction About documentation System overview Specifications Limitations of smoke, heat and CO detectors Smoke and heat detector installation Smoke and heat detector installation locations 5.1.1 Locations to avoid 5.1.2 Multi-story building 5.1.3... -
Page 4: Introduction
RADION Life Safety Introduction This document describes the RADION Life Safety portfolio that includes Smoke, Heat, and CO detectors. The RADION Smoke and Heat detectors monitor the area for indications of fire. The RADION CO detectors monitor the area for dangerous amounts of Carbon Monoxide. -
Page 5: System Overview
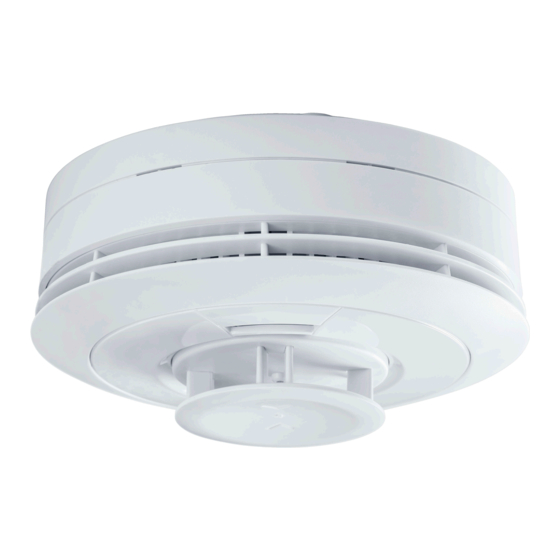
RADION Life Safety System overview | en System overview The detectors described in this manual are connected to a RADION wireless system with a control panel. These detectors have built-in sounders for alarm alerts and visual status LEDs. Each detector contains an RF module that transmits detector information to the supporting control panel for communication and monitoring. - Page 6 | System overview RADION Life Safety ALARM FAULT POWER Callout - Description 1 - LEDs 2 - Test/Silence button 3 - Sounder 4 - Mounting plate Heat detector RFHT-A This heat detector senses a rise in temperature caused by fire. Ideal installation locations for...
-
Page 7: Specifications
RADION Life Safety Specifications | en Specifications Smoke and heat detectors (RFSM2-A/RFHT-A) Power 2 - 3V CR123A Lithium Batteries (replaceable) Smoke sensitivity 1.95%-4% OBS/Ft Sensor types Photoelectric - (RFSM2-A only) Fixed temperature and rate-of-rise Operating temperature 4.4°C to 38°C (40°F to 100°F) Humidity range 0% to 93% R.H. -
Page 8: Limitations Of Smoke, Heat And Co Detectors
| Limitations of smoke, heat and CO detectors RADION Life Safety Limitations of smoke, heat and CO detectors Detectors are very reliable, but may not work under all conditions. No detector provides total protection of life or property. Detectors are not a substitute for life insurance. - Page 9 RADION Life Safety Limitations of smoke, heat and CO detectors | en – Use your neighbor’s phone or a street fire alarm box to call the fire department. Extinguishing the fire should be left to the professionals. Prevention actions –...
-
Page 10: Smoke And Heat Detector Installation
| Smoke and heat detector installation RADION Life Safety Smoke and heat detector installation Smoke and heat detector installation locations Install smoke detectors in the following areas: – bedrooms – living area(s) – all floors of a building, including basements –... -
Page 11: Single Story Building
RADION Life Safety Smoke and heat detector installation | en For minimum protection - Smoke Alarm on each story - in each sleeping area - every 6.4 m (21 ft) of hallways and rooms - within 3.0 m (10 ft) of all bedroom doors... -
Page 12: Wall Mounting
| Smoke and heat detector installation RADION Life Safety – Within 610 mm (24 in) of the peak (measured vertically) on sloping or peaked ceilings. <610 mm (24 in) Figure 5.3: Detector location for slope/peak ceilings Flat ceilings have a height less than 610 mm (24 in): <610mm (24 in) - Page 13 RADION Life Safety Smoke and heat detector installation | en 305 mm 305 mm (12 in) (12 in) Figure 5.5: Mounting location Use a 5.0 mm (13/64 inch) drill bit to drill holes through the center of the marked locations. Push the plastic screw anchors into the drilled holes.
-
Page 14: Tamper Proofing The Detector
| Smoke and heat detector installation RADION Life Safety Tamper proofing the detector Tamper proofing prevents unauthorized removal of the detector from the detector’s mounted location. Break off the pillar on the base of the detector. Figure 5.8: Break pillar from detector Use a small screwdriver to release the catch (push towards mounting surface), then twist off the detector to remove the detector from the mounting plate. -
Page 15: Co Detector Installation
RADION Life Safety CO detector installation | en CO detector installation CO detector Installation locations Consider the following locations when installing CO detectors: – rooms containing a fuel burning appliance – rooms where occupants spend a considerable amount of time –... -
Page 16: Locations To Avoid
| CO detector installation RADION Life Safety CO Alarm CO Alarm 3.4 ft (1 m) - 6.57 ft (2 m) Figure 6.2: Installation locations for CO detectors Locations to avoid Do not place CO detectors in the following locations: –... - Page 17 RADION Life Safety CO detector installation | en Push the plastic screw anchors into the drilled holes. Screw the mounting plate to the ceiling. Pull the battery tab to power the detector. Align the detector on the mounting plate and twist clockwise to attach. The red, amber, and green lights immediately flash in sequence.
-
Page 18: Enrollment
The workflow listed below is a generic representation of the programming/enablement process. Refer to the Points Menu Parameters section inside the Keypad Installer Menu chapter of the compatible Bosch control panel Installation and System Reference Guides, or Points - Point Assignments in RPS Help File for more information. -
Page 19: Enroll Point Rf Id For Wireless Points (Auto-Learn Mode)
RADION Life Safety Enrollment | en RFDW-SM-A information text information text 123456789 information text Mat/N: Bosch Security Systems Made in xxxx Figure 7.1: RFID sticker example Point indexes Point indexes determine how points operate/respond to circumstances within a system: Using either RPS, or a supported keypad, access the Program Menu, and select the Points menu. - Page 20 | Enrollment RADION Life Safety Notice! The Auto Learn mode option is not recommended as the preferred method of entering in the RF ID’s due to the potential of the RADION system picking up the first available RF ID it detects.
-
Page 21: Operation
RADION Life Safety Operation | en Operation Smoke and heat detectors Power the detector To power the detector: Remove the detector from the mounting plate. Pull the battery tab. The red LED, and then the yellow LED flash once. Attach the detector to the base. -
Page 22: Co Detector Alarm Response
| Operation RADION Life Safety Notice! Wait 15 seconds after connecting the power before testing. Weekly button test Press the test button. The green (power) LED flashes and the detector sounds. 8.2.1 CO detector alarm response The following table shows how the detector responds to CO detection. The ppm values shown in the table are for example only. - Page 23 RADION Life Safety Operation | en CO gas Red light responses 24 Hours On Demand (Button press) ppm > 70 ppm 1 flashes every 50 sec 1 flash ppm > 150 ppm 2 flashes every 50 sec 2 flashes ppm > 400 ppm...
-
Page 24: Test/Silence (Co Detector)
| Operation RADION Life Safety 12800 Death within 1-3 minutes. * ppm = parts per million ** OSHA Occupational Safety & Health Association The following symptoms may be related to CARBON MONOXIDE POISONING and should be discussed with ALL members of the household: –... - Page 25 RADION Life Safety Operation | en detector if replace by date has past Sensor Fault 2 flashes 2 sound Replace detector End of Life 3 flashes 3 sound Replace (EOL ) detector Bosch Security Systems, B.V. Installation manual 2020.06 | 03 | F.01U.361.555...
-
Page 26: Device Testing
| Device testing RADION Life Safety Device testing Manually testing smoke and heat detectors Test your detectors after installation as well as weekly to make sure the detectors are operating. – Press and hold the test button until the detector emits a sound and the red LED flashes. - Page 27 RADION Life Safety Device testing | en Notice! If you test with CO, the detector will send an alarm message to the panel and alert the monitoring central station, which may call the fire department. Bosch Security Systems, B.V. Installation manual...
-
Page 28: Maintenance
| Maintenance RADION Life Safety Maintenance 10.1 Replacing smoke and heat detector batteries Warning! Risk of fire or explosion Use only Panasonic CR123A batteries for replacement. Use of another battery may negatively impact detector operation, and may present a risk of fire or explosion. -
Page 29: Cleaning
RADION Life Safety Maintenance | en Figure 10.2: Battery location for CO detector Notice! Use only Duracell alkaline MN2400BK AAA size batteries. 10.3 Cleaning Smoke and heat detectors Clean your detectors regularly. When cleaning detectors: – Use a soft bristle brush or the brush attachment of a vacuum cleaner to remove dust and cobwebs from the slots. -
Page 30: Smoke Chamber Self-Test
| Maintenance RADION Life Safety 10.3.1 Smoke chamber self-test The smoke chamber in the smoke detector runs an automatic test every 16 seconds to monitor if the chamber is degraded. – Clean the detector when it emits a sound 2 times every 48 seconds and the yellow LEDs flash at the same time. -
Page 31: Troubleshooting
RADION Life Safety Troubleshooting | en Troubleshooting 11.1 Smoke and heat detectors Nuisance alarms The detector alarm sounds without any presence of smoke or fire. – Press the test button on the smoke detector to silence the detector for 10 minutes. -
Page 32: Co Detectors
| Troubleshooting RADION Life Safety Operation Description Corrective action Yellow LED is off. Built-in sounder emits an intermittent high pitch "beep." Low battery Red LED is off. Replace battery. Yellow LED flashes once every 48 seconds. Built-in sounder emits a high pitch "beep"... - Page 33 RADION Life Safety Troubleshooting | en – Press and hold the test button for at least 5 seconds. – Make sure the detector attachment to the mounting plate is correct. – Replace the batteries where applicable. – Replace the detector.
- Page 34 | Troubleshooting RADION Life Safety 2020.06 | 03 | F.01U.361.555 Installation manual Bosch Security Systems, B.V.
- Page 36 Bosch Security Systems B.V. Torenallee 49 5617 BA Eindhoven Netherlands www.boschsecurity.com © Bosch Security Systems B.V., 2020...