
Related Manuals for Miele KFN 16947 D ed/cs


Summary of Contents for Miele KFN 16947 D ed/cs
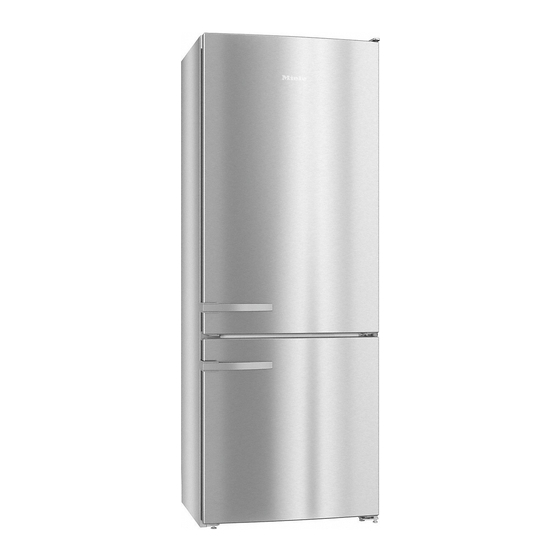
- Page 1 Operating and installation instructions Fridge-freezer To avoid the risk of accidents or damage to the appliance it is essential to read these instructions before it is installed and used for the first time. en-GB M.-Nr. 10 748 750...
-
Page 2: Table Of Contents
Contents Warning and Safety instructions................ 5 Caring for the environment ................ 13 How to save energy..................... 14 Guide to the appliance .................. 16 Control panel ......................16 Display LEDs and symbols in the display ............. 17 Accessories ...................... 19 Accessories supplied .................... 19 Optional accessories..................... - Page 3 Contents Selecting further settings ................... 31 Selecting further settings ..................31 Settings overview ..................... 31 Sabbath mode....................... 31 Changing the temperature unit (°C/°F) ..............32 Activating or deactivating the lock ................ 33 Storing food in the refrigerator section............. 35 Different storage zones ..................35 Food which is not suitable for storage in the refrigerator section ......
- Page 4 Contents Noises........................ 64 Service........................ 65 Contact in case of malfunction ................65 Warranty ........................ 65 Installation...................... 66 Electrical connection ..................... 66 Installation ......................67 Side-by-side installation................... 67 Location......................67 Ventilation ......................68 Door opening angle limiter ................69 Fitting wall spacers supplied................69 Installation ......................
-
Page 5: Warning And Safety Instructions
Miele cannot be held liable for injury or damage caused by non- compliance with these instructions. Keep these instructions in a safe place and pass them on to any future owner. - Page 6 The appliance is not suitable for use in areas where there is a risk of explosion. Miele cannot be held liable for damage resulting from improper or in- correct use of the appliance. ...
- Page 7 In the event of any damage: – avoid naked flames or anything which creates a spark, – disconnect the appliance from the mains electricity supply, – ventilate the room where the appliance is located for several minutes, and – contact the Miele Service Department.
- Page 8 If the electrical connection cable is faulty it must only be replaced by a Miele authorised service technician to protect the user from danger. Do not connect the appliance to the mains electrical supply by a multi-socket adapter or extension lead.
- Page 9 Miele authorised service technician. Otherwise the warranty is invalidated. Miele can only guarantee the safety of the appliance when genu- ine original Miele replacement parts are used. Faulty components must only be replaced by Miele spare parts.
- Page 10 Only use genuine original Miele accessories and spare parts with this appliance. Using accessories or spare parts from other manu- facturers will invalidate the warranty, and Miele cannot accept liabil- ity.
- Page 11 Warning and Safety instructions The surface is susceptible to scratching. Even magnets can cause scratching. Cleaning and care Do not use any oils or grease on the door seals, as these will cause the seals to deteriorate and become porous with time. ...
- Page 12 Warning and Safety instructions Disposal of your old appliance If your old refrigeration appliance has a door lock, destroy it. This will prevent the risk of children playing accidentally locking them- selves in and endangering their lives. Splashes of coolant can damage the eyes. Be careful not to dam- age any part of the pipework whilst awaiting disposal, e.g.
-
Page 13: Caring For The Environment
/ recycling centre for electrical and electronic ap- pliances, or contact your dealer or Miele for advice. You are also respons- ible (by law, depending on country) for deleting any personal data that may be stored on the appliance being disposed... -
Page 14: How To Save Energy
How to save energy Normal energy consump- Increased energy con- tion sumption Installation / In a ventilated room. In an enclosed, unventilated Maintenance room. Protected from direct sun- In direct sunlight. light. Not near to a heat source Near to a heat source (radi- (radiator, oven). - Page 15 How to save energy Normal energy consump- Increased energy con- tion sumption Drawers and shelves ar- ranged as they were when the appliance was delivered. Only open the door when Frequent opening of doors necessary and for as short a for long periods will cause a time as possible.
-
Page 16: Guide To The Appliance
Guide to the appliance Control panel f Display LEDs (see “Display LEDs” ta- Sensor controls for refrigerator sec- tion ble for explanation) a For switching Holiday mode on/off g Display with temperature and sym- bols (symbols only visible during use; b For switching the SuperCool function see “Symbols in the display”... -
Page 17: Display Leds And Symbols In The Display
Guide to the appliance Display LEDs and symbols in the display Display LED Meaning SuperCool symbol (on The function can be selected depending on the left)/SuperFreeze the section (see “Using SuperCool and Su- symbol (on the right) perFreeze”). Power failure Flashes during a power cut ... - Page 18 Guide to the appliance a Control panel with display b Fan c Pull-out shelf d Interior lighting e Egg tray/door shelf f Holder with active charcoal filter (Active AirClean) g Interior lighting h Bottle shelf with bottle holder i Slide regulator for setting the mois- ture level j PerfectFresh zone compartments k Condensate channel and...
-
Page 19: Accessories
Accessories KKF-FF Active AirClean charcoal fil- Accessories supplied ters with holder Egg tray Butter dish The charcoal filters neutralise unpleas- ant odours in the refrigerator section for improved air quality. Ice cube tray Bottle holder Cool pack The cool pack prevents the temperature in the freezer section from rising too Attach the bottle holder to the rear edge quickly in the event of a power cut. -
Page 20: Optional Accessories
Accessories Optional accessories A range of useful Miele accessories and care products are available for your ap- pliance. Multi-purpose microfibre cloth The microfibre cloth is suitable for re- moving fingerprints and light soiling from surfaces such as stainless steel, glass, plastic and chrome without the use of chemicals. -
Page 21: Before Using For The First Time
Before using for the first time Before using for the first time Packaging material Remove all packaging material from the inside of the appliance. Protective foil The stainless steel trim to the interior shelves and the door shelves has a layer of protective foil to prevent dam- age during transportation. -
Page 22: Switching On And Off
Switching on and off The temperature display for the refriger- Operating the appliance ator section indicates the temperature A light touch of the finger on the in the refrigerator section. sensors is all that is required to operate – If the temperature in the freezer sec- this appliance. -
Page 23: Switching Off For Longer Periods Of Time
Switching on and off Switching off the refrigerator section/ Switching the refrigerator section/ PerfectFresh zone separately PerfectFresh zone on separately (if previously switched off) The refrigerator section/PerfectFresh Touch the left-hand On/Off control zone can be switched off without hav- ing to switch off the freezer section. -
Page 24: The Correct Temperature
The correct temperature It is very important to set the correct ... in the refrigerator section temperature for storing food in the ap- and in the PerfectFresh zone pliance. Bacteria will cause food which We recommend a temperature of 4 °C is not stored at the correct temperature in the refrigerator section. -
Page 25: Temperature Display
The correct temperature Temperature range Temperature display – The temperature in the refrigerator In normal operation the upper temper- section can be adjusted from 3 °C to ature display shows the average, cur- 7 °C. rent temperature in the refrigerator section and the lower temperature –... -
Page 26: Using Super Cool And Super Freeze
Using Super cool and Super freeze The following functions can be selec- Super freeze function ted, depending on section. For optimum results switch on the Su- – Refrigerator section per freeze function before putting fresh Super cool food into the freezer section. This helps food to freeze quickly and retain its nu- –... -
Page 27: Switching A Function On Or Off
Using Super cool and Super freeze Switching a function on or off Touch the sensor for the function you want. – The display LED next to the corres- ponding symbol will light up and the function will be switched on. –... -
Page 28: Using Holiday Mode
Using Holiday mode This function is useful when you go on Switching Holiday mode on / off holiday if you do not wish to switch the If Holiday mode cannot be switched refrigerator section off completely and on, the refrigerator section has been do not need a high degree of cooling. -
Page 29: Temperature And Door Alarm
Temperature and door alarm The appliance has a warning system Health risk caused by decom- which ensures that the temperature in posing food. the freezer cannot rise unnoticed and to If the temperature in the freezer sec- avoid energy being wasted if a door is tion remains above -18 °C for a long left open. -
Page 30: Door Alarm
Temperature and door alarm Door alarm The appliance is fitted with a warning system to avoid increased energy con- sumption and food becoming warm if the door is left open. An alarm will sound if the appliance door has been left open for longer than 60 seconds. -
Page 31: Selecting Further Settings
Selecting further settings Settings overview Selecting further settings In Settings mode, certain settings can Switching Sabbath mode on/off be adjusted and functions selected, al- No settings option available lowing you to adjust the refrigeration appliance to suit your requirements. ... -
Page 32: Changing The Temperature Unit (°C/°F)
Selecting further settings When Sabbath mode is active, will Health risk caused by decom- flash in the display. posing food. Switch off Sabbath mode after the As any mains outage during Sabbath Sabbath has passed. mode is not indicated, the frozen goods may thaw or defrost. -
Page 33: Activating Or Deactivating The Lock
Selecting further settings The desired temperature unit will be set. Adjusting the PerfectFresh zone temperature Activating or deactivating the In the PerfectFresh zone, the temperat- lock ure is automatically maintained between The safety lock function can be activ- 0 and 3 °C. However, if you would like it ated to prevent the refrigeration appli- to be warmer or colder, e.g. - Page 34 Selecting further settings MENU lights up in the display and flashes. Touch the On/Off control to exit Settings mode. The temperature in the PerfectFresh zone is now set to the new level.
-
Page 35: Storing Food In The Refrigerator Section
Storing food in the refrigerator section Tip: Do not store food in such a way Risk of explosion due to flam- that it touches the rear wall of the refri- mable mixes of gases. gerator section as it may freeze to the Electrical components can cause rear wall. -
Page 36: Food Which Is Not Suitable For Storage In The Refrigerator Section
Storing food in the refrigerator section – Other fresh food with a label stating it Notes on buying food should be kept at a temperature of The freshness of food when first placed approx. 4 °C in the appliance is an important factor in determining how long it stays fresh, Food which is not suitable for and how long it can be kept in the ap-... -
Page 37: Storing Food In The Perfectfresh Zone
Storing food in the PerfectFresh zone The PerfectFresh zone provides ideal The PerfectFresh zone is divided into storage conditions for fruit, vegetables, two areas: fish, meat and dairy products. Food The PerfectFresh zone compartments stays fresh considerably longer while have a regulator which is used to adjust retaining both flavour and vitamins. -
Page 38: Dry Compartment
Storing food in the PerfectFresh zone Dry compartment Humidity-controlled compart- ment The dry compartment is ideal for storing foods which perish easily, such as The humidity level in the humidity-con- trolled compartment greatly depends – fish and seafood; on the type and quantity of food being –... - Page 39 Storing food in the PerfectFresh zone An increased humidity level in the The following tips may help if you find that food you have stored does humidity-controlled compartment is not keep well (for example, the food achieved by the moisture present in wilts or becomes withered after only the food being stored, i.e.
-
Page 40: Adjusting The Interior Fittings (Refrigerator Section)
Adjusting the interior fittings (refrigerator section) Moving the shelves Removing the PerfectFresh zone drawers Stoppers prevent the shelves from be- The drawers in the PerfectFresh zone ing dislodged by mistake. are on telescopic runners, and can be removed for filling, emptying or cleaning purposes: Remove the bottle shelf from the ap- pliance door to make it easier to take... -
Page 41: Adjusting The Door Shelf/Bottle Shelf
Adjusting the interior fittings (refrigerator section) Risk of damage as a result of in- correct cleaning. The telescopic runners contain a special lubricant which can be washed out during cleaning, dam- aging the runners. Wipe the telescopic runners with a damp cloth to clean them. -
Page 42: Moving The Charcoal Filters
Adjusting the interior fittings (refrigerator section) Moving the charcoal filters When storing very strong smelling food (e.g. very ripe cheese): – Place the holder with the charcoal fil- ters on the shelf where this food is kept. – Change the filters sooner if neces- sary. -
Page 43: Freezing And Storing Food
Freezing and storing food Maximum freezing capacity Storing frozen food To ensure that fresh food placed in the When buying frozen food to store in freezer freezes through to the core as your freezer, check quickly as possible, the maximum –... -
Page 44: Home Freezing
Freezing and storing food – Placing hot foods or drinks in the Home freezing freezer causes food that is already Only freeze fresh food which is in a frozen to partially thaw and increases good condition. energy consumption. Allow hot foods and drinks to cool down before pla- Hints on home freezing cing them in the freezer. - Page 45 Freezing and storing food Before placing food in the freezer – Freezing the maximum amount of food (see data plate) When freezing more than 2 kg of fresh food, switch on the SuperFreeze If the ventilation slots are blocked the function for some time before placing cooling performance will decrease the food in the freezer (see “Using and energy consumption will in-...
-
Page 46: Storage Time For Frozen Food
Freezing and storing food Storage time for frozen food Defrosting frozen goods The storage life of food is very variable, Never re-freeze partially or fully de- even at a constant temperature of frosted food. Defrosted food may only -18 °C. Decomposition processes also be re-frozen after it has been cooked. -
Page 47: Adjusting The Interior Fittings
Freezing and storing food Cooling drinks quickly Using accessories To cool drinks quickly, place them in the Using the cool pack refrigerator section and switch on the The cool pack prevents the temperature Super cool function. in the freezer zone from rising too When cooling drinks quickly in the quickly in the event of a power cut. - Page 48 Freezing and storing food Making ice cubes Fill the ice cube tray three quarters full with water and place it on the bot- tom of one of the freezer drawers. Once frozen, use a blunt instrument, for example a spoon handle, to re- move the ice tray from the freezer if it is stuck.
-
Page 49: Defrosting
Defrosting Refrigerator section and Freezer section PerfectFresh zone The appliance is equipped with a “NoFrost” system. The freezer defrosts The refrigerator section and the automatically. PerfectFresh zone defrost automatically. The moisture generated in the appli- Condensate and ice can build up on the ance collects on the condenser and is back wall of the refrigerator section and automatically defrosted and dissipated... -
Page 50: Cleaning And Care
Cleaning and care Cleaning agents Do not let water get into the elec- tronic module or the lighting. Cleaning and conditioning agents used inside the appliance must be Risk of damage due to moisture food safe. ingress. The steam from a steam cleaner can To avoid damaging all the surfaces of damage plastic and and electrical your appliance, do not use:... -
Page 51: Preparing The Appliance For Cleaning
Cleaning and care Dismantling an adjustable shelf Preparing the appliance for cleaning Before cleaning the shelf remove the plastic trim and protective strip at the Switch the appliance off. back of the shelf. To do this: appears in the display and cooling is ... -
Page 52: Cleaning The Interior And Accessories
Cleaning and care Cleaning the interior and ac- Risk of damage as a result of ex- cessories cessively high dishwasher temperat- ures. The appliance should be cleaned Parts of the refrigeration appliance regularly (at least once a month). may become unusable, e.g. deform, if they are washed in the dishwasher Remove soiling immediately to pre- at more than 55 °C. -
Page 53: Cleaning The Front Of The Appliance And The Side Panels
Cleaning and care Appliance front Risk of damage as a result of in- correct cleaning. Risk of damage as a result of in- The telescopic runners contain a correct cleaning. special lubricant which can be The front finish (CleanSteel) will be washed out during cleaning, dam- damaged. -
Page 54: Cleaning The Door Seal
Cleaning and care Cleaning the door seal After cleaning Replace all shelves and accessories If the door seal is damaged or has in the appliance. slipped out of its groove, the door will not close properly and cooling Reconnect to the mains and switch performance will be reduced. -
Page 55: Replacing The Charcoal Filters
Replacing the charcoal filters Replace the charcoal filters in the holder every 6 months. Replacement KKF-RF charcoal filters can be obtained from Miele, from your dealer or from Miele's website. Tip: The charcoal filter holder is dish- Remove both charcoal filters and washer-proof. -
Page 56: Problem Solving Guide
Check whether the mains fuse has tripped. There could be a fault with the appliance, the household electrical wiring or another electrical appliance. Contact a qualified electrician or Miele. The compressor runs This is not a fault. To save energy, the compressor continuously. - Page 57 Problem solving guide Problem Cause and remedy The appliance doors have been opened too fre- quently, or a large amount of fresh food has been placed inside and/or frozen at the same time. Only open the appliance doors when necessary and for as short a time as possible.
- Page 58 Change the door seal. A replacement is available placed. from Miele or from specialist retailers. Ice or condensation has The door seal has come out of its groove. built up inside the appli- ...
- Page 59 Problem solving guide Display warnings Message Cause and remedy DEMO is shown in the Demo mode is switched on. This allows the refrigera- display. The refrigera- tion appliance to be presented in the showroom tion appliance does not without the cooling system being switched on. Do not get cold, although the activate this setting for domestic use.
- Page 60 Problem solving guide Message Cause and remedy The LED lights up in The temperature alarm has been activated (see the display and a buzzer “Temperature and door alarm”). The temperature in is also sounding. the freezer section has risen higher or fallen lower than the temperature set.
- Page 61 Problem solving guide Message Cause and remedy The LED lights up in Indication of an interruption to the power supply: the display and a buzzer the temperature in the appliance over the last few is also sounding. The days or hours has risen too high because of a power temperature display for cut or interruption to the power supply.
- Page 62 Problem solving guide The interior lighting is not working. Problem Cause and remedy The interior lighting is The refrigeration appliance has not been switched on. not working. Switch the refrigeration appliance on. Sabbath mode is switched on: the temperature dis- play is dark and is shown in the display.
- Page 63 Problem solving guide Other problems Problem Cause and remedy Food has frozen to- The food packaging was not dry when placed in the gether. freezer. Use a blunt instrument, e.g. a spoon handle or plastic scraper, to prise it apart carefully. The external walls of This is not a fault.
-
Page 64: Noises
Noises Normal What causes them noises Brrrrr ... A humming noise is made by the motor (compressor). This noise can get louder for brief periods when the motor switches on. Blubb, A gurgling noise can be heard when coolant is circulating blubb ... -
Page 65: Service
Please quote the model and serial num- ber of your appliance when contacting Miele. This information can be found on the data plate. The data plate can be found inside the appliance. -
Page 66: Installation
Installation Do not connect the appliance to the Electrical connection mains electricity supply by an extension The appliance is supplied with a mains lead. Extension leads do not guarantee cable and moulded plug ready for con- the required safety of the appliance nection to an AC single-phase 220–... -
Page 67: Installation
Installation Location Installation This appliance should be installed in a Fire risk and danger of damage dry, well-ventilated room. from appliances which give off heat. When deciding where to install your re- Appliances which give off heat can frigeration appliance please bear in catch fire and set fire to the refrigera- mind that it will use more energy if in- tion appliance. -
Page 68: Ventilation
Installation Ventilation Risk of damage due to condens- ation on external appliance panels. Risk of fire and damage due to In environments with high humidity, insufficient ventilation. condensation can build up on ex- If the refrigeration appliance is not ternal appliance panels, which can ventilated sufficiently, the com- cause corrosion. -
Page 69: Door Opening Angle Limiter
The door opening angle limiter is avail- Move the appliance carefully on able from Miele or your Miele dealer. floors that are sensitive to scratching to prevent damage. Fitting wall spacers supplied For easier installation there are trans-... -
Page 70: Installing The Refrigeration Appliance In A Run Of Kitchen Units
Installation Aligning the appliance Levelling the appliance door SW19/10 To align the appliance, adjust the front feet using the spanner supplied. Ensure that you unscrew the ad- justable foot from the lower hinge plate with the enclosed spanner until it sits on the floor. - Page 71 Installation When installed next to a wall , a dis- tance of at least 55 mm must be main- tained on the hinge side between the wall and the refrigeration appli- ance . The larger the ventilation gap, the more economically the compressor will work.
-
Page 72: Appliance Dimensions
Installation Appliance dimensions * Dimensions without wall spacers. Appliance depth is increased by 35 mm with the wall spacers supplied fitted. - Page 73 Installation * Dimensions without wall spacers. Appliance depth is increased by 35 mm with the wall spacers supplied fitted. [mm] [mm] [mm] KFN 16947 D ed/cs 2000 2012 2020...
-
Page 74: Changing The Door Hinging
Installation Removing the door handles Changing the door hinging The refrigeration appliance is supplied with hinges on the right. If left-hand hinging is required, the hinges must be changed. Danger of injury and damage when changing the door hinging. There is an increased danger of in- jury and damage if the refrigeration appliance is installed by a single per-... - Page 75 Installation Removing the upper soft-close mechanism Open the upper appliance door. Push the panel toward the refriger- ation appliance and leave it hanging there between the door and appli- ance to start with. Loosen the panel from the soft- ...
- Page 76 Installation Push the pin up and out from be- Push the soft-close mechanism low using a flat-head screwdriver. bracket as far as it will go toward the handle side. Remove the cover . Loosen the screw in the soft-close Now the soft-close mechanism and the mechanism and spacer.
- Page 77 Installation Removing the upper appliance door Danger of injury when removing the upper appliance door. As soon as the hinge pin is located in the upper appliance door rather than in the middle hinge plate, the lower door is not secured and could fall off. Ensure that the hinge pin remains located in the middle hinge plate and in the lower appliance door.
- Page 78 Installation Removing the lower soft-close mech- anism Open the lower appliance door. Push the panel toward the refriger- ation appliance and leave it hanging there between the door and appli- ance to start with. Loosen the panel from the soft- ...
- Page 79 Installation Tip the refrigeration appliance back slightly with the help of another per- son if required. Push the soft-close mechanism bracket as far as it will go toward the handle side. Push the pin up and out from be- ...
- Page 80 Installation Removing the lower appliance door Close the lower appliance door. Danger of injury when removing the lower appliance door. As soon as the hinge pin is removed from the lower appliance door in the following instructions, the appliance door is no longer secured.
- Page 81 Installation Important. Screw the adjustable Refitting the lower appliance door foot into the hinge pin as far as it will go. Reinsert the hinge pin complete with washer and adjustable foot . Important. The lug on the hinge pin must point to the back again.
- Page 82 Installation Inserting the lower soft-close mech- anism Use screw to secure the spacer and soft-close mechanism in place. Remove cover from panel , turn it 180°, and reinsert it on the other side. Attach panel onto soft-close mechanism bracket . ...
- Page 83 Installation Refitting the upper door Fit the upper door onto hinge pin in the middle of the appliance. Close the upper door. Replace panel onto the soft-close mechanism from above, clicking it back into place first at the bottom and then at the top.
- Page 84 Installation Inserting the upper soft-close mech- anism Use screw to secure the spacer and soft-close mechanism in place. Remove cover from panel , turn it 180°, and reinsert it on the other side. Attach panel onto soft-close mechanism bracket . ...
- Page 85 Installation Refitting the handle Risk of damage as a result of in- correct assembly. The door seal can be damaged if the handle is fitted incorrectly. Please make sure you follow the in- structions below carefully when you refit the handle. ...
-
Page 86: Aligning The Appliance Doors
Installation Align the upper door using the long Aligning the appliance doors outer slots in the middle hinge plate: The appliance doors can be aligned with the appliance housing after they have been fitted. In the following illustration the door is not shown in the closed position to make it easier to see what you have to To align the lower door use the long... - Page 87 Tel: +65 6735 1191 Fax. +971 4 3418 852 Fax: 011-46 900 001 Fax: +65 6735 1161 800-MIELE (64353) E-mail: customercare@miele.in E-Mail: info@miele.com.sg E-Mail: info@miele.ae Internet: www.miele.in Internet: www.miele.sg Website: www.miele.ae Manufacturer: Miele & Cie. KG, Carl-Miele-Straße 29, 33332 Gütersloh, Germany...
- Page 88 KFN 16947 D ed/cs en-GB M.-Nr. 10 748 750 / 02...