Philips SmartPro Active Manual
Hide thumbs
Also See for SmartPro Active:
- User manual (190 pages) ,
- Manual (73 pages) ,
- Manual (73 pages)
Table of Contents
Advertisement
Available languages
Available languages
Quick Links
Advertisement
Table of Contents

Related Manuals for Philips SmartPro Active


Summary of Contents for Philips SmartPro Active
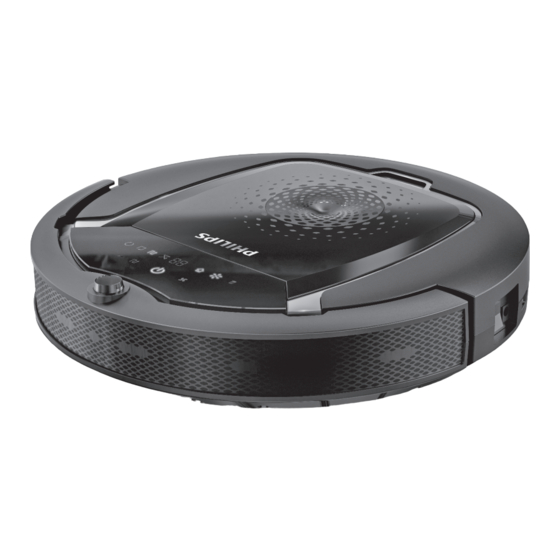
- Page 1 FC8822, FC8812...
- Page 3 FC8822 Wheels stuck Top cover or dust container not placed properly Bumper stuck Robot lifted up from oor Colour of oor too dark Battery not inserted properly / Charging error (switch is o )
- Page 5 English 6 Bahasa Melayu 29 ภาษาไทย 繁體中文 한국의...
-
Page 6: General Description
English Introduction Congratulations on your purchase and welcome to Philips! To fully benefit from the support that Philips offers, register your product at www.philips.com/welcome. General description Handle of dust container lid 2 Dust container lid 3 Filter 4 Dust container... -
Page 7: How Your Robot Works
English Remote control Navigation buttons and start/stop 2 Cleaning time buttons 3 Cleaning mode buttons 4 Fan speed buttons 5 Docking button Control panel of docking station Display with time, day and programming indications 2 Adjusting and setting buttons How your robot works What your robot cleans This robot is equipped with features that make it a suitable cleaner to help you clean the floors in your home. - Page 8 English - The two side brushes help the robot clean in corners and along walls. They also help to remove dirt from the floor and move it towards the suction opening. - The suction power of the robot picks up loose dirt and transports it through the suction opening into the dust container.
-
Page 9: How Your Robot Avoids Height Differences
English 4 Spiral pattern In its auto cleaning mode, the robot uses these patterns in a fixed sequence:z-pattern, random pattern, wall-following pattern, and spiral pattern. When the robot has completed this sequence of patterns, it starts moving in Z-pattern again. The robot continues to use this sequence of patterns to clean the room until the rechargeable battery runs low, or until it is switched off manually. -
Page 10: Removing The Tag From The Remote Control
English 2 Push the side brushes onto the shafts on the bottom of the robot. Note: Make sure you attach the side brushes properly. Press them onto the shaft until you hear them lock into position with a click. Removing the tag from the remote control The remote control works on a CR2025 coin-shaped battery. -
Page 11: Charging On The Docking Station
English Charging When charging for the first time and when the rechargeable battery of the robot is empty, the charging time is four hours. Your robot can be charged in two ways: - On the docking station, either manually or automatically during use; - By connecting the robot directly to the mains. -
Page 12: Preparing The Room For A Cleaning Run
English Charging automatically during use 1 When the robot has finished cleaning or when only 15% of the battery power remains, it automatically searches for the docking station to recharge. When the robot searches for the docking station, the light in the start/stop button turns orange. -
Page 13: Cleaning Mode Selection
English 4 The robot cleans in the auto-cleaning mode until its battery runs low. In the auto-cleaning mode, it follows repeated sequences of Z-pattern, random, wall-following and spiral patterns. Note: To select an individual mode, press one of the mode buttons on the remote control. -
Page 14: Manual Driving
English Random mode In this mode, the robot cleans the room in a mixed pattern of straight and crisscross movements. Wall-following mode In this mode, the robot follows the walls of the room to give the area alongside the walls an extra clean. Spiral mode In this mode, the robot moves in a spiral pattern to clean a small area. -
Page 15: Using The Cleaning Time Buttons
English Using the cleaning time buttons - By default, the robot cleans in auto cleaning mode until its rechargeable battery runs low. The robot will then automatically return to its docking station. If you selected one of the other cleaning times (see below), you can switch back to the default mode by pressing the maximum cleaning time button on the remote control. - Page 16 English Note: For the pictures that belong to the steps below, see the pages at the back of this manual. The programming options available are: Program Indications on display Cleaning every day All day indications are on Cleaning on weekdays Mo to Fri indications are on Cleaning on 2 consecutive days Indications of 2 days are on, e.g.
-
Page 17: Using The Dry Wipe Attachment
English Using the dry wipe attachment The dry wipe attachment is a feature that allows you to clean hard floors with dry wipes. Note: If you use the dry wipe attachment, the robot may have trouble crossing thresholds or climbing onto rugs. Preparing the dry wipe attachment for use 1 Turn the robot upside down and place it on the floor or on a table. -
Page 18: Using The Invisible Wall (Fc8822)
English 3 Push one end of the dry wipe attachment towards the wheel on the other side of the robot to release it. Then pull the attachment off the robot. Using the invisible wall (FC8822) Placing the batteries in the invisible wall The invisible wall operates on four AA batteries. -
Page 19: Cleaning And Maintenance
English 1 Place the unit at a point you do not want the robot to cross, e.g at an open door to a room that is off-limits to the robot. 2 Switch on the invisible wall with the on/off slide on top of the unit. 3 Start the robot. - Page 20 English 3 Use a brush with soft bristles (e.g. a toothbrush) to remove dust or fluff from the front wheel and side wheels. 4 To clean the side brushes, grab them by the bristles and pull them off their shafts. 5 Remove fluff, hairs and threads from the shaft and from the side brush with a soft brush (e.g.
-
Page 21: Emptying And Cleaning The Dust Container
English 9 Remove all visible dirt from the TriActive nozzle. 10 Insert the snap hooks of the TriActive nozzle into the holes in the bottom of the robot. Push the TriActive nozzle back into position. Check if the nozzle can move a few millimeters up and down freely. 11 Push the side brushes onto the shafts on the bottom of the robot again. - Page 22 English 3 Pull up the handle of the dust container lid and lift the dust container out of the dust container compartment. Note: When you remove or reinsert the dust container, take care not to damage the blades of the motor fan. 4 Carefully lift the lid off the dust container (1) and take out the filter (2).
-
Page 23: Ordering Accessories
English Ordering accessories To buy accessories or spare parts, visit www.shop.philips.com/service or go to your Philips dealer. You can also contact the Philips Consumer Care Center in your country (see the international warranty leaflet for contact details). Replacement Replacing the filter Replace the filter if it is very dirty or damaged. -
Page 24: Replacing The Battery Of The Remote Control
Take the robot to an authorized Philips service center to have the battery replaced when you can no longer recharge it or when it runs out of power quickly. You can find the contact details of the Philips Consumer Care Center in your country in the international warranty leaflet. -
Page 25: Removing The Rechargeable Battery
To remove the rechargeable battery, follow the instructions below. You can also take the robot to a Philips service center to have the rechargeable battery removed. Contact the Philips Consumer Care Center in your country for the address of a service center near you. - Page 26 English Troubleshooting Problem Possible cause Solution The robot does not start The rechargeable battery is Charge the rechargeable battery (see cleaning when I press the empty. chapter 'Preparing for use'). start/stop button. The small plug is still inserted The robot does not work on mains power. in the socket on the robot.
- Page 27 If the problem continues to occur on sensors.This causes the robot lighter colored floors, please go to to move in an unusual www.philips.com/support or contact the pattern. Consumer Care Center in your country. The robot is cleaning a floor...
-
Page 28: Error Codes
English Problem Possible cause Solution The robot is moving in The robot is in spot-cleaning This is normal behavior. The spiral mode circles. mode. can be activated when a lot of dirt is detected on the floor for a thorough clean. It is also part of the auto cleaning mode. -
Page 29: Perihalan Umum
Bahasa Melayu Pengenalan Tahniah atas pembelian anda dan selamat menggunakan Philips! Untuk memanfaatkan sepenuhnya sokongan yang ditawarkan oleh Philips, daftar produk anda di www.philips.com/welcome. Perihalan umum Pemegang penutup bekas habuk 2 Tudung bekas habuk 3 Penuras 4 Bekas habuk 5 Penutup atas... -
Page 30: Bagaimana Robot Anda Berfungsi
Bahasa Melayu Unit kawalan jauh Butang navigasi dan mula/henti 2 Butang masa pembersihan 3 Butang mod pembersihan 4 Butang kelajuan kipas 5 Butang dok Panel kawalan stesen dok Paparan penunjuk masa, hari dan pemprograman 2 Melaraskan dan menetapkan butang Bagaimana robot anda berfungsi Apa yang dibersihkan oleh robot anda Robot ini dilengkapi dengan ciri-ciri yang membuatnya pembersih yang sesuai untuk membantu anda membersihkan lantai di rumah anda. - Page 31 Bahasa Melayu - Dua berus tepi membantu robot membersihkan sudut dan sepanjang dinding. Berus itu juga membantu untuk mengeluarkan habuk daripada lantai dan menggerakkannya ke arah bukaan sedutan. - Kuasa sedutan robot mengutip habuk yang bertebaran dan mengangkutnya melalui bukaan sedutan ke dalam bekas habuk. - Robot disertakan dengan pemegang lap kering yang membolehkan anda membersihkan lantai keras anda dengan lebih bersih menggunakan lap kering.
-
Page 32: Bagaimana Robot Anda Mengelak Perbezaan Ketinggian
Bahasa Melayu 4 Corak pilin Dalam mod auto-pembersihan, robot menggunakan corak-corak ini dalam urutan tetap: corak z, corak rambang, corak mengikut dinding dan corak pilin. Apabila robot telah melengkapkan urutan corak ini, ia mula bergerak dalam corak Z semula. Robot terus menggunakan urutan corak ini untuk membersihkan bilik sehingga bateri boleh cas semula kurang kuasa atau sehingga ia dimatikan secara manual. -
Page 33: Membuat Persediaan Untuk Guna
Bahasa Melayu 2 Tolak berus tepi ke aci di bawah robot. Catatan: Pastikan anda menyambungkan berus tepi dengan sempurna. Tekannya ke aci sehingga anda mendengarnya terkancing ke kedudukannya dengan bunyi klik. Keluarkan tag daripada unit kawalan jauh Unit kawalan jauh berfungsi menggunakan bateri CR2025 berbentuk syiling. Bateri ini dilindungi dengan tag perlindungan yang perlu dikeluarkan sebelum guna. - Page 34 Bahasa Melayu Pengecasan Apabila mengecas untuk kali pertama dan apabila bateri boleh cas semula robot sudah kosong, masa pengecasan ialah empat jam. Robot anda boleh dicas dengan dua cara: - Di stesen dok, secara manual atau automatik semasa guna; - Dengan menyambungkan robot secara langsung ke sesalur. Catatan: Apabila bateri boleh cas semula telah dicas sepenuhnya, robot anda boleh membersihkan kawasan selama 120 minit Pengecasan di stesen dok...
-
Page 35: Menyediakan Bilik Untuk Aktiviti Pembersihan
Bahasa Melayu Mengecas secara automatik semasa guna 1 Apabila robot telah selesai membersihkan kawasan atau apabila hanya ada baki 15% kuasa bateri, robot itu akan secara automatik mencari stesen dok untuk mengecas semula. Apabila robot mencari stesen dok, lampu dalam butang mula/henti bertukar menjadi jingga. 2 Apabila bateri boleh cas semula telah dicas sepenuhnya, butang mula/henti menyala secara berterusan. -
Page 36: Pemilihan Mod Pembersihan
Bahasa Melayu 4 Robot membersihkan kawasan dalam mod auto-pembersihan sehingga baterinya kurang kuasa. Dalam mod auto-pembersihan, robot mengikuti urutan berulang corak Z, secara rambang, mengikuti dinding dan corak pilin. Catatan: Untuk memilih mod individu, tekan salah satu daripada butang mod pada unit kawalan jauh. Lihat bahagian 'Pemilihan mod pembersihan' untuk butiran lanjut. -
Page 37: Pemanduan Manual
Bahasa Melayu Mod rambang Dalam mod ini, robot membersihkan bilik dalam corak campuran pergerakan lurus dan silang-menyilang. Mod mengikut dinding Dalam mod ini, robot mengikuti dinding bilik untuk memberi kawasan sepanjang dinding pembersihan tambahan. Mod pilin Dalam mod ini, robot bergerak dalam corak pilin untuk membersihkan kawasan yang kecil. -
Page 38: Mengendalikan Stesen Dok
Bahasa Melayu Menggunakan butang masa pembersihan - Secara lalai, robot membersihkan kawasan dalam mod auto- pembersihan sehingga bateri cas semula kurang kuasa. Robot kemudian akan kembali ke stesen dok secara automatik. Jika anda memilih salah satu masa pembersihan lain (lihat di bawah), anda boleh bertukar kembali kepada mod lalai dengan menekan butang pembersihan maksimum pada unit kawalan jauh. - Page 39 Bahasa Melayu Memprogramkan masa pembersihan Jika anda telah menetapkan masa dan hari dalam minggu pada paparan stesen dok, anda boleh memprogramkan masa pembersihan untuk robot anda. Catatan: Untuk gambar yang tergolong dalam langkah di bawah, lihat halaman di belakang manual ini. Pilihan pemprograman yang tersedia adalah: Program Penunjuk pada paparan...
-
Page 40: Respons Tepuk Tangan
Bahasa Melayu Tekan butang ini untuk mematikan kipas 2 Tekan butang ini untuk menghidupkan kipas pada kelajuan biasa. 3 Butang kipas turbo meningkatkan kelajuan kipas. Respons tepuk tangan Respons tepuk tangan didayakan apabila robot memasuki mod tidur dalam situasi-situasi yang berikut: - apabila ia berhenti membersihkan kawasan kerana terdapat ralat - apabila anda telah memprogramkan masa pembersihan yang singkat - apabila robot itu tidak dapat mencari stesen doknya dalam masa 20... - Page 41 Bahasa Melayu 4 Masukkan pendakap pemasangan pada alat ambah lap kering ke dalam bukaan di belakang roda di satu sisi robot dan tekan sehingga ketat dengan bunyi klik. Kemudian ulang tindakan ini di satu sisi lain. 5 Pusing robot dan letakkan pada lantai atas rodanya dengan alat ambah lap kering menyentuh lantai.
-
Page 42: Pembersihan Dan Penyelenggaraan
Bahasa Melayu 3 Luncurkan penutup belakang ke dalam dinding tidak kelihatan. Menempatkan dinding tidak kelihatan untuk menghentikan robot Anda boleh menggunakan dinding tidak kelihatan untuk mengelakkan robot memasuki bilik atau kawasan yang anda mahu elakkan. 1 Letakkan unit di tempat yang anda tidak mahu robot melintas, cth. di pintu terbuka ke bilik yang tidak boleh dimasuki oleh robot. - Page 43 Bahasa Melayu 2 Gunakan berus yang mempunyai bulu kejur yang lembut (cth. berus gigi) untuk membuang habuk atau bulu halus daripada sensor jatuh. Catatan: Penting untuk anda bersihkan sensor jatuh secara tetap. Jika sensor jatuh kotor, robot mungkin tidak dapat mengesan perbezaan ketinggian atau anak tangga.
-
Page 44: Mengosongkan Dan Membersihkan Bekas Habuk
Bahasa Melayu 8 Bersihkan bukaan sedutan dengan berus lembut (cth. berus gigi). 9 Keluarkan semua habuk yang boleh dilihat daripada muncung TriActive. 10 Masukkan cangkuk kilat muncung TriActive ke dalam lubang di bawah robot. Tolak muncung TriActive semula ke posisinya. Periksa sama ada muncung tersebut boleh bergerak beberapa milimeter ke atas dan bawah dengan bebas. - Page 45 Bahasa Melayu 2 Tanggalkan penutup. 3 Tarik pemegang penutup bekas habuk dan angkat keluar bekas habuk itu daripada petak bekas habuk. Catatan: Apabila anda mengeluarkan atau memasukkan semula bekas habuk, berhati-hati supaya tidak merosakkan bilah kipas motor. 4 Dengan berhati-hati, angkat penutup bekas habuk (1) dan keluarkan penuras (2).
-
Page 46: Memesan Aksesori
Memesan aksesori Untuk membeli aksesori atau alat ganti, lawati www.shop.philips.com/service atau pergi ke penjual Philips anda. Anda juga boleh menghubungi Pusat Penjagaan Pengguna Philips di negara anda (lihat risalah jaminan seluruh dunia untuk maklumat perhubungan). Penggantian Menggantikan penuras Gantikan penuras jika terlalu kotor atau rosak. Anda boleh memesan kit penuras baharu dengan nombor jenis FC8066. -
Page 47: Menggantikan Bateri Boleh Cas Semula
Menggantikan bateri boleh cas semula Jurutera servis yang bertauliah sahaja boleh menggantikan bateri robot yang boleh cas semula. Bawa robot ke pusat servis Philips yang sah untuk menggantikan bateri tersebut apabila anda tidak boleh mengecas semula bateri atau apabila kuasa bateri itu habis dengan cepat. Anda boleh menemui butiran hubungan Pusat Perkhidmatan Pengguna Philips di negara anda dalam risalah jaminan antarabangsa. -
Page 48: Kitar Semula
(2006/66/EC). Kami menasihatkan anda untuk membawa produk anda ke pusat pungutan rasmi atau pusat khidmat Philips supaya bateri boleh cas semula itu dikeluarkan oleh seorang profesional. - Ikuti peraturan negara anda bagi pemungutan produk elektrik dan elektronik serta bateri kitar semula secara berasingan. -
Page 49: Penyelesai Masalah
Penyelesai Masalah Bab ini meringkaskan masalah paling lazim yang anda mungkin hadapi dengan perkakas ini. Jika anda tidak dapat menyelesaikan masalah dengan maklumat di bawah, lawati www.philips.com/support untuk mendapatkan senarai soalan lazim atau hubungi Pusat Penjagaan Pengguna di negara anda. - Page 50 Bahasa Melayu Masalah Punca yang Penyelesaian berkemungkinan Penunjuk amaran Salah satu atau kedua-dua Tetapkan suis kuasa kepada 'off'. berkelip dengan pantas. roda tersangkut. Keluarkan bulu-bulu halus, rambut, benang atau wayar yang tersangkut sekitar ampaian roda. Salah satu atau kedua-dua Bersihkan berus tepi (lihat bab berus tepi tersangkut.
- Page 51 Jika masalah tersebut mencetuskan sensor jatuh. Ini terus berlaku pada lantai berwarna terang, menyebabkan robot bergerak sila pergi ke www.philips.com/support dalam corak yang tidak biasa. atau hubungi Pusat Khidmat Pelanggan di negara anda. Robot membersihkan lantai...
- Page 52 Bahasa Melayu Masalah Punca yang Penyelesaian berkemungkinan Robot bergerak dalam Robot berada dalam mod Ini kelakuan biasa. Mod pilin sangat bersih bulatan. pembersihan rapi. boleh diaktifkan apabila banyak kotoran dikesan di lantai bagi pembersihan yang rapi. Ini juga adalah sebahagian daripada mod auto-pembersihan.
- Page 53 Bahasa Melayu Kod ralat Punca yang Penyelesaian berkemungkinan Bateri tidak dimasukkan Baca arahan dalam bahagian 'Memasukkan dengan betul bateri boleh cas semula ke dalam robot' dalam bab ‘Sebelum penggunaan pertama’. Ralat pengecasan Periksa sama ada suis kuasa berada di kedudukan ‘hidup’ apabila robot berada pada stesen dok...
- Page 54 ขอแสดงความยิ น ดี ก ั บ ผลิ ต ภั ณ ฑ์ ใ หม่ แ ละต้ อ นรั บ เข้ า สู ่ โ ลกของฟิ ล ิ ป ส์ ! เพื ่ อ ให้ ค ุ ณ ได้ ร ั บ ประโยชน์ อ ย่ า งเต็ ม ที ่ จ ากบริ ก ารที ่ Philips มอบให้ โปรดลงทะเบี ย นผลิ ต ภั ณ ฑ์ ข องคุ ณ ที ่...
- Page 55 ภาษาไทย รี โ มทคอนโทรล 1 ปุ ่ ม เลื ่ อ นและเปิ ด /ปิ ด และเริ ่ ม /หยุ ด 2 ปุ ่ ม เวลาทำความสะอาด 3 ปุ ่ ม โหมดทำความสะอาด 4 ปุ ่ ม ความเร็ ว พั ด ลม 5 ปุ ่ ม แท่ น วาง แผงควบคุ...
- Page 56 ภาษาไทย ความแรงในการดู ด ของหุ ่ น ยนต์ จ ะดู ด สิ ่ ง สกปรกที ่ ไ ม่ ฝ ั ง แน่ น แล้ ว ส่ ง ไปยั ง ช่ อ งดู ด เข้ า สู ่ ถ ั ง เก็ บ ฝุ ่ น หุ...
- Page 57 ภาษาไทย หากต้ อ งการรายละเอี ย ดเพิ ่ ม เติ ม โปรดดู บ ท 'การใช้ ห ุ ่ น ยนต์ ข องคุ ณ ' ในส่ ว น 'โหมดทำความสะอาด' วิ ธ ี ก ารที ่ ห ุ ่ น ยนต์ ห ลี ก เลี ่ ย งความต่ า งกั น ของความสู ง หุ...
-
Page 58: การเตรี ย มตั ว ก่ อ นใช้ ง าน
ภาษาไทย การเตรี ย มตั ว ก่ อ นใช้ ง าน การติ ด ตั ้ ง แท่ น วาง 1 เสี ย บปลั ๊ ก ขนาดเล็ ก ของอะแดปเตอร์ เ ข้ า กั บ ช่ อ งเสี ย บบนแท่ น วาง (1) และเสี... - Page 59 ภาษาไทย 2 วางหุ ่ น ยนต์ บ นแท่ น วางที ่ เ สี ย บปลั ๊ ก ไฟอยู ่ 3 กดปุ ่ ม เริ ่ ม /หยุ ด เริ ่ ม ต้ น กะพริ บ หมายเหตุ : เนื ่ อ งจากนี ่ เ ป็ น ครั ้ ง แรกที ่ ค ุ ณ ชาร์ จ หุ ่ น ยนต์ หน้...
- Page 60 ภาษาไทย การใช้ ห ุ ่ น ยนต์ การเริ ่ ม และการหยุ ด 1 ตั ้ ง สวิ ต ช์ เ ปิ ด /ปิ ด ที ่ ด ้ า นข้ า งของหุ ่ น ยนต์ ใ ห้ เ ป็ น ตำแหน่ ง 'เปิ ด ' 2 กดปุ...
- Page 61 ภาษาไทย 7 เพื ่ อ ทำให้ ห ุ ่ น ยนต์ ก ลั บ สู ่ แ ท่ น วางก่ อ นพลั ง งานแบตเตอรี ่ ท ี ่ ช าร์ จ ใหม่ ไ ด้ จ ะเหลื อ น้ อ ย ให้...
- Page 62 ภาษาไทย โหมดเกลี ย ว ในโหมดนี ้ หุ ่ น ยนต์ จ ะเคลื ่ อ นที ่ ใ นรู ป แบบเกลี ย วเพื ่ อ ทำความสะอาดพื ้ น ที ่ ส กปรกขนาดเล็ ก หากเซ็ น เซอร์ ต รวจจั บ ฝุ ่ น ตรวจพบฝุ ่ น หุ...
- Page 63 ภาษาไทย หมายเหตุ : หากต้ อ งการดู ร ู ป ภาพที ่ แ สดงขั ้ น ตอนด้ า นล่ า งนี ้ โปรดดู จ ากหน้ า ที ่ ด ้ า นหลั ง คู ่ ม ื อ นี ้ 1 กดปุ ่ ม ตั ้ ง ค่ า สั ญ ญาณไฟของโหมดตั ้ ง ค่ า และสั ญ ญาณไฟของเวลาจะเริ ่ ม ต้ น กะพริ บ 2 กดปุ...
- Page 64 ภาษาไทย 1 กดปุ ่ ม นี ้ เ พื ่ อ ปิ ด สวิ ต ช์ พ ั ด ลม 2 กดปุ ่ ม นี ้ เ พื ่ อ เปิ ด สวิ ต ช์ พ ั ด ลมในระดั บ ความความเร็ ว ปกติ 3 ปุ...
- Page 65 ภาษาไทย การถอดอุ ป กรณ์ เ สริ ม ที ่ เ ช็ ด ทำความสะอาดแบบแห้ ง 1 ถอดอุ ป กรณ์ เ สริ ม ที ่ เ ช็ ด ทำความสะอาดแบบแห้ ง ออกทั น ที ท ี ่ ็ เ ช็ ด พื ้ น เสร็ จ เรี ย บร้ อ ยแล้ ว 2 หงายหุ...
- Page 66 ภาษาไทย การกำหนดตำแหน่ ง ของอุ ป กรณ์ ผ นั ง เสมื อ นเพื ่ อ จำกั ด ขอบเขตหุ ่ น ยนต์ คุ ณ สามารถใช้ อ ุ ป กรณ์ ผ นั ง เสมื อ นเพื ่ อ ป้ อ งกั น ไม่ ใ ห้ ห ุ ่ น ยนต์ เ ข้ า ไปภายในห้ อ งหรื อ พื ้ น ที ่ ท ี ่ ค ุ ณ ไม่ ต ้ อ งการ 1 ให้...
- Page 67 ภาษาไทย 3 ใช้ แ ปรงที ่ ม ี ข นแปรงนุ ่ ม (เช่ น แปรงสี ฟ ั น ) ในการกำจั ด ฝุ ่ น ผงหรื อ เศษขนจากล้ อ หน้ า และล้ อ ด้ า นข้ า ง 4 ในการทำความสะอาดแปรงด้ า นข้ า ง ให้ จ ั บ ขนแปรงและดึ ง ออกจากด้ า ม 5 ขจั...
- Page 68 ภาษาไทย 9 ขจั ด สิ ่ ง สกปรกที ่ ม องเห็ น ได้ ท ั ้ ง หมดออกจากหั ว ดู ด TriActive 10 เสี ย บตะขอเกี ่ ย วของหั ว ดู ด TriActive ลงในช่ อ งทางด้ า นล่ า งของหุ ่ น ยนต์ ดั น หั ว ดู ด TriActive กลั...
- Page 69 ภาษาไทย 3 ดึ ง ด้ า มจั บ ของฝาถั ง เก็ บ ฝุ ่ น ขึ ้ น และยกถั ง เก็ บ ฝุ ่ น ออกจากช่ อ งใส่ ถ ั ง เก็ บ ฝุ ่ น หมายเหตุ : เมื ่ อ คุ ณ ถอดหรื อ ใส่ ถ ั ง เก็ บ ฝุ ่ น โปรดระมั...
- Page 70 หากต้ อ งการซื ้ อ อุ ป กรณ์ เ สริ ม หรื อ อะไหล่ โปรดไปที ่ www.shop.philips.com/service หรื อ ติ ด ต่ อ ตั ว แทนจำหน่ า ย Philips และคุ ณ ยั ง สามารถติ ด ต่ อ ศู น ย์ บ ริ ก ารลู ก ค้ า Philips ในประเทศของคุ...
-
Page 71: การเปลี ่ ย นแบตเตอรี ่ ข องรี โ มทคอนโทรล
ควรเปลี ่ ย นแบตเตอรี ่ ท ี ่ ส ามารถชาร์ จ ไฟได้ ใ หม่ ข องหุ ่ น ยนต์ โ ดยวิ ศ วกรบริ ก ารที ่ ม ี ค ุ ณ สมบั ต ิ เ หมาะสมเท่ า - นั ้ น นำหุ ่ น ยนต์ ไ ปเปลี ่ ย นแบตเตอรี ่ ท ี ่ ศ ู น ย์ บ ริ ก ารที ่ ไ ด้ ร ั บ การรั บ รองโดย Philips เมื... - Page 72 ติ ด ต่ อ ศู น ย์ บ ริ ก ารลู ก ค้ า Philips ในประเทศของคุ ณ เพื ่ อ ขอรั บ ที ่ อ ยู ่ ข องศู น ย์ บ ริ ก ารที ่ อ ยู ่ ใ กล้...
- Page 73 ภาษาไทย การแก้ ป ั ญ หา ปั ญ หา สาเหตุ ท ี ่ เ ป็ น ไปได้ การแก้ ป ั ญ หา หุ ่ น ยนต์ ไ ม่ ย อมเริ ่ ม ต้ น ทำความสะ- แบตเตอรี ่ ท ี ่ ส ามารถชาร์ จ ไฟได้ ไ ม่ ม ี พ ลั - ชาร์...
- Page 74 หากยั ง คงประสบปั ญ หาแม้ บ นพื ้ น ที ่ ม ี ส ี อ ่ อ นลง โปรดไปที ่ งาน www.philips.com/support เป็ น เหตุ ใ ห้ ห ุ ่ น ยนต์ เ คลื ่ อ นที ่ ใ นรู ป แบบที ่ - หรื...
- Page 75 ภาษาไทย ปั ญ หา สาเหตุ ท ี ่ เ ป็ น ไปได้ การแก้ ป ั ญ หา หุ ่ น ยนต์ ห าแท่ น วางไม่ พ บ มี พ ื ้ น ที ่ ไ ม่ เ พี ย งพอสำหรั บ ให้ ห ุ ่ น ยนต์ ข ั บ - ควรพยายามหาตำแหน่...
- Page 76 繁體中文 簡介 感謝您購買本產品。歡迎來到飛利浦的世界! 為充分享受飛利浦為您提供的好 處,請至下列位址註冊產品:www.philips.com/welcome。 一般描述 1 集塵盒蓋把手 2 集塵盒蓋 3 濾網 4 集塵盒 5 頂蓋 6 錯誤碼表 7 風扇 8 緩衝墊 9 機座感測器 10 電源開關 11 前輪 12 側邊刷毛驅動軸 13 掉落感測器 14 輪子 15 吸塵開口 16 TriActive 特大全方位三效合一吸頭 17 側邊刷毛...
- Page 77 繁體中文 遙控器 1 操控按鈕與開始/停止 2 清潔時間按鈕 3 清潔模式按鈕 4 風扇速度按鈕 5 返回機座按鈕 機座控制面板 1 包含時間、日期與程序指示的顯示幕 2 調整與設定按鈕 自動吸塵機器人運作方式 自動吸塵機器人清潔項目 自動吸塵機器人具備絕佳清潔功能,能協助您清理您的居家地板, 特別適合清理硬質地板,例如木質、磁磚、亞麻地板。 若用於清潔地毯或毛毯等 軟質地板,可能會發生問題。 若在地毯或毛毯上使用自動吸塵機器人,則初次使 用時請待在附近,查看自動吸塵機器人是否適用於該類型地板。 自動吸塵機人清 理深色或亮面硬質地板時,也請在旁監看。 自動吸塵機器人清潔方式 清潔系統 自動吸塵機器人採用 3 步驟清潔系統,有效清潔您的地板。 兩側刷毛可協助自動吸塵機器人清潔角落與牆緣, 亦可將灰塵掃離地板,並把 灰塵移向吸塵開口。...
- Page 78 繁體中文 自動吸塵機器人透過吸力將灰塵由吸塵開口吸入集塵盒中。 配備乾擦拭布固定座的自動吸塵機器人可利用乾擦拭布徹底清潔硬質地板。 清潔模式 啟用自動清潔模式時,自動吸塵機器人會依循自動的清潔模式順序,徹底清潔房間 內所有區域。 所採用的清潔模式包括: 1 Z 字形模式或鋸齒形模式 2 隨機模式 3 沿牆模式 4 螺旋模式 啟用自動清潔模式時,自動吸塵機器人會依循固定順序使用以下模式:Z 字形模 式、隨機模式、沿牆模式及螺旋模式。 當自動吸塵機器人完成此模式順序之後,會重新由 Z 字形模式開始移動。 自動吸 塵機器人繼續使用此模式順序清潔房間,直到充電式電池電量不足或手動關閉為 止。 如果自動吸塵機器人在清潔過程中偵測到特別髒污的區域,將會切換為螺旋模式及 高速風扇速度,以確保徹底清除髒污。 注意: 您也可以按下遙控器上適當的按鈕,直接選擇個別模式。 手動選擇的模式 運作時間只有幾分鐘。 之後,自動吸塵機器人就會切回自動清潔模式。 如需詳細資訊,請參閱「使用自動吸塵機器人」單元的「清潔模式」一節。...
- Page 79 繁體中文 自動吸塵機器人如何避開高度落差 自動吸塵機器人底部有三個掉落感測器。 它使用這些掉落感測器偵測及避開高度 落差,例如樓梯。 注意: 自動吸塵機器人移動時會稍微超過高度落差的邊緣,此屬正常現象,因為 其前方的掉落感測器位於緩衝墊後方。 注意事項: 有時,掉落感測器可能會偵測不到樓梯或其他高度落差。 因此,在前 幾次使用以及在靠近樓梯或其他有高度落差的地點使用時,請謹慎監視自動吸塵機 器人。 請務必定期清潔掉落感測器,以確保自動吸塵機器人可持續偵測高度落差 (相關說明請參閱「清潔與維護」單元)。 第一次使用前 安裝側邊刷毛 1 拆開側邊刷毛包裝,將自動吸塵機器人上下顛倒放置在桌面或地板上。 2 將側邊刷毛推入自動吸塵機器人底部的驅動軸上。 注意: 請確定您正確安裝側邊刷毛。 將它們推到驅動軸上,直到聽到卡入定位 的聲音為止。 取出遙控器的拉片 遙控器使用 CR2025 硬幣形電池。 此電池受到保護拉片的保護,使用前請移除保 護拉片。 1 將電池保護拉片從遙控器的電池槽內拉出。 您現在可以開始使用遙控器。...
- Page 80 繁體中文 使用前準備 安裝機座 1 將轉換器的小插頭插入機座上的插座 (1),然後將轉換器插入電源插座 (2)。 機座的顯示幕會亮起。 2 將機座靠牆擺放在平穩的水平地面上。 注意: 請確認機座前方 80 公分、右方 30 公分與左方 100 公分內沒有任何障 礙物或高度落差。 1 0 0 厘 米 提示: 為確保機座穩定位於選定位置,請用螺絲或兩條雙面膠帶將其確實固定 3 0 厘 於牆壁。 米 充電 首次充電時及自動吸塵機器人的充電式電池電力耗盡後,充電時間為四小時。 自動吸塵機器人有兩種充電方式: 使用期間可手動或自動在機座上充電; 將自動吸塵機器人連接至電源加以充電。 注意: 充電式電池充飽電後,自動吸塵機器人可進行清潔達 100 分鐘 在機座上充電...
- Page 81 繁體中文 2 將自動吸塵機器人放在已插電的機座上。 3 開始/停止按鈕開始閃爍。 注意: 因為這是您第一次為自動吸塵機器人充電,因此顯示幕會顯示開機指示 燈。 4 當電池充飽電力後,開始/停止按鈕會持續亮燈。 使用期間自動充電 1 當自動吸塵機器人完成清潔或剩下 15% 電力時,將自動搜尋機座以進行充電。 當自動吸塵機器人搜尋機座時,開始/停止按鈕燈號會變成橘色。 2 當電池充飽電力後,開始/停止按鈕會持續亮燈。 清潔房間前的準備工作 在啟動自動吸塵機器人進行清潔工作前,請確認您已將地板上所有鬆動和易碎的物 品取走。 也請移除地板上的所有纜線、電線及導線。...
- Page 82 繁體中文 使用自動吸塵機器人 開始和停止 1 將自動吸塵機器人側面的電源開關設定至「開」(on) 的位置。 2 按壓開始/停止按鈕。 您可以按下自動吸塵機器人的開始/停止按鈕。 您也可以按下遙控器上的開關按鈕。 3 開始/停止按鈕將持續亮起,自動吸塵機器人將開始清潔。 4 自動吸塵機器人將以自動清潔模式進行清潔,直到電池電力不足為止。 在自動 清潔模式下,則會依照 Z 字形、隨機、沿牆及螺旋模式順序重複執行清潔。 注意: 若要選擇個別模式,請按下遙控器上的其中一顆模式按鈕。 如需詳細資 訊,請參閱「清潔模式選擇」一節。 5 當電池電力不足時,開始/停止按鈕將變為橘色,自動吸塵機器人會尋找機座以 進行充電。 6 您也可以按下開始/停止按鈕以中斷或停止清潔作業。 如果您再次按下開始/停 止按鈕,而且充電式電池仍有足夠的電力,自動吸塵機器人將以自動清潔模式 繼續清潔。...
- Page 83 繁體中文 7 在充電式電池電力尚未不足前,若要讓自動吸塵機器人返回機座,請按下遙控 器上的返回機座按鈕。 自動吸塵機器人顯示幕的返回機座圖示將亮起,自動吸 塵機器人將會返回機座。 清潔模式選擇 此款自動吸塵機器人在自動清潔模式旁有四種個別清潔模式,只要按下遙控器上的 適當按鈕即可啟動各個模式。 注意: 手動選擇的模式運作時間只有幾分鐘。 之後,自動吸塵機器人就會切回自 動清潔模式。 Z 字形模式 使用 Z 字形模式時,自動吸塵機器人會在房內以 Z 字形環形路線清潔大面積區 域。 隨機模式 使用此模式時,自動吸塵機器人會以直線和交叉移動的混合模式清潔房間。 沿牆模式 使用此模式時,自動吸塵機器人會沿著房間牆壁清潔,讓牆壁邊緣區域更加乾淨。...
- Page 84 繁體中文 螺旋模式 使用此模式時,自動吸塵機器人會以螺旋形清潔小面積的區域。 如果灰塵偵測感 測器偵測到髒污,自動吸塵機器人會將風扇自動切換至高速。 手動操縱 1 利用位於遙控器開始/停止按鈕的上方、下方、左邊、右邊的箭頭按鈕,操縱自 動吸塵機器人於房內清潔。 注意: 在靠近高度落差與樓梯的位置,若以手動方式操作自動吸塵機器人,請 特別小心。 注意: 吸塵功能與側邊刷毛只有在自動吸塵機器人向前移動時才有作用。 向 左、向右或後退按鈕僅用於操作自動吸塵機器人。 使用清潔時間按鈕 依預設,自動吸塵機器人將以自動清潔模式進行清潔,直到充電式電池電力不 足為止。 然後自動吸塵機器人會自動返回其機座。 如果您選擇其中一個其他清 潔時間 (參閱下方),只要按下遙控器上的最大清潔時間按鈕,即可切換回預設 模式。 遙控器上的其他清潔時間按鈕可讓您將自動吸塵機器人的運作時間分別設定為 60、45 及 30 分鐘。 清潔時間結束後,自動吸塵機器人將返回機座。 顯示幕 上的返回機座圖示將會亮起。 如果您不希望自動吸塵機器人在清潔時間結束時返回機座,請按兩次清潔時間 按鈕。 顯示幕上的返回機座圖示隨即消失。 清潔時間結束,機器人就會停止。 操作機座 設定時間與當週日次 如果您要使用清潔程序,您必須先在機座的顯示幕上設定時鐘時間與當週日次。 注意: 有關以下步驟的圖片,請參閱本手冊背面的頁面。...
- Page 85 繁體中文 1 按下設定按鈕。 設定模式指示燈與時鐘時間指示燈開始閃爍。 2 按一下選擇按鈕。 小時指示燈開始閃爍。 3 使用遙控器上的 + 和 - 按鈕設定小時,顯示幕上會出現設定的小時。 4 按下選擇按鈕確認設定的小時。 分鐘指示燈開始閃爍。 5 使用遙控器上的 + 和 - 按鈕設定分鐘。 顯示幕上會出現設定的分鐘。 6 按下選擇按鈕確認設定的分鐘。 表示星期日的「Su」字樣開始閃爍。 7 使用遙控器上的 + 和 - 按鈕設定目前當週的日次。 8 按下選擇按鈕確認設定的當週日次。 9 按下設定按鈕確認時間與當週日次設定。 設定模式指示燈與時鐘時間指示燈皆 停止閃爍並穩定常亮。 設定清潔時間 如果您已在機座的顯示幕上設定時鐘時間與當週日次,即可設定自動吸塵機器人的 清潔時間。...
- Page 86 繁體中文 1 按下此按鈕以關閉風扇 2 按下此按鈕開啟風扇以一般速度運轉。 3 高速風扇按鈕可提高風扇速度。 拍掌回應 當自動吸塵機器人在以下情況進入休眠模式時,將會啟用拍掌回應功能: 因為錯誤而停止清潔時 設定了較短的清潔時間時 在 20 分鐘內找不到機座時 如果您看不到自動吸塵機器人時,拍掌一下便可以找到它。 自動吸塵機器人會以 嗶聲回應,並在顯示幕上亮起所有圖示。 使用乾擦拭布附件 乾擦拭布附件可讓您使用乾擦拭布清潔硬質地板。 注意: 如果您使用乾擦拭布附件,自動吸塵機器人可能會無法跨越門檻或爬上地 毯。 準備乾擦拭布附件以供使用 1 將自動吸塵機器人上下顛倒放置在地板上或桌上。 2 將乾擦拭布放在桌上,再將乾擦拭布附件放在擦拭布上,讓固定突耳朝向自 己。 3 將乾擦拭布的兩端折起,包覆乾擦拭布附件,然後將固定塊壓入凹處,以便將 乾擦拭布固定在附件上。 4 將乾擦拭布附件的固定突耳插入自動吸塵機器人一側輪子的後方開口,然後將 其壓下直到聽到卡入定位的喀噠聲。 接著在另一側重複這些動作。 5 翻轉自動吸塵機器人並將它放在地板上,使輪子與乾擦拭布附件接觸地板。 使用已安裝乾擦拭布附件的自動吸塵機器人 在已安裝乾擦拭布附件的情況下,您可在所有硬質地板上以任何模式使用自動吸塵 機器人。 請勿在地毯或毛毯上使用乾擦拭布附件。...
- Page 87 繁體中文 拆卸乾擦拭布附件 1 在擦拭完地板之後立刻拆卸乾擦拭布附件。 2 將自動吸塵機器人上下顛倒放置在地板上或桌上。 3 將乾擦拭布附件的一端壓向自動吸塵機器人另一側的輪子,藉此鬆開附件。 然 後將附件拉出自動吸塵機器人。 使用隱形牆壁 (FC8822) 將電池放入虛擬牆壁裝置 虛擬牆壁裝置使用四個 AA 電池運作。 1 壓下背蓋 (1) 底部的兩個釋放拉片,將背蓋朝上滑動並從虛擬牆壁裝置 (2) 取 下。 2 從包裝中取出四個 AA 電池並插入虛擬牆壁裝置的電池槽。 注意: 請確定電池的 + 和 - 極方向正確無誤。 3 將背蓋再次滑動裝回到虛擬牆壁裝置上。...
- Page 88 繁體中文 放置虛擬牆壁裝置以阻擋自動吸塵機器人 您可以使用虛擬牆壁裝置以避免自動吸塵機器人進入您不希望它進入的房間或區 域。 1 將虛擬牆壁裝置放置在您不希望自動吸塵機器人通過的地點,例如禁止自動吸 塵機器人進入的敞開房門。 2 利用虛擬牆壁裝置頂部的開關滑桿以開啟其電源。 3 開啟自動吸塵機器人的電源以進行一般清潔作業。 4 當自動吸塵機器人接近虛擬牆壁裝置時,虛擬牆壁裝置上的燈號將開始閃爍, 並且將會射出紅外線光束。 此紅外線光束可使自動吸塵機器人變更路線並避開 虛擬牆壁裝置。 注意: 如果您使用虛擬牆壁裝置,請定期檢查其電池電力是否足夠。 您可以將虛 擬牆壁的電源關閉之後再重新開啟,藉此檢查電力。 如果電池有足夠的電力,虛 擬牆壁裝置上的 LED 燈號將會短暫亮起。 清潔與維護 清潔自動吸塵機器人 為了維持良好的清潔效能,您必須不時清潔掉落感測器、輪子、側邊刷毛以及吸塵 開口。 1 將自動吸塵機器人上下顛倒放置在平坦的表面上 2 使用軟毛刷子 (例如:牙刷) 清理掉落感測器的灰塵或毛絮。 注意: 請務必定期清潔掉落感測器。 如果掉落感測器髒污,自動吸塵機器人可 能無法偵測高度落差或樓梯。...
- Page 89 繁體中文 3 使用軟毛刷子 (例如:牙刷) 清除前輪和側輪的灰塵或毛絮。 4 若要清潔側邊刷毛,請抓住刷毛並將其從驅動軸拉出。 5 使用軟毛刷子 (例如:牙刷) 或軟布將毛絮、毛髮和絲線自驅動軸和側邊刷毛上 移除。 6 檢查側邊刷毛和自動吸塵機器人底部是否有任何可能損壞地板的尖銳物體。 7 將手指插入標有箭頭的地方,解開 TriActive 特大全方位三效合一吸頭的卡榫, 並將 TriActive 吸頭從自動吸塵機器人拉出。 8 用軟毛刷子 (例如:牙刷) 清潔吸塵開口。...
- Page 90 繁體中文 9 清除 TriActive 全方位三效合一吸頭上明顯的灰塵。 10 將 TriActive 全方位三效合一吸頭上的彈簧鉤插入自動吸塵機器人底部的孔中。 將 TriActive 全方位三效合一吸頭推回原位。 檢查吸頭能否自由上下移動幾公 釐。 11 再次將側邊刷毛推入自動吸塵機器人底部的驅動軸上。 清空和清潔集塵盒 集塵盒滿指示燈持續亮起時,應清空並清潔集塵盒。 1 請確定電源開關處於「關」(off) 位置。 2 取下蓋子。...
- Page 91 繁體中文 3 拉起集塵盒蓋把手,將集塵盒自集塵室拉出。 注意: 當您取出或裝入集塵盒時,請小心勿損壞馬達風扇的葉片。 4 小心拿起集塵盒 (1) 的蓋子,再拿出濾網 (2)。 5 在垃圾桶上抖動集塵盒,以清空集塵盒。 用布或軟毛牙刷清潔集塵盒的濾網和 內部。 也請清潔集塵盒底部的吸塵開口。 注意事項: 請勿使用清水或洗碗機來清潔集塵盒及濾網。 6 將濾網放回集塵盒 (1)。 然後將蓋子放回集塵盒 (2) 上。 7 將集塵盒裝回集塵室中,並將頂蓋裝回自動吸塵機器人上。 注意事項: 請務必確認已在集塵盒內部放入濾網。 如果您在集塵盒內沒有濾網 的情況下使用自動吸塵機器人,將會導致馬達損壞。...
- Page 92 繁體中文 訂購配件 若要購買配件或備用零件,請造訪 www.shop.philips.com/service,或洽詢您的飛 利浦經銷商。 您也可以聯絡您所在國家/地區的飛利浦客戶服務中心 (詳細聯絡資 料請參閱全球保證書)。 更換 更換濾網 濾網非常髒或受損時,請予以更換。 您可以訂購型號 FC8066 的新濾網套件。 有 關如何從集塵盒取下濾網以及如何將濾網裝入集塵盒的說明,請參閱「清潔與維 護」單元中的「清空和清潔集塵盒」。 更換側邊刷毛 使用一段期間後,請更換側邊刷毛,以確保適當的清潔效果。 當您發現側邊刷毛有磨損或損壞的跡象時,請務必予以更換。 此外,建議您同時 更換兩側的側邊刷毛。 您可以訂購更換套件 FC8068,其中包括備用的側邊刷毛。 此套件亦包含兩個濾網與三塊乾擦拭布。 1 請確定電源開關處於「關」(off) 位置。 2 若要更換側邊刷毛,請抓住舊側邊刷毛的刷毛部分,將其從驅動軸拉出。 3 將新的側邊刷毛推入驅動軸。 更換乾擦拭布 您可以訂購新的乾擦拭布。 乾擦拭布包含在更換套件 FC8068 中。 此更換套件亦 包含兩個側邊刷毛與兩個濾網。 更換遙控器電池...
- Page 93 繁體中文 1 上下顛倒地拿著遙控器。 壓下電池固定座的釋放按鈕,同時將電池固定座滑出 遙控器。 2 從電池固定座中取出電力已用盡的電池,然後將新的電池放入電池固定座。 接 著將電池固定座滑入遙控器。 更換充電式電池 自動吸塵機器人的充電式電池只能請合格的服務工程師更換。 當您無法充電或是 電池電力消耗過快時,請將自動吸塵機器人送到授權的飛利浦服務中心,以便更換 電池。 您可以在全球保固說明書上找到您所在國家/地區飛利浦客戶服務中心的詳 細聯絡資訊。 回收 此符號表示本產品不得與一般家用廢棄物一併丟棄 (2012/19/EU)。 此符號表示本產品含有內建充電式電池,不得與一般家用廢棄物一併丟棄 (2006/66/EC)。請將產品攜至政府回收站或 Philips 服務中心,由專業人員取出 充電式電池。 請按照您所在國家/地區的規定,分類與回收電子電器產品及充電式電池。正確 處理廢棄產品有助於避免對環境和人類健康帶來負面影響。 取出充電式電池 警告: 請僅在棄置本產品前取出充電式電池。 取出電池前,請確認其電 力已完全耗盡。...
- Page 94 繁體中文 若要取出充電式電池,請遵照下列指示操作。 您也可以將自動吸塵機器人送到飛 利浦服務中心,以取出充電式電池。 請與您所在國家/地區的飛利浦客戶服務中心 聯絡,找到離您最近的服務中心地址。 1 從房間任何一處啟動自動吸塵機器人,而非從機座啟動。 2 讓自動吸塵機器人持續轉動直到充電式電池電量耗盡,以確定充電式電池在您 取下並棄置前已完全放電。 3 鬆開螺絲並取下電池室蓋板。 4 請取出並卸除充電式電池。 5 請將自動吸塵機器人及充電式電池送至電子電器廢棄物回收站。 疑難排解 本章概述了使用本產品最常遇到的問題。 如果無法利用以下資訊解決遇到的問 題,請造訪 www.philips.com/support 瀏覽常見問題清單,或聯絡您所在國家/地區 的飛利浦客戶服務中心。 疑難排解 問題 可能原因 解決方法 按下開始/停止按鈕時,自 充電式電池沒電。 為充電式電池充電 (請參閱「使用前準備」單 動吸塵機器人沒有啟動。 元)。 小插頭仍插在自動吸塵機器人上 自動吸塵機器人無法利用主電源運作, 僅能 的插座上。 使用充電式電池的電力運作。 因此,使用前...
- Page 95 塵盒。 如果無法將濾網刷乾淨或吸乾淨,請更換新的 濾網。 建議您至少每年更換一次濾網。 集塵盒底部的吸塵開口阻塞。 清潔吸塵開口 (請參閱「清潔與維護」單元)。 前輪卡有毛髮或其他灰塵。 清潔前輪 (請參閱「清潔與維護」單元)。 自動吸塵機器人正在清潔極為暗 按下開始/停止按鈕,然後將自動吸塵機器人 色或閃亮的表面,因而觸發掉落 移至顏色較淺的地板上。 如果在顏色較淺的 感測器,導致自動吸塵機器人以 地板上仍發生問題,請前往 異常模式移動。 www.philips.com/support 或聯絡您所在國 家/地區的客戶服務中心。 自動吸塵機器人正在清潔強烈反 拉上窗簾阻隔陽光射入房間。 您亦可在陽光 射陽光的地板, 因而觸發掉落 較不強烈時開始進行清潔。 感測器,導致自動吸塵機器人以 異常模式移動。 充電式電池無法充電或耗電 充電式電池壽命結束。 更換充電式電池 (請參閱「更換」單元)。 快速。 遙控器的電池耗電過快。 您可能未裝入正確的電池類型。 遙控器須使用 CR2025 硬幣形電池。 如果問...
- Page 96 繁體中文 問題 可能原因 解決方法 自動吸塵機器人以旋轉方式 自動吸塵機器人以定點清潔模式 這是正常現象。 當偵測到地板上有大量髒污 移動。 進行清潔。 時,將會啟動螺旋模式以徹底清潔。 這也是 自動清潔模式的一部分。 大約一分鐘之後, 自動吸塵機器人將恢復正常的清潔模式。 您 可以在遙控器上選擇不同的清潔模式以停止螺 旋模式。 自動吸塵機器人無法找到機 沒有足夠的空間可讓自動吸塵機 請嘗試尋找其他適合放置機座的位置。 請參 座。 器人返回機座。 閱「使用前準備」單元中的「安裝機座」。 自動吸塵機器人仍積極尋找中。 請等待約 20 分鐘,讓自動吸塵機器人返回機 座。 自動吸塵機器人並未從機座開始 如果您希望自動吸塵機器人在完成清潔之後返 進行清潔。 回機座,則必須讓它從機座開始運作。 當自動吸塵機器人位於機座 您嘗試為自動吸塵機器人充電, 按下電源開關,開啟自動吸塵機器人電源。 時發出嗶聲。 但是電源開關位於「關」(off) 位 置。...
- Page 97 한국의 소개 필립스 제품을 구입해 주셔서 감사합니다! 필립스가 드리는 지원 혜택을 최대한 누리시려면 www.philips.com/welcome에서 제품을 등록하십시오. 기기 정보 1 먼지통 뚜껑 손잡이 2 먼지통 뚜껑 3 필터 4 먼지통 5 상단 덮개 6 오류 코드 표 7 팬 8 범퍼...
- Page 98 한국의 리모콘 1 탐색 버튼 및 시작/중지 2 청소 시간 버튼 3 청소 모드 버튼 4 팬 속도 버튼 5 도킹 버튼 도킹 스테이션의 제어판 1 시간, 요일 및 프로그래밍 표시 2 조절 및 설정 버튼 로봇 청소기 작동 원리 로봇...
- Page 99 한국의 - 로봇 청소기의 흡입력으로 먼지를 빨아들여 흡입구를 통해 먼지통으로 운반합니다. - 로봇 청소기는 마른 천 홀더와 함께 제공됩니다. 마른 천을 사용하면 딱딱한 바닥을 훨씬 더 깨끗하게 청소할 수 있습니다. 청소 패턴 자동 청소 모드에서 로봇 청소기는 자동 청소 패턴 순서에 따라 공간의 각 부분을 최적화된...
-
Page 100: 로봇 청소기가 낙차를 피하는 방법
한국의 자세한 내용은 '로봇 청소기 사용' 장의 '청소 모드' 섹션을 참조하십시오. 로봇 청소기가 낙차를 피하는 방법 로봇 청소기의 하단에는 세 개의 낙하 방지(drop-off) 센서가 있습니다. 이 센서를 사용하여 계단과 같이 낙차가 있는 공간을 감지하고 피합니다. 참고: 로봇 청소기의 전면 낙하 방지(drop-off) 센서는 범퍼 뒤에 있으므로 낙차가... - Page 101 한국의 사용 준비 도킹 스테이션 설치 1 어댑터의 전원 플러그를 도킹 스테이션의 소켓에 꽂고(1) 어댑터를 벽면 콘센트에 꽂습니다(2). 도킹 스테이션의 디스플레이가 켜집니다. 2 도킹 스테이션은 평평한 바닥에 벽 쪽으로 둡니다. 참고: 도킹 스테이션의 앞쪽 80cm, 오른쪽 30cm 및 왼쪽 100cm 지점에 낙차...
- Page 102 한국의 2 플러그가 전원에 연결된 도킹 스테이션에 로봇 청소기를 놓습니다. 3 시작/중지 버튼이 깜박이기 시작합니다. 참고: 로봇 청소기를 처음 충전하는 경우 로봇 청소기의 디스플레이에 부팅 표시등이 표시됩니다. 4 충전식 배터리의 충전이 완료되면 시작/중지 버튼의 표시등이 계속 켜져 있습니다. 사용 중 자동 충전 1 로봇...
-
Page 103: 시작 및 중지
한국의 로봇 청소기 사용 시작 및 중지 1 로봇 청소기 측면의 전원 스위치를 '켬' 위치로 설정합니다. 2 시작/중지 버튼을 누릅니다. 로봇 청소기에서 시작/중지 버튼을 누를 수 있습니다. 또한 리모콘의 시작/중지 버튼을 누를 수도 있습니다. 3 시작/중지 버튼이 켜진 상태로 유지되고 로봇 청소기가 청소를 시작합니다. 4 배터리의... -
Page 104: 청소 모드 선택
한국의 7 충전식 배터리 잔량이 없어지기 전 로봇 청소기가 도킹 스테이션으로 돌아가도록 하려면 리모콘에서 도킹 버튼을 누릅니다. 로봇 청소기 디스플레이의 도킹 아이콘이 켜지고 로봇 청소기가 도킹 스테이션으로 돌아갑니다. 청소 모드 선택 자동 청소 모드 옆에 네 가지 청소 모드가 있으며, 리모콘의 해당 버튼을 눌러 각각... - Page 105 한국의 나선형 모드 이 모드에서는 로봇 청소기가 나선형 패턴으로 움직이며 좁은 구역을 청소합니다. 먼지 감지 센서가 먼지를 감지하면 자동으로 팬을 터보 속도로 전환합니다. 수동 작동 1 리모콘에 있는 시작/중지 버튼의 위, 아래 및 왼쪽, 오른쪽 화살표 버튼을 사용하여 실내 전체를 탐색합니다. 참고: 로봇...
- Page 106 한국의 참고: 아래 단계에 나와 있는 그림은 이 설명서 뒷부분의 페이지를 참조하십시오. 1 설정 버튼을 누릅니다. 설정 모드 표시등과 시간 표시등이 깜박이기 시작합니다. 2 선택 버튼을 한 번 누릅니다. 시간 표시가 깜박이기 시작합니다. 3 리모콘의 + 및 - 버튼을 사용하여 시간을 설정합니다.디스플레이에 설정한 시간이...
- Page 107 한국의 10 청소 프로그램을 설정하면 디스플레이에 청소 프로그램 표시등과 선택한 요일이 표시됩니다. 로봇 청소기가 대기 상태이고 충전식 배터리가 완전히 충전되면 프로그래밍된 요일의 프로그래밍된 시간에 청소를 시작합니다. 팬 속도 버튼 팬 속도 버튼을 사용하여 팬 속도를 터보로 높이거나 팬의 작동을 중지할 수 있습니다.
- Page 108 한국의 4 마른 천 부속품의 고정 돌출부를 로봇 청소기의 바퀴 바로 뒤에 있는 구멍에 삽입하고 딸칵 소리가 날 때까지 밀어 넣습니다. 그런 다음 다른 쪽 바퀴에서도 이 동작을 반복합니다. 5 로봇 청소기의 바퀴와 마른 천 부속품이 바닥에 닿도록 로봇 청소기를 놓습니다.
- Page 109 한국의 3 뒷면 덮개를 가상 벽 유닛에 다시 밀어 넣습니다. 가상 벽 유닛을 배치하여 로봇 청소기의 작동 멈추기 가상 벽 유닛을 사용하여 로봇 청소기가 원치 않는 공간 또는 구역으로 진입하는 것을 방지할 수 있습니다. 1 로봇 청소기가 진입하지 못하도록 하고자 하는 지점(예: 로봇 청소기의 진입을...
- Page 110 한국의 2 부드러운 브러시(예: 칫솔)를 사용하여 낙하 방지 센서에서 먼지 또는 보풀을 제거합니다. 참고: 낙하 방지 센서를 정기적으로 청소하는 것이 중요합니다. 낙하 방지 센서가 더러운 경우 로봇 청소기가 낙차 또는 계단을 감지하지 못할 수 있습니다. 3 부드러운 브러시(예: 칫솔)를 사용하여 앞바퀴 및 옆바퀴에서 먼지 또는 보풀을...
-
Page 111: 먼지통 비우기 및 청소
한국의 8 부드러운 브러시(예: 칫솔)로 흡입구를 청소합니다. 9 TriActive 노즐에서 보이는 먼지를 모두 제거합니다. 10 TriActive 노즐 스냅 후크를 로봇 청소기 하단 구멍에 끼웁니다. TriActive 노즐을 다시 제 자리에 밀어 넣습니다. 노즐이 위아래로 몇 밀리미터씩 원활하게 움직이는지 확인합니다. 11 사이드 브러시를 로봇 청소기 하단 축에 다시 끼웁니다. 먼지통... - Page 112 한국의 2 덮개를 분리합니다. 3 먼지통 뚜껑 손잡이를 위로 당기고 먼지통 보관함에서 먼지통을 들어올립니다. 참고: 먼지통을 분리하거나 다시 끼우는 경우 모터 팬의 날이 손상되지 않도록 주의하십시오. 4 먼지통에서 뚜껑을 조심스럽게 들어올린 다음(1) 필터를 꺼냅니다(2). 5 휴지통 위에서 먼지통을 털어내 비웁니다. 부드러운 칫솔이나 천을 사용하여 필터와...
-
Page 113: 사이드 브러시 교체
주의: 먼지통 안에 필터가 있는지 항상 확인하십시오. 먼지통 안에 필터가 없는 상태로 로봇 청소기를 사용하는 경우 모터가 손상될 수 있습니다. 액세서리 주문 액세서리 또는 예비 부품을 구입하려면 www.shop.philips.com/service를 방문하거나 필립스 대리점에 문의하십시오. 또한 해당 국가의 필립스 고객 상담실에 문의하셔도 됩니다(연락처 정보는 국제 보증서 참조). -
Page 114: 리모콘 배터리 교체
한국의 3 새로운 사이드 브러시를 축에 끼웁니다. 마른 천 교체 새 마른 천을 주무할 수 있습니다. 마른 천은 교체 키트 FC8068에 포함되어 있습니다. 이 교체 키트에는 사이드 브러시 두 개와 필터 두 개도 포함되어 있습니다. 리모콘 배터리 교체 리모콘에는 동전 모양의 CR2025 배터리가 사용됩니다. 리모콘 버튼을 눌러도 로봇... -
Page 115: 충전식 배터리 분리
한국의 재활용 - 이 기호는 본 제품을 일반 가정용 쓰레기와 함께 폐기하면 안 됨을 의미합니다(2012/19/EU). - 이 기호는 본 제품에 가정용 쓰레기(2006/66/EC)와 함께 폐기하면 안 되는 충전식 배터리가 포함되어 있음을 나타냅니다. 제품을 지정된 재활용 수거 장소 또는 필립스 서비스 센터에 가져가 충전식 배터리를 전문적으로 처리하는... - Page 116 한국의 문제 해결 이 장에서는 제품을 사용하면서 접할 수 있는 가장 일반적인 문제를 다룹니다. 아래 정보를 통해 문제를 해결하지 못한 경우 www.philips.com/support를 방문하여 자주 묻는 질문(FAQ) 목록을 참조하거나 해당 국가의 필립스 고객 지원 센터로 문의하십시오. 문제 해결 문제점 예상 원인...
- Page 117 광이 나는 표면을 청소하면 더 엷은 색상의 바닥으로 이동하도록 합니다. 낙하 방지 센서가 작동합니다. 엷은 색상의 바닥에서도 문제가 계속 이는 로봇 청소기가 비정상적인 발생하는 경우, www.philips.com/support를 패턴으로 움직이는 원인이 참조하거나 해당 국가의 필립스 서비스 됩니다. 센터로 문의하십시오. 로봇 청소기가 햇빛이 강하게...
- Page 118 한국의 문제점 예상 원인 해결책 로봇 청소기가 도킹 로봇 청소기가 도킹 도킹 스테이션을 다른 위치에 두십시오. 스테이션을 찾지 못합니다. 스테이션으로 이동하기 위한 '사용 전 준비' 장의 '도킹 스테이션 설치'를 충분한 공간이 없습니다. 참조하십시오. 로봇 청소기가 도킹 스테이션을 도킹 스테이션으로 돌아가기까지 약 20분간 아직...
- Page 121 empty page before backcover...
- Page 122 © 2017 Koninklijke Philips N.V. >75% recycled paper >75% papier recyclé All rights reserved 4222.003.4342.1 (7/7/2017)