
Related Manuals for Siemens RD150


Summary of Contents for Siemens RD150
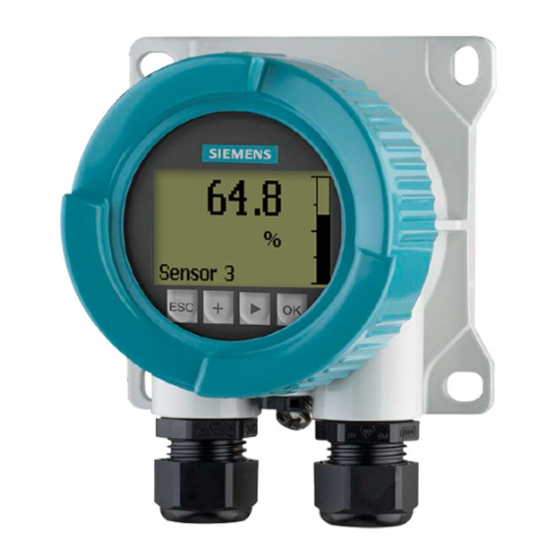
- Page 1 Indication and adjustment RD150 4 … 20 mA/HART External display and adjustment unit Operating Instructions • 07/2018...
- Page 2 RD150 - Operating Instructions MAN-100472...
-
Page 3: Table Of Contents
Adjustment system ......................22 Measured value indication - Selection of national language ........... 23 Start menu ........................24 Parameter adjustment - RD150 ..................24 Parameter adjustment - Sensors via Generic HART ............29 Setup via PACTware ....................... 31 Connect the PC ......................31 Parameter adjustment with PACTware ................ - Page 4 10.3 Dimensions ........................42 10.4 Trademark ........................45 Safety instructions for Ex areas Take note of the Ex specific safety instructions for Ex applications. These instructions are attached as documents to each instrument with Ex approval and are part of the operating instructions manual. Editing status: 2018-07-12 RD150 - Operating Instructions MAN-100472...
-
Page 5: About This Document
Action This arrow indicates a single action. Sequence of actions Numbers set in front indicate successive steps in a procedure. Battery disposal This symbol indicates special information about the disposal of bat- teries and accumulators. MAN-100472 RD150 - Operating Instructions... -
Page 6: For Your Safety
During work on and with the device, the required personal protective equipment must always be worn. Appropriate use The RD150 is suitable for measured value indication and adjustment of 4 … 20 mA/HART sensors. You can find detailed information about the area of application in chapter "Product description". -
Page 7: Eu Conformity
English language. Installations in the US shall comply with the relevant requirements of the National Electrical Code (ANSI/NFPA 70). Installations in Canada shall comply with the relevant requirements of the Canadian Electrical Code. MAN-100472 RD150 - Operating Instructions... -
Page 8: Product Description
– This operating instructions manual – Ex-specific "Safety instructions" (with Ex versions) – If necessary, further certificates Information: In this operating instructions manual, the optional instrument features are also described. The actual range of functions is determined by the order specification. RD150 - Operating Instructions MAN-100472... -
Page 9: Principle Of Operation
Sensor The sensor adjustment is carried out via a PC with PACTware/DTM. Sensor adjustment via PC with PACTware Fig. 3: Connection of the RD150 to the sensor and the PC, adjustment via PC with PACTware Voltage supply/Signal output sensor RD150 Interface adapter 4 …... -
Page 10: Packaging, Transport And Storage
Primary or Secondary Master to the sensor. Adjustment range: Sensor adjustment, indication scaling RD150 HART multidrop: the RD150 can be also used as an indicating device for a bus participant in a HART multidrop system. Adjustment range: Sensor adjustment for a bus participant, indication... -
Page 11: Accessories And Replacement Parts
It can be inserted into the sensor or the external display and adjustment unit and removed at any time. You can find additional information in the operating instructions manual "LG Local Display Interface" (Document-ID 43838). MAN-100472 RD150 - Operating Instructions... -
Page 12: Mounting
To maintain the housing protection, make sure that the housing lid is closed during operation and locked, if necessary. Make sure that the degree of contamination specified in chapter "Technical data" meets the existing ambient conditions. Mounting instructions Wall mounting The RD150 in all available housing materials is suitable for wall mounting. 82 mm (3.23") 10 mm (0.39") Fig. - Page 13 The kit consists of an adapter plate and four mounting screws M6 x 12. The adapter plate is screwed to the base of RD150 by the user. Fig. 6: RD150 with aluminium and stainless steel housing for carrier rail mount-...
- Page 14 Mounting brackets Tube (diameter 1" to 2") Front panel mounting The RD150 is also available with a plastic housing for panel mount- ing. The housing is fastened to the rear of the panel by means of the supplied screw clamps.
-
Page 15: Connecting To Power Supply
Output voltage of the power supply unit can be lower under nomi- nal load (with a sensor current of 20.5 mA resp. 22 mA in case of fault message) • Voltage loss on the RD150 (see supply circuit in chapter "Techni- cal data") You can find information on the load resistance in chapter "Technical data", (voltage supply of the respective sensor) -
Page 16: Connection Technology And Steps
If screened cable is necessary, we recommend connecting the cable Cable screening and grounding screen on both ends to ground potential. In the RD150, the screen should be connected directly to the internal ground terminal. In Ex systems it must be ensured that the grounding complies with the installation regulations. - Page 17 9. Tighten the compression nut of the cable entry gland. The seal ring must completely encircle the cable 10. Reinsert the display and adjustment module, if one was installed 11. Screw the housing lid back on MAN-100472 RD150 - Operating Instructions...
-
Page 18: Wiring Plan
For power supply Wiring plan - Panel mounting Fig. 11: Wiring plan RD150 for 4 … 20 mA sensors - panel mounting To the sensor Ground terminal in the switching cabinet for connection of the cable screen For power supply... -
Page 19: Connection Hart Multidrop
Connection HART multidrop The following illustrations show in a simplified way the use of RD150 in conjunction with several HART sensors. Fig. 13: Installation example with one RD150 for several sensors in a Multidrop system Sensor RD150 Voltage supply/Processing Connection signal conditioning instrument/ four-wire sensor Four-wire sensor with ac- The following illustration shows the simplified the connection of tive 4 … 20 mA output RD150 to a four-wire sensor with active 4 …... -
Page 20: Connection Example
Sensor power supply HART off on Fig. 14: Bridge between terminals 1 and 4 on the RD150 Bridge RD150 Active sensor Connection example 4...20mA Sensor power supply HART 6 7 8 off on Fig. 15: Connection example 4 … 20 mA/HART... -
Page 21: Set Up With The Display And Adjustment Module
"Display and adjustment module". Insert display and adjustment module Mount/dismount display The display and adjustment module can be inserted into the RD150 and adjustment module and removed again at any time. It is not necessary to interrupt the power supply. -
Page 22: Adjustment System
– Confirm selected menu – Edit parameter – Save value • [->] key: – Change measured value presentation – Select list entry – Select menu items in the quick setup menu – Select editing position • [+] key: RD150 - Operating Instructions MAN-100472... -
Page 23: Measured Value Indication - Selection Of National Language
This menu item is used to select the national language for further language parameter adjustment. A later change of the selection is possible via menu item "Setup - Display, Menu language". With the "OK" key you move to the start menu. MAN-100472 RD150 - Operating Instructions... -
Page 24: Start Menu
The start menu is divided into two sections with the following func- tions: The selection branches into the following menus for parameter adjust- ment of the RD150 or the connected sensor. Note: The symbol "S" is displayed in the upper right corner of the display if there is a HART connection to the sensor. - Page 25 It switches on automatically when the current in the signal circuit is 4 mA or higher. Setup - Damping To damp process-dependent measured value fluctuations, set an integration time of 0 … 999 s in this menu item. The increment is 0.1 s. The entered integration time influences the current value and the display. The HART value remains unaffected. MAN-100472 RD150 - Operating Instructions...
- Page 26 The PIN number is entered while locking. Diagnostics - Device In this menu item, the device status is displayed. status In case of instrument failure, an error code with text message is dis- played. You can find information on cause and rectification in chapter "Diagnosis and service". RD150 - Operating Instructions MAN-100472...
- Page 27 With this function, the display settings are copied. Copy display settings The following parameters or settings are saved: • All parameters of the menu "Setup" as well as the menu item "Additional adjustments - HART mode" MAN-100472 RD150 - Operating Instructions...
- Page 28 HART mode function as either Primary or Secondary Master. The parameter "HART address", defines the address of the sensor RD150 communicates with via HART. The factory setting is "Secondary Master" and the address 00. Info - Instrument name In this menu item, you can read out the instrument name and the...
-
Page 29: Parameter Adjustment - Sensors Via Generic Hart
Enter the requested parameters via the appropriate keys, save your settings with [OK] and jump to the next menu item with the [ESC] and the [->] key. Setup - Upper Range In this menu item, the measuring range final value of the sensor is set. Proceed as follows: MAN-100472 RD150 - Operating Instructions... - Page 30 0 … 999 s in this menu item. The increment is 1 s. Diagnostics - Device In this menu item, the device status is displayed. status Info - Serial number In this menu item, you read out the instrument serial number: RD150 - Operating Instructions MAN-100472...
-
Page 31: Setup Via Pactware
Fig. 18: Connection of the PC via interface adapter USB cable to the PC Interface adapter RD150 Via HART modem The PC is connected via a HART modem to the sensor side of the RD150. Parameter adjustment options: • Sensor MAN-100472 RD150 - Operating Instructions... -
Page 32: Parameter Adjustment With Pactware
DTM. Furthermore, not all described functions are included in older firmware versions. You can download the latest instrument software from our homepage. A description of the update procedure is also available in the Internet. The further setup steps are described in the online help of PACTware and the DTMs. RD150 - Operating Instructions MAN-100472... -
Page 33: Saving The Parameterisation Data
DTM from our homepage www.siemens.com/sitranslg. Saving the parameterisation data We recommend documenting or saving the parameterisation data via PACTware. That way the data are available for multiple use or service purposes. MAN-100472 RD150 - Operating Instructions... -
Page 34: Diagnostics And Servicing
EDD. You can find a detailed overview of this function in the operating instructions of the respective sensor. External display and The following table shows the error codes and text messages of the adjustment unit RD150 and gives information on the cause and removal. Code Cause Rectification Text message • •... -
Page 35: Rectify Faults
The following table describes possible errors in the current signal and helps to eliminate them: Error Cause Rectification • • 4 … 20 mA signal not sta- Fluctuating measured value Set damping MAN-100472 RD150 - Operating Instructions... -
Page 36: Software Update
Instruments with approvals can be bound to certain software versions. Therefore make sure that the approval is still effective after a software update is carried out. You can find detailed information in the download area on our home- page: www.siemens.com/sitranslg. How to proceed if a repair is necessary If it is necessary to repair the instrument, please contact the agency serving you. RD150 - Operating Instructions MAN-100472... -
Page 37: Dismount
WEEE directive. Correct disposal avoids negative effects on humans and the environ- ment and ensures recycling of useful raw materials. Materials: see chapter "Technical data" If you have no way to dispose of the old instrument properly, please contact us concerning return and disposal. MAN-100472 RD150 - Operating Instructions... -
Page 38: Supplement
0.7 kg (1.543 lbs) Ʋ Stainless steel housing 2.0 kg (4.409 lbs) Mounting elements approx. Ʋ Brackets for tube mounting 0.4 kg (0.882 lbs) Ʋ Adapter plate for carrier rail mounting 0.5 kg (1.102 lbs) RD150 - Operating Instructions MAN-100472... - Page 39 Functional safety SIL non-reactive Adjustment elements Slide switch in the connection compart- Activate/deactivate the integrated communication resist- ment ance for HART If the loop current is not sufficient for operation, the display does not work. When the measured values are outside the measuring range, a message is displayed instead of the measured value. MAN-100472 RD150 - Operating Instructions...
- Page 40 Ʋ Plastic housing IEC 60529 IP 66/IP 67, NEMA Type 4X Ʋ Housing for panel mounting (mount- IEC 60529 IP 40, NEMA Type 1 Ʋ Aluminium/Stainless steel housing IEC 60529IP 66/IP 68 (0.2 bar), NEMA Type 6P RD150 - Operating Instructions MAN-100472...
-
Page 41: Hart Communication
Write Damping value Damping Write Tag, descriptor, date Sensor TAG, … Write range values Write scaling values Set upper range value Max. adjustment/SPAN Set lower range value Min. adjustment/ZERO Write PV units PV unit When used with fulfilled housing protection MAN-100472 RD150 - Operating Instructions... -
Page 42: Dimensions
Fig. 21: RD150 with plastic housing RD150, plastic housing (panel mounting) 72,5 mm 22,5 mm 70 mm (2.85") (0.89") (2.76") 56 mm (2.20") 76 mm (2.99") Fig. 22: RD150 with plastic housing for panel mounting RD150 - Operating Instructions MAN-100472... - Page 43 97 mm (3.82") Fig. 23: RD150 with Aluminium housing RD150, stainless steel housing (precision casting) ø 86 mm ~ 75 mm (3.39") (2.95") 97 mm (3.82") Fig. 24: RD150, with stainless steel housing (precision casting) MAN-100472 RD150 - Operating Instructions...
- Page 44 Mounting elements 97 mm (3.82") 82 mm 7 mm (3.23") (0.28") Fig. 25: Adapter plate for carrier rail mounting of RD150 48...84 mm (1.89"...3.31") 20 mm 20 mm (0.79") (0.79") Fig. 26: Brackets for tube mounting of RD150 RD150 - Operating Instructions...
-
Page 45: Trademark
10.4 Trademark All the brands as well as trade and company names used are property of their lawful proprietor/ originator. MAN-100472 RD150 - Operating Instructions... - Page 46 Error codes 34 Grounding 16 HART mode 28 Instrument versions 8 Lock adjustment 26 Modes 10 Mounting – Carrier rail 12 – Front panel 14 – Position 12 – Tube 13 Recycling 37 Repair 36 Reset 27 RD150 - Operating Instructions MAN-100472...
- Page 47 Notes MAN-100472 RD150 - Operating Instructions...
- Page 48 For more information www.siemens.com/level www.siemens.com/weighing Siemens Canada Limited Subject to change without prior notice PD PA PI LW MAN-100472 Rev. 1.0 1954 Technology Drive P.O. Box 4225 © Siemens AG 2018 Peterborough, ON K9J 7B1, Canada email: techpubs.smpi@siemens.com Printed in Canada www.siemens.com/processautomation...