Table of Contents
Advertisement
Quick Links
OWNER'S MANUAL
WASHER AND DRYER
Before beginning installation, read these instructions
carefully. This will simplify installation and ensure that the
product is installed correctly and safely. Leave these
instructions near the product after installation for future
reference.
EN ENGLISH
FWV796*TSE
MFL71724722
Rev.00_061220
Copyright © 2020 LG Electronics Inc. All Rights Reserved.
www.lg.com
Advertisement
Table of Contents

Related Manuals for LG FWV796 TSE Series


Summary of Contents for LG FWV796 TSE Series
- Page 1 This will simplify installation and ensure that the product is installed correctly and safely. Leave these instructions near the product after installation for future reference. EN ENGLISH FWV796*TSE www.lg.com MFL71724722 Rev.00_061220 Copyright © 2020 LG Electronics Inc. All Rights Reserved.
-
Page 2: Table Of Contents
Adding Detergents and Softeners ..............21 Control Panel ....................24 Programme Table ....................27 Drying Programme ..................32 Extra Options and Functions ................35 SMART FUNCTIONS LG ThinQ Application ..................38 Smart Diagnosis ....................41 MAINTENANCE Cleaning After Every Wash................43 Cleaning the Appliance Periodically & Performing an Emergency Water Evacuation......................44 TROUBLESHOOTING Before Calling for Service................47... - Page 3 APPENDIX Product Fiche....................57...
-
Page 4: Safety Instructions
SAFETY INSTRUCTIONS SAFETY INSTRUCTIONS READ ALL INSTRUCTIONS BEFORE USE The following safety guidelines are intended to prevent unforeseen risks or damage from unsafe or incorrect operation of the appliance. The guidelines are separated into ‘WARNING’ and ‘CAUTION’ as described below. Safety Messages This symbol is displayed to indicate matters and operations that can cause risk. - Page 5 SAFETY INSTRUCTIONS • Children of less than 3 years should be kept away unless continuously supervised. • If the power cord is damaged, it must be replaced by the manufacturer, its service agent or similarly qualified persons in order to avoid a hazard. •...
- Page 6 SAFETY INSTRUCTIONS • The appliance is not to be used if industrial chemicals have been used for cleaning. Installation • Never attempt to operate the appliance if it is damaged, malfunctioning, partially disassembled, or has missing or broken parts, including a damaged cord or plug. •...
- Page 7 • Do not touch the door during a high temperature programme. • In case of a water leak from the appliance or flood, disconnect the power plug and contact the LG Electronics customer information centre. • Turn off water taps to relieve pressure on hoses and valves and to minimize leakage if a break or rupture should occur.
- Page 8 • Only qualified service personnel from LG Electronics service centre should disassemble, repair, or modify the appliance. Contact an LG Electronics customer information centre if you move and install the...
-
Page 9: Caring For The Environment
• You can take your appliance either to the shop where you purchased the product, or contact your local government waste office for details of your nearest authorised WEEE collection point. For the most up to date information for your country, please see www.lg.com/global/recycling. -
Page 10: Installation Parts And Specifications
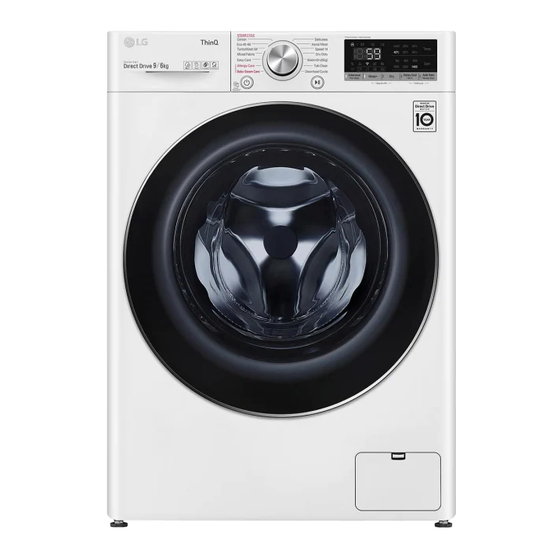
INSTALLATION INSTALLATION Parts and Specifications NOTE • Appearance and specifications may change without notice to improve the quality of the appliance. Front View Rear View a Control Panel a Power Plug b Detergent Dispenser Drawer b Transit Bolts c Drum c Drain Hose d Door e Cover Cap... - Page 11 INSTALLATION Accessories *1 The included accessories vary depending on the model you purchased. Cold Supply Hose Anti–slip Sheets*1 Spanner Elbow Bracket for Securing Drain Hose Caps for Covering Transit Bolt Tie Strap Holes Specifications Model FWV796*TSE Power Supply 220‒240 V~, 50 Hz Product Weight 73 kg Dimension(mm)
-
Page 12: Installation Place Requirements
INSTALLATION Installation Place or floor moldings that may increase the required clearances. Requirements Before installing the appliance, check the following information to make sure that the appliance should be installed in a correct place. Installation Location • This appliance must be installed on firm flooring to minimize vibration during the spin cycle. - Page 13 • Power outlet must be within 1 meter of either side of the appliance. NOTE WARNING • You can purchase rubber cups (part No. 4620ER4002B) from the LG service • Repairs to the appliance must only be centre. carried out by qualified personnel. Repairs carried out by inexperienced persons may cause injury or serious malfunctioning.
-
Page 14: Unpacking The Appliance
INSTALLATION Unpacking the fully loosen all transit bolts by turning them counterclockwise. Appliance Lifting the Appliance Off the Foam Base * This feature may vary depending on the model purchased. After removing the carton and shipping material, lift the appliance off the foam base. -
Page 15: Levelling The Appliance
• Do not install the washing machine on diagonally, adjust the feet again. a plinth, stand or elevated surface unless it is manufactured by LG • Check whether the appliance is Electronics for use with this model. perfectly level after installation. -
Page 16: Connecting The Water Supply Hose
NOTE excessive vibration. Incorrect levelling • Additional anti-slip sheets are available may cause malfunction through noise at LG Electronics service centre. and vibration. If this occurs, install the anti-slip sheets under the levelling feet and adjust the level. Clean the floor to attach the anti-slip Connecting the Water sheets. - Page 17 INSTALLATION • No further backflow protection NOTE required for connection to the water inlet. • After connecting the water inlet hose to the water tap, turn on the water tap to flush out foreign substances (dirt, sand, sawdust, and etc.) in the water Checking the Rubber Seal lines.
-
Page 18: Installing The Drain Hose
INSTALLATION Installing the Drain • When installing the drain hose to a sink, secure it tightly with string. Hose Installing the Drain Hose with the Elbow Bracket The drain hose should not be placed higher than 100 cm above the floor. Water in the appliance may not drain or may drain slowly. -
Page 19: Operation Operation Overview
OPERATION OPERATION Operation Overview • Remove items from the flexible door seal gasket to prevent clothing and door seal damage. Using the Appliance Before the first wash, select the Cotton wash programme and add a half amount of the detergent. Start the appliance without clothes. -
Page 20: Preparing The Wash Load
OPERATION Checking the Clothes Care Label appliance will shut off and all settings will be lost. The symbols tell you about the fabric content of your garment and how it End of cycle. should be washed. • When the cycle is finished, a melody Symbols on the Care Labels will sound. -
Page 21: Adding Detergents And Softeners
OPERATION keys can damage both your appliance • Do not use liquid detergent if you are and clothes. using the Delay End function, or if you have selected Pre Wash option, as the liquid will dispense immediately and may harden in the drawer or the tub. •... - Page 22 OPERATION Open the dispenser drawer. to dispense too early, which may stain the clothes. Add the detergent and softener into the appropriate compartments. NOTE • Do not pour fabric softener directly onto the clothes in the wash drum, a Main wash detergent compartment doing so will cause dark staining on the clothes that will be difficult to...
- Page 23 OPERATION NOTE • Do not put tablets into the dispenser. Adding Water Softener A water softener, such as anti-limescale can be used to cut down on the use of detergent in areas with high water hardness level. • First add detergent, and then the water softener.
-
Page 24: Control Panel
OPERATION Control Panel The actual control panel may differ from model to model. Control Panel Features Description Power On/Off Button • Press this button to turn the washing machine on. Programme Knob • Programmes are available according to the clothes type. •... - Page 25 • This allows you to select an additional programmes and will light when selected. Remote Start With the LG ThinQ app, you can use a smartphone to control your appliance remotely. • In order to use this function, refer to SMART FUNCTIONS.
- Page 26 OPERATION Description Programme Status Indicators • When a washing programme is running, LED for the active stage will blink, and the LEDs for the remaining stages will remain steady. Once a stage is complete, the LED will turn off. If a cycle is paused, the active stage LED will stop blinking.
-
Page 27: Programme Table
OPERATION Programme Table Washing Programme Cotton 40 ℃ (Cold to 95 ℃) Max. Load: Rating Description Washes normally soiled clothes by combining various drum motions. • Pressing the Start/Pause button without selecting a programme will cause the Cotton programme to begin immediately, using the default settings. - Page 28 OPERATION Delicates 20 ℃ (Cold to 40 ℃) Max. Load 3 kg Description Washes machine-washable lingerie, sheer and lacy clothes. Hand/Wool 30 ℃ (Cold to 40 ℃) Max. Load 2 kg Description Washes hand-washable and machine-washable delicate clothes such as washable wool, lingerie, dresses etc. •...
- Page 29 OPERATION utilized detergent, fluctuations in the main electricity supply and chosen additional options. • Select the appropriate water temperature for chosen wash programme. Always follow garment manufacturer’s care label or instructions when washing to avoid damage to clothes. • Select the proper wash temperature and spin speed for the desired programmes. •...
- Page 30 OPERATION Extra Options *1 This option is automatically inserted in the programme and can not be deselected. NOTE • Delay End and Add Item options can be selected for every washing programme in this table. Programme Intensive Pre Wash Rinse+ Cotton Eco 40-60 TurboWash...
- Page 31 OPERATION Selectable Maximum Spin Speed Spin Speed Programme Default Available Cotton 1400 rpm Eco 40-60 1400 rpm TurboWash 59 1200 rpm 400 to 1400 rpm Mixed Fabric 1000 rpm Easy Care 1400 rpm Allergy Care 1400 rpm Baby Steam Care 1000 rpm Up to 1000 rpm Delicates...
-
Page 32: Drying Programme
OPERATION Drying Programme Always stretch these materials out immediately after drying. General Tips for Drying Permanent Press and Synthetics Use the automatic programmes to dry Do not overload your appliance. Take out most loads. Electronic sensors measure permanent press articles as soon as the the temperature of the exhaust to appliance stops to reduce wrinkles. - Page 33 OPERATION of the load, and the dryness selected Normal Eco ( affect drying time. Suitable for energy dry programme. • When you select drying only, spinning • Fabric Type: Cotton or linen fabrics runs automatically for energy such as cotton towels, t-shirts, and efficiency.
- Page 34 OPERATION • Time 30/60/120 minutes - For timed NOTE drying • If you select the programme, you will • Iron ( ) - For damp drying items be unable to select a dry programme. for ironing If this occurs, press the Power button •...
-
Page 35: Extra Options And Functions
OPERATION Extra Options and Intensive This function is used to wash normal and Functions heavily soiled clothes. • Press the Intensive button. You can use the extra options and functions to customize the programmes. Follow the next steps to customise a Customising a Washing washing programme: Programme... - Page 36 OPERATION Open the door after it unlocks itself NOTE and add or remove necessary • If you select the washing programme, clothing items. you will be unable to select a spin only. If this occurs, press Power button Close the door and press the Start/ twice to cycle the machine off and back Pause button.
- Page 37 OPERATION Settings • Press and hold the Rinse+ and Dry buttons simultaneously for 3 seconds Child Lock to deactivate/activate this function. Use this option to disable the controls. This function can prevent children from changing cycles or operating the appliance. NOTE •...
-
Page 38: Smart Functions
SMART FUNCTIONS SMART FUNCTIONS LG ThinQ Application Smart Diagnosis This function provides useful The LG ThinQ application allows you to information for diagnosing and solving communicate with the appliance using a issues with the appliance based on the smartphone. pattern of use. - Page 39 To check your network product again. frequency, contact your Internet service provider or refer to your wireless router manual. • LG ThinQ is not responsible for any Installing the LG ThinQ network connection problems or any Application faults, malfunctions, or errors caused by network connection.
- Page 40 The period of time after which • Once this function is enabled, you can the power management minu only start a cycle from the LG ThinQ function, or a similar function, smartphone application. If the cycle is switches the equipment...
-
Page 41: Smart Diagnosis
• Launch the LG ThinQ application and This offer is valid for a period of three select the Smart Diagnosis feature in years after our last shipment of this the menu. - Page 42 SMART FUNCTIONS NOTE • For best results, do not move the smartphone while the tones are being transmitted.
-
Page 43: Maintenance
MAINTENANCE MAINTENANCE WARNING • Unplug the appliance before cleaning to avoid the risk of electric shock. Failure to follow this warning may result in serious injury, fire, electric shock, or death. • Never use harsh chemicals, abrasive cleaners, or solvents to clean the appliance. They may damage the finish. -
Page 44: Evacuation
MAINTENANCE Cleaning the Appliance Press the Start/Pause button to start. Periodically & Performing an Leave the door open to dry the inside of the appliance completely. Emergency Water • When the inside of the appliance is Evacuation not dried completely, it may cause a bad smell or mildew. - Page 45 MAINTENANCE Remove the water inlet filter with water and then proceed to remove small pliers and then clean the filter any debris or objects from the filter. using a medium bristle tooth brush. After cleaning the drain pump filter, carefully reinsert the filter and screw Cleaning the Drain Pump Filter the drain cap back in clockwise and Performing an Emergency...
- Page 46 MAINTENANCE • Then gently pull the drawer outward while pressing hard the disengage button. Remove the build-up of detergent and softener. • Rinse the drawer and the components of the drawer with warm water to remove the build-up from detergent and softener. Use only water to clean the dispenser drawer.
-
Page 47: Troubleshooting
Your appliance is equipped with an automatic error-monitoring system to detect and diagnose problems at an early stage. If the appliance does not function properly or does not function at all, check the following tables before calling to LG Electronics service centre. - Page 48 • Check and clean the drain filter. Door sensor malfunctions. dE dE1 dEz dE4 • Please call LG service centre. You can find your local LG DOOR ERROR service centre phone number in the warranty card. This is a control error.
- Page 49 TROUBLESHOOTING Symptoms Possible Cause & Solution Is supply/drain hose or drain pump frozen? • Supply warm water into the drum in order to unfreeze the FROZEN FAILURE drain hose and the drain pump. Cover the supply hose with wet and warm towel. Water leaks.
- Page 50 TROUBLESHOOTING Symptoms Possible Cause & Solution Vibrating noise Package materials are not removed. • Remove package materials. The clothes may be unevenly distributed in the drum. • Pause the programme and redistribute the clothes after the door unlocks. Not all levelling feet are resting firmly and evenly on the floor.
- Page 51 TROUBLESHOOTING Symptoms Possible Cause & Solution Appliance does Control panel has powered off due to inactivity. not operate. • This is normal. Press the Power button to turn the appliance on. Appliance is unplugged. • Make sure that the cord is plugged securely into a working outlet.
- Page 52 TROUBLESHOOTING Symptoms Possible Cause & Solution Door does not The door cannot be opened for safety reasons once the open. appliance starts. • This is normal. You can safely open the door after turns off. Appliance is not Inlet filter clogged. filling properly.
- Page 53 TROUBLESHOOTING Symptoms Possible Cause & Solution Cycle end is Unbalance is detected or suds removing programme is delayed • This is normal. The time remaining shown on the display is only an estimated duration. Actual time may vary. Performance Symptoms Possible Cause &...
- Page 54 TROUBLESHOOTING Symptoms Possible Cause & Solution Wrinkling Appliance is not unloaded promptly. • Always remove items from the appliance as soon as the programme is complete. Appliance is overloaded. • The appliance can be fully loaded, but the drum should not be tightly packed with items.
- Page 55 TROUBLESHOOTING Drying Symptoms Possible Cause & Solution Dry problem Check water supply tap. • Do not overload. Check that the washing machine is draining properly to extract adequate water from the load. When load of laundry is too small to tumble properly. Add a few towels.
- Page 56 • Find the Wi-Fi network connected to your smartphone and not connected to remove it, then register your appliance on LG ThinQ. the Wi-Fi network. Mobile data for your smartphone is turned on. • Turn off the Mobile data of your smartphone and register the appliance using the Wi-Fi network.
- Page 57 APPENDIX APPENDIX Product Fiche Commission Delegated Regulation (EU) No 96/60/EC Asterisk(s) means model variant and can be varied (0-9) or (A-Z). FWV796*TSE Energy efficiency class Energy consumption 6.12 • Washing, spinning and drying (kWh/cycle) 1.52 • Washing and spinning only (kWh/cycle) Washing performance and water extraction efficiency class •...
- Page 58 APPENDIX FWV796*TSE • Energy consumption (kWh/year) 1224 • Water consumption (litres/year) 33000 Estimated annual energy and water consumption for a four-person household, never using the drier (200 cycles) • Energy consumption (kWh/year) • Water consumption (litres/year) 12400 Noise during washing, spinning and drying phases using standard 60 °C cotton washing cycle and 'dry cotton' drying cycle.
- Page 59 Memo...