
Related Manuals for Huawei IPC6091-P360


Summary of Contents for Huawei IPC6091-P360
- Page 1 IPC6091-P360 V300R019C00 Quick Start Guide Issue Date 2019-02-22 HUAWEI TECHNOLOGIES CO., LTD.
- Page 2 Notice The purchased products, services and features are stipulated by the contract made between Huawei and the customer. All or part of the products, services and features described in this document may not be within the purchase scope or the usage scope. Unless otherwise specified in the contract, all statements, information, and recommendations in this document are provided "AS IS"...
-
Page 3: Table Of Contents
6.1 Set the Initial Password..............................15 6.2 Modify IP Address................................17 6.3 Login Web Interface..............................18 7 Smart Track Setup........................19 7.1 Enable Alarm Track..............................19 7.2 Set Calibration Parameters............................20 8 Warranty Card..........................22 Issue 01 (2019-02-22) Copyright © Huawei Technologies Co., Ltd. -
Page 4: Important Safeguards And Warnings
Please keep this user manual well for future reference. FCC SDOC Compliance Statement Supplier's Declaration of Conformity (SDoC) Unique Identifier: trade name: HUAWEI; product name: Network camera; model number: IPC6091-P360 Responsible Party- U.S. Contact Information Huawei Technologies USA Inc. - Page 5 Keep the indoor device away from rain or damp to avoid fire or lightning. Keep sound ventilation to avoid heat accumulation. Pack the device with standard factory packaging or the equivalent material when transporting the device. Issue 01 (2019-02-22) Copyright © Huawei Technologies Co., Ltd.
- Page 6 You can also use air gun to remove the dust if the shield is stained with dust. Issue 01 (2019-02-22) Copyright © Huawei Technologies Co., Ltd.
- Page 7 All the designs and software are subject to change without prior written notice. The manual will be regularly updated according to the product upgrade without prior announcement. If there is any uncertainty or controversy, please refer to our final explanation. Issue 01 (2019-02-22) Copyright © Huawei Technologies Co., Ltd.
-
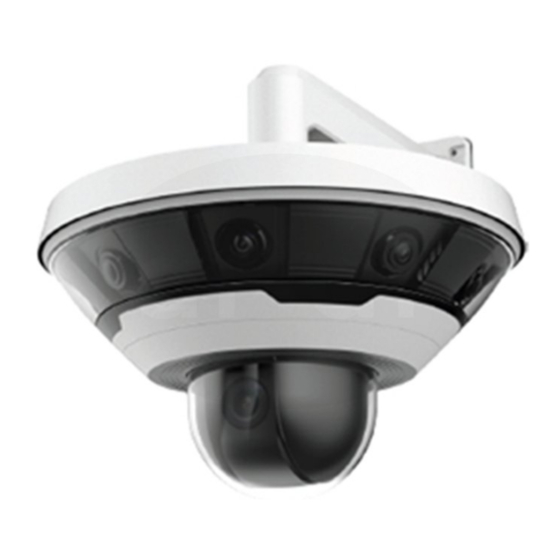
Page 8: Product Overview
Support intelligent alarm for no SD card, SD card capacity warning, SD card error, network disconnection and IP conflict. Support panoramic image correction on the client end. Support smart track, auto tracking and other intelligent functions. Issue 01 (2019-02-22) Copyright © Huawei Technologies Co., Ltd. - Page 9 It can be applied to places which require HD image quality and large scenario monitoring, such as square, airport, supermarket, hotel, government, school, factory, public safety, forensic security and safe city etc. Issue 01 (2019-02-22) Copyright © Huawei Technologies Co., Ltd.
-
Page 10: Unpacking Inspection
After unpacking the package, check whether the device is intact and confirm the accessory list. For details, see the accessory list delivered with the device. For details about the configuration, see the specific product documentation. Issue 01 (2019-02-22) Copyright © Huawei Technologies Co., Ltd. -
Page 11: Device Structure
The following figure is for reference only, which is used to know the function of cable port. Different devices have different cables, please refer to the actual device for more details. Figure 4-1 External ports Issue 01 (2019-02-22) Copyright © Huawei Technologies Co., Ltd. -
Page 12: Dimensions
The following figures are for reference only, which are used to know the device dimension. Please refer to the actual device for more details. Figure 4-2 Device dimensions 1 (unit: mm) Figure 4-3 Bracket dimensions 1 (unit: mm) Issue 01 (2019-02-22) Copyright © Huawei Technologies Co., Ltd. -
Page 13: Device Installation
Step 2 Find the SD card slot in the location shown in Figure 5-1, adjust the direction of Micro SD card well and insert it into the slot and complete installation. Issue 01 (2019-02-22) Copyright © Huawei Technologies Co., Ltd. -
Page 14: Install Device
Please cut off the device power when installing Micro SD card. It can install the anti-drop rope on the hook of the device bottom and use installation handle to carry the device when moving the device. Issue 01 (2019-02-22) Copyright © Huawei Technologies Co., Ltd. -
Page 15: Fix Mounting Bracket
----End 5.2.2 Install Adapter Block Pull the device external cable through the adapter block and twist it into the installation bracket, then use the locking screw to tighten it firmly. Issue 01 (2019-02-22) Copyright © Huawei Technologies Co., Ltd. -
Page 16: Connect Device Cable
Step 3 Put the main body of waterproof connector on the network port and rotate it clockwise to lock the network port and waterproof connector firmly. Issue 01 (2019-02-22) Copyright © Huawei Technologies Co., Ltd. -
Page 17: Fix Device
Step 1 Twist the device into the adapter block and use anti-drop screw to tighten it firmly. Step 2 Adjust the monitoring angle well according to the requirements. Step 3 Use locking screw to fix the device firmly. ----End Issue 01 (2019-02-22) Copyright © Huawei Technologies Co., Ltd. -
Page 18: Network Configuration
Step 1 In the address box of Internet Explorer, enter http://IPC IP address and press Enter. The Device Initialization page is displayed, as shown in Figure 6-1. NOTE 192.168.0.120 is the default IP address of the camera. Issue 01 (2019-02-22) Copyright © Huawei Technologies Co., Ltd. - Page 19 Step 3 Click OK. The Online Upgrade page is displayed, as shown in Figure 6-2. Figure 6-2 Online Upgrade Step 4 Deselect Auto-check for updates. Step 5 Click OK to complete device initialization. ----End Issue 01 (2019-02-22) Copyright © Huawei Technologies Co., Ltd.
-
Page 20: Modify Ip Address
Step 5 Set the Mode as Static, and enter the planned start IP, subnet mask and gateway. NOTE Set the Mode as DHCP when there is DHCP server in the network, the device will automatically acquire IP address from the DHCP server. Issue 01 (2019-02-22) Copyright © Huawei Technologies Co., Ltd. -
Page 21: Login Web Interface
1 and substream 2 respectively; represents mainstream. ----End Issue 01 (2019-02-22) Copyright © Huawei Technologies Co., Ltd. -
Page 22: Smart Track Setup
Step 1 Choose Setup > Event > Smart Track > Alarm Track. The Alarm Track tab page is displayed, as shown in Figure 7-1. Figure 7-1 Alarm Track tab page Step 2 Click the slider to enable Alarm Track. ----End Issue 01 (2019-02-22) Copyright © Huawei Technologies Co., Ltd. -
Page 23: Set Calibration Parameters
Figure 7-3 Selecting a lens ID Click and click video image to display calibration box, drag the calibration box to proper location. Issue 01 (2019-02-22) Copyright © Huawei Technologies Co., Ltd. - Page 24 It can add at least 4 calibration points for video image of each lens by repeating step Step 2.1 Step 2.3. Step 3 Click Save to complete setting. ----End Issue 01 (2019-02-22) Copyright © Huawei Technologies Co., Ltd.
-
Page 25: Warranty Card
IPC6091-P360 Quick Start Guide 8 Warranty Card Warranty Card Issue 01 (2019-02-22) Copyright © Huawei Technologies Co., Ltd. - Page 26 IPC6091-P360 Quick Start Guide 8 Warranty Card Issue 01 (2019-02-22) Copyright © Huawei Technologies Co., Ltd.