Table of Contents
Advertisement
T
ABLE OF
Safety Precautions
WARNING:
DANGEROUS
VOLTAGE INSIDE
WARNING:
TO PREVENT FIRE OR SHOCK HAZARD,
DO NOT EXPOSE THIS UNIT TO RAIN OR
MOISTURE.
• The STANDBY/ON and VCR POWER buttons do not completely shut off
the mains power from the unit, but switch operating current on or off only.
• The rating plate is on the rear of the unit.
Table of Contents
Some Do's and Dont's............................................................................................. 3
Description of Controls ......................................................................................... 4
Front Panel .................................................................................................. 4
Rear Panel ................................................................................................... 5
On-Screen Display ...................................................................................... 5
Remote Control ........................................................................................... 6
Display Window .......................................................................................... 8
Getting Connected Up ........................................................................................... 9
VCR to TV Connection using the RF Connection ...................................... 9
VCR to AV TV Connection using the SCART Connection ........................ 9
VCR to AV TV Connection using the S-video Connection ...................... 10
Setting Up ............................................................................................................. 11
Auto Set Up/Preset Download .................................................................. 11
Setting the Video Channel ......................................................................... 14
Power Save Mode ..................................................................................... 15
Preset Download ....................................................................................... 15
Auto Channel Setting ................................................................................ 15
Manual Channel Setting ............................................................................ 16
Clock Setting ............................................................................................. 20
®
Set Up .............................................................................. 20
Basic Operations .................................................................................................. 21
Playback .................................................................................................... 21
Recording .................................................................................................. 22
Automatic Operations ............................................................................... 22
Advanced Operations .......................................................................................... 23
Special Effect Playbacks ........................................................................... 23
Tracking Adjustments ............................................................................... 23
Index Search .............................................................................................. 23
SmartPicture .............................................................................................. 24
DSPC ........................................................................................................ 24
Digital TBC/NR ........................................................................................ 25
Digital 3R .................................................................................................. 25
Receiving/Recording NICAM Stereo and Bilingual Programmes ........... 25
Selecting Monitor Sound .......................................................................... 25
Using On-Screen Display ......................................................................... 26
One Touch Recording (OTR) .................................................................... 26
Selecting Recording Format ..................................................................... 27
Selecting AV1 and AV2 Input signal ......................................................... 27
Automatic Satellite Programme Recording .............................................. 28
EasyLink Functions .................................................................................. 28
Timer Recording ....................................................................................... 30
Tape Duplication ....................................................................................... 32
Audio Dubbing ......................................................................................... 33
System Connections ............................................................................................. 34
Connection To a Satellite Tuner (Simple Connections) ............................ 34
Connection To a Satellite Tuner (Perfect Connections) ............................ 34
Connection To a Decoder .......................................................................... 35
Operating TV ....................................................................................................... 36
Before Requesting Service .................................................................................. 37
Specifications ........................................................................................................ 38
VIDEO Plus+
and PlusCode are registered trade-
marks of Gemstar Development Corporation. The
VIDEO Plus+
system is manufactured under license
from Gemstar Development Corporation.
C
ONTENTS
................................... 29
625
- 2 -
Introduction
Congratulations on purchasing your
new VCR.
You can't wait to get it working, but
before you do, spare a few moments to
read this brief introduction to the world
of video recording. It may repay you
handsomely in terms of improved
results, and avoiding of costly mis-
takes.
Important for the United
Kingdom.
This machine is fitted with an
approved moulded 13 Amp plug. To
change a fuse in this type of plug,
please follow these instructions.
1
Take off the fuse cover and
take out the fuse.
2
Put in a new fuse which
should be a BS1362 3A,
A.S.T.A or BSI approved
type.
3
Refit the fuse cover.
If the plug fitted is not suitable for
your socket, cut it off and fit
another type.
If the plug you fit contains a fuse, it
should be a 3Amp fuse. If you fit a
plug which does not need a fuse,
make sure the fuse on your fuse box
is not greater than 5 Amps.
i
Note: Please destroy the plug
you have cut off so that it
cannot be used in a 13 Amp
socket somewhere else.
How to connect a plug
The wires in the lead from the
video recorder are coloured as
follows.
* Blue - 'neutral' ('N')
* Brown - 'live' ('L')
4
Connect the blue wire to the
terminal in the plug which is
marked with the letter 'N' or
coloured black.
5
Connect the brown wire to
the terminal in the plug
which is marked with the
letter 'L' or coloured red.
6
Do not connect either of the
wires to the terminal in the
plug which is marked with
the letter 'E', the symbol
coloured green or green and
yellow.
Before you refit the plug cover,
make sure that the grip at the
bottom of the plug is clamped over
the plastic cover of the lead, not just
over the two wires.
or
Advertisement
Table of Contents

Related Manuals for Philips VR1000/02X


Summary of Contents for Philips VR1000/02X
-
Page 1: Table Of Contents
ABLE OF Safety Precautions WARNING: DANGEROUS VOLTAGE INSIDE WARNING: TO PREVENT FIRE OR SHOCK HAZARD, DO NOT EXPOSE THIS UNIT TO RAIN OR MOISTURE. • The STANDBY/ON and VCR POWER buttons do not completely shut off the mains power from the unit, but switch operating current on or off only. •... -
Page 2: Some Do's And Dont's
This equipment has been designed and manufactured to meet international safety standards but, like any electrical equipment, care must be taken if you are to obtain the best results and safety is to be assured. read the operating instructions before you attempt to use the equipment. ensure that all electrical connections (including the mains plug, extension leads and interconnections between pieces of equipment) are properly made and in accordance with the manufacturer's instructions. -
Page 3: Description Of Controls
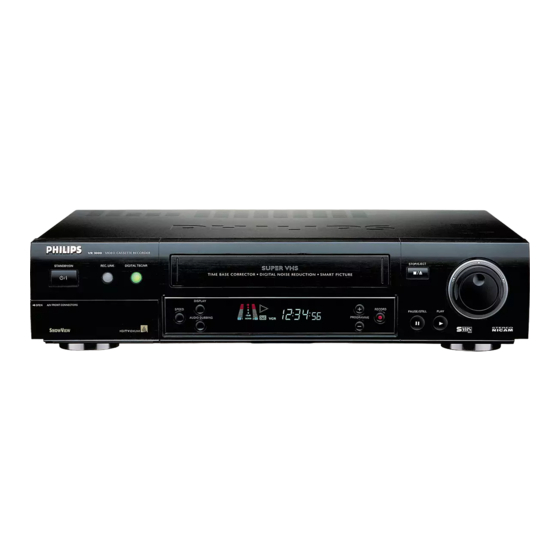
ESCRIPTION OF Front Panel VR 1000 VIDEO CASSETTE RECORDER STANDBY/ON REC LINK DIGITAL TBC/NR TIME BASE CORRECTOR DIGITAL NOISE REDUCTION SMARTPICTURE DISPLAY OPEN AV FRONT CONNECTORS SPEED AUDIO DUBBING IEWLINK OPEN IEWLINK Open the lid. 1 STANDBY/ON button • Turns the VCR on or off. •... -
Page 4: Rear Panel
Rear Panel S OUT 1 AC (alternating current) power cord Connect the AC power cord to an AC outlet. 2 S-VIDEO out jack For connecting to the S-Video input jack on a TV or another VCR. ( P.9, P.32) On-Screen Display The following information (VCR operating status) appears on the TV screen. -
Page 5: Remote Control
PICTURE JOG/SHTL RECORD Using this remote control to operate TV You can use this remote control to operate PHILIPS TV and other manufacturers’ TV. To operate TV, see page 36. ONTROLS 1 MUTE button Minimizes the TV volume instantly. Press again to return to the previous volume level. - Page 6 23 STOP button Stops the tape. 24 TV CH +/– button Changes the TV channels. Release at a desired channel. 25 DISPLAY button Switches display between present time, tape remaining time, time counter and channel position. ( P.22) 26 TIMER button Displays the Timer Recording menu.
-
Page 7: Display Window
Display Window VPS/PDC NORM 10 11 1 Sound level indicator Indicates the audio signal level. 2 Programme Time Indicators \ \ \ \ \ | | | | | : Start programme time. : Stop programme time. 3 Operation mode indicators ‡... -
Page 8: Getting Connected Up
ETTING VCR to TV Connection using the RF connection To connect to a TV with No 21-pin AV input connector. Connection 1 Disconnect the antenna or cable from the TV and the AC power cord Diagram of the TV from the AC outlet. 2 Connect the antenna or cable to the VCR. -
Page 9: Vcr To Av Tv Connection Using The S-Video Connection
VCR to AV TV Connection Using the S-video Connection To obtain high-quality S-VHS pictures and Hi-Fi sounds, you can also use the S-VIDEO CONNECTION described below; 1) Complete the VCR to TV connection using the RF Connection. 2) Connect an S-Video/Audio cables between the S-VIDEO OUT/AUDIO OUT jacks on the VCR and an S-Video/Audio input jacks on a TV. -
Page 10: Setting Up
ETTING Auto Set Up/Preset Download For the first time you press the STANDBY/ON button on the front panel or VCR POWER on the remote control to turn on the VCR after you plug the AC power cords, the Auto Set up/Preset Download display will appear on the TV screen and the VCR’s display window. - Page 11 ETTING ¶ If “– –:– –” appears, both Auto Channel Set and Auto Clock Set have failed. Make sure the TV antenna cable is connected correctly and press OK to re-perform the Auto Set Up. 3 Press OK. If the correct current time is displayed on the display window, the Auto Channel Set and Clock Set have been completed successfully.
- Page 12 Preset Download Before performing the following steps, be sure to finish Preparation on page 11. ¶ If you are referring to the display window, press ∞ to select “CH – –” and press OK or 4. Channel position number increases from “CH 1”.
-
Page 13: Setting The Video Channel
ETTING Setting the Video Channel The video Channel (RF Output Channel) is the channel on which your TV receives picture and sound signals from the VCR through the RF cable. IMPORTANT Perform the following steps only if – – Video Channel Set has not been done correctly by the Auto Set Up function. ( P.11) –... -
Page 14: Power Save Mode
Power Save Mode You can reduce the power consumption while the VCR is turned off. Select Mode Set Screen 1 Press MENU. ∞ 2 Press to select “MODE SET” then press OK or 4. Set Power Save Mode ∞ Press to select “POWER SAVE”... -
Page 15: Manual Channel Setting
ETTING Manual Channel Setting When you want to do channel setting manually, perform the following procedures as required. • If you want to ..add channels (See below) ... delete unwanted channels (See next column) ... change the channel positions (See next column) ... - Page 16 If you want to descramble programmes when receiving scrambled broadcasts When you can receive a scrambled broadcast, you can descramble the programme by connecting this VCR to an external decoder through the VCR’s AV2 IN/DECODER connector. Complete the connection described on page 34 and follow the instructions below;...
-
Page 17: Tv Station And Id List
ETTING TV Station And ID List STATION NAME Anglia TV ANGL ARTE ARTE BBC Group BBC1 BBC1 BBC2 BBC2 Berlin 1 BLN1 Berlin 2 BLN2 Border TV BORD Bayern1 Bayern3 BRT1 BRT1 BRT2 BRT2 Children Ch CHLD Canal + Channel TV CHNL Central TV CNTR... -
Page 18: Tv Station Channel Number Guide
TV Station Channel Number Guide Only the main stations are listed. There are in addition many relay stations, and full lists are available from the BBC and ITV. BBC1 BBC2 ITV London & South-East Bluebell Hill Crystal Palace Dover Heathfield Oxford South-West Beacon Hill... -
Page 19: Clock Setting
ETTING Clock Setting You can also reset or correct the clock manually. Select Clock Set Screen 1 Press MENU. ∞ 2 Press to select “INITIAL SET ” then press OK or 4. The Initial Set menu appears. ∞ 3 Press to select “CLOCK SET”... -
Page 20: Basic Operations
ASIC PERATIONS Playback Make sure... • Your VCR, TV, and antenna are connected correctly. On TV 1 Turn on the TV. 2 Select the video channel (or external video input). On VCR Insert a cassette. The VCR turns on automatically and the counter is reset to 0:00:00. -
Page 21: Recording
ASIC PERATIONS Recording When using this VCR, an index mark is always marked at the beginning of every recording. These index marks make it easier for you to search for the beginning of the recordings (see “Index Search” ). ( P.23) Make sure... -
Page 22: Advanced Operations
DVANCED Special Effect Playbacks Are you familiar with tape playback? If so, you are ready to enjoy the special effect playback features described below. To view a still picture Press PAUSE/STILL briefly during playback. Playback is freezed and a still picture appears. -
Page 23: Smartpicture
DVANCED SmartPicture You can make the picture softer or sharper or distinct the picture when playing the tape. SmartPicture is set to AUTO when you receive the VCR. Select SmartPicture Mode 1 Press the SMARTPICTURE button. The AUTO current setting will appear on the screen for about 5 seconds. -
Page 24: Digital Tbc/Nr
Digital TBC/NR Your VCR is equipped with the Digital TBC (Time Base Corrector) that removes jitter from fluctuating video signals to deliver a stable picture even with old tapes and rental cassettes. The on/off of Digital 3-DNR (Noise Reduction) which cuts noise and enables clear picture reproduction is also linked to this function. -
Page 25: Using On-Screen Display
DVANCED Using On-Screen Display You can display the VCR operating status on the TV screen. For the information about what you can see on the TV screen, see page 5. Select MODE SET Screen 1 Press MENU. ∞ 2 Press to select “MODE SET”... -
Page 26: Selecting Recording Format
Selecting Recording Format When shipped from the factory, this VCR has been set to select automatically S-VHS format for recording on an S-VHS tape and VHS format for recording on a VHS tape. If you want to make a recording using VHS format on an S-VHS tape, follow the procedure below. -
Page 27: Automatic Satellite Programme Recording
DVANCED Automatic Satellite Programme Recording This facility allows you to record automatically a satellite programme which is timer-programmed on your external satellite tuner. Connect a satellite tuner to the VCR’s AV2 IN/ DECODER connector ( P.34) and programme the timer on the satellite tuner;... -
Page 28: Timer Recording
Timer Recording Using the VIDEO Plus+ System You can simplify the programming method of timer recording by using the VIDEO Plus+ system. Whenever you want to record a TV program, all you need to do is to find out the pro- gramme’s VIDEO Plus+ number. -
Page 29: Timer Recording
DVANCED Timer Recording To record while you’re away, follow step 1 — 9 below. For each programme you set, the VCR will turn on, start recording, and turn off automatically. You can store up to 8 programmes. Make sure... • The clock is set to the correct time before setting timer recording. - Page 30 Useful function for Timer Recording: Auto Tape Speed With this function activated, the VCR can change the tape speed and record the programme in LP mode if not enough tape remains for recording in SP mode. 1 Press MENU. ∞ 2 Press to select “MODE SET”, then press OK or 4.
-
Page 31: Tape Duplication
DVANCED Tape Duplication Connection 1 Connect the recording VCR (this VCR) and the playing VCR. Diagram 2 Connect the recording VCR (this VCR) to the TV. Recorder Your VCR ANT. IN S OUT AV1 OUT AV1 IN/OUT AUDIO COMP. Y/C PAUSE AV2 IN/DECODER LP30363-002... -
Page 32: Audio Dubbing
Audio Dubbing VR 1000 VIDEO CASSETTE RECORDER POWER REC LINK DIGITAL TBC/NR TIME BASE CORRECTOR DIGITAL NOISE REDUCTION SMARTPICTURE DISPLAY SPEED AUDIO DUBBING VIDEO L AUDIO R NORM Audio cable Audio component (CD player etc.) Make Connections Connect an audio component to the AUDIO IN (L and R) connectors on the VCR’s front panel. -
Page 33: System Connections
YSTEM Connection To a Satellite Tuner (Simple Connections) Outdoor Unit Aerial Satellite Cable Satellite Tuner Unit DECODER Mains outlet S OUT AV1 OUT AV1 IN/OUT COMP. Y/C AV2 IN/DECODER LP30363-002 LP20654-002 Connection To a Satellite Tuner (Perfect Connections) Outdoor Aerial Unit Satellite Cable Satellite Tuner Unit... -
Page 34: Connection To A Decoder
Connection To a Decoder RF Cable (provided) Receiver AV1 IN/OUT S OUT AV1 OUT AV1 IN/OUT AUDIO COMP. Y/C PAUSE AV2 IN/DECODER LP30363-002 LP20654-002 RF OUT AV2 IN/DECODER Decoder The AV2 IN/DECODER connector can be used as an input terminal for an external decoder (descrambler). -
Page 35: Operating Tv
For operating TV Note: Though this remote control can operate most of the PHILIPS TVs as well as many other manufacturers', some of the TVs will not operate or some functions available on the TVs will not work with this remote control. -
Page 36: Before Requesting Service
EFORE Check the following points once again if you are having some difficulties with your VCR. IMPORTANT Periodic maintenance is required in order to maintain the VCR’s continuous excellent performance. After a period of time the video heads will require replacement. If cleaning or replacement of the video heads is required, this service should be performed at an authorized video system service center. -
Page 37: Specifications
EFORE Miscellaneous A cassette cannot be inserted. The cassette does not eject. The cassette ejects when you press RECORD, or when you press VCR POWER or STANDBY/ON to set timer recording. PECIFICATIONS Possible number of TV channel Number of pre-programmable memory blocks Number of days in advance Accessories supplied Design and specifications are subject to change without notice.