Table of Contents
Advertisement
Quick Links
Advertisement
Chapters
Table of Contents

Related Manuals for Philips RFX9600/93


Summary of Contents for Philips RFX9600/93
- Page 1 用户指南 Starter’s Guide RFX9600...
- Page 3 RFX9600 RFX9600 用用用用 用户指南 Starter’s Guide...
-
Page 4: Table Of Contents
RFX9600 用户指南 RFX9600 用用用用 目录 安装须知 ......................取出延伸器... -
Page 5: 安装须知
安装须知 Pronto.串口延伸器是 Pronto 系统的重要组成部分,利用它可以在整个住宅范围内通过 RF 控制 A/V 设备。此外,它还可以通过 RS232 连接到 A/V 设备,允许您使用电源传 感实现可靠的开关机切换。例如,还可以使用它控制影幕和投影仪升降。 为了在无线 Pronto.网络中使用该延伸器,您需要: • 安装延伸器:将其连接到路由器和外部设备,如电视或接收器。 • 配置延伸器:将其连接到 PC,使用配置工具进行配置。 该延伸器用在具有无线接入点和/或路由器的网络中,如下图所示。... -
Page 6: 取出延伸器
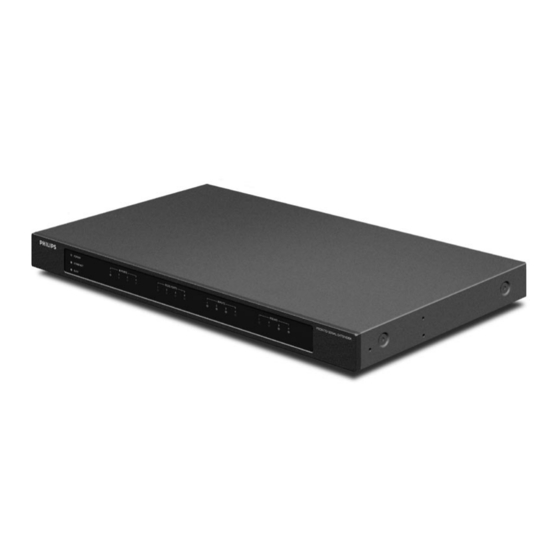
RFX9600. 用户指南 取出延伸器 Pronto 串口延伸器 前面板 电源指示灯 以太网指示灯 后面板 4 个调节 .IR. 输出 . 拨码开关 电源输入 4 个 IR 端口 以太网端口 (RJ45) 4 组 .4 个指示灯,分别用于 • IR 端口; • 串行 (RS232). 端口; • 传感器输入; • 中继输出。 忙指示灯 配置开关 延伸器 ID 开关 接地... -
Page 7: 安装延伸器
RFX9600 用户指南 电源适配器 配置线缆 2 根迷你插孔 IR 线缆 2 个双红外发射器 以太网交叉线缆 安装套件 安装延伸器 在机架上安装延伸器 警告 保持延伸器远离放大器等热源。 使用螺丝钉将安装板. 固定在延伸器上。 使用螺杆、垫圈和螺帽 将延伸器安装到机架。... -
Page 8: 将延伸器连接到外部设备
RFX9600 用户指南 将延伸器连接到外部设备 延伸器可以通过背面板上的各种输出连接到外部设备。 警告 确保始终在设备电源关闭之后再连接到延伸器。 将延伸器连接到红外控制的 A/V 设备 为了使延伸器能够传输 IR 信号,您需要将通过延伸器背面的 IR 输出将它连接到 A/V 组件。 使用延伸器附带的以下一种线缆,将延伸器连接到红外控制 A/V 设备: • 双红外发射器; -或- • 迷你插孔 IR 线缆。 在延伸器中插入迷你插孔,将发射器连 接到红外控制设备的红外显示。 调节 IR 输出的功率大小。 在延伸器背面,有 4 个拨码开关,每个对应一个 IR 输出。使用这些拨码开关,. 降低使用双红外发射器和迷你插孔线缆时的功率大小。 在您怀疑 IR 信号对于接收 A/V 组件来说太强时,或者在将 IR 端口连接到外部 IR 总线 系统时,这些拨码开关就非常有帮助。... -
Page 9: 使用传感器输入
使用传感器输入 当控制板发出一个宏用来打开或关闭多个 A/V 组件时,通常会使用离散的代码确保 组件的状态。有时只有切换代码可用:用一个命令在打开和关闭状态之间切换,而 没有单独的命令用来打开和关闭组件。在此情况下,系统可能变得不同步。此问题 可以使用电源传感解决: • 连接到.A/V 组件的电源传感器可以检测是否打开了组件的电源。 通过将电源传感器连接到延伸器,可以继而将信息传输到延伸器。 • 有些 A/V 组件(如接收器)上有专门用于此用途的迷你插孔输出。这些迷你插孔 输出可以连接到延伸器上的电源传感输入。 •.对于视频信号源,可以使用视频传感器模块。 确保在 ProntoEdit Professional 的操作列表中创建了特定的电源传感命令。 注意. 延伸器未提供传感器模块,但是大多数可用的传感器模块都与延伸器兼容。. 电源传感输入通过电压在 5V 与 30V 之间的电源输入触发。 使用标准连线和 Phoenix 接头。 RFX9600 用户指南 如果传感器模块的. 输出提供一个电平, 则使用此连线方案。 如果传感器模块由延伸. 器供电(输出是中继),. 则使用此连线接方案。... -
Page 10: 连接到中继控制的设备
RFX9600 用户指南 连接到中继控制的设备 连接到串口设备 有两种方法将串口设备连接到延伸器: 对于大多数 A/V 组件,都可以使用标准的“母-公”或“母-母” RS232 线缆。 注意. 使用标准连线和 Phoenix. 接头。 使用串行线缆。... -
Page 11: 连接到 Lutron Radiora 照明系统
提示. 如果使用上图所示的 RS232 连线 方案时遇到通信问题,请确保将 延伸器的 GND 引脚与 A/V 组件侧 面正确接好。 连接到 Lutron RadioRa 照明系统 .. 通过 RS232 端口将.Lutron.照明系统连接到延伸器。请参阅第.7.页上的 “连接到 串口设备” 一章。 .. 打开.ProntoEdit Professional。 .. 打开配置文件。 . 在配置文件中插入“Lutron.照明系统”。. 注意. 如果有多个延伸器,通过“系统属性”将这些延伸器添加到配置文件,然后 再配置“ Lutron. 照明系统”。 . 打开“Lutron 照明系统属性”。 .. 调整.Lutron.照明系统的设置。 . 选择与.Lutron.照明系统相连的延伸器。 .. -
Page 12: 在网络中插入多媒体服务器
.. 打开.“Multimedia Server Properties”(多媒体服务器属性)。 .. 调节多媒体服务器的设置: • 如果多媒体服务器使用固定的 IP 地址,则填入该 IP 地址。 • 如果服务器使用动态 IP 地址,则填入其主机名称。 插入 Windows MCE PC 作为音乐服务器 在.Pronto.网络中添加.MCE PC.作为音乐服务器之前,您需要在 MCE PC.上安装. 特定的软件。您可以通过我们的网站.www.pronto.philips.com 购买此软件。. 在.“Downloads”(下载)部分可以找到更多说明。 注意. 您需要为每个要添加到 Pronto 网络的 MCE PC 购买一个许可证。 .. 将.PC.连接到路由器。 .. 打开.ProntoEdit Professional。 .. 打开配置文件。... -
Page 13: 配置延伸器
. 将延伸器 ID 开关设置为 1 或设置为尚未被 Pronto 网络中其它延伸器使用的 ID。 .. 将配置开关设置为 1 开始使用: 配置开关: 1 .. 插入延伸器电源适配器的插头。 延伸器将启动。启动之后,电源指示灯和以太网指示灯亮绿光。在延伸器处理 代码或宏时,忙指示灯闪烁绿光。 配置延伸器 您可以将延伸器直接连接到 PC 完成配置。 如果延伸器已安装并连接到外部设备,则还可以通过路由器配置延伸器。有关详细 说明,请参阅第 11 页上的 “通过路由器完成配置” 。 提示. 为确保性能最佳,请使用专用网络进行所有 Pronto 通信。这样, Pronto 网络就. 不会受到其它网络和网络设置更改的影响。 直接连接到 PC 完成配置 .. 使用配置缆线(即附送的. 以太网交叉线缆)将延伸. - Page 14 RFX9600 用户指南 .. 确保手边准备了 IP 地址和子网掩码,然后按屏幕上的说明操作。 . 在完成配置之后,断开延伸器与计算机的连接,然后使用以太网直线缆将延伸 器重新连接到路由器。将配置开关设置为 1 开始使用。 通过路由器完成配置 .. 延伸器已连接到路由器。. 还需要将路由器连接到.PC。 .. 将配置开关设置为 3 开始配置: 延伸器将重新启动。成功启动之后,电源指示灯和以太网指示灯亮绿光,忙指 示灯闪烁红光/绿光。 .. 在.PC.上打开.ProntoEdit Professional。 .. 在“工具”菜单中,选择.“Extender Discovery”(延伸器发现)。 此时将打开延伸器发现工具,上面显示了在 Pronto 网络中检测到的所有延伸器 的列表。 .. 选择您要配置的延伸器,然后单击.“Configure”(配置)按钮。 此时配置工具将在浏览器中打开。 .. 确保手边准备了 IP 地址和子网掩码,然后按屏幕上的说明操作。 .. 在完成配置之后,断开延伸器与计算机的连接,然后使用以太网直线缆将延伸 器重新连接到路由器。将配置开关设置为.1.开始使用。...
-
Page 15: 支持
支持 故障种类和处理方法 指示灯的指示含义 指示灯 以太网指示灯 颜色 绿色闪烁 正在确定延伸器的 IP 地址。 绿色 延伸器功能正常。 红色/绿色闪烁 请参阅第 12.页上的 “存在 IP 冲突” 红色 主题。 请参阅第 12.页上的 “无法确定 .IP. 地 红色闪烁 址” 主题。 存在 IP 冲突 在网络中有另一个 A/V 组件使用的固定 IP 地址与延伸器相同。在配置工具中更改延 伸器的 IP 地址。 如果问题仍然存在,请检查路由器设置。 无法确定 IP 地址 •... -
Page 16: 使用延伸器操作 A/V 组件
• 确保正确设置了延伸器上的开关。 存在重复的延伸器 ID 使用延伸器 ID.开关,为同一 Pronto 网络中的每个延伸器指定唯一的 ID。确保在 ProntoEdit Professional 中正确配置了控制板; 可以在同一个 Pronto 网络中使用 16 个不同的延伸器。 重置延伸器 仅在延伸器显示异常状况时,才有必要执行此操作。 要执行重置,请从延伸器上拔下电源适配器插头。等候几秒钟,再将其插上。 固件更新 在有可用的延伸器固件更新时,会在飞利浦 Pronto 网站 www.pronto.philips.com 予以. 公布。 注意. 您始终可以在配置工具中查看固件的当前版本。 .. 在.PC.上下载固件的新版本,然后保存在所需的位置。 .. 拔掉延伸器的插头。您可以按下述的方法之一更新固件。 使用配置线缆更新延伸器 .. 使用配置缆线(即附送的以太网交叉线缆)将延伸器与.PC.连接起来。 .. 确保在配置延伸器时将.PC.切换到.DHCP(通常这是默认的)。 .. 将配置开关设置为.2 开始配置:... - Page 17 .. 在左导航窗格中选择.“Firmware Update”(固件更新)。 此时将打开“固件更新”页面。 .. 按照屏幕上的说明操作。 在系统要求您浏览到更新文件时,您需要选择之前从网站上下载的 ZIP 文件。 通过路由器更新延伸器 如果延伸器已安装并连接到设备,则通过路由器更新延伸器可能更方便。 .. 延伸器已连接到路由器。还需要将路由器连接到.PC。 .. 将配置开关设置为 3 开始配置: 配置开关: 3 延伸器将重新启动。成功启动之后,电源指示灯和以太网指示灯亮绿光,忙指 示灯闪烁红光/绿光。 .. 在.PC.上打开.ProntoEdit Professional。 .. 在“工具”菜单中,选择.“Extender Discovery”(延伸器发现)。 此时将打开延伸器发现工具,上面显示了在 Pronto 网络中检测到的所有延伸器 的列表。 .. 选择您要配置的延伸器,然后单击.“Configure”(配置)按钮。 此时配置工具将在浏览器中打开。 .. 在左导航窗格中选择.“Firmware Update”(固件更新)。 此时将打开“固件更新”页面。 .. 按照屏幕上的说明操作。 在系统要求您浏览到更新文件时,您需要选择之前从网站上下载的...
-
Page 18: 规格
一般信息 连接 设置 指示灯指示 尺寸/重量 工作温度 红外 (IR) 随附的附件 Pronto. 串口延伸器用户指南 © Copyright 2007 Royal Philips Electronics, Interleuvenlaan 74-76, 3001 Leuven(比利时) 注意: 保留所有权利。未事先征得版权所有人同意,不得全文或部分翻印本文内容。 本手册若有内容遗漏、技术或编辑错误,或者因为使用 RFX9600 Pronto 串口延伸器直接或间接导致损害, 皇家飞利浦电子集团将不承担任何责任。 此用户指南中的信息如有更改,恕不预先另行通知。所有品牌或产品名称都是各自公司或组织的商标 或注册商标。 本用户指南的概念和实现: Human Interface Group, De Regenboog 11, 2800 Mechelen(比利时) www.higroup.com 基于... - Page 19 RFX9600.用户指南 附注...
- Page 20 RFX9600 Starter’s Guide RFX9600 Starter’s Guide Contents Before.You.Start ....................Unpacking.the.Extender Installing.the.Extender Mounting the Extender in a Rack...
-
Page 21: Before.you.start
RFX9600 Starter’s Guide Before You Start The Pronto Serial Extender is an important element of the Pronto System and makes it possible to control A/V equipment via RF in the entire house. In addition, it can be connected to A/V equipment via RS232 and allows you to use power sensing for reliable power on/off switching. -
Page 22: Unpacking.the.extender
RFX9600 Starter’s Guide Unpacking the Extender Pronto Serial Extender Front Panel Power LED Ethernet LED Back Panel 4 dipswitches for the IR outputs Power input 4 IR ports Ethernet input (RJ45) 4 groups of 4 LEDs each for the • IR ports; •... -
Page 23: Installing.the.extender
RFX9600 Starter’s Guide 2 Mini-jack IR Cables Power Adapter Configuration Cable 2 Dual IR Emitters Crossed Ethernet cable Mounting Kit Installing the Extender Mounting the Extender in a Rack Warning Keep the Extender away from heat sources such as amplifiers. Fit the mounting plate on the Extender with the screws. Attach the Extender to a rack, using the screws, washers and... -
Page 24: Connecting The Extender To External Equipment
Attaching the Extender to Infrared Controlled A/V equipment For the Extender to transmit an IR signal, you need to connect it to the A/V component via the IR Output on the back of the Extender. In contrast to previous Philips Extenders, the RFX9400 has no IR blaster. -
Page 25: Using The Sensor Inputs
Using the Sensor Inputs When the Control Panel sends out a macro to switch multiple A/V components on or off, discrete codes are normally used to ensure the state of the component. In some cases, only toggle codes are available: one command toggles between the on and off state, and there is no separate command for switching the component on and switching it off. -
Page 26: Connecting To Relay-Controlled Equipment
RFX9600 Starter’s Guide Connecting to Relay-controlled Equipment Connecting to Serial Equipment There are two ways to connect serial equipment to the Extender: Note For most A/V components a standard female to male or female RS232 cable can be used. Use standard wiring and Phoenix connectors. Use a serial cable. -
Page 27: Connecting To A Lutron Radiora Lighting System
Tip In case you experience communication problems when using the RS232 wiring solution illustrated above, make sure that the GND pin on the Extender is grounded correctly on the side of the A/V component. Connecting to a Lutron RadioRa Lighting System .. Connect.the.Lutron.Lighting.System.to.the.Extender.via.the.RS232.port..Refer.to. chapter.‘Connecting to Serial Equipment’ on.page 7. .. Open.ProntoEdit Professional. .. Open.the.configuration file. . Insert.the.Lutron Lighting System.in.the.configuration.file.. Note If there are multiple Extenders, add these Extenders to the configuration file via the System Properties before configuring the Lutron Lighting System. . Open.the.Lutron Lighting System Properties. .. -
Page 28: Inserting A Multimedia Server In The Network
Before you can add the MCE PC in the Pronto Network as a Music Server, you need to install specific software on the MCE PC. You can purchase this software via our website www.pronto. philips.com. You find more instructions in the Downloads section. Note You need to buy one license for each MCE PC you want to add to the Pronto Network. -
Page 29: Configuring The Extender
. Set.the.Extender ID switch.to.1.or.to.an.ID.that.is.not.yet.used.by.another.Extender.in. the.Pronto.Network. .. Set.the.Configuration switch.to.1 for use: Configuration switch: 1 .. Plug.in.the.Extender’s.power adapter. The Extender will start up. After startup, the Power and Ethernet LEDs are green. The Busy LED blinks green when it’s processing a code or a macro. Configuring the Extender You can connect the Extender directly to the PC for configuration. - Page 30 RFX9600 Starter’s Guide .. Make.sure.you.have.the.IP address and netmask.at.hand,.and.follow.the.onscreen. instructions. . When.the.configuration.is.completed,.disconnect.the.Extender.from.the.computer.and. reconnect.it.to.the.router.with.a.straight.Ethernet.cable..Set.the.Configuration.switch. to.1.for.use. Configuration through a router .. The.Extender.is.already. connected.to.the.router... Connect.the.router.to.the.PC.. as.well. .. Set.the.Configuration switch.to.3 for configuration: The Extender will restart. After start-up, the Power and Ethernet LEDs are green and the Busy LED is red/green blinking.
-
Page 31: Support
Support Troubleshooting What Do the LEDs Indicate? LEDs Ethernet LED Colors Green blinking The Extender’s IP address is being determined. Green The Extender is functioning normally. Red/green blinking Refer to the topic ‘There is an IP conflict’ on page 12. Refer to the Refer to the topic ‘The IP address Red blinking cannot be determined’... -
Page 32: Operating A/V Components With The Extender
To perform a reset, unplug the power adapter from the Extender. Wait a few seconds, and plug it in again. Firmware Update When an update of the Extender firmware is available, this will be announced on the Philips Pronto website: www.pronto.philips.com. Note You can always see the current version of the firmware in the Configuration Tool. - Page 33 You may have to refresh the browser before the Configuration Tool appears. .. Select.Firmware Update.in.the.left.navigation.pane. The Firmware Update page opens. .. Follow.the.onscreen.instructions. When you are asked to browse to the update file, you need to select the ZIP file you downloaded earlier from the website.
-
Page 34: Specifications
All rights are reserved. Reproduction in whole or in part is prohibited without prior consent of the copyright owner. Royal Philips Electronics is not liable for omissions or for technical or editorial errors in this manual or for damages directly or indirectly resulting from the use of the RFX9600 Pronto Serial Extender. - Page 35 RFX9600 Starter’s Guide Notes...