
Related Manuals for Philips SPD5210CC/00


Summary of Contents for Philips SPD5210CC/00
- Page 1 How to... for External Hard Disk Drive Install Guide Installationsanleitung Guide d'installation Guida d'installazione Installatiegids Guía de instalación Kurulum Kılavuzu...
-
Page 2: Table Of Contents
Contents How to connect this external harddisk on your system? (USB installation) How to install the external harddisk for Windows 98 Second Edition and Windows ME) ? How to safely disconnect the external harddisk without shutting down your system? How to quick format the external harddisk? How to format the external harddisk? How to use the One-Click synchronization button? How to restore a backup? - Page 3 Inhoud Hoe moet u deze externe harde schijf op uw systeem aansluiten? (USB-installatie) How to install the external harddisk for Windows 98 Second Edition and Windows ME) ? Hoe moet u veilig de externe harde schijf loskoppelen zonder uw systeem uit te schakelen? Hoe moet u snel de externe harde schijf formatteren? Hoe moet u de externe harde schijf formatteren? Hoe moet u de One-Click synchroniseren knop gebruiken?
-
Page 5: How To Connect This External Harddisk On Your System? (Usb Installation)
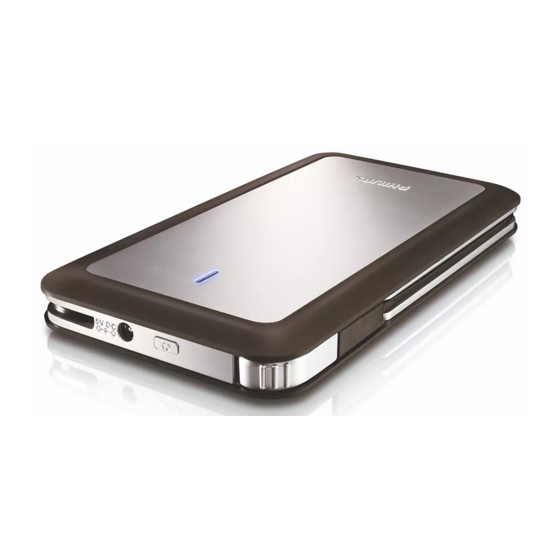
How to connect this external harddisk on your system? (USB installation) Anschließen des externe Festplatte an Ihr System (USB-Installation) Comment raccorder disque dur externe sur votre système ? Come collegare questa disco rigido esterno al proprio sistema (installazione USB) Hoe moet u deze externe harde schijf op uw systeem aansluiten? (USB-installatie) ¿Cómo conectar esta disco duro externo en su sistema? (Instalación USB) Bu harici sabit disk sisteminize takma şekli? (USB kurulumu) The next pages show how to... - Page 6 Votre boîte comprend les éléments suivants : A: votre nouveau disque dur externe C: Manuel Contenuto della confezione: A: La nuova unità HDD esterna C: La guida d'uso Het volgende zit in de doos: A: Uw nieuwe externe HDD-apparaat C: Instructiehandleiding La caja debe contener: A: Su disco duro externo C: Manual Cómo...
- Page 7 A drive icon appears for the external HDD in Windows Explorer; the name of the drive varies, depending on your computer system. You can save and copy data on the drive by moving files and folders to the drive icon, just as you do when using your floppy disk or hard disk.
-
Page 8: How To Install The External Harddisk For Windows 98 Second Edition And Windows Me)
How to install the external harddisk for Windows 98 Second Edition only? Follow the next steps: 1. Insert the Nero Disc and browse to the directory “Philips Drivers” 2. Double click “win98SE.exe” 3. Click next 4. Accept the terms of license agreement 5. -
Page 9: How To Safely Disconnect The External Harddisk Without Shutting Down Your System
How to safely disconnect the external harddisk without shutting down your Sicheres Entfernen der externe Festplatte ohne Herunterfahren Ihres Systems Comment débrancher en toute sécurité le disque dur externe sans Come scollegare in modo sicuro l'unità disco rigido esterno senza spegnere Hoe moet u veilig de externe harde schijf loskoppelen zonder uw systeem uit te schakelen? ¿Cómo desconectar de forma segura el equipo disco duro externo sin... - Page 10 Para desconectar el disco duro externo sin apagar su ordenador, haga clic en el este símbolo. Bilgisayarınızı kapatmaksızın harici HDD’nin bağlantısını kesmek için, bu sembol üzerine tıklatınız. "Safely remove USB..." (Güvenlice USB’yi çıkar...)üzerine tıklatınız. Bu açılır menü belirdiğinde, harici HDD’nin bağlantısını kesebilirsiniz. To disconnect the external HDD without shutting down your computer, click on this symbol.
-
Page 11: How To Quick Format The External Harddisk
How to quick format the external harddisk ? Schnellformatieren der externe Festplatte Comment formater rapidement le disque dur externe? Come formattare rapidamente l'unità disco rigido esterno Hoe moet u snel de externe harde schijf formatteren? ¿Cómo formatear rápidamente el equipo disco duro externo? Harici sabit disk’ı... - Page 12 üzerine tıklatarak bir hızlı formatlamayı seçebilirsiniz. In Windows Explorer right click the external HDD. Im Windows Explorer rechtsklicken Sie auf der externen Philips Festplatte. Dans l’Explorateur de Windows, cliquez avec le bouton droit sur le disque dur externe. In Windows Explorer cliccare sull'unità HDD esterna.
- Page 13 When this popup appears, you have to click "OK". Please be aware that all the data that is on the drive will be lost. Sobald dieses Popup-Fenster angezeigt wird, müssen Sie auf "OK" klicken. Bitte beachten Sie, dass alle Daten, die auf dem Laufwerk sind bei diesem Vorgang verloren gehen.
-
Page 15: How To Format The External Harddisk
How to format the external harddisk? Formatieren der externe Festplatte Comment formater le disque dur externe ? Come formattare l'unità disco rigido esterno Hoe moet u de externe harde schijf formatteren? ¿Cómo formatear el equipo disco duro externo? harici sabit disk’ı formatlama şekli? The next pages show how to Auf den nächsten Seiten wird format your new external HDD. - Page 16 Choose "Start". Wählen Sie "Start". Choisissez "Start" (Démarrer). Scegliere "Start". Kies "Start". Elija "Start" (Inicio). "Start" (Başlat)’ı seçiniz. Choose "Settings". Wählen Sie "Settings" (Einstellungen). Choisissez "Settings" (Paramètres). Scegliere "Settings" (Impostazioni). Kies "Settings" (Instellingen). Elija "Settings" (Configuración). "Settings" (Ayarlar)’ı seçiniz. Choose "Control Panel". Wählen Sie "Control Panel"...
- Page 17 Choose "Administrative Tools". Wählen Sie "Administrative Tools" (Verwaltung). Choisissez "Administrative Tools" (Outils administratifs). Scegliere la scheda "Administrative Tools" (Strumenti di amministrazione). Kies "Administrative Tools" (Systeembeheer). Elija la ficha "Administrative Tools" (Herramientas administrativas). "Administrative Tools" (İdari Araçlar)’ı seçiniz. Choose "Computer Management". Wählen Sie "Computer Management"...
- Page 18 "Unallocated" (Tahsis edilmemiş) sabit disk üzerine sağ düğmeyle tıklatınız. Right click on "Unallocated" hard disk. Rechtsklicken Sie auf die "Unallocated" (nicht zugeordnete) Festplatte. Cliquez avec le bouton droit sur disque dur "Unallocated" (Non alloué). Cliccare con il tasto destro del mouse sul disco rigido "Unallocated"...
- Page 19 Accept "Primary partition" by clicking "Next". Bestätigen Sie "Primary partition" (Primäre Partition), indem Sie auf "Next" (Weiter) klicken. Acceptez la "Primary partition" (Partition primaire) en cliquant sur "Next" (Suivant). Accettare la "Primary partition" (Partizione primaria) cliccando su "Next" (Avanti). Accepteer "Primary partition" (Primaire partitie) door op "Next"...
- Page 20 Kies het bestandssysteem (standaard is NTFS) en geef het station een naam onder "Volume label" (Volumenaam) en klik op "Next" (Volgende). Elija el sistema de archivo (la opción predefinida es NTFS) y dé un nombre al disco en "Volume label" (Etiqueta del volumen) y haga clic en "Next"...
-
Page 21: How To Use The One-Click Synchronization Button
How to use the One-Click synchronization button? So wird die One-Click für Synchronisation verwendet Comment utiliser le bouton One-Click synchronisation ? Come usare il pulsante One-Click per la sincronizzazione Hoe moet u de One-Click synchroniseren knop gebruiken? ¿Cómo utilizar el botón One-Click para la sincronización? Olarak senkronizasyon One-Click için düğmesinin kullanılma şekli? The next pages show how to Auf den nächsten Seiten wird... - Page 22 Als u voor de eerste keer op de knop One-Click drukt na installatie van de NERO-software, verschijnt het volgende scherm: Si pulsa el botón One-Click por primera vez después de instalar el software NERO, aparecerá la siguiente pantalla: Eğer One-Click düğmesine, NERO yazılımının kurulumundan sonra ilk kez basıyorsanız, aşağıdaki ekran belirecektir.
- Page 23 Click the next button in order to make a backup with files and folders you select. Klicken Sie auf die Schaltfläche „Weiter“, um eine Sicherungskopie von den markierten Dateien und Ordnern zu erstellen. Cliquez sur le bouton Next (Suivant) pour créer une copie de sauvegarde des fichiers et des répertoires sélectionnés.
- Page 24 Controleer of u de juiste bestemming hebt geselecteerd (de externe harde schijf van Philips) en klik daarna op de knop Next (volgende). Compruebe que ha elegido el destino correcto (su disco duro externo Philips), después haga clic en el botón Siguiente.
- Page 25 Select the correct target path and backup name then press the next button. Wählen Sie den richtigen Zielpfad und Namen für die Sicherungskopie. Klicken Sie dann auf die Schaltfläche „Weiter“. Choisissez l’emplacement et le nom de fichier de la sauvegarde à créer, puis cliquez sur Next (Suivant). Selezionare il percorso di destinazione e il nome di backup corretti, quindi cliccare sul pulsante Next (Avanti).
- Page 26 Als dit scherm verschijnt weet u dat u erin geslaagd bent een nieuwe taak toe te voegen aan de EasySync- wizard. Si aparece esta pantalla sabrá que ha agregado correctamente un nuevo trabajo al Asistente EasySync. Eğer bu ekran belirirse, yeni bir İş’i EasySync sihirbazına başarı ile eklemiş olduğunuzu anlarsınız. Iedere keer dat u op de One-Click knop drukt zal dit scherm verschijnen en wordt het backupproces uitgevoerd.
-
Page 27: How To Restore A Backup
How to restore a backup? Wiederherstellen einer Sicherungskopie Comment restaurer une sauvegarde ? Hoe moet u een backup terugzetten? ¿Cómo restaurar una copia de seguridad? Bir yedek kopyayı geri yükleme şekli? The next pages show how to Auf den nächsten Seiten wird restore a backup. - Page 28 Se abre la ventana de Restauración de Nero BackItUp. Haga clic en "Restore Backup" (Iniciar). Nero BackItUp’ın YedekKopyasınıAl)Geri Yükle Penceresi açılır. "Restore Backup" (Geri Yüklemeyi Başlat) üzerine tıklatınız. Nero Geri Yükle Sihirbazı belirir. "Next" (İleri) üzerine tıklatınız. restauración. Haga clic en "Next" (Siguiente). Dosya kaynağını...
- Page 29 Click "Next". Klicken Sie auf "Next" (Weiter). Cliquez sur "Next" (Suivant). Cliccare su "Next" (Avanti). Klik op "Next" (Volgende). Haga clic en "Next" (Siguiente). "Next" (İleri) üzerine tıklatınız. Click "Next". Klicken Sie auf "Next" (Weiter). Cliquez sur "Next" (Suivant). Cliccare su "Next" (Avanti). Klik op "Next"...
- Page 30 You have successfully restored your backup. Sie haben Ihre Sicherungskopie erfolgreich wiederhergestellt. Vous avez restauré votre sauvegarde avec succès. Il ripristino del backup è stato effettuato. U hebt nu met succes een backup hersteld. Ha restaurado con éxito su copia de seguridad. Yedek kopyanızı...
-
Page 31: How To Defragment
Bei anderen Betriebssystemen popups. können andere Popup-Fenster angezeigt werden. Op de volgende pagina’s kunt u Las páginas siguientes muestran zien hoe u uw nieuwe Philips cómo desfragmentar su nuevo externe HDD moet disco duro externo Philips. defragmenteren. Las imágenes de pantalla... - Page 32 En el explorador de Windows haga clic con el botón derecho en la letra de la unidad de su disco duro externo Philips. Windows Explorer’de Philips harici HDD’nizin sürücü harfi üzerine sağ düğmeyle tıklatınız. In Windows Explorer right click on the drive letter of your Philips external HDD.
- Page 33 Click "Defragment Now...". Klicken Sie auf "Defragment Now..." (Jetzt defragmentieren...") Cliquez sur "Defragment Now..." (Défragmenter maintenant...). Cliccare su "Defragment Now..." (Esegui deframmentazione). Klik op "Defragment Now..." (Nu defragmenteren...). Haga clic en "Defragment Now..." (Desfragmentar ahora...). "Defragment Now..." (Şimdi Birleştir...) üzerine tıklatınız. Choose the appropriate drive and then click "Defragment".
-
Page 35: Warranty,Environment And Safety
"Start", "My Computer". Click with the right mouse button on the "Nero" icon and choose "Explore". Choose the "Philips Warranty" folder and you will find the warranty documents. If you do not have Adobe Acrobat Reader, you can find it in the folder "Acrobat Reader"... -
Page 36: Specifications
Although this product has been designed with utmost care for long-lasting performance, Philips does advice you to handle electronics with good care: Avoid contact with water, exposure to extreme forces. Please make sure you place the device in a well ventilated environment, to ensure longest possible lifetime and optimal performance. -
Page 37: Garantie,Umwelt Und Sicherheit
Oberfläche oder klicken Sie auf "Start", "My Computer". Klicken Sie mit der rechten Maustaste auf das Symbol "Nero" und wählen Sie "Explore". Wählen Sie den Ordner "Philips Warranty"; hier finden Sie die Garantiedokumente. Wenn Sie keinen Adobe Acrobat Reader haben, können Sie ihn im Ordner "Acrobat Reader"... -
Page 38: Spezifikationen
Technische Daten: Aufnahmemedien: Schnittstelle: Speicherkapazität: Drehgeschwindigkeit: Übertragungsgeschwindigkeit USB (max.): Cache-Memory: Außenmaße (BxHxT): http://www.philips.com/storage Spezifikationen 2,5" HDD USB 2.0 40 / 80 GB 4200 30Mb/s 8 MB 87.4x158.6x18.2 mm... -
Page 39: Garantie, Environnement Et Consignes De Sécurité
"Démarrer" puis "Poste de travail". Cliquez avec le bouton droit sur l’icône "Nero" et choisissez "Explorer". Choisissez le dossier "Philips Warranty" : vous y trouverez les documents relatifs à la garantie. Si vous n'avez pas Adobe Acrobat Reader, vous le trouverez dans le dossier Acrobat Reader de ce disque. -
Page 40: Caractéristiques Techniques
Caractéristiques techniques : Support d’enregistrement : Interface : Capacité : Vitesse rotationnelle : Taux de transfert USB (maximum) : Mémoire cache : Dimensions externes (lxHxP) : http://www.philips.com/storage Caractéristiques techniques 2,5" HDD USB 2.0 40 / 80 GB 4200 30Mb/s 8 MB... -
Page 41: Garanzia, Ambiente E Sicurezza
Fare clic sull'icona "Risorse del computer" nel desktop oppure fare clic su "Start", "Risorse del computer". Fare un clic destro sull'icona "Nero" e selezionare "Esplora". Selezionare la cartella "Philips Warranty" che contiene i documenti relativi alla garanzia. Se non si ha Adobe Acrobat Reader, è possibile reperirlo nella cartella "Acrobat Reader"... -
Page 42: Specifiche Tecniche
Specifiche tecniche Dispositivo di registrazione: Interfaccia: Capacità: Velocità di rotazione: Velocità di trasferimento USB (massima): Memoria cache: Dimensioni esterne (L X A X P): http://www.philips.com/storage Specifiche tecniche 2,5" HDD USB 2.0 40 / 80 GB 4200 30Mb/s 8 MB 87.4x158.6x18.2 mm... -
Page 43: Garantie, Milieu En Veiligheid
"Start" en dan op "Deze computer". Klik met de rechtermuisknop op het pictogram "Nero" en daarna op "Verkennen". Ga naar de map "Philips Warranty". Daar vindt u documentatie over de garantie. Als u het programma Adobe Acrobat Reader nog niet hebt, kunt u het vinden in de map "Acrobat Reader"... -
Page 44: Technische Gegevens
Technische gegevens: Opslagmedia: Interface: Capaciteit: Draaisnelheid: Overdrachtsnelheid USB (maximum): Cachegeheugen: Externe afmetingen (BxHxD): http://www.philips.com/storage Technische gegevens 2,5" HDD USB 2.0 40 / 80 GB 4200 30Mb/s 8 MB 87.4x158.6x18.2 mm... -
Page 45: Garantía,Entorno Y Seguridad
"Inicio" y "Mi PC". Haga clic con el botón derecho del ratón en el icono "Nero" y elija "Explorar". Seleccione la carpeta "Philips Warranty", en la que encontrará los documentos de la garantía. Si no dispone de Adobe Acrobat Reader, podrá encontrarlo en la carpeta "Acrobat Reader"... -
Page 46: Especificaciones
Especificaciones técnicas: Soporte de grabación: Interfaz: Capacidad: Velocidad de giro: Velocidad de transferencia USB (máximo) : Memoria caché: Dimensiones externas (Ancho x Alto x Fondo): 87.4x158.6x18.2 mm http://www.philips.com/storage Especificaciones 2,5" HDD USB 2.0 40 / 80 GB 4200 30Mb/s 8 MB... -
Page 47: Garanti,Ortam/Çevre Ve Güvenlik
Masaüstünüzde "Bilgisayarım" ikonu/simgesi üzerine tıklatınız ya da "Başlat", "Bilgisayarım" üzerine tıklatınız. "Nero" ikonu/simgesi üzerine sağ fare düğmesi ile tıklatıp "Araştır"ıı seçiniz. "Philips Garanti" klasörünü seçtiğinizde garanti belgelerini bulacaksınız. Adobe Acrobat Reader yazılımınız yok ise, bu disk üzerindeki "Acrobat Reader" klasöründe onu bulabilirsiniz ya da http://www.adobe.com web sitesinden ücretsiz olarak... -
Page 48: Teknik Özellikler
Teknik özellikler: Kayit ortamlari: Arayüz: Kapasite: Dönüş Hızı: Aktarım hızı USB (maksimum): Ön bellek: Harici boyutlar (ExBxÇ): http://www.philips.com/storage Teknik Özellikler 2,5" HDD USB 2.0 40 / 80 GB 4200 30Mb/s 8 MB 87.4x158.6x18.2 mm... - Page 49 Notes...
- Page 50 Notes...
- Page 51 Notes...
- Page 52 All dimensions shown are approximate. © 2005 Koninklijke Philips Electronics N.V. All rights reserved. Reproduction, copying, usage, modifying, hiring, renting, public performance, transmission and/or broadcasting in whole or part is prohibited without the written consent of Philips Electronics N.V. 9305 125 2473.9...