Table of Contents
Advertisement
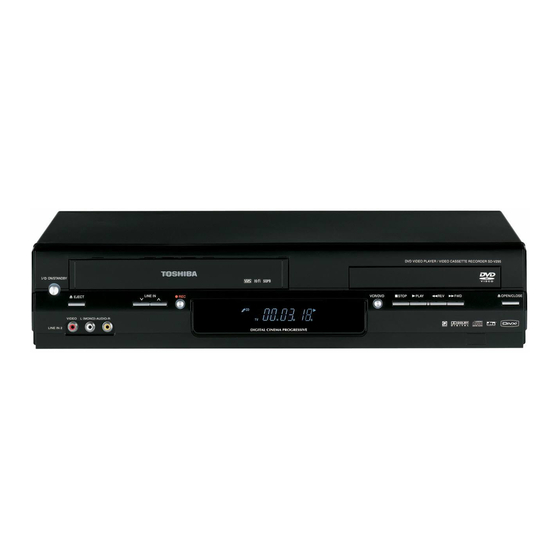
DVD VIDEO PLAYER & VIDEO
CASSETTE RECORDER
LECTEUR DVD & MAGNÉTOSCOPE
SD-V395KC
OWNER'S MANUAL
MODE D'EMPLOI
©2007 Toshiba Corporation
This device does not tape-record copy protected DVD Video Discs.
Cet appareil ne permet pas d'enregistrer sur cassettes des disques DVD protégés contre la copie.
2K60121A.indb 1
2K60121A.indb 1
Owner's Record
The model number and serial number are
on the back of your DVD/VCR. Record these
numbers in the spaces below.
Refer to these numbers whenever you
communicate with your Toshiba dealer
about this DVD/VCR.
Model number:
Serial number:
ENGLISH
Introduction
Connections
Basic setup
Playback
Recording
Other functions
Playback
Function setup
FRANÇAIS
Introduction
Branchements
Réglages de base
Enregistrement
Autres fonctions
Réglage des fonctions
Mémo de l'utilisateur
La désignation du modèle et le
numéro de série se trouvent à l'arrière
de votre DVD/VCR. Consignez ces
numéros dans les espaces ci-dessous
et communiquez-les à votre revendeur
Toshiba chaque fois que vous le consultez
au sujet de cet DVD/VCR.
Désignation du modèle:
Numéro de série:
1/12/2007 3:50:00 PM
1/12/2007 3:50:00 PM
2
14
22
(VCR)
25
(VCR)
28
(VCR)
30
(VCR)
32
(DVD)
41
(DVD)
Others
44
2
14
22
(VCR)
Lecture
25
(VCR)
28
(VCR)
30
(VCR)
Lecture
32
(DVD)
41
(DVD)
Divers
44
Advertisement
Table of Contents

Related Manuals for Toshiba SD-V395KC


Summary of Contents for Toshiba SD-V395KC
- Page 1 à l’arrière de votre DVD/VCR. Consignez ces numéros dans les espaces ci-dessous et communiquez-les à votre revendeur Toshiba chaque fois que vous le consultez au sujet de cet DVD/VCR. Désignation du modèle: Numéro de série:...
-
Page 2: Introduction
Introduction SAFETY PRECAUTIONS CAUTION RISK OF ELECTRIC SHOCK DO NOT OPEN CAUTION: TO REDUCE THE RISK OF ELECTRIC SHOCK, DO NOT REMOVE COVER (OR BACK). NO USER-SERVICEABLE PARTS INSIDE. REFER SERVICING TO QUALIFIED SERVICE PERSONNEL. WARNING: TO REDUCE THE RISK OF FIRE OR ELECTRIC SHOCK, DO NOT EXPOSE THIS APPLIANCE TO RAIN OR MOISTURE. -
Page 3: Important Safeguards
IMPORTANT SAFEGUARDS 1. READ INSTRUCTIONS All the safety and operating instructions should be read before the unit is operated. 2. RETAIN INSTRUCTIONS The safety and operating instructions should be retained for future reference. 3. HEED WARNINGS All warnings on the unit and in the operating instructions should be adhered to. 4. - Page 4 Introduction IMPORTANT SAFEGUARDS 14. POWER LINES An outside antenna system should not be located in the vicinity of overhead power lines or other electric light or power circuits, or where it can fall onto or against such power lines or circuits. When installing an outside antenna system, extreme care should be taken to keep from touching such power lines or circuits, as contact with them might be fatal.
-
Page 5: Power Source
IMPORTANT SAFEGUARDS / 19. REPLACEMENT PARTS When replacement parts are required, be sure the service technician uses replacement parts specified by the manufacturer or those that have the same characteristics as the original part. Unauthorized substitutions may result in fire, electric shock or other hazards. 20. -
Page 6: Precautions
Introduction Precautions Notes on handling When shipping the DVD/VCR, the original shipping carton and packing materials come in handy. For fully protection, repack the unit as it was originally packed at the factory. Do not use volatile liquids, such as insect spray, near the DVD/VCR. -
Page 7: Notes On Discs
Notes on discs On handling discs Do not touch the playback side of the disc. Do not attach paper or tape to discs. On cleaning discs Fingerprints and dust on the disc cause picture and sound deterioration. Wipe the disc from the center outwards with a soft cloth. -
Page 8: K60121A.indb 8 2K60121A.indb
Because of problems and errors that can occur during the creation of DVD and CD Software and/or the manufacture of DVD and CD discs, Toshiba cannot assure that the DVD player will successfully play every disc bearing DVD and CD logos. If you happen to... -
Page 9: Table Of Contents
Contents Introduction SAFETY PRECAUTIONS ...2 IMPORTANT SAFEGUARDS ...3 Power source ...5 Precautions ...6 Notes on discs ...7 Contents ...9 Identification of controls ...10 Connections Antenna connections ...14 Cable TV connections ...16 Connecting to a TV ...18 Connecting to optional audio equipment ...20 Basic setup (VCR) Setting the video channel ...22 Setting the language ...22... -
Page 10: Identification Of Controls
Introduction Identifi cation of controls See the page in for details. Front panel ON/STANDBY button Cassette loading slot EJECT button CHANNEL AUDIO (L/R)/VIDEO IN (LINE IN 2) jacks Rear panel DVD S-VIDEO OUT jack AC power cord DVD COMPONENT OUT jacks 2K60121A.indb 10 2K60121A.indb 10 VCR/DVD mode selector... -
Page 11: Display Window
Display window Play indicator VCR indicator (VCR) Recording indicator (VCR) Track indicator (CD) Tape loaded indicator (VCR) Timer Recording indicator (VCR) VCR operation status Press CALL to display VCR operation status on the screen. To cancel the display, press CALL again. While watching TV DAY OF THE WEEK CLOCK... -
Page 12: Remote Controls
Introduction Identifi cation of controls (Continued) The instructions in this manual describe the function on the remote control. See the page in Remote controls VCR DVD button EJECT button (VCR) CLOCK/COUNTER button 27 VCR MENU button SETUP button 41 CM SKIP button ZOOM button TOP MENU button Direction buttons... -
Page 13: Inserting Batteries
Inserting batteries Open the battery compartment cover in the direction of the arrow. Caution: Never throw batteries into a fire. Notes: • Be sure to use AAA size batteries. • Dispose of batteries in a designated disposal area. • Batteries should always be disposed of with the environment in mind. Always dispose of batteries in accordance with applicable laws and regulations. -
Page 14: Connections
Connections Connections Antenna connections If you are using an antenna system, follow these instructions. If you are a Cable TV subscriber, skip ahead to page the proper connections. Antenna to DVD/VCR connection The DVD/VCR must be connected “between” the antenna and the TV. First, disconnect the antenna from the TV and connect it to the DVD/VCR. -
Page 15: Dvd/Vcr To Tv Connection
DVD/VCR to TV connection After you have connected the antenna to the DVD/VCR, you must connect the DVD/VCR to the TV. Below are 3 common methods of connecting your DVD/VCR to a TV. Find the type of TV you are using and follow the connection diagram. -
Page 16: Cable Tv Connections
Connections Connections Cable TV connections Many cable companies offer services permitting reception of extra channels including pay or subscription channels. This DVD/VCR has an extended tuning range and can be tuned to most cable channels without using a cable company supplied converter box, except for those premium channels which are intentionally scrambled. - Page 17 IMPORTANT: Make sure the TV/CABLE menu option is set to the “CABLE” mode. This DVD/VCR cannot receive scrambled programs since it does not contain a descrambler. In order to receive scrambled programs, your existing descrambler must be used. Descrambler boxes are available from cable companies. Consult your local cable company for more information concerning connection to their descrambler equipment.
-
Page 18: Connecting To A Tv
Connections Connections Connecting to a TV Connect the DVD/VCR to your TV. Note: This method transports VHS and DVD-video signals. For enhanced DVD-video performance, we recommend you to connect the S-video or ColorStream Basic connection Signal flow To wall outlet Notes: •... -
Page 19: Component Video Outputs
S-video output An S-Video connection is superior to Video (Yellow) output. Use this method for DVD playback when the connected television has S- Video input, and does not have component video inputs. Component video outputs PROGRESSIVE outputs Some TVs or monitors are equipped with component video inputs that are capable of reproducing a progressively scanned video signal. Connecting to these inputs allows you to view the highest quality pictures with less flicker. -
Page 20: Connecting To Optional Audio Equipment
Connections Connections Connecting to optional audio equipment You can enjoy high quality dynamic sounds of DVD video discs or audio CDs by connecting the DVD/VCR to optional audio equipment. Connection for video signal to your TV, see Connecting to an amplifier equipped with a Dolby Dolby Digital Dolby Digital is the surround sound technology used in theaters showing the latest movies, and is now available to reproduce this realistic effect in the home. -
Page 21: Connecting To An Amplifier Equipped With A Digital Audio Input
Connecting to an amplifier equipped with a MPEG2 audio decoder MPEG2 sound You can enjoy motion picture and live concert DVD video discs encoded via the MPEG2 recording system with dynamic realistic sound by connecting an amplifier equipped with an MPEG2 audio decoder or MPEG2 audio processor. Amplifier equipped with an MPEG2 audio decoder To COAXIAL... -
Page 22: Basic Setup (Vcr)
Basic setup (VCR) Basic setup (VCR) Setting the video channel When a TV is connected with the 75 ohm coaxial cable only. To view playback of a recorded tape or DVD disc, or to watch a program selected by the VCR’s channel selector, the TV must be set to channel 3 or 4 (video channel). -
Page 23: Clock Setting
Clock setting The AUTO CLOCK function will automatically set the built- in clock (Month, Day, Year and Time) when the DVD/VCR is connected to an Antenna or Cable system and it is turned off. The DVD/VCR searches for a station in your area containing the necessary AUTO CLOCK setting signals. -
Page 24: Tuner Setting
Basic setup (VCR) To set DAYLIGHT SAVING TIME You can set the DAYLIGHT SAVING TIME automatically or manually. Press VCR MENU. Press SET + or – to select “SYSTEM SETUP”, then press ENTER. Press SET + or – to select “DAYLIGHT SAVING TIME”, then press ENTER. -
Page 25: Loading And Unloading A Cassette Tape
Basic setup (VCR)/ Playback (VCR) To ADD/DELETE channels Press VCR MENU. Press SET + or – to select “CH SETUP”, then press ENTER. Press SET + or – to select the “ADD/DELETE” and press ENTER. To Add or Delete channels 1) Press Direct channel selection buttons (0–9) or SET +/–... -
Page 26: Cassette Tape Playback
Playback (VCR) Cassette tape playback To play a pre-recorded tape. Playback Preparation: • Turn ON the TV and select the corresponding video input. • Press VCR DVD selector to select the VCR mode. (The VCR mode indicator will light). Load a pre-recorded tape (When loading a cassette tape without the erase prevention tab, playback will start automatically). -
Page 27: Convenient Function
Video head cleaning ■ Video head clogging The video heads are the means by which the DVD/VCR reads the picture from the tape during playback. In the unlikely event that the heads become dirty enough to be clogged, no picture will be displayed. This can easily be determined if, during playback of a known good tape, there is good sound, but no picture (picture is extremely snowy). -
Page 28: Recording (Vcr)
Recording (VCR) Recording a TV program Recording and viewing the same TV program. Recording a TV program Preparation: • Turn ON the TV and select to the corresponding video input. • Press VCR DVD selector to select the VCR mode. (The VCR mode indicator will light.) Load a cassette tape with the erase prevention tab intact. -
Page 29: One-Touch Timer Recording (Otr)
One-touch Timer Recording (OTR) The One-touch Timer Recording feature provides a simple and convenient way to make a timed recording. One-touch Timer Recording (OTR) Preparation: • Turn ON the TV and select to the corresponding video input. • Press VCR DVD selector to select the VCR mode. (The VCR mode indicator will light.) Example: One-touch Timer Recording for 30 minutes. -
Page 30: Stereo Recording And Playback
Recording (VCR)/Other functions (VCR) To set daily/weekly timer Weekly (e.g. WKL-TU: each Tuesday) or daily (e.g. MO-SA: Monday to Saturday) Timer recording Follow the procedure of timer recording on page At step 3, press SET + or – repeatedly until the desired setting appears. -
Page 31: Second Audio Program (Sap)
Second Audio Program (SAP) Second Audio Program (SAP) Your DVD/VCR is fitted with a SAP broadcast system which enables you to switch to a second audio program when viewing a selected channel. This function applies only when the program is broadcast in multi-languages through the SAP broadcast system. -
Page 32: Playback (Dvd)
Playback (DVD) Playing a disc This section shows you the basics on how to play a disc. CAUTION Keep your fingers well clear of the disc tray as it is closing. Neglecting to do so may cause serious personal injury. ■... -
Page 33: Advanced Playback
Playing in fast reverse or fast forward directions Press REV or FWD during playback. REV: Fast reverse playback FWD: Fast forward playback • Each time you press REV or FWD, the playback speed changes. ■ To resume normal playback Press PLAY. Notes: •... -
Page 34: Marking Desired Scenes
Playback (DVD) Marking desired scenes The unit stores the points that you want to watch again up to 3 points. You can resume playback from each scene. Press MARKER during playback. Select the blank Marker using ▲ or ▼. Then press ENTER at the desired scene. •... -
Page 35: Random Playback
Random playback The unit can also select tracks at random and playback them. These feature works for Video CD. For Audio CD and MP3/WMA/JPEG/Divx® CD, please see “Random playback (CD)” Press PLAY MODE during playback or stop mode. Press ▲/▼ to select “Mode”, then press ENTER repeatedly to select “Random”. -
Page 36: Setting Surround Sound
Playback (DVD) Setting surround sound This DVD video player equipped with a “QSound”. It can produce the effect of being in a cinema or a concert hall. Press AUDIO during playback. Press ◀ or ▶ to select “On”. • The on screen display will disappear after a few seconds. -
Page 37: Mp3/Wma/Jpeg/Divx ® And Audio Cd Operation
Use of CD-RW for MP3 files is not recommended. You must obtain any required permission from copyright owners to download or use copyrighted content. Toshiba cannot and does not grant such permission. MP3/WMA/JPEG/DivX Limitations on MP3/WMA/JPEG/DivX •... -
Page 38: Jpeg Cd Playback
Playback (DVD) MP3/WMA CD and Audio CD playback Place an Audio CD or a disc on which MP3 or WMA files have been recorded onto the disc tray. A file browser screen will appear on the screen. Press ▲/▼ to select the desired file. •... -
Page 39: Slide Show Playback
Slide show playback The slide show enables you to view pictures (files) one after another automatically. Preparation: Set “JPEG Interval” setting to “5 Seconds”, “10 Seconds” or “15 Seconds” Select your desired starting file for the slide show in step 3 on “JPEG CD playback” Press ENTER or PLAY to start slide show from the selected file. - Page 40 Playback (DVD) Random playback (CD) In the file browser, press ◀/▶/▲/▼ to select “Mode” in stop mode. Press ENTER to select “Random”. Press PLAY. • The Random playback will start. ■ To resume normal playback Select Mode : “Off” in step 2. Program playback (CD) In the file browser, press ◀/▶/▲/▼...
-
Page 41: Function Setup (Dvd)
Function setup (DVD) Customizing the function settings You can change the default settings to customize performance to your preference. Setting procedure Press SETUP in stop mode. • The following on-screen display appears. Press ▲ or ▼ to select the desired section, then press ◀... - Page 42 Function setup (DVD) ■ Display On screen display can be switched on or off when you press any buttons. Off: On screen displays do not appear when you press any buttons. On: On screen displays appear when you press any buttons (factory setting). ■...
-
Page 43: Temporary Cancel The Rating Level By Dvd Disc
Notes: • The parental control level is equivalent to the following USA movie ratings. Level 1: G Level 5: Level 2: Level 6: R Level 3: PG Level 7: NC-17 Level 4: PG-13 Level 8: The parental control levels for other countries/area than U.S. -
Page 44: Others
Others Language code list Enter the appropriate code number for the initial settings “Menu”, “Subtitle” and/or “Audio” Language Name Code Language Name Code Language Name Code Language Name Code Abkhazian 1112 Fiji Afar 1111 Finnish Afrikaans 1116 French Albanian 2927 Frisian Amharic 1123 Galician Arabic... -
Page 45: Troubleshooting
Troubleshooting Before calling a service technician, please check the following table for a possible cause of the symptoms and some solutions. Symptoms DVD/VCR DVD/VCR does not operate. No picture. No sound. The remote control does not function. No Cable TV reception. TV recording does not work. -
Page 46: Specifications
Others Specifi cations General Power supply Power consumption Weight Dimensions Tuner Antenna input/output RF channel output Color system Video head Audio track Hi-Fi frequency response Hi-Fi dynamic range FF/REW time at 25˚C (77˚F) Applicable disc Frequency range S/N ratio Harmonic distortion Wow and flutter Operating conditions Input/Output... -
Page 47: Limited Canadian Warranty
Modifications to the Player not approved in writing by TCL, and service made necessary by the use or installation of non- Toshiba modifications to the Player; h. Service of a Player on which the TOSHIBA label or logo, rating label or serial number have been defaced or removed; On-site service and repair of the Player; and Damage to the Player caused by failure to follow the specifications, User manuals or guides as to usage and/or storage. - Page 48 If, after following all of the operating instructions in this manual and checking the “Troubleshooting” section, you find that service is needed: (1) To find the nearest TCL Authorized Service Depot, visit TCL’s web site at www.toshiba.ca, or call toll free 1-866-275-6372. (2) Present your bill of sale or other proof of purchase to the Toshiba Factory Service Depot.
- Page 49 Memo 2K60121A.indb 49 2K60121A.indb 49 1/12/2007 3:50:22 PM 1/12/2007 3:50:22 PM...