
Related Manuals for Toshiba SD-K741SU


Summary of Contents for Toshiba SD-K741SU
- Page 1 TOSHIBA DVD VIDEO PLAYER SD-K741SU OWNER’S MANUAL 2004 Toshiba Corporation Introduction Connections Basic playback Advanced playback Function setup Others...
-
Page 2: Introduction
- Consult the dealer or an experienced radio/TV technician for help. Changes or modifi cations made to this equipment, not expressly approved by Toshiba, or parties authorized by Toshiba, could void the user’s authority to operate the equipment. The lightning fl ash with arrowhead symbol, within an equlateral triangle, is intended to alert the user to the presence of uninsulated “dangerous voltage “within the... - Page 3 Be aware that this equipment is still powered even after the ON/STANDBY indicator turns off (standby mode) by pressing the ON/STANDBY button. To disconnect this equipment completely from the main power, pull out the power plug from the wall outlet. Serial No. MANUFACTURED SERIAL NO. TOSHIBA CORPORATION 1-1, SHIBAURA 1-CHOME, MINATO-KU, TOKYO 105-8001, JAPAN...
-
Page 4: Important Safety Instructions
Introduction IMPORTANT SAFETY INSTRUCTIONS CAUTION: PLEASE READ AND OBSERVE ALL WARNINGS AND INSTRUCTIONS GIVEN IN THIS OWNER’S MANUAL AND THOSE MARKED ON THE UNIT. RETAIN THIS BOOKLET FOR FUTURE REFERENCE. This set has been designed and manufactured to assure personal safety. Improper use can result in electric shock or fi... - Page 5 7. Do not block any ventilation openings. Install in accordance with the manufacturer’s instruction. 8. Do not install near any heat sources such as radiators, heat registers, stove, or other apparatus (including amplifi ers) that produce heat . 9. Do not defeat the safety purpose of the polarized or grounding-type plug. A polarized plug has two blades with one wider than the other.
-
Page 6: Additional Safety Instructions
Introduction IMPORTANT SAFETY INSTRUCTIONS 13. Unplug this apparatus during lightning storms or when unused for long periods of time. 14. Refer all servicing to qualifi ed service personnel. Servicing is required when the apparatus has been damaged in any way, such as power-supply cord or plug is damaged, liquid has been spilled or ob- jects have fallen into the apparatus, the apparatus has been exposed to rain or moisture, does not operate normally, or has been dropped. - Page 7 18. Keep your fi ngers well clear of the disc tray as it is closing. Neglecting to do so may cause serious personal injury. 19. Do not place a heavy object on or step on the apparatus. The object may fall, causing serious per- sonal injury and serious damage to the apparatus.
-
Page 8: Precautions
Introduction Precautions Precautions Notes on handling ■ When shipping the DVD video player, the original shipping carton and packing materials come in handy. For maximum protection, repack the units as it was originally packed at the factory. Take care not to give it a shock or shake when carrying. -
Page 9: Notes On Discs
Notes on discs Notes on discs On handling discs ● Do not touch the playback side of the disc. ● Do not attach paper or tape to discs. On cleaning discs ● Fingerprints and dust on the disc cause picture and sound deterioration. -
Page 10: Notes On Region Numbers
If you happen to experience and diffi culty playing a DVD on a Toshiba DVD player, please feel free to call our Contact listed in "LIM- ITED UNITED STATES WARRANTY DVD PLAYERS"... -
Page 11: Table Of Contents
Table of Contents Table of Contents Introduction ●SAFETY PRECAUTIONS...2 ●IMPORTANT SAFETY INSTRUCTIONS...4 ●Precautions...8 ●Notes on Discs ...9 Notes on region numbers...10 ●Table of Contents...11 ●Identifi cations of controls...12 Front panel ...12 Rear panel...13 Remote control ...14 Loading batteries...15 Operating with the remote control ...15 Connections ●Connecting to a TV...18 Connecting to a TV ...18... -
Page 12: Identifi Cations Of Controls
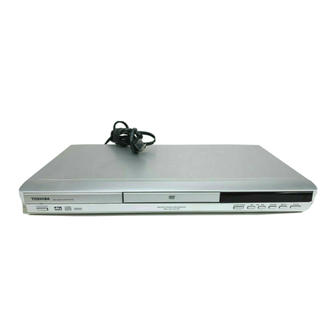
Introduction Identifi cation of Controls Identifi cation of Controls See the page in for details. Front panel ON/STANDBY indicator ON: Lit in green Standby mode: Not lit ON/STANDBY button Disc tray OPEN/CLOSE button SKIP button PAUSE button DVD display Remote Sensor PLAY button STOP button... -
Page 13: Rear Panel
Rear panel Rear panel Rear VIDEO OUT jack BITSTREAM/PCM DIGITAL COAXIAL AUDIO OUT jack ANALOG AUDIO OUT (L/R) jacks S VIDEO OUT jack VIDEO OUT (Y/P B /P R ) (Component video) jacks Power cord... -
Page 14: Remote Control
Introduction Identifi cation of Controls (continued) Identifi cation of Controls (continued) The instructions in this manual describe the functions on the remote control. See the page in Remote control OPEN/CLOSE button SKIP buttons SUBTITLE button ANGLE button AUDIO button STOP button TOP MENU button DIRECTION buttons NAVI button... -
Page 15: Loading Batteries
Loading batteries Open the cover. Insert batteries (AAA size). Make sure to match the + and -on the batteries to the marks inside the battery compartment. Close the cover. Notes on batteries Improper use of batteries may cause battery leakage and corrosion. -
Page 17: Connections
Connections Read this chapter fi rst to make all necessary preparations. ● Connecting to a TV ● Connecting to an audio system and TV equipped with component video inputs ● Connecting to an amplifi er equipped with a Dolby Digital decoder ●... -
Page 18: Connecting To A Tv
Connections Connecting to a TV Connecting to a TV Connect the DVD video player to your TV. For details of output sound, see 42 . Connecting to a TV Signal Flow (yellow) To S VIDEO To VIDEO S video cable (not supplied) If the TV has an S video input, connect the DVD video player with an S video cable. -
Page 19: Connecting To An Audio System And Tv Equipped With Component Video Inputs
Interlaced outputs/inputs(ColorStream ® ) Some TVs or monitors are equipped with component video inputs. Connecting to these inputs allows you to enjoy higher quality picture playback. Actual labels for component video inputs may vary depending on the TV manufacturer.(ex.Y, R-Y, B-Y or Y, C B , C R ) In some TVs or monitors, the color levels of the playback picture may be reduced slightly or the tint may change. -
Page 20: Connecting To Optional Equipment
Connections Connecting to Connecting to Optional Equipment You can enjoy high quality dynamic sounds by connecting the DVD video player. to optional audio equipment. ● For connection to your TV, see “Connecting to a TV“. ● For details of output sound, see ●... -
Page 21: Connecting To An Amplifi Er Equipped With A Dolby Digital Decoder
Connecting to an amplifi er equipped with a Dolby Digital decoder Dolby Digital Dolby Digital is the surround sound technology used in theaters showing the latest movies, and is now available to reproduce this realistic effect the home. You can enjoy motion picture and live concert DVD video discs with this dynamic realistic sound by connecting the DVD video player to a 6 channel amplifi... -
Page 22: Connecting To An Amplifi Er Equipped With A Dts Decoder
Connections Connecting to Connecting to Optional Equipment Connecting to an amplifi er equipped with a DTS decoder Digital Theater System(DTS) DTS is a high quality surround technology used in theaters and now available for home use, on DVD video discs or audio CDs. If you have a DTS decoder or processor, you can obtain the full benefi... - Page 23 Basic playback Begin your operation. ● Playing a Disc ● Variable Speed Playback ● Locating a Desired Section...
-
Page 24: Basic Playback
Basic playback Playing a Disc Playing a Disc This section shows you the basics on how to play a disc. Basic Playback Preparations When you want to view a disc, turn on the TV and select the video input connected to the DVD video player. - Page 25 2, 4 STOP PLAY PAUSE MENU ENTER TOP MENU ■ To pause playback (still mode) Press PAUSE/STEP during playback. To resume normal playback, press PAUSE/STEP the PLAY button. ● The sound is muted during still ‚• mode. ■ To stop playback Press STOP.
-
Page 26: Variable Speed Playback
Basic playback Variable Speed Playback Variable Speed Playback You can play discs at various speeds. Also you can resume playback from the location where you stopped playback. Playing in fast reverse or fast forward directions Press REV or FWD during playback. REV: Fast reverse playback FWD: Fast forward playback Each time you press the REV or... -
Page 27: Playing In Slow-Motion
Playing in slow-motion Press SLOW during playback. SLOW Each time you press the SLOW button, the slow-motion speed changes. Resume playback from the same location Press STOP once at the location where you want to interrupt playback. The DVD video player memorizes STOP the location where playback is stopped. -
Page 28: Locating A Desired Section
Basic playback Locating a Desired Section Locating a Desired Section Normally, DVD video discs are divided into titles, and the titles are sub-divided into chapters. VIDEO CDs and audio CDs are divided into tracks. You can quickly locate any specifi c title, chapter, or track. DVD Video disc Title 1 Chapter 2 Chapter 1... -
Page 29: Locating A Desired Section By Entering The Corresponding Number
Locating a desired section by entering the corresponding number Press T. If you are using a VIDEO CD/audio CD, skip step 2. Then at step 3, enter the number for the track you want using the number buttons. e.g. SEARCH Search Time Title /Chapter... -
Page 31: Advanced Playback
Advanced playback Customizing the performance of your DVD video player ● ● Accessing a Specifi c Location Directly ● Repeating a Specifi c Segment ● Playing in a Varied Order ● Playing in a Favorite Order ● Zooming a Picture Selecting the Picture Enhancement (E.P.M.) ●... -
Page 32: Accessing A Specifi C Location Directly
Advanced playback Accessing a Specifi c Location Directly Accessing a Specifi c Location Directly You can access specifi c location by entering its corresponding time (hours, minutes, seconds) Entering the time counter of the desired location Press T once. Press the button, the time counter SEARCH is highlighted. -
Page 33: Repeating A Specifi C Segment
Repeating a specifi c segment Repeating a specifi c segment You can specify a desired segment and repeat it. Repeat a specifi c segment Press A-B RPT at the beginning of the segment (point A) you want to play repeatedly. A-B RPT Rep A- Press A-B RPT again at the end of the... -
Page 34: Playing In A Varied Order
Advanced playback Playing in a Varied Order Playing in a Varied Order You can play titles, chapters within a title, or track in a varied order. Playing titles, chapters or tracks in a varied order Press PLAY MODE during playback, the screen displays as follows. -
Page 35: Playing In A Favorite Order
Playing in a Favorite Order Playing in a Favorite Order You can combine your favorite titles, chapters or tracks and play them in the order you determine. You can program up to 12 selections into the memory. (Memory playback) Setting titles, chapters or tracks in a favorite order Insert a disc and press MEMORY. -
Page 36: Zooming A Picture
Advanced playback Zooming a Picture Zooming a Picture You can magnify areas within a picture. Zooming a Picture Press ZOOM button during normal, slow or still playback. The DVD video player enters ZOOM the zoom playback mode and displays the icon. e.g. -
Page 37: Selecting The Picture Enhancement (E
Selecting the Picture Enhancement (E.P.M.*) Selecting the Picture Enhancement (E.P.M.*) You can easily select a preferred picture enhancement. * E.P.M.: Enhanced Picture Mode Selecting the picture enhancement Press E.P.M. The picture enhancement menu appears. Video Enhance E.P.M. Brightness Brightness Brightness Sharpness Sharpness Sharpness... -
Page 38: Selecting The Sound Enhancement (E.a.m.)
Advanced playback Selecting the Sound Enhancement (E.A.M.*) Selecting the Sound Enhancement (E.A.M.*) You can easily select a preferred audio enhancement. * E.A.M.: Enhanced Audio Mode Selecting the sound enhancement Press E.A.M. The sound enhancement icon appears. E.A.M. 3D On Select the sound enhancement by pressing the E.A.M. -
Page 39: Selecting The Camera Angle
Selecting the Camera Angle Selecting the If the scene was recorded from multiple angles, you can easily change the camera angle of the scene you are watching. Changing the camera angle Press ANGLE while playing a scene recorded with multiple angles. While playing a scene recorded ANGLE with multiple angles, angle icon... -
Page 40: Selecting Subtitles
Advanced playback Selecting Subtitles Selecting You can display subtitles on the TV screen and select a subtitle language from those included on the DVD video disc. Good evening! BONSOIR! Selecting a subtitle language Press SUBTITLE during playback. current SUBTITLE displayed. e.g. -
Page 41: Selecting A Language
Selecting a Language Selecting You can select a preferred language and sound recording system from those included on the DVD video disc. Selecting a playback audio setting Press AUDIO during playback. AUDIO The current audio setting is displayed. e.g. D 2 ch ENG The abbreviation of the language appears instead of the language name. - Page 42 Advanced playback Selecting a playback audio setting ■ Output sound conversion table Output Input Dolby Digital Linear PCM video disc MPEG1, MPEG2 VIDEO CD MPEG1 Linear PCM 44.1 kHz/16 bit Audio CD MP3/WMA Signals of 96kHz from the BITSTREAM/PCM jack are depressed to 48 kHz by down sampling process when: - “3D On”...
-
Page 43: On-Screen Display Operation
On-screen Display Operation On-screen Display Operation When you turn on the on-screen display, you can view information on operational status and access features and settings. On-screen display operation Press NAVI The following display appears. NAVI Each time you press the NAVI button, the on-screen display changes as follows. See the pages in e.g. - Page 44 Advanced playback On-screen Display Operation (Continued On-screen Display Operation (Continued) On-screen Display Operation (Continued) On-screen Display Operation (Continued On-screen display operation ■ Features 1 / 3 Title number (Track number) 24 / 28 Chapter number Chapter : To stop playback. : Playback starts from the beginning of the current chapter.
- Page 45 ■ Viewing the operational status 1 Press DISPLAY once. The following display appears. Time counter Elapsed time/remaining time of the current title Elapsed time/remaining time of the current track 2 Press DISPLAY twice. The following display appears. Title number Title 1/3 Title 1/3 Title 1/3 Title 1/3...
-
Page 46: Playing Mp3/Wma Files
Advanced playback Playing MP3/WMA Files Playing MP3/WMA Files You can play MP3/WMA fi les that have been recorded on a CD-R or CD-ROM on the DVD video player. Playing MP3/WMA fi les ■ Preparations Make sure that a disc you want to play is compatible with this DVD video player. ... - Page 47 Customers should also note that permission is required in order to download MP3 fi les and music from the internet. Toshiba has no right to grant such permission. Permission should always be sought from the copyright owner.
-
Page 48: Viewing Jpeg Files
Advanced playback Viewing JPEG Files Viewing JPEG Files You can play JPEG fi les that have been recorded on a CD-R or CD-ROM on the DVD video player. You can select a preferred view: a page of 9 thumbnail images, a single image view, and slide show of a selected folder. - Page 49 To quit the JPEG playback, press STOP. STOP If you press STOP button, you can return to the folder list. Pressing the OPEN/CLOSE button to open the disc tray can also quit the playback. ■ To view a single image (To pause slide show) Press PAUSE/STEP PAUSE/STEP ‚•...
-
Page 50: Starting From A Thumbnail View Or A Folder List
Advanced playback Viewing JPEG Files (Continued) Viewing JPEG Files (Continued) Starting from a thumbnail view and a folder list ■ To display a thumbnail view 1. Press TOP MENU during playback. e.g. TOP MENU A thumbnail view appears You can select an image to play at your preference. 2. -
Page 51: Viewing A Single Image
Viewing a single image On a thumbnail view, select an image by pressing Press ENTER or PLAY. The selected image is E N T E R displayed. PLAY To pause playback ‚• Press PAUSE/STEP during playback. To quit the JPEG playback, press STOP. If you press the PLAY button ... - Page 52 Advanced playback Viewing JPEG Files (Continued) Viewing JPEG Files (Continued) Viewing a single image ■ To magnify an image Press ZOOM repeatedly. ZOOM Each time you press the ZOOM button, the magnifi cation level changes as follows: (The icon and monitor scope appear.) 3 (Maximum) and monitor scope disappear.) Notes...
- Page 53 JPEG fi les compatibility Discs whose compatibility with this DVD video player has been confi rmed by TOSHIBA are as follows. Many of these discs, when loaded, will make the DVD video player enter the automatic mode to play a prescribed folder in the disc.
-
Page 55: Function Setup
Function setup You can customize the default settings to your preference. ● Customizing the Function Settings ● Table of Languages... -
Page 56: Customizing The Function Settings
Function setup Customizing the Function Settings Customizing the Function Settings You can customize the default settings to your preference. Setting procedure Press SETUP during stop. following display appears. Language Language Language Video Video Video Video Video Press to select a item for the setting you want to change, and then press ENTER. -
Page 57: Parental Password
Setting Language OSD Menu Subtitle Audio DVD Menu Video TV Shape Video Output Audio Digital Output Parental Password Parental Default Details To select a preferred language for on-screen displays. To select a preferred language for subtitles To select a preferred language for the sound track To select a preferred language for the disc menus. -
Page 58: Setting Details
Function setup Customizing the Function Settings (continued) Customizing the Function Settings (continued) Setting details Language Language Language Language English English OSD Menu Subtitle English Audio English DVD Menu English OSD Menu English: To view On-screen displays in English. Français: To view On-screen displays in French. Español: To view On-screen displays in Spanish. - Page 59 Video Language Video Video TV Shape 4:3 Lettrer Box Lettrer Lettrer Box Video Output CVBS TV Shape 4:3 Pan Scan: Select when a standard 4:3 TV is connected. Displays pictures cropped to fi ll your TV screen. Either or both sides of the picture are cut off.
- Page 60 Function setup Customizing the Function Settings (continued) Customizing the Function Settings (continued) Setting details Audio Language Video Video Video Video Video Digital Output Digital Output Select the output sound format corresponding to your system connection. For details of sound recording systems, see PCM: Select when connected to a 2 channel digital stereo amplifi...
- Page 61 Parental Language Video Audio Password - - - - Parental 8. Adult Default You cannot play DVD video discs rated higher than the level you selected unless you cancel the parental lock function. For example, when you select 7, discs rated higher than level 7 are locked out and cannot be played.
-
Page 62: Table Of Languages
Function setup Table of Languages Table of Languages Table of languages and their abbreviations Abbreviation Language - - - No alternate language CHI (ZH) Chinese DUT (NL) Dutch ENG (EN) English FRE (FR) French GER (DE) German ITA (IT) Italian JPN (JA) Japanese KOR (KO) -
Page 63: Others
Others ● Before calling Service Personnel ● Specifi cations ● LIMITED UNITED STATES WAR- RANTY DVD PLAYERS- EXCHANGE WARRANTY... -
Page 64: Before Calling Service Personnel
Others Before Calling Service Personnel Before Calling Service Personnel Check the following guide for the possible cause of a problem before contacting service. Symptoms and correction Symptom Cause No power. The power plug is disconnected. The DVD video player turned The automatic power off function ... -
Page 65: Specifi Cations
Specifi cations Specifi cations DVD video player/outputs/supplied accessories DVD Video Player Power supply Power consumption Mass External dimensions Signal system Laser Frequency range Signal-to noise ratio Audio dynamic range Harmonic distortion Wow and fl utter Operating conditions Outputs Video output S video output Component video output Audio output (BITSTREAM/PCM COAXIAL) -
Page 66: Limited United States Warranty Dvd Players
Others LIMITED UNITED STATES WARRANTY DVD PLAYERS- EXCHANGE WARRANTY Toshiba America Consumer Products, L.L.C. (“TACP”) makes the following limited warranties to original consumers in the United States. THESE LIMITED WARRANTIES EXTEND TO THE ORIGINAL CONSUMER PURCHASER OR ANY PERSON RECEIV- ING THIS DVD PLAYER AS A GIFT FROM THE ORIGINAL CONSUMER PURCHASER AND TO NO OTHER PURCHASER OR TRANSFEREE. - Page 67 DVD Product to and from the Service Station. For additional information, visit TACP’s web site: www.tacp.toshiba.com ALL WARRANTIES IMPLIED BY THE LAW OF ANY STATE OF THE U.S.A., INCLUDING THE IMPLIED WARRANTIES OF MERCHANT ABILITY AND...
- Page 68 TOSHIBA Printed in China...