Sony RM-AX4000 Operating Instructions Manual
Remote controls: integrated remote commander
Hide thumbs
Also See for RM-AX4000:
- Software manual (118 pages) ,
- Service manual (20 pages) ,
- Quick start manual (2 pages)
Table of Contents
Advertisement
Quick Links
RM-AX4000
Integrated Remote
Commander
To go to the section you want to read, click the
title in the PDF Bookmarks, the title in the
"Table of Contents" of the Operating
Instructions, or the page in the sentences.
© 2005 Sony Corporation
Operating Instructions
Getting Started
Operating the Remote Commander
Unit Settings
Setting by On-Remote Setup
Additional Information
Appendix
Advertisement
Table of Contents

Related Manuals for Sony RM-AX4000


Summary of Contents for Sony RM-AX4000
- Page 1 To go to the section you want to read, click the title in the PDF Bookmarks, the title in the “Table of Contents” of the Operating Instructions, or the page in the sentences. © 2005 Sony Corporation Operating Instructions Getting Started Operating the Remote Commander...
- Page 2 The model number and serial number are located on the rear of the unit. Record the serial number in the spaces provided below. Refer to them whenever you call your Sony dealer regarding this product. Model No. RM-AX4000 Serial No.
- Page 3 •In no event will SONY be liable for any financial damage, or loss of profits, including claims made by third parties, arising out of the use of the software supplied with this unit.
- Page 4 The Remote Commander is preset at the factory to operate Sony brand components, so you can use it out of the box as a control center for your Sony AV components. Remote control signals for non-Sony components are also preset...
- Page 5 Learning function lets you program other remote control signals you may need The Remote Commander’s learning function can learn the remote control infrared signals of non-preset components. The Remote Commander can learn remote control signals (infrared signals only) of other devices such as air conditioners, lights, etc.
-
Page 6: Table Of Contents
Table of Contents Getting Started Unpacking ... 8 Location and function of controls ... 8 Installing the batteries ... 10 When to replace the batteries ... 10 Setting the clock ... 11 Remote Commander settings and operating procedures ... 13 About the factory setting ... - Page 7 Setting by On-Remote Setup Setting the preset codes ... 45 Using non-preset remote control operations – Learning function ... 47 To clear the learned signal from a key or button ... Learning up to 4 signals to one key ... For accurate learning ...
-
Page 8: Getting Started
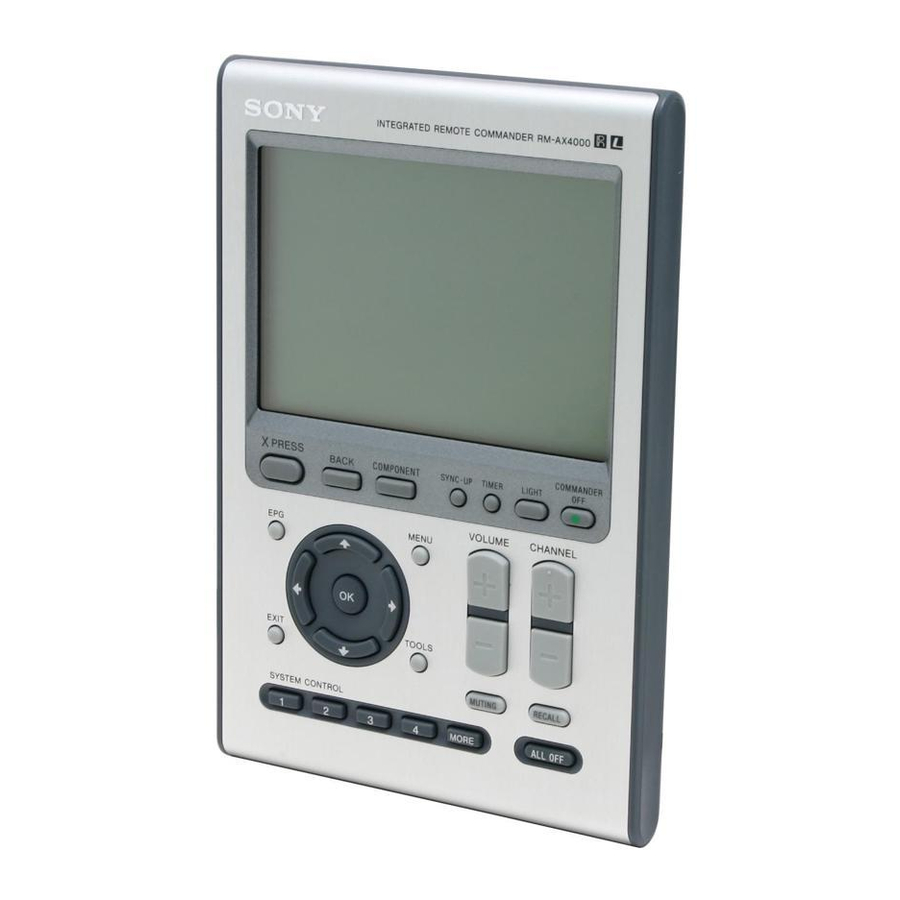
Getting Started Unpacking Check the contents of the package before using the Remote Commander. •Remote Commander RM-AX4000 (1) •USB mini cable (1) •CD-ROM for the AX Remote Editor software, PDF file Operating Instructions (1) •Quick Start Guide (1) •Preset code lists (1) •Warranty Card (1) Location and function of controls... - Page 9 5 XPRESS button (pages 22-24) The XPRESS names appear as the Label keys. When you press an XPRESS name, the operating display for that XPRESS function appears, and its macro is performed. 6 MENU button (pages 76-87) Calls up the menu screen for components that have menu function.
-
Page 10: Installing The Batteries
The clock does not work while replacing the batteries. Alkaline batteries will last up to 5 months (a Sony TV turned On/Off up to approx. 500 times per day). If the Remote Commander does not operate properly, the batteries are getting weak and E appears on the LCD display. -
Page 11: Setting The Clock
Setting the clock When you install batteries the first time, the Remote Commander enters clock setup mode. “DS_TIME” appears as the Display title. “STD_TIME” lights and “SET” and “DS_TIME” flash on the Label keys. STD_TIME: standard time DS_TIME: daylight savings time LEARN DS_TIME [STD_TIME]... - Page 12 Setting the clock (continued) Set the hour and AM (or PM) by pressing the F or f button. The selected hour and AM (or PM) flash. Next, press the g button. The hour and AM (or PM) are set. “00” (minute) and “SET” flash. LEARN CLOCK STD_TIME...
-
Page 13: Remote Commander Settings And Operating Procedures
About the factory setting The Remote Commander (RM-AX4000) is preset at the factory to operate most Sony brand AV components (see the table below). If you operate a non-Sony AV component, you need to set the component’s preset code on the Remote... -
Page 14: Setting Procedure For On-Pc Setup
Remote Commander settings and operating procedures (continued) Programmable items of On-PC Setup and On-Remote Setup Main setting Using the AX items Remote Editor Setting the preset codes Learning the remote control signals Editting the label Setting the Timer Programming the Timer Setting System Control function *1... -
Page 15: Setting Procedure For On-Remote Setup
When using On-PC Setup If you set up the Remote Commander using On-PC Setup, you do not need to read this PDF manual “Setting by On- Remote Setup”. (pages 45 – 69) Setting procedure for On- Remote Setup If you set the Remote Commander On- Remote Setup, follow the procedure below. -
Page 16: Installing The "Ax Remote Editor
Installing the “AX Remote Editor” By installing the “AX Remote Editor” software on the supplied CD-ROM onto your PC, you can set up the Remote Commander with your PC. “AX Remote Editor” makes setting up complex operations like a series of commands (a macro) easy, and also allows various other convenient functions that can only be set up on the PC. -
Page 17: Installing The Usb Driver
Click [Next]. Follow the on-screen instructions and proceed with the installation. When the installation is complete, “AX Remote Editor 1.0 Setup” automatically quits. If the installation display is hidden behind other windows If “AX Remote Editor 1.0 Setup” disappears behind other displays while installing, press the [Tab] key several times while pressing down the [Alt] key to bring up “AX Remote Editor 1.0 Setup”... - Page 18 Installing the “AX Remote Editor” (continued) For Windows XP users Close all software running on Windows. Insert the supplied CD-ROM into the CD-ROM drive of the PC. After a moment, “InstallShield Wizard” of “AX Remote Editor” appears. Click [Cancel] to close “InstallShield Wizard”...
-
Page 19: Connecting The Remote Commander To Your Pc
Click [Next]. Installing of the USB driver starts. The “Completing the Found New Hardware Wizard” display appears when the installation is complete. Click [Finish]. Installing of the USB driver finishes. Connecting the Remote Commander to your PC You can now connect the Remote Commander (RM-AX4000) to your PC with the supplied USB mini cable. -
Page 20: Starting Up "Ax Remote Editor
Tips • If you are using an operating system other than Windows XP, click the “Start” button of Windows and point to “Programs” - “Sony AX” - “AX Remote Editor” and click to start up “AX Remote Editor”. • If “ ” (the shortcut icon of AX Remote Editor) is displayed on the desktop of Windows, double-click the icon to open it. -
Page 21: Operating The Remote Commander
Some XPRESS functions are preset at the factory to operate Sony brand components (see the table at right). However, depending on the factory preset code, they may not necessarily be effective. -
Page 22: Operating The Xpress Function
Operating your components (continued) Operating the XPRESS function LEARN COMMANDER PRESS BACK COMPONENT SYNC-UP TIMER LIGHT VOLUME CHANNEL MENU EXIT TOOLS MUTING RECALL SYSTEM CONTROL MORE ALL OFF When you press an XPRESS button on the Remote Commander, the XPRESS names appear at the bottom of the display. - Page 23 Example: To play a DVD player by XPRESS function (when On-PC Setup was used to set up the Remote Commander) Press the XPRESS button. PRESS “XPRESS” appears as the Display title. LEARN XPRESS A-CBL D-SAT If a page number such as “/1” appears to the right side of Display title, multiple pages are available.
- Page 24 Operating your components (continued) Example: To play a DVD player by XPRESS function (when On- Remote Setup was used to set up the Remote Commander) Press the XPRESS button. PRESS “XPRESS” appears as the Display title. LEARN XPRESS A-CBL D-SAT If a page number such as “/1”...
-
Page 25: To Synchronize With The Status Of A Component - Sync-Up
Press the key(s) or button(s) you want to operate. When the signal is sent, You can also use other buttons, such as the VOLUME +/–, CHANNEL +/–, MUTING, cursor, and MENU buttons. When you are finished using the Remote Commander, press the COMMANDER OFF button. -
Page 26: To Perform An Easy Action "Air-Slide" For Xpress Function
Operating your components (continued) Press the DONE key. DONE The component’s (ON/OFF) power status is synchronized with the Remote Commander. When you are finished using the Remote Commander, press the COMMANDER OFF button. COMMANDER The Remote Commander turns off. If you want to return to the previous display Press the BACK button, the previous LCD display returns. -
Page 27: Operating Components Individually
Operating components individually LEARN COMMANDER COMPONENT PRESS BACK COMPONENT SYNC-UP TIMER LIGHT button VOLUME CHANNEL MENU EXIT TOOLS MUTING RECALL SYSTEM CONTROL MORE ALL OFF When you press the COMPONENT button on the Remote Commander, the component names appear at the bottom of the display. - Page 28 Operating your components (continued) Press the component name you want to operate (in this case, TV). The component name appears as the Display title. And the keys you use to control the TV are displayed as Touch-keys. LEARN DISPLAY MAIN/SUB INPUT ENTER TV_TUNER ANT/SW...
-
Page 29: To Control The Volume
To control the volume LEARN COMMANDER PRESS BACK COMPONENT SYNC-UP TIMER LIGHT VOLUME CHANNEL MENU VOLUME +/– button EXIT TOOLS MUTING button MUTING RECALL SYSTEM CONTROL ALL OFF MORE Press the VOLUME +/– buttons to control the volume, and the MUTING button to silence. -
Page 30: To Quickly Switch The Timer On Or Off
Executing a series of commands at a scheduled time (continued) How to set the Timer function For On-PC Setup: See the Help menu provided in “AX Remote Editor.” For On-Remote Setup: See “Setting the Timer” on page 59. To quickly switch the Timer on or off With the Remote Commander (RM- AX4000), you can quickly switch a Timer... -
Page 31: Executing A Series Of Commands With Just One Button - System Control Function
If you want to quit before finishing Press and hold the COMMANDER OFF button for more than 2 seconds. The previous status returns, and the Remote Commander turns off. If you want to return to the previous display Press the BACK button or the COMMANDER OFF button, the previous LCD display returns. -
Page 32: Using Other Useful Functions
Executing a series of commands with just one button (continued) Notes • If the remote control detectors of the components are too far apart, or if something is blocking them, some of the components may not operate in the ordered sequence when you press a SYSTEM CONTROL button or System Control key. -
Page 33: Locking The Controls - Hold Function
Locking the controls – Hold function To prevent accidental operation, you can lock all the buttons with the Hold function. However, any programmed Timer functions will still be activated while the controls are locked. While pressing the COMMANDER OFF button, press the touch-key. The LCD display turns off. -
Page 34: Unit Settings
Unit Settings Setting the backlight The LCD display’s backlight is preset at the factory to activate whenever the Remote Commander (RM-AX4000) is operated, and to switch off automatically if you do not operate for more than 10 seconds. You can set the backlight automatic-off time, the brightness, the setting of the fade effect, and which buttons activate the backlight. - Page 35 Press the BACK button or the COMMANDER OFF button. COMMANDER BACK “LIGHT” appears as the Display title. LEARN LIGHT OFF_TIME LEVEL FADE ON_MODE Note When you set the automatic-off time to longer than 10 seconds (factory setting), the battery life may be shorter. Press “LEVEL”...
- Page 36 Setting the backlight (continued) Press the ON or OFF key to select the fade effect of the backlight. ON: fade in/out backlight OFF: normal backlight The fade effect of the backlight changes and a beep sounds each time you press the keys. Press the BACK button or the COMMANDER OFF button.
-
Page 37: Setting The Lcd Display
If you want to quit before finishing Press and hold the COMMANDER OFF button for more than 2 seconds. The previous status returns, and the Remote Commander turns off. If you want to return to the previous display Press the BACK button or the COMMANDER OFF button, the previous LCD display returns. - Page 38 Setting the LCD display (continued) Press “DISPLAY” on the Label keys. DISPLAY “DISPLAY” appears as the Display title. LEARN DISPLAY DISP-OFF ALIGN CONTRAST Press ”DISP-OFF” on the Label keys. DISP-OFF The setting display for automatic-off time of the LCD display appears. LEARN DISPLAY DISP-OFF...
-
Page 39: Calibrating The Alignment Of The Lcd Display
Calibrating the alignment of the LCD display You can calibrate the alignment of the LCD display if the Touch-keys are not working properly. To change this setting, perform the following procedure. While pressing the COMMANDER OFF button, press the MENU button and EXIT button. -
Page 40: Setting The Contrast Of The Lcd Display
Setting the LCD display (continued) Setting the contrast of the LCD display You can adjust the contrast of the LCD display if the screen is not viewed properly. To change this setting, perform the following procedure. While pressing the COMMANDER OFF button, press the OK button. -
Page 41: Setting The Beep
Setting the beep The Remote Commander (RM-AX4000) is preset at the factory with the confirmation beep set to on. To change this setting, perform the following procedure. While pressing the COMMANDER OFF button, press the MUTING button. COMMANDER MUTING “SET” appears as the Display title. LEARN LIGHT DISPLAY OTHER If “OTHER”... -
Page 42: Adjusting The Clock
Adjusting the clock You can adjust the clock after setting. To change this setting, perform the following procedure. While pressing the COMMANDER OFF button, press the MUTING button. COMMANDER MUTING “SET” appears as the Display title. LEARN LIGHT DISPLAY OTHER If “OTHER”... -
Page 43: To Change The Display To The Daylight Savings Time (Summer Time) Indication
Press and hold the COMMANDER OFF button for more than 2 seconds. COMMANDER The Remote Commander turns off. If you want to quit before finishing Press and hold the COMMANDER OFF button for more than 2 seconds. The previous status returns, and the Remote Commander turns off. - Page 44 Adjusting the clock (continued) Press “DS_TIME” on the Label keys. DS_TIME The setting display for daylight savings time appears. The current setting is shown inside the [ ], while the other flashes. LEARN OTHER DS_TIME [STD_TIME] Press the STD_TIME or DS_TIME key.
-
Page 45: Setting By On-Remote Setup
Remote Commander by setting their preset codes. Setting of the preset code is required in the following cases: – To use a Sony component that is not registered to the Remote Commander by the default setting – To use other brands of components... - Page 46 Setting the preset codes (continued) Select the component name you want the Remote Commander to preset by pressing the Label key (in this case, TV). The “TV” and current preset code (in this case, “8001”) appear as the Label keys. “0”...
-
Page 47: Using Non-Preset Remote Control Operations - Learning Function
If you want to quit before finishing Press and hold the COMMANDER OFF button for more than 2 seconds. The previous status returns, and the Remote Commander turns off. If you want to return to the previous display Press the BACK button or the COMMANDER OFF button, the previous LCD display returns. - Page 48 Using non-preset remote control operations (continued) Place the Remote Commander (RM-AX4000) head to head with your component’s remote control. Remote control for your component about 1 - 3 inches (3 - 8 cm) away While pressing the COMMANDER OFF button, press the MUTING button.
-
Page 49: To Clear The Learned Signal From A Key Or Button
Press the key or button on the Remote Commander you want to “teach” the preset code to. “ ” flashes and only the pressed LEARN LEARN key remains on the LCD display. LEARN LEARN When you have programmed the buttons on the Remote Commander The names of buttons not on the LCD display (VOLUME +/–, CHANNEL +/–, MUTING,... - Page 50 Using non-preset remote control operations (continued) Press the BACK button or the COMMANDER OFF button. COMMANDER BACK “LEARN” appears as the Display title. LEARN LEARN A-CBL D-SAT If you want to teach another signal, repeat steps 4 - 6. Press and hold the COMMANDER OFF button for more than 2 seconds.
-
Page 51: For Accurate Learning
• When you teach a remote control unit with an interactive signal exchange system (supplied with some Sony receivers and amplifiers) to the Remote Commander, the response signal of the component may interfere with the learning of the Remote Commander. - Page 52 Programming a series of commands with just one button (continued) While pressing the COMMANDER OFF button, press the MUTING button. COMMANDER MUTING “SET” appears as the Display title. LEARN PRESET LEARN MACRO Press “MACRO” on the Label keys. MACRO “MACRO” appears as the Display title.
- Page 53 Select the component name you want the Remote Commander to program the series of commands (a macro) by pressing the Label key (in this case, TV). The “TV” appears as the Display title, and the programmable keys for the selected component flash. LEARN POWER 2PIC...
-
Page 54: To Clear Programmed Series Of Commands For System Control Button Or System Control Key
Programming a series of commands with just one button (continued) If you want to quit before finishing Press and hold the COMMANDER OFF button for more than 2 seconds. The setting is canceled, and the Remote Commander turns off. If you want to return to the previous display Press the BACK button or the COMMANDER OFF button. - Page 55 Press “SYSTEM” on the Label keys. SYSTEM “SYSTEM” appears as the Display title. LEARN SYSTEM SYSTEM5 SYSTEM6 SYSTEM7 SYSTEM8 While pressing the SYNC-UP button, press the programmed key or button you want to clear. A beep sounds, “SYSTEM” appears as the Display title.
-
Page 56: Setting The Xpress Macro Activation
Setting the XPRESS macro activation You can switch the XPRESS macro activation to on or off when selecting the XPRESS function. If you set to off, the XPRESS display appears without sending the XPRESS macro. To change this setting, perform the following procedure. -
Page 57: Controlling The Volume Of Visual Components Connected To An Audio Component
Controlling the volume of visual components connected to an audio component The Remote Commander (RM-AX4000) is factory preset based on the assumption that you hear the sound of your visual components from your TV speakers, and that you hear sound of your audio components from the loudspeakers connected to your amplifier. - Page 58 Controlling the volume of visual components connected to an audio component (continued) Press the Display title (SET) once. “VOLUME” flashes on the Label keys. LEARN LABEL VOLUME LIGHT DISPLAY Press “VOLUME” on the Label keys. VOLUME The setting display of volume control appears.
-
Page 59: Setting The Timer
Setting the Timer Up to 8 Timers can be set on the Remote Commander (RM-AX4000). You can program the Timer for the day of the week, the hour, the minute and a series of commands (a macro). You can set each Timer to be executed or not. - Page 60 Setting the Timer (continued) Press “MACRO” on the Label keys. MACRO “COMPONENT” appears as the Display title. The component names flash on the Label keys. If a page number such as “/1” appears to the right side of Display title, multiple pages are available. Press the number to go to the next page.
- Page 61 When the maximum of 32 steps are input, the Timer macro programming finishes and a beep sounds, and the Timer macro displays in order. LEARN PROG4 ON/OFF MACRO TIME TEST Notes • You can input up to 32 steps for one Timer.
- Page 62 Setting the Timer (continued) Press the F or f button to set the day(s) of the week. Each time the F or f button is pressed the day(s) of the week change as follows. SU : Sunday MO : Monday TU : Tuesday WE : Wednesday TH : Thursday...
- Page 63 Press the ON/OFF or TEST key to activate the Timer. ON/OFF: With a beep sound, “ON” appears on the top-right of the LCD display, and the Remote Commander enters the Timer standby mode. TEST: You can check the Timer macro by transmitting the signals.
-
Page 64: To Clear A Timer Macro
Setting the Timer (continued) To clear a Timer macro While pressing the COMMANDER OFF button, press the MUTING button. COMMANDER MUTING “SET” appears as the Display title. LEARN PRESET LEARN MACRO Press “TIMER” on the Label keys. TIMER “TIMER” appears as the Display title. The Timer numbers “PROG1”... -
Page 65: Changing The Names Of Labels
Press “YES” on the Label keys. The Timer macro is cleared, then “COMPONENT” appears as the Display title. LEARN COMPONENT /1 A-CBL D-SAT If you press the NO key The Timer macro is not cleared, and the display returns to step 3. Press and hold the COMMANDER OFF button for more than 2 seconds. - Page 66 Changing the names of labels (continued) Press the Display title (SET) once. “LABEL” flashes on the Label keys. LEARN LABEL VOLUME LIGHT DISPLAY Press “LABEL” on the Label keys. LABEL “LABEL” appears as the Display title. LEARN LABEL XPRESS COMPO SYSTEM TIMER Select the type of Label key you want the Remote Commander to...
- Page 67 Input digits or characters for the Label key by pressing the number keys (0 -9), SYMBOL 1 key or SYMBOL 2 key on the Touch-key. Begin inputting digits or characters from the left. Press the number key repeatedly until you obtain the desired digit or character.
-
Page 68: Erasing All The Settings - Reset
Erasing all the settings – Reset You can clear all the settings to reset the Remote Commander to its factory settings. While pressing the COMMANDER OFF button, press the MUTING button. COMMANDER MUTING “SET” appears as the Display title. LEARN PRESET LEARN MACRO Press the Display title (SET) - Page 69 Press the “YES” on the Label keys. With a beep sound, the all settings are cleared. Press and hold the COMMANDER OFF button for more than 2 seconds. COMMANDER The Remote Commander turns off. If you want to quit before finishing Press and hold the COMMANDER OFF button for more than 2 seconds.
-
Page 70: Additional Information
Power requirements Remote control and backlight: Four size AA (R6) batteries Battery life Approx. 5 months (a Sony TV turned on/off up to approx. 500 times per day) Dimensions × 1 × 7 in. (w × h × d) Approx. -
Page 71: Troubleshooting
Troubleshooting If you have problems setting up or using the Remote Commander, first check the batteries (page 10), then check the items below. Trouble with the Remote Commander's basic settings Problem The Remote Commander does not turn on. The LCD display turns off automatically. - Page 72 Troubleshooting (continued) Problem A System Control key does not work properly. Even if I set the Timer macro, the component does not work properly. Even if I operate an XPRESS function, the TV does not turn on, or it turns off. Even if I operate an XPRESS function, the Source component does...
- Page 73 • Avoid learning in places under direct sunlight or strong fluorescent light. • When you teach a remote control unit with an interactive signal exchange system (supplied with some of Sony's receivers and amplifiers) to the Remote Commander, the response signal of component may interfere with the learning of the Remote Commander.
- Page 74 Troubleshooting (continued) Problem The keys learned do not operate properly. “NG” flashes 5 times when learning. “NG” flashes twice when learning. The Remote Commander does not memorize the radio band change (AM/ FM) or frequency. The setting display does not appear. The setting display finishes in process of the setting.
- Page 75 Customer Support Information After you have read through this manual, if you still cannot get the Remote Commander to work properly, call the Sony Customer Support Helpline at 1-800-822-2217. Solution In AX Remote Editor, click “Tools” on the menu bar, then select “Update Firmware for Remote”...
-
Page 76: Appendix
Appendix Table of preset functions Note There may be some components or functions that cannot be operated with this Remote Commander. KEY DISPLAY FUNCTION POWER To turn the power on/off 1 – 9, 0, ENTER To change the channel (To change to channel 5, for example, press 0 and 5, or press 5 and ENTER.) -
Page 77: A-Cbl (Analog Cable Box)
A-CBL (Analog Cable box) KEY DISPLAY FUNCTION POWER To turn the power on/off 1 – 9, 0, ENTER To change the channel (To change to channel 5, for example, press 0 and 5, or press 5 and ENTER.) +100 To select numbers 100 and above DISPLAY To turn on the display... -
Page 78: D-Sat (Digital Satellite)
Table of preset functions (continued) D-SAT (Digital Satellite) KEY DISPLAY FUNCTION POWER To turn the power on/off 1 – 9, 0, ENTER To change the channel (To change to channel 5, for example, press 0 and 5, or press 5 and ENTER.) •... -
Page 79: Dvd (Dvd Player)
DVD (DVD player) KEY DISPLAY FUNCTION POWER To turn to the power on/off 1 – 9, 0 Number buttons: To set items selected from the screen To select numbers 10 and above ENTER To enter a setting or to set items selected from the screen To decide the distance between A and B... -
Page 80: Vcr (Video Cassette Recorder)
Table of preset functions (continued) VCR (Video Cassette Recorder) KEY DISPLAY FUNCTION POWER To turn the power on/off 1 – 9, 0, ENTER To change the channel (To change to channel 5, for example, press 0 and 5, or press 5 and ENTER.) To rewind To play To fast-forward... -
Page 81: Dvr (Digital Video Recorder)
DVR (Digital Video Recorder) KEY DISPLAY FUNCTION POWER To turn the power on/off 1 – 9, 0, ENTER To change the channel (To change to channel 5, for example, press 0 and 5, or press 5 and ENTER.) • To enter the subchannel number INFO To display program... -
Page 82: Cd (Cd Player)
Table of preset functions (continued) CD (CD player) KEY DISPLAY FUNCTION POWER To turn the power on/off 1 – 9, 0 To select the track number To select numbers 10 and above ENTER To enter the setting To rewind To play To fast-forward To stop To pause... -
Page 83: Rcvr (Receiver/Amplifier)
RCVR (Receiver/Amplifier) KEY DISPLAY FUNCTION POWER To turn the power on/off 1 - 9, 0 Keys to use the tuner directly To select numbers 10 and above ENTER To enter the setting TUNER To select the input source: TUNER VIDEO 1 To select the input source: VIDEO 1 VIDEO 2... -
Page 84: Dvdvr (Dvr/Dvd Combo)
Table of preset functions (continued) DVDVR (DVR/DVD combo) KEY DISPLAY FUNCTION POWER To turn the power on/off 1 – 9, 0 Number buttons: To set items selected on the screen To select numbers 10 and above ENTER To enter a setting or to set items selected on the screen INFO To display program... -
Page 85: Dvd-R (Dvd Recorder)
DVD-R (DVD Recorder) KEY DISPLAY FUNCTION POWER To turn the power on/off 1 – 9, 0 Number buttons: To set items selected on the screen To select numbers 10 and above ENTER To enter a setting or to set items selected on the screen To decide the distance between A and B To rewind... -
Page 86: D-Cbl (Digital Cable Box)
Table of preset functions (continued) D-CBL (Digital Cable box) KEY DISPLAY FUNCTION POWER To turn the power on/off 1 – 9, 0, ENTER To change the channel (To change to channel 5, for example, press 0 and 5, or press 5 and ENTER.) INFO To display program information... -
Page 87: Dav (Dvd/Receiver Combo)
DAV (DVD/Receiver combo) KEY DISPLAY FUNCTION POWER To turn the power on/off 1 – 9, 0 Number buttons: To set items selected on the screen To select numbers 10 and above ENTER To enter the setting TUNER To select the tuner band To rewind To play To fast-forward... -
Page 88: Pj (Projector)
Table of preset functions (continued) PJ (Projector) KEY DISPLAY FUNCTION POWER To turn the power on/off DISPLAY To show the current play status on the screen INPUT To change the input mode WIDE To switch to the WIDE mode To move the cursor upward To move the cursor downward To move the cursor to the... -
Page 89: Tape (Cassette Deck)
TAPE (Cassette deck) KEY DISPLAY FUNCTION POWER To turn the power on/off 1 – 9, 0 To select the track number ENTER To enter the setting To select a tape deck: Deck A or B (Dual cassette deck only To rewind To play To fast-forward REC*... -
Page 90: Md (Md Deck)
Table of preset functions (continued) MD (MD deck) KEY DISPLAY FUNCTION POWER To turn the power on/off 1 – 9, 0 To select the track number (0 for the track 10) To select numbers 10 and above ENTER To enter the setting To rewind To play To fast-forward... -
Page 91: Light
LIGHT FUNCTION (Key display of other remote commanders) DISPLAY Lutron Spacer Spacer System SCENE1 SCENE2 SCENE3 SCENE4 SCENE13 SCENE14 SCENE15 SCENE16 FULL ON ALL ON ALL OFF CHANNEL + Raise Raise Lower Lower CHANNEL – Toggle RECALL Grafik RadioRA Home- Works Interac- tive... -
Page 92: Full Display
Full Display MO TU WE TH FR SA LEARN LEARN 0123456789AB INFO TUNER TOP MENU S.INDEX PQRS WXYZ DISPLAY MAIN/SUB PHONO SYMBOL 1 SYMBOL 2 INPUT +100 ENTER CLEAR 0123456789ABCDEFGHIJKLMNOPQRSTUV LOCK POWER ON OFF 2PIC SWAP VIDEO 1 VIDEO 2 VIDEO 3 TAPE FAVORITE... -
Page 93: Index
Index Adjusting the backlight the calibration of the LCD display the clock the contrast of the LCD display the volume Air-Slide Alignment Audio component Automatic-off time of the backlight of the LCD display AX Remote Editor installing starting up using Help Backlight Battery Beep... - Page 94 Index (continued) Erasing all the settings (RESET) the learned function from a key or button the macro (programmed series of commands) the Timer macro Factory settings Air-Slide list Backlight Components list Controlling the volume of visual components Erasing all the settings (Reset) Preset functions of each components XPRESS list Help...
- Page 95 Setting the automatic-off time of the backlight the automatic-off time of the LCD display the backlight the beep the calibration of the LCD display the clock the contrast of the LCD display the names of the labels the preset codes the System Control macro the Timer the volume...
- Page 96 Sony Corporation...