Miele KF 2801 Vi Operating And Installation Instructions
Hide thumbs
Also See for KF 2801 Vi:
- Operating and installation instructions (140 pages) ,
- Operating and installation instructions (136 pages)
Table of Contents

Related Manuals for Miele KF 2801 Vi


Summary of Contents for Miele KF 2801 Vi
- Page 1 Operating and installation instructions Fridge-freezer To avoid the risk of accidents or damage to the appliance it is essential to read these instructions before it is installed and used for the first time. en-GB M.-Nr. 11 273 040...
-
Page 2: Table Of Contents
Contents Warning and Safety instructions................ 6 Caring for the environment ................ 15 Installation...................... 16 Location......................... 16 Climate range ....................16 Installation notes ....................17 Adjoining cabinets/units ................... 17 Load-bearing capacity of the niche floor ............18 Ventilation ......................18 Door hinging ..................... 18 Side-by-side ..................... - Page 3 Performing a Self test ..................72 Switching on the Door assistant ............... 73 Switching off the Door assistant ............... 75 Miele@home ......................75 Switching off the Demo mode ................79 Resetting the settings to their default settings ..........80 Switching Holiday mode on or off ..............82 Switching Sabbath mode on or off ..............
- Page 4 Contents Removing the freezer baskets................98 Removing the dividing panel (depending on the model)........99 Removing the ice cube container................99 Storing food in the refrigerator section............ 100 Different storage zones ..................100 Food which is not suitable for storage in the refrigerator section ....... 101 Notes on buying food..................
- Page 5 Contents Service........................ 132 Contact in case of malfunction ................132 Warranty ......................132 Conformity declaration .................. 133 Copyrights and Licences .................. 134...
-
Page 6: Warning And Safety Instructions
Miele cannot be held liable for injury or damage caused by non- compliance with these instructions. Keep these instructions in a safe place and pass them on to any future owner. - Page 7 The appliance is not suitable for use in areas where there is a risk of explosion. Miele cannot be held liable for damage resulting from improper or in- correct use of the appliance. ...
- Page 8 – Avoid naked flames or anything which creates a spark. – Disconnect the refrigeration appliance from the mains electricity supply. – Ventilate the room where the refrigeration appliance is located for several minutes. – Contact the Miele Customer Service Department.
- Page 9 If the electrical connection cable supplied is damaged, it must only be replaced by an original spare part to prevent a hazard for the user. Miele can only guarantee the safety of the appliance when ori- ginal Miele spare parts are used.
- Page 10 Miele replacement parts are used. Faulty components must only be replaced by Miele spare parts. Miele cannot be held liable for damage caused by a faulty mains water connection. The ice-cube maker must only be connected to a cold water sup-...
- Page 11 Warning and Safety instructions Risk of injury. Ensure that you do not come into contact with mov- ing parts on dispensing mechanism of the ice cube maker or the heating element on the ice cube maker. Correct use The appliance is designed for use within a certain climate range (ambient temperatures), and should not be used outside this range.
- Page 12 Only use genuine original Miele accessories and spare parts with this appliance. Using accessories or spare parts from other manu- facturers will invalidate the warranty, and Miele cannot accept liabil-...
- Page 13 Warning and Safety instructions Cleaning and care Do not use any oils or grease on the door seals, as these will cause the seals to deteriorate and become porous with time. Do not use a steam cleaning appliance to clean or defrost this ap- pliance.
- Page 14 Warning and Safety instructions Transport Always transport the appliance in an upright position and in its ori- ginal transport packaging to avoid damage in transit. Danger of injury and damage to the appliance. The refrigeration appliance is very heavy and must be transported by two people. Disposal of your old appliance ...
-
Page 15: Caring For The Environment
Miele. By law, you are solely re- sponsible for deleting any personal data from the appliance prior to disposal. Take care not to damage your refrigera- tion appliance’s pipework before or dur-... -
Page 16: Installation
Installation If installation near a heat source is un- Location avoidable, observe the following min- This appliance should be installed in a imum distances between the appliance dry, well-ventilated room. and the heat source: When deciding where to install your re- –... -
Page 17: Installation Notes
Installation Installation notes Risk of damage due to high hu- midity. Risk of damage and injury due to In environments with high humidity, the refrigeration appliance tipping condensation can build up on ex- over. ternal panels of the refrigeration ap- This refrigeration appliance is very pliance, which can cause corrosion. -
Page 18: Load-Bearing Capacity Of The Niche Floor
When fully loaded, the weight of the re- ventilation gaps. The ventilation gaps frigeration appliance is approx.: must not be covered or blocked in any way. KF 2801 Vi, KF 2811 Vi 393 kg KF 2901 Vi, KF 2911 Vi 449 kg Door hinging ... -
Page 19: Side-By-Side
Installation Side-by-side If the door hinges of the refrigeration appliances are next to each other, This appliance can be installed side-by- you must take into account the thick- side with another refrigeration appli- ness of the furniture fronts and door ance. -
Page 20: Specifications For The Mains Water Connection
Installation . . . without partition wall Specifications for the mains water connection – Connection to the water supply must comply with the applicable regula- tions in the country where the appli- ance is being installed. All appliances and systems used to supply water to the refrigeration ap- pliance must also comply with the applicable regulations in the respect-... -
Page 21: Building-In Dimensions
Installation Building-in dimensions KF 2801, KF 2811 Vi 30 mm ≥ 244 mm 22 mm ≥ 102 mm ≥ 85 mm 102 mm Side view... - Page 22 Installation KF 2901 Vi, KF 2911 Vi 30 mm ≥ 244 mm 22 mm ≥ 85 mm ≥ 102 mm 102 mm Side view...
-
Page 23: Dimensions When The Appliance Door Is Opened (Opening Angle 90°)
Installation Dimensions when the appliance door is opened (opening angle 90°) KF 2801 Vi, KF 2811 Vi 829 mm Front panel Handle* (max. 38 mm)* KF 2901 Vi, KF 2911 Vi 982 mm Front panel Handle* (max. 38 mm)* * The dimensions of the front panels and handles will vary according to the indi- vidual kitchen. -
Page 24: Dimensions When The Appliance Door Is Opened (Opening Angle 115°)
Installation Dimensions when the appliance door is opened (opening angle 115°) KF 2801 Vi, 829 mm Front panel Handle* 363 mm KF 2811 Vi (max. 38 mm)* KF 2901 Vi, 982 mm Front panel Handle* 428 mm KF 2911 Vi (max. 38 mm)* * The dimensions of the front panels and handles will vary according to the indi- vidual kitchen. -
Page 25: Dimensions Of Front Panels
Installation Dimensions of front panels KF 2801 Vi, KF 2811 Vi 756 mm 1304 mm 2029 mm 3 mm 722 mm ≥ 102 – 132 mm... - Page 26 Installation KF 2901 Vi, KF 2911 Vi 908 mm 1304 mm 2029 mm 3 mm 722 mm ≥ 102 – 132 mm...
-
Page 27: Installing The Appliance
Installation Tools required Installing the appliance – Cordless drill Before starting ... – TX 20 screwdriver It is essential to read these operating – Hammer drill and installation instructions carefully before starting to install the appli- – Drill bits in various sizes, ance. -
Page 28: Weight Of The Front Panels
Installation Weight of the front panels Aligning the building-in niche Before installing the front panels, make sure that they do not exceed the max- imum permitted weight: Refrigera- Max. Max. tion appli- weight of weight of ance upper front lower front panel panel KF 2801 Vi,... -
Page 29: Checking The Building-In Niche
Installation Checking the building-in niche Before installation Check the installation dimensions Before installation, remove any ac- (see “Installation dimensions” in “In- cessories from the back of the appli- stallation”). ance. Check the position of the electrical Check the refrigeration appliance for connection. - Page 30 Installation With the help of several people as re- quired, carefully lift the refrigeration appliance from the pallet, starting with the back of the appliance. Risk of damaging the floor from the load. Moving the refrigeration appliance can cause damage to the floor. Move the refrigeration appliance carefully on floors that are sensitive to scratching.
-
Page 31: Preparing The Building-In Niche
Installation Preparing the building-in niche The anti-tip brackets prevent the refri- geration appliance from tipping. Risk of damage and injury due to The anti-tip brackets are also used to fix the refrigeration appliance tipping the building-in niche securely to the over. - Page 32 Installation Risk of injury and damage due to tipping refrigeration appliance. If the anti-tip brackets are fixed too The accessory pack supplied con- high up, they cannot be used to se- tains fixing screws for various applic- cure the refrigeration appliance. ations/materials.
-
Page 33: Pushing The Refrigeration Appliance Into The Building-In Niche
Installation Pushing the refrigeration appliance into the building-in niche Push the refrigeration appliance into the niche, taking care not to damage the electrical and mains water con- nections. If you are installing several refrigera- tion appliances side by side, now se- cure the appliances to one another (see the installation instructions for the side-by-side installation kit). - Page 34 Installation Tip: Secure the power cord to prevent it becoming caught: tie a piece of string to the middle of the cable and as the re- frigeration appliance is being pushed into the niche, pull the cable forward underneath the appliance. ...
-
Page 35: Aligning The Refrigeration Appliance
Installation Aligning the refrigeration appliance The installation aids on the appli- ance door provide assistance with the alignment of the refrigeration appli- ance in the building-in niche. The installation aids are suitable for a furniture front thickness of 19 mm or 38 mm. - Page 36 Installation Adjust the rear feet with a ratchet (at- tachment: socket, 8 mm) or a TX 20 screwdriver . Position the supplied spacers on both sides on the markings next to the adjustable feet at the front of the refrigeration appliance.
- Page 37 Installation Place a spirit level across the installa- tion aids on the appliance door to check the refrigeration appliance’s alignment. Unscrew the adjustable feet Adjust the front feet with a ratchet (at- and on both sides at least until the tachment: socket, 8 mm) or a TX 20 marking on the plinth has reached the screwdriver .
-
Page 38: Securing The Refrigeration Appliance In The Building-In Niche
Installation Check the alignment of the refrigera- If it is not possible to secure the refri- tion appliance again using the install- geration appliance at the top, it can be ation aids and the spirit level. attached to the building-in niche with the side fixing plates: Securing the refrigeration appliance in the building-in niche... -
Page 39: Preparing To Install The Front Panels
Installation Open both appliance doors. Preparing to install the front panels Open the appliance doors as far as they will go. Screw the fixing plate lugs at the top and bottom to the cabinets/units adjacent to the appliance. In a side-by-side combination, only ... - Page 40 Installation Remove the nuts and washers from the threaded bolts and store them in a safe place – they will be re- Unscrew the angle trims from both quired later. sides of the appliance door and place Take the mounting frame off the the trims and screws to one side –...
- Page 41 Installation Secure the mounting frame to the top of the front panel, using at least 10 screws depending on the size. The mounting frame has several differ- ent types of holes to take account of a variety of front panels. When securing the frame, always screw into the strongest part of the front panel.
-
Page 42: Securing And Aligning The Furniture Front
Installation Securing and aligning the furniture front Now insert the angle trims on both sides as far as they will go into the provided spaces in the mounting frame . Open the appliance door and hang the furniture front on its frame onto the threaded bolts . - Page 43 Installation Align the depth of the furniture front via the gaps in the angle trims . Press the angle trims into the white plastic frame on both sides from the outside and screw them on loosely at first. Spare screws are provided in the plastic bag marked with the letter E.
- Page 44 Installation Close the appliance door and check the distance between the door and adjacent furniture fronts again. Measure the gap Z between the Place the washers and nuts back mounting frame for the lower appli- in position and tighten the nuts . ance door and the upper appliance The furniture front is now secured.
- Page 45 Installation Mounting the fixing brackets The fixing brackets are used to addi- tionally secure the front panels to the bottom of the appliance doors. Do not mount the fixing brackets until the appliance (or side-by-side com- bination, if applicable) has been in- stalled and the front panels have been aligned.
- Page 46 Installation Tighten the screw at the bottom of Click each cover onto the relevant the appliance door in each case. fixing bracket. Fit each cover over the fixing brackets .
-
Page 47: Securing The Covers
Installation Securing the covers Before the cover can be installed in the gap above the refrigeration ap- pliance, it must be assembled as fol- lows: Place the assembled cover into the gap above the refrigeration appli- ance so it clicks into place. While do- ing so, slide both parts of the cover together as required. - Page 48 Installation On both the upper and lower appli- ance doors, install the plastic cov- ers to the sides of the appliance door by clicking them into the gap Secure both sides of the refrigeration between the appliance door and the appliance using at least 3 clips ...
-
Page 49: Securing The Plinth And Plinth Fascia
Installation Risk of fire and damage due to insufficient ventilation. If the refrigeration appliance is not ventilated sufficiently, the com- pressor will run more frequently and for longer periods. This will result in increased energy consumption and a higher operating temperature for the compressor. -
Page 50: Limiting The Opening Angle Of The Appliance Door
Installation Limiting the opening angle of the ap- pliance door The door hinges are set ex works to en- able the appliance door to be opened wide. If the appliance door hits an adjacent wall when opened, for example, the opening angle can be limited to 90°. -
Page 51: Mains Water Connection
Installation Mains water connection Connection to the water supply must comply with the applicable regula- Information about the mains water tions in the country where the appli- connection ance is being installed. All appliances and systems used to supply water to ... -
Page 52: Connecting The Refrigeration Appliance To The Water Supply
Installation The stainless steel hose must only be replaced by an original Miele spare part. The food-grade, stainless steel hose is available to order from the Miele webshop, from the Miele Customer Service Department or from your local Miele dealer. -
Page 53: Electrical Connection
(AC 220–240 V 50/60 Hz sup- from the appliance. This could result in ply). A longer connection cable is avail- a short circuit. able to order from the Miele Customer Do not plug in other appliances behind Service Department. the refrigeration appliance. The fuse rating must be at least 10 A. - Page 54 Installation Connecting the appliance Insert the plug connector into the socket at the back of the refrigeration appliance. Make sure that the plug connector has clicked into position correctly. Insert the plug of the refrigeration ap- pliance into the socket. The refrigeration appliance is now con- nected to the electricity supply.
-
Page 55: Saving Energy
Saving energy Normal energy consump- Increased energy con- tion sumption Installation / In a ventilated room. In an enclosed, unventilated Maintenance room. Protected from direct sun- In direct sunlight. light. Not near to a heat source Near to a heat source (radi- (radiator, oven). - Page 56 Saving energy Normal energy consump- Increased energy con- tion sumption Drawers and shelves ar- ranged as they were when the appliance was delivered. Only open the door when Frequent opening of doors necessary and for as short a for long periods will cause a time as possible.
-
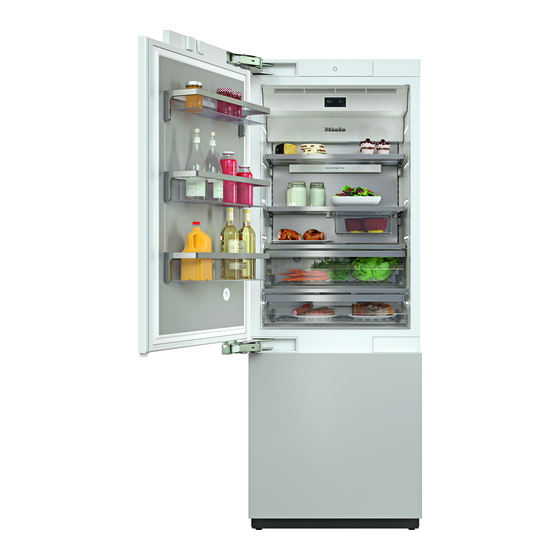
Page 57: Guide To The Appliance
Guide to the appliance... - Page 58 Guide to the appliance a Automatic door opening (Push2open/Pull2open) b Display c On/Off switch d Shelves e Holder for the Active AirClean filter f Interior lighting g Hanging drawer for storing small food items h Shelves in the appliance door i Humidity-controlled compartment with moisture regulator for fruit and veget- ables j Dry compartment temperature regulator...
-
Page 59: Main Screen
Sensor control for setting the temperature d Display for Miele@home connection status (only visible when Miele@home has been set up) e SuperFreeze display (only visible when the SuperFreeze function has been switched on) f Temperature display (target temperature) for the freezer zone g Sensor control ... -
Page 60: Settings Mode
Door assistant Push2open Pull2open ) Switch on or off (see “Selecting additional settings”) Set up, deactivate or query WiFi connection status Miele@home (see “Selecting additional settings”) * Demo mode Switch off * (only visible when Demo mode , is switched on see “Selecting additional settings”) - Page 61 Guide to the appliance Switch on or off or reset Water filter display (see "Selecting additional settings”) Display Active Switch on or off or reset (see “Selecting additional settings”) AirClean filter Symbols in Settings mode / Scroll in Settings mode or select a setting /...
-
Page 62: Accessories
Accessories Active AirClean filters Accessories supplied The Active AirClean filters neutralise un- Appliance plug pleasant odours in the refrigerator sec- tion and stop odours from being trans- Labels for the MasterFresh zone ferred to the food. Each type of food has its own charac- teristics which determine the specific Insert the supplied Active AirClean fil- storage conditions it requires. -
Page 63: Optional Accessories
Accessories Metal filler panels for cassette fronts Optional accessories A range of useful Miele accessories and care products are available for your ap- pliance. Multi-purpose microfibre cloth The microfibre cloth is suitable for re- moving fingerprints and light soiling from surfaces such as stainless steel, glass, plastic and chrome without the use of chemicals. -
Page 64: Initial Commissioning
Initial commissioning Cleaning Before using for the first time Please refer to the relevant instruc- Allow the refrigeration appliance to tions in “Cleaning and care”. stand for approx. 1 hour before con- necting it to the power supply. Clean the inside of the appliance and This will prevent potential functional the accessories. -
Page 65: Sticking On The Masterfresh Zone Labels
Initial commissioning Sticking on the MasterFresh zone la- – Dry compartment for food which bels goes off quickly Remove the label from the foil and stick it onto the frame of the dry com- partment (see “Appliance descrip- tion”). Tip: If you are not satisfied with the po- sitioning of the labels, you can easily pull them off and stick them on again. -
Page 66: Operating The Refrigeration Appliance
Initial commissioning Settings mode Operating the refrigeration ap- pliance In Settings mode , you can select different refrigeration appliance func- The touch display can be scratched tions and alter their settings to some by pointed or sharp objects, e.g. extent (see “Selecting additional set- pens. -
Page 67: Starting Up For The First Time
– Set the Temperature unit °C (degrees Celsius) or °F (degrees Fahrenheit) – Set up Miele@home Select if you wish to set up Continue Miele@home now (to do this, follow the instructions under “Selecting ad- ditional settings – Miele@home”). -
Page 68: Switching On And Off
Switching off the refrigeration appli- on when the appliance door is opened. ance Miele will appear, followed by the main Switch the refrigeration appliance off screen on the refrigeration appliance by pressing the On/Off switch. -
Page 69: Switching Off For Longer Periods Of Time
Switching on and off Switching off for longer peri- ods of time If the refrigeration appliance is not go- ing to be used for a longer period of time: Switch the refrigeration appliance off. Switch off at the wall and withdraw the plug from the socket, or discon- nect the fuse. -
Page 70: Selecting Additional Settings
Selecting additional settings In Settings mode , you can select dif- The display is unlocked briefly so you ferent refrigeration appliance settings can adjust the setting as required. Clos- and alter their settings to some extent, ing the appliance door will reactivate allowing you to adjust the appliance to the sensor lock. -
Page 71: Switching Eco Mode On Or Off
Selecting additional settings Switching Eco mode on or Health risk caused by decom- posing food. The usability and quality of food in is useful when you go on holi- Eco mode the freezer zone may deteriorate if day, for example, if you do not wish to the temperature remains above switch off the appliance completely or -18 °C for an extended period. -
Page 72: Performing A Self Test
sensor control. Make a note of the error message(s) displayed. Contact the Miele Customer Service Department and inform them of the error message(s) on the display. Confirm the message with OK. -
Page 73: Switching On The Door Assistant
Selecting additional settings Switching on Push2open Switching on the Door assist- ant In Settings mode , use the and sensor controls to select Door You can choose between the two door assistant and select OK to confirm assistants: Push2open Pull2open your selection. The default door assistant is Push2open ... - Page 74 Selecting additional settings – Adjusting the duration of the Auto- – Adjusting the intensity Close function You can also adjust the intensity of the You can also adjust the duration for Pull2open function. The lower the set in- how long the appliance door will remain tensity, the less force required when open until it closes automatically.
-
Page 75: Switching Off The Door Assistant
Use the and sensor controls to – The Miele@mobile app select and select OK to confirm – A Miele user account The user ac- your selection. count can be created via the Touch the sensor control to return Miele@mobile app. - Page 76 Your refrigeration appliance‘s password Miele@home availability is its serial number, which can be found The ability to use the Miele@mobile app on the data plate. depends on the availability of the The data plate can be found in the in- Miele@home service in your country.
- Page 77 Selecting additional settings Open the Miele@mobile app and fol- Connecting your refrigeration appli- ance via WPS low the instructions in the app. Your router must be equipped with the As soon as your refrigeration appli- WPS function for this connection op- ance has been integrated into your tion.
- Page 78 Miele@home and then disconnected the connection, you will need to react- If you have changed your WiFi network, ivate the connection. you can set up Miele@home again for your refrigeration appliance. In Settings mode , use the In Settings mode , use the ...
-
Page 79: Switching Off The Demo Mode
Selecting additional settings Switching off the Demo mode Demo mode allows the refrigeration appliance to be presented in the showroom without the cooling sys- tem being switched on. This setting is not needed for domestic use. If Demo mode has been switched on as a default setting, will show on the display. -
Page 80: Resetting The Settings To Their Default Settings
°C °F Temperature unit / Switched off Keypad lock Switched off Eco mode Door assistant Push2open Miele@home Switched off Holiday Switched off Dispenser unit Switched on Sabbath mode Switched off Water filter display... - Page 81 Selecting additional settings Switched on Display Active AirClean filter 4 °C Temperature in the fridge zone Temperature in the dry com- 2 °C partment -18 °C Temperature in the freezer zone...
-
Page 82: Switching Holiday Mode On Or Off
Selecting additional settings Switching Holiday mode on Health risk caused by decom- or off posing food. The usability and quality of food in Holiday mode is useful when you go on the fridge zone may deteriorate if the holiday, for example, if you do not wish temperature remains above 4 °C for to switch off the fridge zone completely an extended period. -
Page 83: Switching Sabbath Mode On Or Off
Selecting additional settings Switching the Holiday mode on Switching Sabbath mode on or off In Settings mode , use the and sensor controls to select Holi- The refrigeration appliance has a Sab- and select OK to confirm your se- bath mode to support the observance of lection. -
Page 84: Switching On, Switching Off Or Resetting The Water Filter Display
Selecting additional settings – The SuperFreeze function Switching on, switching off or (if previously switched on) resetting the Water filter dis- play – The ice cube maker (if previously switched on) Depending on the quantity of ice cubes produced, the Water filter display will re- You can still select: mind you approx. - Page 85 Selecting additional settings Switching the Water filter dis- Resetting the Water filter display play on After you have cleaned the water filter, If the has been you must reset the Water filter display Water filter display switched off once, it must be switched that it can be displayed again after on again if required.
-
Page 86: Switching On, Switching Off Or Resetting The Display Active Airclean Filter
Selecting additional settings Switching the Display Active AirClean Switching on, switching off or filter on resetting the Display Active If the Display Active AirClean filter AirClean filter been switched off once, it must be Display Active AirClean filter will re- switched on again if required. mind you approx. - Page 87 Selecting additional settings Resetting the Display Active AirClean filter After you have replaced the Active AirClean filters, you must reset the Dis- play Active AirClean filter so that it can be displayed again after 6 months. If you do not reset the display, it ap- pears again and again.
-
Page 88: The Correct Temperature
The correct temperature It is very important to set the correct ... in the fridge zone and in the temperature for storing food in the ap- MasterFresh zone pliance. Bacteria will cause food which We recommend a temperature of 4 °C is not stored at the correct temperature in the fridge zone. -
Page 89: In The Freezer Section
The correct temperature If you have adjusted the temperature, ... in the freezer section wait for approx. 6 hours if the appli- To freeze fresh food and to store frozen ance is not very full and for approx. food for long periods, a temperature of 24 hours if the appliance is full before -18 °C is required. -
Page 90: Temperature Range
The correct temperature To set the temperature regulator to the "colder” position, pull the hand- ling aid downwards. The temperature in the dry compart- ment of the MasterFresh zone drops permanently to just above 0 °C. Temperature range The temperature can be adjusted: –... -
Page 91: Using Super Cool And Super Freeze
Using Super cool and Super freeze Switching SuperCool off SuperCool function Touch the sensor control to set the The Super cool function can be used to temperature. rapidly reduce the temperature in the refrigerator section to its lowest setting ... - Page 92 Using Super cool and Super freeze SuperFreeze function The refrigeration appliance will now run at maximum power. For best results, switch the SuperFreeze function on before putting fresh food Switching off SuperFreeze into the freezer. Touch the sensor control to set the This helps food to freeze quickly and re- temperature.
- Page 93 Using Super cool and Super freeze Tip: To save energy, you should manu- ally switch the SuperFreeze function off once the freezer reaches a constant temperature of -18 °C or colder. Monitor the temperature in the freezer zone.
-
Page 94: Temperature And Door Alarm
Temperature and door alarm The appliance has been fitted with a Health risk caused by decom- warning system which ensures that the posing food. temperature in the freezer cannot rise If the temperature in the freezer re- unnoticed and to avoid energy being mains above -18 °C for a long time, wasted if the door is left open. - Page 95 Temperature and door alarm Door alarm The alarm will sound if a door is left open for more than 2 minutes. The message Close the door will also ap- pear on the display. As soon as the corresponding door is closed, the alarm will stop and the mes- sage on the display will go out.
-
Page 96: Adjusting The Interior Fittings
Adjusting the interior fittings Moving the shelves in the ap- Moving the shelves pliance door If necessary, the adjustable shelves can be removed or their height can be ad- Only move the shelves in the appli- justed: ance door when they are empty. The shelves in the appliance door can be moved for loading and unloading and for cleaning or they can be re-... -
Page 97: Removing The Hanging Drawer
Adjusting the interior fittings Moving the hanging drawer Removing the hanging drawer The hanging drawer can be fixed under The hanging drawer can be moved to any shelf in the refrigerator section. the left or right if required. Pull the hanging drawer out. To clean the hanging drawer, remove it as follows: ... -
Page 98: Removing Compartments From The Refrigerator Section
Adjusting the interior fittings Removing compartments from Removing the freezer baskets the refrigerator section The freezer baskets can also be re- moved if necessary (e.g. for cleaning). The compartments in the refrigerator section are on telescopic runners, and Open the lower appliance door as can be removed for filling, emptying or wide as possible. -
Page 99: Removing The Dividing Panel (Depending On The Model)
Adjusting the interior fittings Removing the dividing panel (de- Removing the ice cube con- pending on the model) tainer The dividing panel in the freezer basket The ice cube container can be removed can be removed for cleaning: for cleaning: The dividing panel is secured to the ... -
Page 100: Storing Food In The Refrigerator Section
Storing food in the refrigerator section Different storage zones Risk of explosion due to flam- mable mixes of gases. Due to natural air circulation, there are Electrical components can cause different temperature zones in the refri- flammable mixes of gases to ignite. gerator section. -
Page 101: Food Which Is Not Suitable For Storage In The Refrigerator Section
Storing food in the refrigerator section Warmest area the type of food, the appearance, con- sistency, flavour and/or vitamin content The warmest area in the refrigerator may be altered if stored at too cold a section is at the top in the front area temperature. -
Page 102: Notes On Buying Food
Storing food in the refrigerator section Notes on buying food The freshness of food when first placed in the appliance is an important factor in determining how long it stays fresh, and how long it can be kept in the ap- pliance. -
Page 103: Storing Food In The Masterfresh Zone
Storing food in the MasterFresh zone Humidity-controlled compartment MasterFresh zone with moisture regulator The MasterFresh zone provides ideal storage conditions for fruit, vegetables, fish, meat and dairy products. Food stays fresh considerably longer while retaining both flavour and vitamins. The humidity level in the humidity-con- The MasterFresh zone comprises a hu- midity-controlled and a dry compart- trolled compartment can be regulated... - Page 104 Storing food in the MasterFresh zone The moisture regulator is used to regu- Tip: If the humidity level is too high and late the amount of moisture in the hu- a lot of moisture has collected in the midity-controlled compartment with compartment, select the setting.
-
Page 105: Dry Compartment With Low Temperature
Storing food in the MasterFresh zone Dry compartment with low temperat- Tip: This compartment is ideal for all homecooked meals as any microorgan- isms that may still be present cannot multiply. The dry compartment is ideal for storing perishable foods such as: The temperature in the dry compart- –... - Page 106 Storing food in the MasterFresh zone The following tips may help if you find that food you have stored does not keep well (for example, the food wilts or becomes withered after only a short storage time): Only place fresh food in the appliance. The initial condition of the food is crucial to maintaining freshness.
-
Page 107: Freezing And Storing Food
Freezing and storing food Maximum freezing capacity Storing frozen food To ensure that fresh food placed in the Never re-freeze partially or fully de- freezer freezes through to the core as frosted food. Defrosted food may quickly as possible, the maximum only be re-frozen after it has been freezing capacity must not be ex- cooked. -
Page 108: Home Freezing
Freezing and storing food – Placing hot foods or drinks in the Home freezing freezer causes food that is already Only freeze fresh food which is in a frozen to partially thaw and increases good condition. energy consumption. Allow hot foods and drinks to cool down before pla- Hints on home freezing cing them in the freezer. -
Page 109: Before Placing Food In The Freezer
Freezing and storing food Before placing food in the Storage time for frozen food freezer The storage life of food is very variable, even at a constant temperature of When freezing more than 2 kg of -18 °C. Decomposition processes also fresh food, switch on the SuperFreeze take place in frozen food, albeit at a function for 24 hours before placing... -
Page 110: Defrosting Frozen Goods
Freezing and storing food Defrosting frozen goods Cooling drinks quickly When cooling drinks quickly in the Never re-freeze partially or fully de- freezer, make sure bottles are not left in frosted food. Defrosted food may only for more than one hour; otherwise be re-frozen after it has been cooked. -
Page 111: Making Ice Cubes
Making ice cubes Ice cube production is halted automat- For the automatic ice cube maker to ically when the ice cube container is operate, it must be connected to a full. mains water supply (see “Mains water connection”). The ice cube maker can make up to approx. - Page 112 Making ice cubes Ice cube production does not stop when the ice cube container has been removed. Ice cubes can fall into the freezer basket underneath. Only remove the ice cube container for the shortest possible time or switch off the ice cube maker before removing it.
-
Page 113: Automatic Defrosting
Automatic defrosting Refrigerator section and Freezer section MasterFresh zone The appliance is equipped with a “NoFrost” system. The freezer defrosts The refrigerator section and the automatically. MasterFresh zone defrost automatically. The moisture generated in the appli- Condensate and ice can build up on the ance collects on the condenser and is back wall of the refrigerator section and automatically defrosted and dissipated... -
Page 114: Cleaning And Care
Cleaning and care Cleaning agents Do not let water get into the elec- tronic unit or the lighting. To avoid damaging the surfaces of your appliance, do not use: Risk of damage due to moisture – Cleaning agents containing soda, ingress. -
Page 115: Before Cleaning The Refrigeration Appliance
Cleaning and care Before cleaning the refrigera- Interior cabinet and accessor- tion appliance Switch the refrigeration appliance off Clean the refrigeration appliance reg- by pressing the on/off switch. ularly, or at least once a month. Remove soiling immediately to pre- ... -
Page 116: Cleaning The Door Seal
The ventilation gaps should be cleaned on a regular basis with a brush or vacuum cleaner (e.g. use the dusting brush for Miele vacuum cleaners) Turn the cap of the filter cartridge an- ticlockwise as far as the marker 1.). - Page 117 Cleaning and care Turn the cap of the filter cartridge clockwise as far as the marker 6.). Rinse the mesh under running luke- warm water. Turn the mesh over un- Risk of damage caused by water der the running water to clean it on all rushing out.
-
Page 118: Replacing The Active Airclean Filters
Change Active AirClean filter will appear on New Active AirClean filters can be ob- the display. tained from the Miele Customer Ser- Confirm the message with OK. vice Department, your Miele dealer or the Miele website. To remove the holder for the Active... -
Page 119: After Cleaning
Cleaning and care After cleaning Replace all shelves and accessories in the fridge zone. Reconnect to the mains and switch the refrigeration appliance back on. Place food in the fridge zone and close the door. Switch the SuperFreeze function on for a while so that the freezer zone can cool down quickly. -
Page 120: Problem Solving Guide
Insert the plug into the socket. opened. The mains fuse has tripped. There could be a fault with the refrigeration appliance, the household elec- trical wiring or another electrical appliance. Contact a qualified electrician or the Miele Cus- tomer Service Department. - Page 121 Problem solving guide Problem Cause and remedy The compressor is The ventilation gaps in the housing unit have been switching on more fre- covered or become too dusty. quently and for longer Do not block the ventilation gaps. periods of time, so the ...
- Page 122 Problem solving guide Problem Cause and remedy The compressor comes This is not a fault. The temperature setting is too high. on less and less often Correct the temperature setting. and for shorter periods Check the temperature again after 24 hours. of time.
- Page 123 Problem solving guide Problem Cause and remedy The storage life of the The temperature in the dry compartment of the food stored in the dry MasterFresh zone is possibly too high. The temperat- compartment of the ure in the dry compartment is controlled by the set MasterFresh zone is re- temperature in the fridge zone.
- Page 124 Problem solving guide Display warnings Message Cause and remedy The warning sounds The temperature in the refrigeration appliance has and the message risen significantly. Freezer This could be due to, for example: temperature too high. Max. appears temperature °C – The appliance door being opened too often, or on the display.
- Page 125 The voltage level is too high/low. Observe the connection data under “Installation – Electrical connection”. Contact the Miele Customer Service Department if necessary. To turn the alarm off, touch the symbol. The error message will not disappear from the display until the error has been rectified.
- Page 126 Problem solving guide Problems with the ice cube maker Problem Cause and remedy The ice cube maker is The refrigeration appliance and the ice cube maker not producing any ice are not switched on. cubes. Switch the refrigeration appliance and the ice cube maker on.
- Page 127 Problem solving guide Problem Cause and remedy The ice cube maker is Several household appliances connected to the mains only producing small water connection are in operation, which has reduced ice cubes. the amount of water being taken in. Avoid using the dishwasher, washing machine, etc., at the same time.
- Page 128 Close the stopcock immediately. ance. Check whether the water line is damaged. Contact the Miele Customer Service Department. Check whether the water pressure is too high. If the water pressure is too high, this can cause leaks (see “Mains water connection”...
- Page 129 If the lighting cover is defective, do not look from a close range directly into the lighting with optical in- struments (e.g. magnifying glass or similar). Call the Miele Customer Service Department.
-
Page 130: Noises
Noises Normal What causes them noises Brrrrr ... A humming noise is made by the motor (compressor). This noise can get louder for brief periods when the motor switches on. Blubb, A gurgling noise can be heard when coolant is circulating blubb ... -
Page 131: Water Filter
Water filter The refrigeration appliance is supplied Depending on the quantity of ice cubes with a water filter (IntensiveClear mesh produced, the IntensiveClear mesh filter filter) that filters mains water for making must be cleaned approx. every ice cubes. 6 months. appears on the dis- Clean the water filter The water filter does not have to be... -
Page 132: Service
Please quote the model and serial num- ber of your appliance when contacting Miele. This information can be found on the data plate. The data plate can be found inside the appliance. -
Page 133: Conformity Declaration
Conformity declaration Miele hereby declares that this refriger- ator complies with Directive 2014/53/ The complete text of the EU declaration of conformity is available from one of the following internet addresses: – Products, Download from www.miele.co.uk – For service, information, operating in- structions etc: go to www.miele.co.uk/domestic/cus-... -
Page 134: Copyrights And Licences
Copyrights and Licences Miele uses their own and third party software which is not subject to any so-called Open Source Licence for the operation and control of the appliance. This software/ these software components are protected by copyright. The copyright powers of Miele and third parties have to be respected. - Page 135 Tel: +65 6735 1191 Fax. +971 4 3418 852 Fax: 011-46 900 001 Fax: +65 6735 1161 800-MIELE (64353) E-mail: customercare@miele.in E-Mail: info@miele.com.sg E-Mail: info@miele.ae Internet: www.miele.in Internet: www.miele.sg Website: www.miele.ae Manufacturer: Miele & Cie. KG, Carl-Miele-Straße 29, 33332 Gütersloh, Germany...
- Page 136 KF 2801 Vi, KF 2811 Vi, KF 2901 Vi, KF 2911 Vi en-GB M.-Nr. 11 273 040 / 00...