Bosch HBL8463UC Installation Manual
Built-in and combination ovens
Hide thumbs
Also See for HBL8463UC:
- Use and care manual (35 pages) ,
- Installation manual (52 pages) ,
- Use and care manual (77 pages)

Related Manuals for Bosch HBL8463UC


Summary of Contents for Bosch HBL8463UC
- Page 1 Built-in and Combination Ovens Installation Manual HBL8463UC HBL8443UC HBL8743UC HBL8453UC HBL8753UC HBL87M53UC...
-
Page 2: Table Of Contents
Three-wire Connection ............. 11 Transport ................5 Oven Installation ............12 For Best Installation ............12 Bosch Combination Ovens ........... 6 Pre-Assembly of the Combination Oven ...... 12 Before you Begin ............6 Tools and Parts Needed ............. 6 Remove Oven Door Prior to Installation ....... 14 Parts Included ............... -
Page 3: Safety Definitions
Safety Definitions S a f e t y D e f i n i t i o n s WARNING This indicates that death or serious injuries may occur as a result of non-observance of this warning. CAUTION This indicates that minor or moderate injuries may occur as a result of non-observance of this warning. -
Page 4: Important Safety Instructions
IMPORTANT SAFETY INSTRUCTIONS READ AND SAVE THESE INSTRUCTIONS IMPORTANT: SAVE THESE INSTRUCTIONS FOR THE Electric Safety I M P O R T A N T S A F E T Y I N S T R U C T I O N S R E A D A N D S A V E T H E S E... -
Page 5: Transport
IMPORTANT SAFETY INSTRUCTIONS READ AND SAVE THESE INSTRUCTIONS Transport To avoid damage to the oven vent, use the transport method shown in the picture below. -
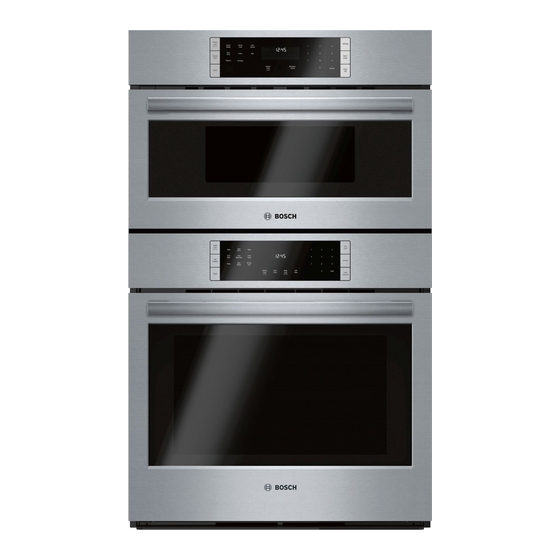
Page 6: Bosch Combination Ovens
Bosch Combination Ovens The HBL8743UC, HBL8753UC and HBL87M53UC Bosch The combination ovens listed here are approved for ▯ combination ovens are sold as sets, each of which use in a single cutout, using single power connection. includes two built-in oven components: a conventional Each conventional oven component is designed with ▯... -
Page 7: Removing Packaging
Removing Packaging Packaging Bracket Removal-Left and Built-in Ovens: Right Sides Cut the straps. Open top of carton and remove top wood frame. Lift the carton up and over the appliance to remove, or carefully cut along the cut line on the back left side of the carton with a blade shorter than 3/4”... -
Page 8: Appliance And Cabinet Cutout Dimensions
Appliance and Cabinet Cutout Dimensions It is good practice, when an oven is installed at the end Single Oven Wall Mount Installation of a cabinet run, adjacent to a perpendicular wall, or cabinet door, to allow at least 1/4” (6.4 mm) space between the side of the oven and the wall/door. -
Page 9: Dimensions For Combination Oven Units
Under-Counter Installation Combination Oven Traditional Installation * Includes ¾” (19 mm) base plate. **For single ovens installed under a cabinet, the junction box should be located to the right or left of the unit within range of the power cord. Dimensions for Combination Oven Units The cabinet base must be flat and capable of supporting the weight of the combination oven up to 429 lbs... - Page 10 Combination Oven Flush Mount Installation Flush installation requires two side cleats to be attached inside the cabinet frame, recessed from the front.
-
Page 11: Electrical Installation - Grounding Instructions
All model ovens on the front cover of this installation instruction manual are dual rated, designed to be connected to either 208 or 240V AC, 60 Hz, 4 wire, single-phase power supply. Model Circuit Required HBL8463UC 208V, 60 Hz/ 240V, 60 Hz HBL8443UC 30 AMP HBL8453UC HBL8743UC... -
Page 12: Oven Installation
Oven Installation NOTICE: Before installing the appliance, be sure to Assembly of the two Oven Units verify the cabinet dimensions and electrical connections. Notes For Best Installation Do not place the oven into the wall cabinet until after ▯ mounting the speed oven on top of the lower oven and The oven can be difficult for two people to handle during securing it with the universal connector brackets. - Page 13 Place the speed oven on top of the universal Connecting Speed Oven Electrical Conduit to connector brackets and fasten in place using three (3) Lower Oven screws per side. Tighten the screw securely, but do Note: When installing the combination unit, the power not overtighten.
-
Page 14: Remove Oven Door Prior To Installation
Remove Oven Door Prior to Installation Snap the conduit connector into the hole by pressing it in until it clicks into place. It is recommended to remove the conventional (lower) Follow the wiring diagram label and match and oven door to help reduce the unit weight. connect each wire by color to the wires attached to the NOTICE: Do not remove the speed oven door. -
Page 15: Installing The Oven Into The Cabinet
Installing the Oven into the Cabinet Close the oven door until it catches on the hinge stop levers, locking the hinges at the proper angle for door removal. The door will be open about 7 inches at the CAUTION top. This takes the spring tension off the hinges so the door can be easily lifted out. -
Page 16: How To Replace The Oven Door
Proceed to lift the oven following the guidelines below Install the supplied screws through the tap holes in the with the door removed: trim (2 screws for single ovens, 4 screws for combination ovens). It is recommended to drill pilot Lift points (1) on the front of the unit are for lifting from ▯... -
Page 17: Testing Operation
Please don’t hesitate to contact our Customer Support Department if you have any questions or in the unlikely event that your Bosch® appliance needs service. Our service team is ready to assist you. 800-944-2904 www.bosch-home.com/us/support...