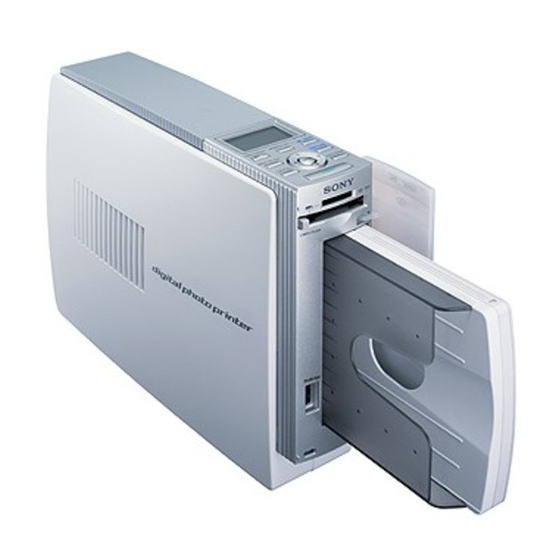
Sony DPP-EX50 Operating Instructions Manual
Digital photo printers: photo printer
Hide thumbs
Also See for DPP-EX50:
- Service manual (48 pages) ,
- Quick start manual (3 pages) ,
- Specifications (2 pages)
Table of Contents
Advertisement
Quick Links
Digital Photo
Printer
DPP-EX50
Operating Instructions
Before operating this printer, please read
this manual thoroughly and retain it for
future reference.
2004 Sony Corporation
3-207-729-13 (1)
Before you begin
Preparations
Printing using a
TV monitor
(MONITOR OUT mode)
Printing using the printer's
LCD display
(LCD mode)
Printing from a PictBridge
camera (PictBridge mode)
Printing from a PC
(PC mode)
Troubleshooting
Additional information
Advertisement
Table of Contents

Related Manuals for Sony DPP-EX50


Summary of Contents for Sony DPP-EX50
- Page 1 Digital Photo Printer DPP-EX50 Operating Instructions Before operating this printer, please read this manual thoroughly and retain it for future reference. 2004 Sony Corporation 3-207-729-13 (1) Before you begin Preparations Printing using a TV monitor (MONITOR OUT mode) Printing using the printer's...
-
Page 2: Declaration Of Conformity
CAUTION Sony shall assume no responsibility for any accidental or consequential damages or loss of the recording contents which may be caused by use or malfunction of the printer or “Memory Stick”. - Page 3 CONSEQUENTIAL DAMAGES OF ANY NATURE, OR LOSSES OR EXPENSES RESULTING FROM ANY DEFECTIVE PRODUCT OR THE USE OF ANY PRODUCT. On trademarks and copyrights •VAIO is the trademark of Sony Corporation. •Microsoft and Windows ® are registered trademarks or trademarks of Microsoft Corporation in the United States and other countries.
-
Page 4: Table Of Contents
Sony Corporation reserves the right to make any modification to this manual or the information contained herein at any time without notice. - Page 5 Making various prints (Creative Print) .. 42 Displaying the Creative Print menu ... 43 Making a Creative print ... 43 Saving and printing a Creative print image ... 58 Changing the print settings (SET UP) ... 60 Changing the printer preferences (OPTION) ...
-
Page 6: Before You Begin
Before you begin Overview What you can do with this printer The Digital Photo Printer DPP-EX50 provides the following four operation modes, depending on the medium or device you use for printing. When you print an image on a “Memory Stick” or a CompactFlash card Printing using a TV monitor Connect the printer to a TV monitor to view the images and monitor operations for printing an image. - Page 7 When you print an image on a “Memory Stick” or a CompactFlash card Printing using the printer‘s LCD display Print images while checking the image number and conduct operations on the printer‘s LCD display. Printing from a PictBridge camera (PictBridge mode) c Page 81 Connect a PictBridge-compliant digital camera to the printer to print...
-
Page 8: Operation Flows
Operation flows Depending on the operation mode you choose, follow the operation flow below: MONITOR LCD mode OUT mode Get the printer ready for printing • Prepare the printing pack (not supplied) (page 12) • Load the print cartridge (page 13) •... -
Page 9: Features
Features xSupreme picture quality functions enabling photo-realistic printing High performance heat-resistant technology for dye sublimation printing The printer employs the professional dye sublimation printing systems. With its professional digital filter, the printer eliminates color deterioration that may occur because of the heated head, and reproduces photo-realistic prints. - Page 10 x Convenient printing operations High-speed CPU enabling quick adjustment and printing The printer employs a high-speed CPU, which allows you to process, preview, and print an image quickly. 3D animation interface (MONITOR OUT mode only) The printer’s 3D animation interface will allow you to figure out the next step easily, learn what the icon or cursor means, and enjoy operating the printer.
-
Page 11: Preparations
Me/2000 Professional/XP Home Edition/XP Professional – PictureGear Studio V.2.0 Cleaning cartridge (1) Clamp filter (1) • Operating Instructions (this booklet, 1) • Quick Start Guide (1) • Warranty (1) • Owner registration card (1) • Sony End User Software License Agreement (1) -
Page 12: Preparing The Printing Pack (Not Supplied)
• 30 sheets of Small size photo paper • Print cartridge for 30 prints To order printing packs, visit the following web site: www.sony.com/printers Notes • Use the printing pack for this printer only. • For high quality prints, avoid placing the... -
Page 13: Loading The Print Cartridge
Slide open the cartridge compartment cover. Cartridge cover Insert the print cartridge. Insert the print cartridge, with the Sony logo side up, until it clicks into place. Sony logo Close the cartridge compartment cover. Removing the print cartridge When the print cartridge runs out, the (cartridge error) indicator appears on the printer‘s LCD display. - Page 14 Notes • Do not touch the ink ribbon or place the print cartridge in a dusty location. Fingerprints or dust on the ink ribbon may result in imperfect printing. Ink ribbon • Never put your hand into the cartridge compartment. The thermal head reaches high temperatures, especially after repeated printing.
-
Page 15: Inserting The Print Paper
4 Inserting the print paper Open the paper tray cover. Adjust the spacer to the paper size you want to use. On the bottom inside of the paper tray, there are three arrow markers showing the slider stopper positions for the three paper sizes. Slide the spacer. -
Page 16: Remove The Protective Sheet
x To use Small size paper Slide the spacer toward the paper feed direction until it clicks into place at the most inside arrow marker. Paper feed direction Spacer Note Make sure to adjust the slider to the paper size before you install the print paper. - Page 17 Push and open the printer’s paper tray compartment cover. Insert the paper tray into the printer. Insert it firmly until it clicks into place. Notes • Do not remove the paper tray during printing. • To avoid paper jam or malfunctions of the printer, make sure the following before printing: –...
-
Page 18: Printing Using A Tv Monitor (Monitor Out Mode)
Printing using a TV monitor (MONITOR OUT mode) When you connect your printer to a TV monitor, you can display the images and check the operations on the TV monitor. You can perform the following printing operations: • Printing a selected image (page 22) •... -
Page 19: Connecting The Ac Power Cord
Connecting the AC power cord After you have made the connections, connect the AC power cord to the AC outlet. The ON/STANDBY indicator lights in red. To the wall outlet AC power cord Note The AC power cord in the above illustration is for 120 V AC only. -
Page 20: Inserting A Compactflash Card
Inserting a CompactFlash card To print an image stored on a CompactFlash card, insert the CompactFlash card into the CompactFlash card slot until it clicks into place. For the varieties of CompactFlash card that you can use with the printer, see page 130. - Page 21 Press INPUT SELECT repeatedly to select the memory card containing the images that you want to print. Display the desired memory card type on the upper left of the TV monitor (“Memory Stick” or “CompactFlash”) . The access indicator flashes, and the images on the selected memory card are displayed on the TV monitor.
-
Page 22: Basic Printing Operations
Basic printing operations Printing a selected image This section explains how to select an image and print it in full size. Borderless standard print Press the arrow (B/b/V/v) button to move the yellow frame (cursor) to the image you want to print. Yellow frame Press PRINT. -
Page 23: Before Printing
When printing is complete and the print paper automatically emerges, remove the printed paper from the paper tray. Notes • Do not remove the memory card while the access indicator is flashing; the memory card or printer may be damaged. •... -
Page 24: Printing Multiple Images
To display the preview of another image Press the arrow (B/b/V/v) button to display an image positioned left, right, upper, or below of the selected image in the image list. To print the previewed image Press PRINT. The previewed image is printed. - Page 25 Press ENTER or CANCEL to set the print quantity. • To increase the print quantity one by one, press ENTER. • To decrease the print quantity one by one, press CANCEL. • To cancel the selection, press CANCEL for more than two seconds.
- Page 26 Press PRINT. Printing of the images selected with orange frames starts. During printing, the printing process is displayed on the TV monitor. To stop printing Press CANCEL. When you are printing multiple copies, the next printing after the one currently printing will be cancelled.
-
Page 27: Auto Printing (Index/Dpof/All)
AUTO printing (INDEX/DPOF/ ALL) AUTO (automatic) printing allows you to print multiple images stored on the “Memory Stick” or a CompactFlash card at one time. The printer provides the following three AUTO printing methods: • INDEX printing You can print a list (index) of all the images contained in the “Memory Stick”... - Page 28 To print DPOF-preset images: DPOF Only the DPOF-preset images are displayed with orange frames, each with the preset print quantity. DPOF indication To print all the images in a memory card: ALL All the images are selected with orange frames. ALL indication To cancel selection (except for the DPOF printing)
- Page 29 During printing, the printing process is displayed on the TV monitor. To stop printing Press CANCEL. When you are printing multiple copies, the next printing after the one currently printing will be cancelled. When printing is complete and the print paper automatically emerges, remove the printed paper from the paper tray.
-
Page 30: Editing An Image
Editing an image You can display the EDIT menu on the TV monitor and edit or add an effect to an image. This section explains how to edit an image as follows: Displaying the EDIT menu (page Editing an image •... -
Page 31: Displaying The Edit Menu
Displaying the EDIT menu Follow step 1 on page 22 to select an image that you want to edit or press PICTURE to display its preview image. Press MENU. The menu bar is displayed. EDIT menu icon Menu bar To exit the menu mode Press MENU again. -
Page 32: Editing An Image
Editing an image Enlarging and reducing the size of an image Display the EDIT menu (page 31). Press the arrow (B/b/V/v) button to select an image or to reduce the size of it and then press ENTER. Each time you press ENTER, the image becomes larger or smaller: : up to 200% : up to 60%... - Page 33 Press ENTER. The image is fixed to the position. Rotating an image You can rotate an image clockwise or counterclockwise. Display the EDIT menu (page 31). Press the arrow (B/b/V/v) button to select (Rotate) and then press ENTER. The Rotate menu is displayed. Rotate menu Rotate tool Press the arrow (V/v) button...
- Page 34 Press the arrow (V/v) button to select the desired adjustment tool and press ENTER. The adjustment slider appears. When “Brightness” is selected. Adjustment slider Move the slider to the desired position to adjust the level. • Brightness: Press V to brighten the picture or v to darken it.
- Page 35 Reducing the red-eye phenomenon You can reduce the red-eye phenomenon of a subject shot using a flash. Note If you perform editions such as enlarging, reducing the size of, rotating or moving an image after the red-eye reduction adjustment, the red-eye reduction may not take effect.
-
Page 36: Superimposing Characters
Each time you press ENTER, the frame becomes larger or smaller. Enlarge/reduce the size of the frame Make the size of the adjustment frame two to seven times as large as the eye size. Note Make sure to perform the red-eye reduction adjustment for the right and left eye separately. - Page 37 Select a font. The characters are input in the font displayed in the “FONT” button. To select a different font, do the following: 1 Press the arrow (B/b/V/v) button to select “FONT.” 2 Press ENTER repeatedly until the desired font is displayed: Note You cannot specify multiple fonts and colors for a sequence of characters input.
- Page 38 •To insert a character among the input characters Press the arrow (B/b/V/v) button to select “B” or “b” on the window and then press ENTER repeatedly until the cursor (|) moves to the position where you want to insert a character. After you finish entering the remaining characters, press the arrow (B/b/V/v) button...
- Page 39 Note Once you select “Execute”, you cannot move or delete the characters. Registering commonly-used characters as a message You can register commonly-used characters as a message and can load them later onto the character input box. Up to three messages, each message with the maximum of 80 characters, can be registered.
-
Page 40: Saving And Printing The Edited Image
Saving and printing the edited image Saving the edited image After you finish editing, you can save the edited image under a new file number. The selected image will not be overwritten. Press the arrow (B/b/V/v) button to select “Save” and press ENTER. - Page 41 Resetting the editing You can remove editing done in the EDIT window and reset the edited image to its original status. Press the arrow (B/b/V/v) button to select “Reset” and press ENTER. The confirmation dialog box is displayed. Press the arrow (B/b) button to select “OK”...
-
Page 42: Making Various Prints (Creative Print)
Making various prints (Creative Print) You can display the Creative Print menu on the TV monitor and make a card, calendar, split images prints using the image of the “Memory Stick” or CompactFlash card. This section explains how to make a print as follows: Displaying the Creative Print menu (page 43) -
Page 43: Displaying The Creative Print Menu
Displaying the Creative Print menu Press MENU. The menu bar is displayed. Creative Print menu icon To exit the menu mode Press MENU. The previous window is displayed. Press the arrow (B/b) button to select (Creative Print) and then press ENTER. The Creative Print menu is displayed. - Page 44 Press the arrow (B/b) button to select the print size, then press ENTER. The wallpaper selection window is displayed. When you select “Postcard size” Press the arrow (B/b/V/v) button to select the desired wallpaper, then press ENTER. If you do not want to place wallpaper on the image, select “No Wallpaper.”...
- Page 45 Press the arrow (B/b/V/v) button to select the desired image, then press ENTER. The window used for adjusting the image size and position is displayed. Adjustment tools Press the arrow (B/b/V/v) button to select the desired adjustment tool, then press ENTER.
- Page 46 Press the arrow (B/b/V/v) button to select “Execute” and press ENTER. The framed image is displayed. Using the items in this window, you can add your favorite effects on the print (pages 46 to 49). Items you can add to the print Preview of the created print Check the preview, then save and print your Creative print.
- Page 47 3 Adjust the size and position of the stamp. For information on adjustment, see step 8 on page 45. To cancel the operation Press CANCEL. The window of the previous step is displayed. 4 Press the arrow (B/b/V/v) button to select “Execute” and then press ENTER.
- Page 48 x Adding a calendar 1 Press the arrow (B/b/V/v) button to select (Calendar) and press ENTER. The window used for selecting a calendar type is displayed. 2 Press the arrow (B/b/V/v) button to select the desired calendar type and press ENTER. The calendar setting window is displayed.
- Page 49 4 Press the arrow (B/b/V/v) button to select “Execute” and then press ENTER. The window used for adjusting the calendar size and position is displayed. 5 Adjust the size and position of the calendar. For information on adjustment, see step 8 on page 45. 6 Press the arrow (B/b/V/v) button to select “Execute”...
- Page 50 Making a calendar You can add a selected calendar to an image or images to make an original calendar. Display the Creative Print menu (page 43). Press the arrow (B/b/V/v) button to select “Calendar”, then press ENTER. The print size selection window is displayed.
- Page 51 2 Press the arrow (B/b/V/v) button to select the desired image, then press ENTER. The window used for adjusting the image size and position is displayed. Adjustment tools 3Press the arrow (B/b/V/v) button to select the desired adjustment tool, then press ENTER.
- Page 52 2 Set the calendar. Press the arrow (V/v) button to select the following items and press the arrow (B/b) to select an option. Item Procedures Start Month Set the first month and the year starting the calendar. Press the arrow (B/b) to select the month or year and press the arrow (V/v) button to set the number.
- Page 53 Making a card You can add a greeting and your own message to images and make an original card like the one shown below. Display the Creative Print menu (page 43). Press the arrow (B/b/V/v) button to select “Card”, then press ENTER.
- Page 54 2 Press the arrow (B/b/V/v) button to select the desired image, then press ENTER. The window used for adjusting the image size and position is displayed. Adjustment tools 3Press the arrow (B/b/V/v) button to select the desired adjustment tool, then press ENTER.
- Page 55 3 Press the arrow (B/b/V/v) button to select the desired color, then press ENTER. The selected message is placed in the message area. Enter characters. Press the arrow (B/b/V/v) button to select the characters area, then press ENTER. The keyboard is displayed. For how to enter characters, see “Superimposing characters”...
- Page 56 Making split images You can make a print with 2-split, 4-split, 9- split, 13-split, or 16- split images. Display the Creative Print menu (page 43). Press the arrow (B/b/V/v) button to select “Split Image”, then press ENTER. The print size selection window is displayed.
- Page 57 Press the arrow (B/b/V/v) button to select the desired frame that you wan to add to an image, then press ENTER. If you do not want to use any frame, select “No Frame.” The image list is displayed. Press the arrow (B/b/V/v) button to select the desired image, and then press ENTER.
-
Page 58: Saving And Printing A Creative Print Image
Saving and printing a Creative print image Saving a Creative print After you finish making a Creative print, you can save the image with a new file number. The selected image will not be overwritten. Press the arrow (B/b/V/v) button to select “Save” and press ENTER. - Page 59 Printing an edited image Press PRINT. The dialog box to specify the print quantity is displayed. Set the print quantity. • To increase the print quantity one by one, press ENTER repeatedly. • To reduce the print quantity one by one, press CANCEL repeatedly.
-
Page 60: Changing The Print Settings (Set Up)
Changing the print settings (SET UP) The SET UP menu allows you to change various print settings listed on pages 61 and 62. Buttons to be used in this section Press MENU. The menu bar is displayed. SET UP menu icon To exit the menu mode Press MENU. - Page 61 Item Settings Auto Fine Print 3 Photographical*/ •Photographical: Adjusts an image automatically Vivid Exif Print Borders Finish Glossy* Texture Contents so that the image is printed with natural and beautiful pictures. •Vivid: Adjusts an image automatically so that the image is printed with stronger sharpness correction and more vivid pictures than the Photographical mode.
- Page 62 Item Settings Date Print OFF* Color Setting *: Factory settings To cancel settings Press CANCEL. The settings will be returned to the state they were in before you made changes. Contents Prints the date of shooting with an image when the image is a file recorded in the DCF (Design rule for Camera File system) format.
-
Page 63: Changing The Printer Preferences (Option)
Changing the printer preferences (OPTION) The OPTION menu allows you to change the preferences listed on page Buttons to be used in this section Press MENU. The menu bar is displayed. OPTION menu icon To exit the menu mode Press MENU. The previous window is displayed. - Page 64 item Settings Listing Order Ascending* Descending Image Without Icon* Thumbnail Generate Image data display On Off* Beep *: Factory settings To cancel settings Press CANCEL. The settings will be returned to the state they were in before you made changes. Contents In the image list window, the images are displayed in the order of their image numbers,...
-
Page 65: Viewing A Slideshow
Viewing a slideshow You can perform a slideshow of the images saved in a “Memory Stick” or CompactFlash card. You can also manually print an image being displayed. Buttons to be used in this section Press MENU. The menu bar is displayed. Menu bar SLIDESHOW menu icon To exit the menu mode... - Page 66 • When “Manual” is selected: The image with the cursor in the image list is displayed. To switch images, press the arrow (B/b/V/v) button. The image to the left, right, above, or below the current image in the image list will be displayed. To stop slideshow Press CANCEL.
-
Page 67: Deleting Images
Deleting images You can delete images in the “Memory Stick” or CompactFlash card. You can also format the “Memory Stick.” Notes • During deleting or formatting, do not turn off the printer or remove the “Memory Stick” or CompactFlash card from the insertion slot. - Page 68 Press the arrow (V/v) button to select “Delete Image” and press ENTER. The image list is displayed. A trash icon is displayed on the image selected with the cursor before you pressed MENU in step 1. Trash icon Press the arrow (B/b/V/v) button to move the trash icon to the image you want to delete, then press ENTER.
-
Page 69: Formatting A "Memory Stick
Formatting a “Memory Stick” You can format a “Memory Stick”. Press MENU. The menu bar is displayed. Press the arrow (B/b) button to select (DELETE/FORMAT) and then press ENTER. The DELETE/FORMAT menu is displayed. Press the arrow (V/v) button to select “Memory Stick Format”... - Page 70 Press the arrow (B/b) button to select (IMAGE SEARCH) and then press ENTER. The IMAGE SEARCH menu is displayed. You can search for an image by file number, date, or folder number. Cursor IMAGE SEARCH menu Press the arrow (V/v) button to select the search key and press ENTER.
- Page 71 • When you select “By Folder No.”: Specify the folder number of the images you want to search for: Press ENTER. Searching starts. When the search is complete, the search results will be displayed. If no images have been found “No images were found”...
-
Page 72: Printing Using The Printer's Lcd Display (Lcd Mode)
Printing using the printer‘s LCD display (LCD mode) You can use the printer‘s LCD display to carry out the following printing operations: • Printing a selected image (page 74) Specify the image number and print an image. • AUTO printing (INDEX/DPOF/ALL) (page 76) •... -
Page 73: Inserting A Memory Card
Inserting a memory card Inserting a “Memory Stick” To print an image stored on a “Memory Stick,” insert it into the “Memory Stick” slot until it clicks into place. For the varieties of “Memory Stick” that you can use with the printer, see page 127. -
Page 74: Printing Images
Printing images Printing a selected image This section explains how to specify an image number and print the image. Turn on the printer. The ON/STANDBY indicator lights in green. Press MONITOR OUT to turn off the MONITOR OUT indicator. The LCD mode is selected . Press INPUT SELECT repeatedly to select the memory card containing the images that... - Page 75 Press the arrow (V/v) button to select the folder (when multiple folders exist) and press the arrow (B/b) button to select the desired image number. Image number Press ENTER or CANCEL to set the print quantity. • To increase the print quantity one by one, press ENTER.
-
Page 76: Auto Printing (Index/Dpof/All)
When printing is complete and the print paper automatically emerges, remove the printed paper from the paper tray. Notes • Do not remove the memory card while the access indicator is flashing; the memory card or printer may be damaged. •... - Page 77 Notes • For how to preset images for printing, see the manual of your digital camera. • Some types of digital camera do not support the DPOF function, or the printer may not support some of the functions of the digital camera. Turn on the printer.
- Page 78 Press AUTO PRINT repeatedly to display “INDEX,” “DPOF,” or “ALL” on the LCD display. The selected printing indication (INDEX, DPOF, or ALL) Print quantity Folder name Image number Press PRINT. Printing starts. During printing, “PRINT” is displayed in the LCD display.
-
Page 79: Changing The Print Settings
Changing the print settings By connecting your printer to a TV monitor, you can display SET UP and OPTION menus and change the print settings. Connect the printer to a TV monitor (page 18). Turn on the printer and TV monitor (page 20). - Page 80 OPTION menu Listing Order You can select the order of the images to be displayed. (Ascending*/ Descending) Beep You can select whether or not operation and warning beeps sound. (On*/Off). * Factory settings For the details on how to make settings, see pages 60 and 63.
-
Page 81: Printing From A Pictbridge Camera (Pictbridge Mode)
Printing from a PictBridge camera (PictBridge mode) You can connect a PictBridge-compliant digital camera and print an image directly from your digital camera. • Printing images from the digital camera (this page) • Changing the print settings (page 83) (You need to connect the printer to a TV monitor to make settings.) How to attach the clamp filter If the USB cable supplied with your... -
Page 82: Turn On The Printer
Turn on the printer. The ON/STANDBY indicator of the printer lights in green. Connect a PictBridge- compliant digital camera to the printer. Use the USB connecting cable supplied with the digital camera. To the PictBridge connector (USB A- TYPE) To the PictBridge connector (USB) PictBridge-compliant digital camera... -
Page 83: Changing The Print Settings
If you do not make settings for print quality with your digital camera, an image will be printed according to the print settings with the SET UP menu (page 60). Note • If you replace a print cartridge while the printer is connected to a digital camera, an image may not be printed properly. - Page 84 SET UP menu Auto Fine Print 3 You can select or disable automatic picture adjustment for printing. (Photographical*/ Vivid/Off) Exif Print You can turn on or off the automatic adjustments of the images shot by an Exif Print-compliant digital camera to its optimum picture quality.
-
Page 85: Printing From A Pc (Pc Mode)
PictureGear Studio • On copyrights of design materials The copyrights of the design materials contained in this software are owned by Sony Corporation or Sony Music Communications Corporation. Any commercial use is prohibited by the copyrights laws. • Duplication of copyrighted materials, such as photographs, is prohibited except for private or domestic use. - Page 86 • Printer driver for DPP-EX50: The software describes the printer’s requirements and enables printing from the computer. • PictureGear Studio: Sony’s original software application that allows you to handle still images—capturing, managing, processing, and printing. Notes • If a hub is used to connect the printer and...
-
Page 87: Installing The Printer Driver
The setup starts automatically and the installation window is displayed. Note In case the installation window is not automatically displayed, double-click the “Setup.exe” of the CD-ROM. Click “Installing Printer ® 2000 Driver.” ® The “Sony DPP-EX50 - InstallShield Wizard” dialog box appears. Continued... - Page 88 Click “Next.” The license agreement dialog box is displayed. Check “I accept the terms of the license agreement” and click “Next”. If you check “I do not accept the terms of the license agreement”, you cannot proceed to the next step. The “Ready to install the program”...
- Page 89 Turn on the printer. The ON/STANDBY indicator lights in green. Click “Next”. Connect the USB connectors of the printer and your computer. Use a commercially available USB 2.0-compatible connecting cable. To USB connector (B- TYPE) To USB connector Windows PC Note Use a commercially available A-B TYPE USB-compatible connecting cable...
-
Page 90: Checking The Installation
3. • After installation, the “Sony DPP-EX50” is not set as the default printer. Set the printer you use for each application. • Before you use the printer, read the Readme file (the Readme folder of the CD- ROMcEnglish foldercReadme.txt). - Page 91 In case the installation window is not automatically displayed, double-click the “Setup.exe” of the CD-ROM. Click “Installing Printer Driver.” The “Sony DPP-EX50 - InstallShield Wizard” dialog box appears. Click “Next.” The license agreement dialog box is displayed. Check “I accept the terms of the license agreement”...
-
Page 92: Installing The Picturegear Studio
Click “Yes.” The dialog box used for restarting the computer is displayed. Check “Yes, I want to restart the computer now.” and click “OK.” After the computer is restarted, the relevant files will be deleted and uninstallation is complete. To check uninstallation Select “Printers and Faxes”... - Page 93 Notes • In case the installation window is not automatically displayed, double- click the “Setup.exe” of the CD- ROM. • Depending on the PC system environments, the Microsoft Data Access Component 2.7 and Jet 1.0 should be installed during the PictureGear Studio installation.
- Page 94 • The PictureGear Studio supplied with the DPP-EX50 has the following limitations: – In PhotoCollection, you cannot select paper other than “Sony.” – In PrintStudio, you cannot create or print “Label.” – In PrintStudio, you cannot create or print a “Sticker, name card, or card.”...
- Page 95 Uninstalling the PictureGear Studio When the software becomes unnecessary, remove it from your PC hard disk as follows: Remove the USB cable between the printer and the Insert the supplied CD-ROM into the CD-ROM drive of your computer. The setup starts automatically and the installation window is displayed.
-
Page 96: Printing Photos From The Picturegear Studio
The print paper selection dialog box is displayed. Note Make sure to set the print quantity in this dialog box. Even if you set the number of copies in “Paper/Output” tab of the “Sony DPP-EX50 Properties” dialog box, the print quantity will not be reflected. - Page 97 Click “Sony Standard Papers”, and then select the desired paper size. Select either of the following paper sizes for the DPP-EX series: • DPP-EX series 4 x 6“ (Postcard size) SVM-25LS/25LW/75LS • DPP-EX series 3.5 x 5” SVM-30MS • DPP-EX series 3.5 x 4“ (Small...
- Page 98 Exif print • When checked, an image shot with a Exif Print (Exif 2.2)- compliant digital camera will be adjusted and printed with its optimum picture quality. Note The image displayed on the monitor will not be adjusted. • When unchecked, an image will be printed without adjustments.
- Page 99 Finish Select the finish of the printed image: • Glossy • Texture Copies Specify the number of copies to be printed. Note Depending on the application you use, the print quantity setting of the application has priority over that specified here. Enlarge/ Specify the percentage to Reduce...
- Page 100 Exif Print Check it to adjust and print an image shot with a Exif Print (Exif 2.2)-compliant digital camera. The printer driver uses the color conversion and Exif shooting data to adjust the image. This option is effective only with PictureGear Studio. Red-eye reduction Check it to automatically reduce the red-eye...
- Page 101 Click “Print All” or “Print the selected page only”. The confirmation dialog box for printing is displayed. Make sure that the specified print paper and print cartridge are loaded and click “OK”. Printing starts. When “Print preview” is checked in step 8 The preview window is displayed.
-
Page 102: Printing From Other Application Software
Click “Yes. The printing job is canceled. Note Do not cancel the printing job on process, which may cause a paper jam. Printing from other application software You can use a commercially-available application software to print an image from the DPP-EX50. Select “DPP-EX50” in the print dialog box and select the print paper size in the page setup dialog box. - Page 103 Print quantity setting in the Properties dialog box Depending on the application you use, the print quantity setting of the application you use may have priority over the setting specified in the printer driver dialog box. Exif Print Settings in the “Graphics” The Exif Print setting in the “Color reproduction/Picture quality”...
-
Page 104: Troubleshooting
Troubleshooting If trouble occurs If you run into any problems using the printer, use the following guidelines to solve the problem. If the problem persists, consult your Sony dealer. Power Symptom Check The ON/ • Is the AC power cord... - Page 105 Symptom Check “DEMO” is • Did you press INPUT displayed on the SELECT when no TV monitor. memory card is inserted? Some images in • Are thumbnail images the image list are displayed in the image not displayed or list? not printed even if they are displayed.
- Page 106 Check Symptom • Are there more than 9 999 Some images in images saved in the the image list are memory card? not displayed or not printed even if they are displayed. • Did you name or rename an image file with your •...
- Page 107 Check Symptom • Is the previewed image In the EDIT extremely stretched menu, there are vertically or horizontally. blank areas at the top and bottom of the previewed image. • Is a PictBridge-compliant The “PictBridge” digital camera connected to indication turns on the printer? even after INPUT SELECT is pressed...
-
Page 108: Printed Results
Check Symptom • Are you using print paper Paper does not that was not designed for feed. the printer? • Is the print paper jammed? The print paper • Is it in the middle of the emerges partially printing process? during printing in process. - Page 109 Symptom Check The printed •Did you use the EDIT menu pictures are to enlarge the image? inferior in quality. • Did you allow dust or finger prints to get on the printed surface? • Did you use used print paper? •...
- Page 110 Check Symptom • Did you use an AdobeRGB- The printed compliant digital camera, pictures are not compatible with the inferior in DCF 2.0, to shoot an image quality. in the AdobeRGB mode? The picture quality and colors of the image previewed on the screen differs from those printed.
- Page 111 Check Symptom The date cannot • Is “Date Print” set to be printed. “On”? • Does the image support DCF? The date is • Is “Date Print” set to printed “Off”? unintentionally. • Was the date saved with the image when it was shot with the digital camera.
- Page 112 Check Symptom • Did you rotate the image The image is or add other process? stretched horizontally when printed. There are white lines or dots on the printed pictures. The picture is too bright, dark, reddish, yellowish, or greenish. The eyes of the subject are red.
- Page 113 Settings Symptom Check The “Borders” • Are you using the small size “Yes/No” setting print paper? does not take effect. • Are you operating the Creative Print menu? Operations are rejected with beeps. Saving or deleting an image Symptom Check You cannot save •...
- Page 114 Turn off the ON/STANDBY button and then turn it on. After the motor sound stops, try to remove the cartridge. If this does not solve the problem, contact Sony service facilities or your Sony dealer. c Paper is jammed. See “If paper jams”...
- Page 115 Paper is jammed. See “If paper jams” (.page 124) and remove jammed paper from the printer. If jammed paper cannot be removed, contact the Sony service facilities. c If no indicator is lit, the thermal head may be overheated. Leave the printer until the head cools down and the printer resumes printing.
-
Page 116: Connecting With A Computer
Cause/Solutions c The printer does not provide the function for viewing the memory card images from the printer. c Please download the printer driver from the Customer support home page (.page 132). Or contact your Sony dealer. - Page 117 Check Symptom • Are you sure that you have The printer followed the installation driver cannot be procedures correctly? installed. • Is another application program running? • Did you specify the CD- ROM as the installation CD- ROM correctly? • Is the USB driver installed? •...
- Page 118 5 to 10 seconds, and then connect the cable again. – Restart your computer. If these do not solve the problem, consult with your Sony dealer or service facilities. c Remove the USB cable and then connect it again.
- Page 119 Check Symptom • Is “Exif Print” checked Colors are not in the “Graphics” tab reproduced of the “DPP-EX50 correctly. Properties” dialog box? • Is “ICM” selected in the “Graphics” tab of the “DPP-EX50 Properties” dialog box? Preview image does not reflect the print settings in the “Graphics”...
-
Page 120: If An Error Message Appears
An error has occurred with the printer. Unplug the AC power cord of the printer, connect it again and then try operating again. If this occurs again, consult with your Sony dealer or Sony service facilities. Meaning/Solutions c The “Memory Stick” is not inserted. Insert it into the “Memory Stick”... - Page 121 Error messages Protected. Release the protect and try deleting again. Protected. Release the protect and try formatting again. Protected. Release the protect and try saving again. The Memory Stick is full. The CompactFlash card is full. An error detected in the Memory Stick.
-
Page 122: Print Cartridge
Print cartridge Error messages No print cartridge inside. Set the print cartridge. Press [PRINT] again. No print cartridge inside. Set the print cartridge for ### size. Press [PRINT] again. Print cartridge finished. Set a new print cartridge. Press [PRINT] again. Print cartridge finished. -
Page 123: Print Paper
(.page 15) c Paper jams. See “If paper jams” (page 124) and remove jammed paper from the printer. If the jammed paper cannot be removed, contact the Sony service facilities. -
Page 124: If Paper Jams
Pull out the jammed paper slowly. Note If you cannot remove the jammed paper, contact your Sony dealer. Cleaning the inside of the printer If white lines or dots are printed on the pictures, use the cleaning cartridge supplied with the printer and the protective sheet supplied in the printing pack to clean inside the printer. - Page 125 Adjust the spacer to feed the protective sheet you will use for cleaning. Place the protective sheet contained in the printing pack in the paper tray. Insert the protective sheet with the no-imprint side facing up and the arrow pointing in the same direction as the arrow in the tray.
-
Page 126: Additional Information
Additional information Precautions On safety • Be careful not to set or drop any heavy objects on the power cord, or to damage the power cord in any way. Never operate this printer with a damaged power cord. • Should any solid object or liquid fall into the cabinet, unplug the printer and have it checked by qualified personnel before operating it any... -
Page 127: About The "Memory Stick
On cleaning Clean the cabinet, panel and controls with a soft dry cloth, or a soft cloth lightly moistened with a mild detergent solution. Do not use any type of solvent, such as alcohol or benzine, which may damage the finish. On restrictions on duplication If duplicating documents with the printer, pay special attention to the... -
Page 128: Types Of "Memory Stick" That The Printer Can Use
• “Memory Stick” (with memory select function): “Memory Stick” (with memory select function) incorporates multiple 128MB memory units, which can be selected by a user via a mechanical switch on the reverse side of the media. Each memory unit can be used to categorize various types of data. -
Page 129: Notes On Use
On data read/write speed The data read/write speed differs depending on the combination of the “Memory Stick” and the device you use. What is “MagicGate”? “MagicGate” is the copyright protection technology that works when both the “Memory Stick” and the device employ the technology. -
Page 130: About The Compactflash Card
• Avoid getting liquids on the “Memory Stick” or using it in areas subject to high humidity. • Avoid using or storing the “Memory Stick” in a location subject to: – extremely high temperature such as the hot inside of a car or the outdoors exposed to direct sunlight, or a place near a heater. -
Page 131: Specifications
– excessive dust – electrostatic or electronic noises – magnetic fields • When storing and carrying the CompactFlash card, keep it in its original case to ensure protection of important data. • Avoid removing the CompactFlash card from the insertion slot or turning off the ON/STANDBY button while the printer is accessing the CompactFlash card. - Page 132 *4: The printer functions may be limited for a TIFF file. Customer support home page The latest support information is available at the following homepage addresses: For the customers in the U.S.A.: http://www.sel.sony.com/SEL/ service/conselec/ For the customers in Canada: http://www.sony.ca/service For the customers in Europe: http://www.sonydigitallink.com/ index/index.asp For the customers in Singapore: http://www.css.ap.sony.com...
-
Page 133: Printing Range
Printing range Postcard size 95.5 mm/ inch (1 516 dots) 3.5 x 5 inch size 127 mm/5 inch (2 015 dots) 83.9 mm/ inch (1 332 dots) 122 mm/4 Small size 95.5 mm/3 71.7 mm/ inch (1 136 dots) 152.4 mm/6 inch (2 418 dots) 146.3 mm/5 inch (2 322 dots) inch (1 936 dots) - Page 134 The printing range differs for a border or a borderless print as shown in the illustrations on the previous page. For a border print, the margin sizes differ depending on the aspect ratio of the image to be printed as follows. The illustrations of the previous page are those when an image with a 2:3 aspect ratio is printed.
-
Page 135: Glossary
Glossary Auto Fine Print 3 The function automatically corrects the picture quality so that an image may be printed in more vivid, clear and beautiful pictures. It is especially effective for a darker image with low contrast. The pictures are corrected to reproduce natural skin colors, vivid tree leaf green, or clear sky blue. -
Page 136: Lists Of Templates And Patterns In Creative Print (Monitor Out Mode Only)
Lists of templates and patterns in Creative Print (MONITOR OUT mode only) Free layout templates Calendar patterns Frames Stamps... - Page 137 Calendar templates x Postcard size Card templates x Postcard size/3.5 x 5 inch size x Small size Split-image templates x Postcard size x 3.5 x 5 inch size x Small size Messages x 3.5 x 5 inch size...
- Page 138 x Small size Frames...
-
Page 139: Identifying The Parts
Identifying the parts For details, see the pages indicated in the parentheses. Printer 1 MONITOR OUT button (pages 20, 2 ON/STANDBY button (pages 20, 74, 82, 89) 3 INPUT SELECT button (pages 21, 4 Arrow (B/b/V/v) button 5 ENTER button 6 CANCEL button (page 25) 7 LCD display (page 72) 8 MENU button (pages 31, 43, 60) -
Page 140: Paper Tray
Paper tray 1 Ventilation holes 2 VIDEO OUT (output) connector (page 18) Connects to the video input of your TV monitor. USB connector (pages 82, 89) Connects to the USB connector of your computer. 4 AC power cord 1 Cover (page 15) 2 Spacer (page 15) -
Page 141: Index
Index Symbols 3.5 x 5 inch size 12 Adding a special filter to an image 34 Adjusting an image 33 ALL 27, 76 Auto Fine Print 3 61 AUTO PRINT 27, 78 Beep 64 Border/borderless print Calendar 50 Card 53 Cartridge compartment cover 13 Cleaning... - Page 142 Paper jams 124 Paper size 12 Paper tray 15, 140 PC mode 7, 89 PictBridge 7, 10, 81, 135 PICTURE 23 Post card size 12 Print cartridge 12, 13 Print paper 12, 15 Print quantity 25 Print settings (SET UP) Printer preferences (Options) 63 Printing...
- Page 144 Sony Corporation Printed in Korea...