
Related Manuals for Sony SDZ-S100


Summary of Contents for Sony SDZ-S100
-
Page 1: Tape Drive Unit
S-AIT Tape Drive Unit Operating Instructions 5 _________________________________ Page Important Safeguards 50 ________________________________ Page SDZ-S100 SDZ-S130 © 2003 Sony Corporation 4-680-196-13 (2) -
Page 2: Safety Information
Tape Drive Unit and will be very helpful if you have to contact technical support. Model No. Safety Information Your S-AIT Tape Drive Unit is assigned model number SDZ-S100 or SDZ-S130 for regulatory compliance certifications. The number is indicated on the model number label on your drive along with the rated voltage and current. - Page 3 (Bauartkurzzeichen H05RR-F 3G 0.75 mm ATTENTION According to the EU Directives related to product safety, EMC and R&TTE the manufacturer of this product is Sony Corporation, 6-7-35 Kitashinagawa Shinagawa-ku Tokyo, 141-0001 Japan. The Authorised Representative is Sony Deutschland GmbH, Hedelfinger Strasse 61,70327 Stuttgart, Germany. For any service or guarantee matters please refer to the addresses given in separate service or guarantee documents.
- Page 4 Subpart B of Part 15 of FCC Rules. If you have any questions about this product, contact your dealer. Trade Name: SONY Model No.: SDZ-S100, SDZ-S130 Responsible Party: Sony Electronics Inc. Address: 16530 Via Esprillo San Diego, CA. 92127 U.S.A.
-
Page 5: Table Of Contents
Preparing the Host Computer ...18 Setting the DIP Switches ...19 If necessary, change the settings as follows... 19 Setting the SCSI ID (SDZ-S100 only) ...22 Setting the Loop ID (SDZ-S130 only) ...23 Installing the S-AIT Tape Drive Unit...25 Connecting the Power Cable...26 Installing Device Drivers...26... - Page 6 © 2003 Sony Corporation. All rights reserved. Trademarks • Sony, Advanced Intelligent Tape, and Super Advanced Intelligent Tape are trademarks or registered trademarks of Sony Corporation in this country, other countries, or both. • Other product names are trademarks or registered trademarks of their respective owners in this country, other countries, or both.
-
Page 7: Overview
Advanced Metal Evaporated (AME) Tape S-AIT media is based on AME technology. This technology represents the culmination of over 50 years of Sony innovation and experience in magnetic tape technology. The AME tape formulation, with diamond-like carbon coating, offers an extraordinary durability and reliability, up to 30,000 media passes, and an estimated media archival life of up to 30 years. -
Page 8: Product Features
• Sleek and elegant design. Features of the SDZ-S100 (SCSI model) • Ultra 160 SCSI LVD/SE interface is fully supported for host computer access. • Burst data transfer rate of 160 MB per second, synchronous. -
Page 9: Compatible Cartridges
Compatible Cartridges Data Cartridges Cleaning Cartridges Supported Software Tape cartridges used with the S-AIT Tape Drive Unit must be marked with the SAIT-1 logo. SAIT-1 logo Caution Only use cartridges designed specifically for S-AIT. To clean the read/write heads, use the S-AIT Cleaning Cartridge. For details about cleaning, see “Head Cleaning”... -
Page 10: Components And Functions
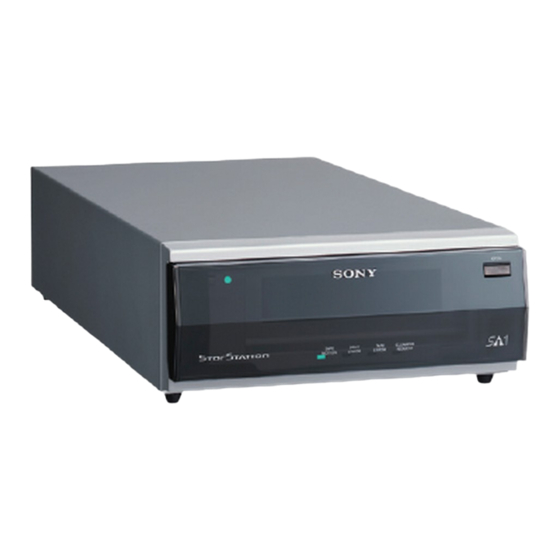
Components and Functions Front Chapter 1 Introduction TAPE DRIVE TAPE CLEANING MOTION ERROR ERROR REQUEST A Front Door Used to protect the front of the unit. Press the DOOR button to unlock and open the door when inserting or removing cartridges. Note Even when the front door is closed and a cartridge is ejected by software, the cartridge does not come in contact with the door. -
Page 11: Power Indicator
Front door opened A Power Switch Press this switch to turn the S-AIT Tape Drive Unit on or off. When you restart the unit, be sure to wait at least 10 seconds before turning it on again. B POWER Indicator Lights green when the unit is on. - Page 12 Chapter 1 Introduction Drive Status The indicators of the S-AIT Tape Drive Unit show the status of the unit. This status is indicated by a combination of colors (green, orange, or yellow), and whether the indicators are lit or flashing. Refer to the table below for explanations about the meaning of indicator activity.
-
Page 13: Rear
A SCSI ID Switch Used to set the SCSI ID of the S-AIT Tape Drive Unit. Upon shipment, the SCSI ID is 0. For details, see “Setting the SCSI ID (SDZ-S100 only)” on page 22. B RS-232C Connector For service use only. You do not normally need to use this connector. - Page 14 Chapter 1 Introduction SDZ-S130 A RS-232C Connector For service use only. You do not normally need to use this connector. B Cooling Fan and Ventilation Holes Be careful not to block the ventilation holes. If you do, the unit may overheat, resulting in damage.
-
Page 15: Bottom
Bottom A Access Cover for Service Use Do not open this cover. For service use only. B Dip Switch Access Cover If you need to change the data compression settings, remove this cover to change the DIP switch settings. For details about setting the DIP switches, see “Setting the DIP Switches”... -
Page 16: About The Label
About the label A Model number The model number is located on the bottom of the unit, together with the serial number. Refer to the model and serial numbers on the label when seeking technical support. B Serial number The serial number is located on the bottom of the unit, together with the model number. -
Page 17: Overview
Overview Unpacking Installation This chapter describes the general procedures for positioning the S-AIT Tape Drive Unit, connecting it to the host computer, and turning it on. This chapter also describes initial setup. Installation and setup procedures may vary slightly depending on your system. Note You will need the box and packing materials if you wish to move or transport the unit. -
Page 18: Package Contents
Package Contents Preparing the Host Computer Chapter 2 Installation After opening the package, make sure that all the following items are present. Contact your dealer if anything is missing. • S-AIT Tape Drive Unit (1) • Operating Instructions (1) Note In addition to the above, other items may be included in the package. -
Page 19: Setting The Dip Switches
Setting the DIP Switches If necessary, change the settings as follows By setting the DIP switches at the bottom of the S-AIT Tape Drive Unit, you can: • Choose whether to compress the data when recording. • Choose whether the host can control data compression. The default settings of the DIP switches is as follows. - Page 20 Chapter 2 Installation Change the settings with a pointed object. Each DIP switch is defined in the tables below. SWA settings (SDZ-S100) SWA (SDZ-S100) 1 2 3 4 5 6 7 8 SWA settings (SDZ-S130) SWA (SDZ-S130) 1 2 3 4 5 6 7 8...
- Page 21 After changing the DIP switch settings, replace the access cover. If you are using a SDZ-S100 (SCSI model), proceed to “Setting the SCSI ID (SDZ-S100 only)” on page 22. If you are using a SDZ-S130 (Fibre Channel interface model), proceed to “Setting the Loop ID (SDZ-S130 only)”...
-
Page 22: Setting The Scsi Id (Sdz-S100 Only)
The SCSI ID is a unique address that identifies the SDZ-S100 to the host. The default SCSI ID of the SDZ-S100 is 0. The unit can be configured to SCSI ID addresses ranging from 0 to 15 (or 0 to F) using the SCSI ID switch on the rear of the unit. -
Page 23: Setting The Loop Id (Sdz-S130 Only)
Setting the Loop ID (SDZ-S130 only) You can set the Loop ID with the loop ID jumpers, if necessary. These jumpers are functional when the topology is arbitrated loop. When the jumpers are enabled, they acquire AL_PA through LIHA (Loop Initialization Hard Assigned). - Page 24 Arbitrated Loop Physical Addresses (AL_PA) and Loop IDs 7-bit Loop ID AL_PA (Hex) (Decimal) Chapter 2 Installation 8-bit 7-bit Loop ID AL_PA (Hex) (Hex) (Decimal) (Hex) 8-bit 8-bit 7-bit Loop ID AL_PA (Hex) (Decimal) (Hex) — — — — — —...
-
Page 25: Installing The S-Ait Tape Drive Unit
Installing the S-AIT Tape Drive Unit The S-AIT Tape Drive Unit weights about 7 kg (15.4 lb.) and has the following dimensions. Make sure that the surface where you will install the S-AIT Tape Drive Unit is appropriate before installing the unit. Note Install the S-AIT Tape Drive Unit on a horizontal surface near an AC power outlet. -
Page 26: Connecting The Power Cable
Contact your dealer for details or visit the Sony Web site (http://www.sony.net/Products/storagesolution/). If you are using a SDZ-S100 (SCSI model), proceed to “Connecting the SCSI Bus Cable (SDZ-S100 only)” on page 27. If you are using a SDZ-S130 (Fibre Channel interface model), proceed to “Connecting the Optical Fiber Cable for Fibre Channel (SDZ-S130 only)”... -
Page 27: Connecting The Scsi Bus Cable (Sdz-S100 Only)
• Turn off all the connected devices before connecting the SCSI cable, including the SDZ-S100 and the host computer. • If the SDZ-S100 is the last or only device on the SCSI bus, make sure that you connect the terminator to the open connector. - Page 28 12 m (39.4 ft.). (The SDZ-S100 internal cable length is 25 cm (9.8 in.).) • If the SDZ-S100 is the last device on the SCSI bus, make sure that you connect the terminator to the open connector.
-
Page 29: Connecting The Optical Fiber Cable For Fibre Channel (Sdz-S130 Only)
Connecting the Optical Fiber Cable for Fibre Channel (SDZ-S130 only) The SDZ-S130 is equipped with an interface that complies with the Fibre Channel standards with the following specifications. • Short-wave laser • 200 MB/sec • Duplex LC Fibre Channel connectors The equipment (HBA, hub, switch, etc.) to be connected to the SDZ-S130 must be of the same type. -
Page 30: Configuring The S-Ait Tape Drive Unit To The Host
Configuring the S-AIT Tape Drive Unit to the Host Chapter 2 Installation Configure the S-AIT Tape Drive Unit as follows. Turn on the S-AIT Tape Drive Unit. For details, see “Turning the Unit On or Off” on page 31. To configure the unit for use, refer to the documentation of the host computer and software. -
Page 31: Overview
Overview Turning the Unit On or Off Turning On the Unit Operation This chapter describes how to turn the unit on and off, as well as how to insert and eject cartridges. Press the DOOR button to unlock and open the front door. Chapter Chapter 3 Operation... - Page 32 • Do not push down the front door when it is opened. Doing so may result in damage. Notes • If you start the host computer before the SDZ-S100, the SCSI ID is not detected correctly. Therefore, you must always start the SDZ-S100 before starting the host computer.
-
Page 33: Turning Off The Unit
Turning Off the Unit Preparing Cartridges Inserting a Cartridge Press the DOOR button to unlock and open the front door. Press the power switch on the front panel. Caution Do not turn off the S-AIT Tape Drive Unit when it is in use or there is a cartridge in the unit, as this could damage data. -
Page 34: Removing A Cartridge
Removing a Cartridge Chapter 3 Operation Apply gentle pressure to the back of the cartridge until the unit takes the cartridge and loads it. Caution Do not apply force to the cartridge after the unit starts loading it. Otherwise, the cartridge may rush out of the unit when it is ejected. Close the front door to minimize any contamination from airborne particles. -
Page 35: Compatible Cartridges
Using the Media Compatible Cartridges Data Cartridge S-AIT Tape Drive Unit uses: • S-AIT data cartridges • S-AIT cleaning cartridges Only use the cartridges above with your S-AIT Tape Drive Unit. Do not use other types of cartridges, such as LTO Ultrium, SDLT, or DLT. S-AIT data cartridges contain a half inch AME (Advanced Metal Evaporated) tape. -
Page 36: Components And Functions
Components and Functions Chapter 4 Using the Media A Insertion Guide The insertion guide is a large notch preventing you from inserting the cartridge incorrectly or inserting cartridges of other types into the unit. B Insertion Indicator This arrow shows the direction in which the cartridge must be inserted into the drive. - Page 37 Bottom E Recognition Holes Used by the unit to determine the type of cartridge. S-AIT data cartridge recognition holes are all closed. S-AIT cleaning cartridge holes are closed except hole Caution Do not open the recognition holes as this may prevent the unit from recognizing the type of cartridge correctly.
-
Page 38: Setting The Write-Protect Switch
Setting the Write-protect Switch Cleaning Cartridge Chapter 4 Using the Media J Reel Lock Used to prevent the tape from moving when it is outside the unit. When you insert a cartridge into the unit, its reel locks are released automatically. Caution Do not close the reel lock as this may cause loading problems. -
Page 39: Handling Cartridges
Handling Cartridges Handling or storing S-AIT cartridges incorrectly can damage them or their tapes. Follow the guidelines below to avoid damaging your cartridges. Handling precautions • Before using cartridges, let them acclimate themselves to the normal operating environment for at least 24 hours. •... -
Page 40: Usage, Storage, And Transport Environmental Specifications
Usage, Storage, and Transport Environmental Specifications Chapter 4 Using the Media Before using cartridges, let them acclimate themselves to the operating environment for at least 24 hours. Operating environment Temperature 5 to 35°C (41 to 95°F) Relative humidity 20 to 80% (non-condensing) Wet bulb temperature 26°C (79°F) Storage environment Temperature... -
Page 41: Head Cleaning
Head Cleaning Appendix The S-AIT Tape Drive Unit is equipped with an automatic head cleaning system and was developed to require only a minimum of cleaning. Yet, to maintain the unit in peak condition, the unit determines when head cleaning using a cleaning cartridge is necessary. -
Page 42: Changing The Air Filter Unit
Changing the Air Filter Unit Appendix We recommend that you replace the air filter unit at least once a year. Consult your dealer to purchase air filter units. Note We recommend that you clean the air filter unit once a month with a vacuum cleaner. -
Page 43: Hardware Reset
You can update the S-AIT Tape Drive Unit firmware by downloading the new version of the firmware to your unit through the SCSI bus. To obtain up-to-date firmware and installation instructions, contact your dealer or visit the Sony Web site (http://www.sony.net/Products/storagesolution/). -
Page 44: Avoiding Damage
Avoiding Damage Avoid Shock and Vibrations Intense shock, such as from dropping the unit, may damage it. Environmental Considerations Do not store or use the unit in locations subject to: • high humidity • excessive dust • high temperature • intense vibrations •... -
Page 45: Troubleshooting
The SDZ-S100 is an LVD device. Do not connect HVD devices to the unit. • Verify the length of the SCSI cable. If your SDZ-S100 is the only device on the SCSI bus, make sure that the total length does not exceed 24.7 m (81 ft.). - Page 46 Appendix The SDZ-S130 (Fibre Channel interface model) and the host computer cannot communicate with each other • Verify that the host computer is on. • Verify the FC status indicator at the rear of the unit. If it is lit orange, there is a connection error.
-
Page 47: Specifications
Specifications Performance Environmental Specifications Storage capacity 500 GB (uncompressed with 600 m S-AIT Data Cartridge) 1.3 TB (2.6:1 compression ratio Data transfer rate 30 MB/sec (uncompressed Burst data transfer rate 160 MB/s (maximum, synchronous, SCSI) 200 MB/s (maximum, Fibre Channel) Bit error rate Less than 10 Initialize time... -
Page 48: Power Specifications/Miscellaneous
7 kg (15.4 lb.) In the interest of product improvement, specifications are subject to change without notice. The following options are available from Sony. For details about these options and the air filter units, contact your dealer. S-AIT data cartridge 500 GB uncompressed, 1300 GB compressed, 600 m (1968 ft.) tape... -
Page 49: Index
Index Air filter unit ... 42 Appendix ... 41 Arbitrated Loop Physical Addresses (AL_PA) and Loop IDs ... 24 Avoiding damage ... 44 Cartridges ... 9, 33, 35, 39 Changing air filter unit ... 42 Cleaning ... 41 Cleaning cartridge ... 38 Components ... -
Page 50: Important Safeguards
IMPORTANT SAFEGUARDS For your protection, please read these safety instructions completely before operating the appliance, and keep this manual for future reference. Carefully observe all warnings, precautions and instructions on the appliance, or the one described in the operating instructions and adhere to them. - Page 51 Power Sources — This unit should be operated only from the type of power source indicated on the marking label. If you are not sure of the type of electrical power, consult your dealer or local power company. For the unit with a three-wire grounding type ac plug: If you are unable to insert the plug into the outlet, contact your electrician to have a suitable plug installed.
- Page 52 UTILISATION Alimentations — Cet appareil ne peut fonctionner qu'avec l'alimentation indiquée sur l'étiquette. Si vous n'êtes pas certain de la puissance électrique, consultez votre distributeur ou votre société régionale d'électricité. Pour l'appareil doté d'une fiche ca du type de mise à la terre à trois conducteurs: Si vous n'arrivez pas à...
- Page 53 BEDIENUNG Stromzufuhr — Dieses Gerät sollte ausschließlich mit dem auf dem Markierungsschild angegebenen Strom versorgt werden. Wenn Sie die Stromstärke anzweifeln, beraten Sie sich bitte bei Ihrem Elektriker oder bei Ihrer örtlichen Stromversorgungsgesellschaft. Für die Verwendung eines drei-kabligen Erdungssteckers des Types ac: Wenn es Ihnen nicht gelingt den Stecker in die Anschlußdose zu stecken nehmen Sie bitte mit Ihrem Elektriker Kontakt auf und...
- Page 54 Fuentes de alimentación — Este aparato debe funcionar solamente con el tipo de fuente de alimentación que se indica en la etiqueta de características. Si no está seguro del tipo de alimentación eléctrica que tiene, consulte a su distribuidor o a la compañía de suministro eléctrico de su zona.
- Page 55 GEBRUIK Voedingsbronnen — Dit toestel mag alleen worden gevoed door het type voeding dat aangegeven is op het typeplaatje. Als u niet zeker bent van het type van uw elektrische voeding, neem dan contact op met uw dealer of plaatselijke elektriciteitsmaatschappij.
- Page 56 ANVÄNDNING Nätspänning — Apparaten får endast anslutas till den spänning och strömart, som framgår av märkplåten. Tala med återförsäljaren eller med den lokala kraftleverantören, om du inte är säker på strömarten. Apparat med skyddsjordad stickpropp: tag kontakt med en elektriker för att få stickproppen utbytt, om den inte passar i ditt vägguttag.
- Page 57 Fonti di alimentazione elettrica — Il dispositivo deve essere messo in funzione utilizzando esclusivamente il tipo di alimentazione indicata sull'etichetta dei dati di funzionamento. Qualora non siate sicuri sul voltro tipo di alimentazione elettrica, consultate il vostro rivenditore o la società di erogazione dell'energia elettrica.
- Page 58 UTILIZAÇÃO FONTES DE ALIMENTAÇÃO — Este conjunto deverá ser ligado apenas ao tipo de fonte de alimentação indicado na etiqueta. Se não tiver a certeza quanto ao tipo de corrente eléctrica, consulte o seu revendedor ou a EDP. Conjunto com uma ficha ac de três fios com ligação à terra: Se não conseguir introduzir a ficha na tomada, peça ao seu electricista que instale uma tomada adequada.
- Page 59 KÄYTTÖ Liittäminen sähköverkkoon — Liitä vastaanotin vain sähköverkkoon, jonka jännite on sama kuin arvokilpeen merkitty. Jos olet epävarma, ota yhteys vastaanottimen myyjään tai paikalliseen sähköyhtiöön. Laitteet, joissa on suojamaadoitettu pistotulppa: Jos et saa kytkettyä pistotulppaa pistorasiaan, käänny sähköasentajan puoleen. Toimiva suojamaadoitus on tärkeä sinun turvallisuudellesi.
- Page 60 ANVENDELSE Strømkilder — Dette apparat må kun drives med den type strømkilde, der er angivet på typeskiltet. Er man ikke sikker på, hvilken strømtype, man har, må man spørge sig for hos sin forhandler eller det lokale el-selskab. For apparater med et jordet treleder-stik til vekselstrøm: Hvis stikket ikke kan sættes ind i kontakten, kontaktes en elektriker for at få...
- Page 61 BRUK Spenningsforsyning — Apparatet må bare brukes med den spenningsforsyning som er angitt på merkeskiltet. Hvis du er usikker på hvilken spenningstype du har, må du kontakte forhandleren eller det lokale elektrisitetsverket. For apparater som har et nettstøpsel med tre ledninger og jord: Hvis ikke støpslet kan settes inn i stikkontakten, må...
- Page 64 For information about the S-AIT Tape Drive Unit, contact your reseller. Printed in Japan...