Table of Contents
Advertisement
Quick Links
• For detailed operations and information, refer to the INSTRUCTION MANUAL
on the following website:
<https://www.kenwood.com/cs/ce/>
Model name indication position
See "Removing the trim plate" (P.13)
Take the time to read through this instruction manual.
Familiarity with installation and operation procedures will help you obtain the best performance from your new
receiver.
For your records
Record the serial number, found on the back of the unit, in the spaces designated on the warranty card, and in the space
provided below. Refer to the model and serial numbers whenever you call upon your KENWOOD dealer for information or
service on the product.
Model DMX125BT Serial number
US Residence Only
© 2019 JVC KENWOOD Corporation
!B5K-0673-01_K_EnFrEs.indb 1
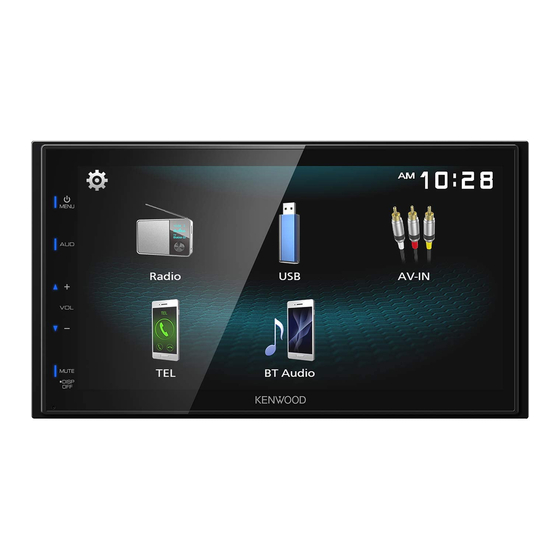
DMX125DAB
DMX125BT
MONITOR WITH RECEIVER
Quick Start Guide
Trim plate
Plaque de garniture
Placa de montaje
Register Online
Register your KENWOOD product at www.kenwood.com/usa/
B5K-0673-01 (K)
2019/04/11 14:59
Advertisement
Table of Contents

Related Manuals for Kenwood DMX125DAB


Summary of Contents for Kenwood DMX125DAB
- Page 1 Record the serial number, found on the back of the unit, in the spaces designated on the warranty card, and in the space provided below. Refer to the model and serial numbers whenever you call upon your KENWOOD dealer for information or service on the product.
-
Page 2: Table Of Contents
DAB Basic Operation ..................6 Presetting stations ....................6 • When you purchase optional accessories, check DAB Setup ........................ 6 with your KENWOOD dealer to make sure that USB ....................7 they work with your model and in your area. Preparation ......................... 7 •... -
Page 3: Getting Started
Getting Started [Bluetooth] Turn the ignition key of your car to ACC. Displays the Bluetooth Settings screen. The unit is turned on. [Screen] Press the <8MENU> button. [Dimmer] Touch [ Select the dimmer mode. “High” (Default) / “Mid” / “Low” [Demo] Select the demonstration mode. -
Page 4: Basics
4 + , – (Volume) • When android device with “Mirroring OB for • Adjusts volume. The volume will go up until 20 KENWOOD” application installed is connected. when you keep pressing [ + ]. 4 Switches to an external component connected to 5 MUTE/ DISP OFF (Display off) the AV-IN input terminal. -
Page 5: Radio
Radio Radio Radio Basic Operation Radio Setup Press the <8MENU> button. Touch [ Touch [Radio]. Set each item as follows. Ñ Source control screen [Auto Store] Automatically searches and stores the 6 stations with the strongest signals for the selected band. 1 Displays the information of the current station: “Auto Store”... -
Page 6: Dab
DAB Basic Operation DAB Setup Press the <8MENU> button. Touch [ Touch [DAB]. Set each item as follows. Ñ Source control screen Service List Displays the Service List screen. [TI] Displays the information of the current station: Service Name Switches to the traffic information automatically when the traffic bulletin starts. -
Page 7: Usb
Ñ For Video playback Preparation When the operation buttons are not displayed Ñ Connecting a USB device on the screen, touch the display. Remove the cap of the USB terminal. Connect the USB device with the USB cable. The unit reads the device and playback starts. ] : You can adjust image quality in video Ñ... -
Page 8: Ipod/Iphone
iPod/iPhone iPod/iPhone Preparation Playback operations Ñ Connecting iPod/iPhone Ñ Control the music you are listening to on the source control screen. • For Lightning connector models: Use USB Audio cable for iPod/iPhone—KCA-iP103 (optional accessory). • For details about connecting iPod/iPhone, see page 15 . -
Page 9: External Components
External Components External Components Using external audio/video players Rear view camera To use a rear view camera, the REVERSE lead Ñ Starting playback connection is required. For connecting a rear view camera. (P.14) Connect an external component to the AV-IN input terminal. -
Page 10: Bluetooth
Bluetooth Bluetooth Register your smartphone to the Make a phone call unit Press the <8MENU> button. You can use your Bluetooth smartphone when Touch [TEL]. paired to this unit. See the table below for each operation method. Turn on the Bluetooth function on your smartphone/cell-phone. -
Page 11: Controlling Audio
Controlling Audio Controlling Audio Playing Bluetooth Audio Device You can adjust various settings such as audio balance or subwoofer level. Press the <8MENU> button. Press the <AUD> button. Touch [BT Audio]. See the below for each operation method. Ñ Source control screen Controlling General Audio Press the <AUD>... -
Page 12: Installation
Installation Installation Before Installation • Connect the speaker wires correctly to the terminals to which they correspond. The unit may be Before installation of this unit, please note the damaged or fail to work if you share the ¤ wires or following precautions. -
Page 13: Installing The Unit
Installation Ñ Supplied accessories for installation Installing the unit Ñ Non-Japanese cars (3 m) Bend the tabs of the mounting sleeve with a screwdriver or similar utensil and attach it in place. ✎ NOTE (M5 × 6 mm) (M5 × 7 mm) •... - Page 14 Installation Ñ Microphone unit Ñ Removing the unit 1) Check the installation position of the microphone 1) Remove the trim plate by referring to step 1 in (accessory 4). “Removing the trim plate”. 2) Clean the installation surface. 2) Insert the extraction key (accessory 2) deeply into 3) Remove the separator of the microphone the slot as shown.
- Page 15 (not ST REMOTE Connect to vehicle’s steering remote supplied) matched to your car. harness. Contact your KENWOOD dealer for details. Accessory 4: Light Green (Parking sensor wire) Bluetooth Microphone Accessory 9: Extension cable For best safety, be sure to Connect to the vehicle’s...
- Page 16 Installation Ñ Connecting an iPod/iPhone/Android Android smartphone Micro USB to USB cable M4x6 REAR OUT FRONT OUT AV IN 1 3 5 7 2 4 6 8 iPod/iPhone 1 3 5 7 Lightning connector 2 4 6 8 CAM IN VIDEO OUT VIDEO IN KCA-iP103 (0.8m) Accessory 5 Accessory 6...
-
Page 17: About This Unit
About this Unit About this Unit More information Note for specifications Ñ Usable USB device Ñ Bluetooth section This unit can play MPEG1/ MPEG2/ MPEG4/ H.264/ Frequency MKV/ MP3/WMA/ AAC/ WAV/ FLAC/ OGG files stored : 2.402 – 2.480 GHz in a USB mass storage class device. -
Page 18: Copyrights
Bluetooth SIG, Inc. and any other materials provided with the distribution. use of such marks by JVC KENWOOD Corporation is Neither the name of the Xiph.org Foundation nor the under license. Other trademarks and trade names are names of its contributors may be used to endorse or those of their respective owners. - Page 19 Acerca de esta unidad For USA For Canada Ñ FCC WARNING Ñ IC (Industry Canada) Notice This device contains licence‐exempt 1. This device complies with Part 15 of the FCC transmitter(s)/receiver(s) that comply with Rules. Operation is subject to the following Innovation, Science and Economic Development two conditions: Canada’s licence‐exempt RSS(s).
- Page 20 Acerca de esta unidad For Argentina Supplier’s Declaration of Conformity Ñ Información acerca de la eliminación Trade Name: KENWOOD de equipos eléctricos y electrónicos Products: DIGITAL MEDIA RECEIVER al final de la vida útil (aplicable a los Model Name: DMX125BT países que hayan adoptado sistemas...
- Page 21 !B5K-0673-01_K_EnFrEs.indb 52 2019/04/11 14:59...