Table of Contents
Advertisement
Hard Disk
Recorder
Operating Instructions
To find out useful hints, tips and information about Sony products and services
please visit: www.sony-europe.com/myproduct/
© 2011 Sony Corporation
SVR-HDT500 / SVR-HDT1000
4-265-096-13(1)
Hookups and Settings
Watching TV Programmes
Recording
Playback
Erasing and Labelling
Copying to an External HDD
Device
Settings and Adjustments
Additional Information
Advertisement
Table of Contents

Related Manuals for Sony SVR-HDT1000


Summary of Contents for Sony SVR-HDT1000
- Page 1 Hard Disk Recorder Operating Instructions To find out useful hints, tips and information about Sony products and services please visit: www.sony-europe.com/myproduct/ © 2011 Sony Corporation SVR-HDT500 / SVR-HDT1000 4-265-096-13(1) Hookups and Settings Watching TV Programmes Recording Playback Erasing and Labelling...
-
Page 2: Warning
Never use the plug without the fuse cover. If you should lose the fuse cover, please contact your nearest Sony service station. Precautions • The supplied AC adaptor must be used to power this recorder. -
Page 3: Precautions
Sony. • If the hard disk needs to be formatted or replaced, it will be done at the discretion of Sony. All contents of the hard disk drive will be erased, including contents that violate copyright laws. - Page 4 On recording Make trial recordings before making the actual recording. On compensation for lost recordings Sony is not liable and will not compensate for any lost recordings or relevant losses, including when recordings are not made due to reasons including recorder failure, or...
-
Page 5: Table Of Contents
Table of Contents WARNING ..........2 Precautions . - Page 6 Copying to an External HDD Device Before Copying the Recorded Titles ......31 Connecting an external HDD device .
-
Page 7: Guide To Parts And Controls
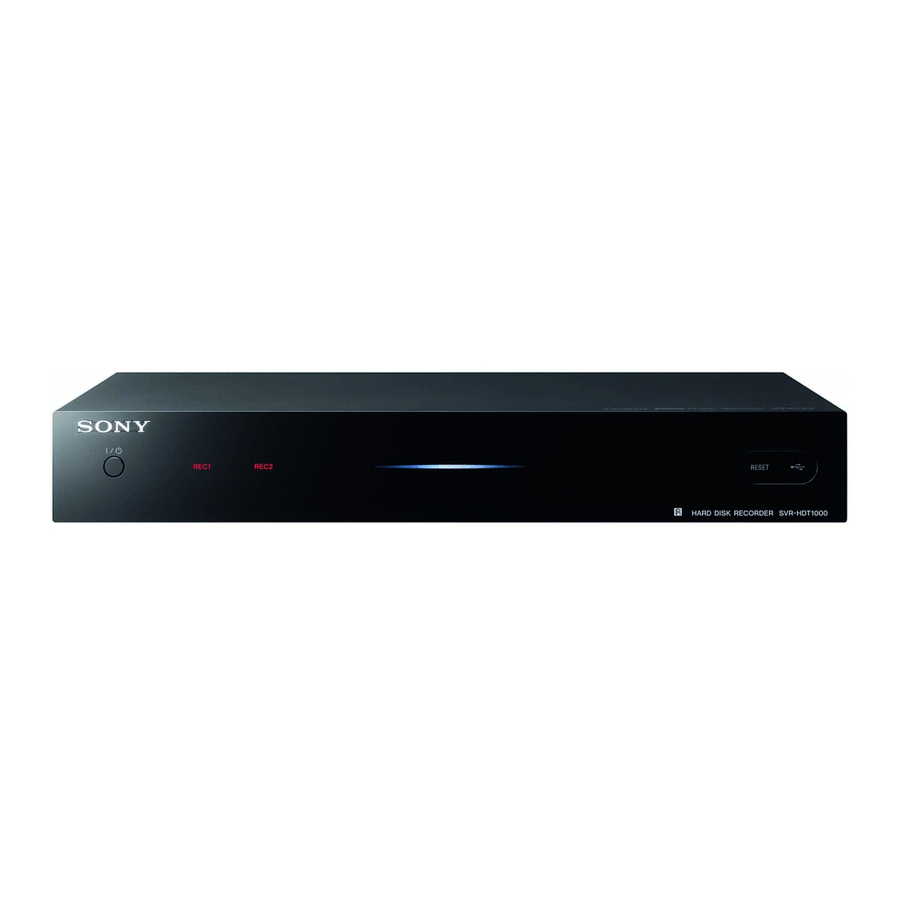
Guide to Parts and Controls For more information, see the pages in parentheses. Front panel A [/1 (on/standby) Turns the recorder on or off. B REC1/REC2 indicators C Power indicator Lights up in white when the recorder is turned on. USB jack (26, 28, 31) Connect a USB device to this jack. - Page 8 Remote Number 5, AUDIO, PROG +, N, and TV PROG + buttons have a tactile dot. Use the tactile dot as a reference when operating the recorder. A % (muting) Turns off the recorder’s output sound. If the sound is not turned off by pressing % (muting), press TV % (muting).
- Page 9 O REPEAT (25) Repeats a title/file. P z REC Starts recording a title. x REC STOP Stops recording a title. Q TV [/1 (on/standby) (44) TV t (input select) (44) TV PROG (programme) +/– (44) (volume) +/– (44) TV % (muting) (44)
-
Page 10: Hookups And Settings
Hookups and Settings Step 1: Connecting the Aerial Cable Connect the aerial cable by following the steps below. Do not connect the mains lead until you have made all the connections. To watch TV in standby mode, set “Standby Mode” to “Mode 2” in “Step 3: Easy Setup” (page 13) or use a splitter (not supplied) to divide aerial input signals between the TV and the recorder. -
Page 11: Step 2: Connecting The Tv And Audio Component
Hard disk recorder To connect a TV through an audio component Hard disk recorder HDMI cable (supplied) When connecting a Sony TV/audio component that is compatible with the “Control for HDMI” function, see page 17. HDMI cable (supplied) Audio component HDMI cable... -
Page 12: Connecting Other Cables
Connecting other cables To connect to video jacks Connecting to video jacks will enable you to view pictures. A Video output jack Yellow You will enjoy standard quality images. To connect to audio jacks Connecting to audio jacks will enable you to listen to sound. -
Page 13: Step 3: Easy Setup
Step 3: Easy Setup Be careful not to disconnect the cables or exit the “Easy Setup” function during this procedure. Insert two R6 (size AA) batteries by matching the 3 and # ends on the batteries to the markings inside the battery compartment. -
Page 14: Connecting To The Network
Connecting to the Network Use a LAN cable to connect to the LAN (100) terminal on the recorder. LAN cable (not supplied) Broadband ADSL modem/ router Cable modem To set the network settings Press SYSTEM MENU to select “Others,” “Connection,” then “Network” (page 37), and follow the on-screen instructions to complete the setup. -
Page 15: Watching Tv Programmes
Watching TV Programmes Watching TV Turn on the recorder and your TV. Then switch the input selector on your TV so that the signal from the recorder appears on your TV screen. Press PROG +/– to select the programme position. You can also select the programme position using the number buttons and To select a programme using the Channel... -
Page 16: Viewing Two Pictures Simultaneously - Pip (Picture-In-Picture)
To set the Favourite List You can quickly display the channel to watch if you stored your favourite channels. Press SYSTEM MENU and select “Channel.” Select “Edit Favourite List” in “Edit Channel.” Enter your four-digit password using the number buttons. The default password is “0000.”... -
Page 17: About The "Control For Hdmi" Functions For Bravia Sync (For Hdmi Connections Only)
About the “Control for HDMI” functions for BRAVIA Sync (for HDMI connections only) By connecting Sony components that are compatible with the “Control for HDMI” function with a supplied HDMI cable, operation is simplified as below: • One-Touch Play With one touch of the following buttons,... -
Page 18: Recording
Recording Using the EPG (Electronic Programme Guide) Display The Electronic Programme Guide is a guide showing the television programme schedule for a day or more at a time on your television. Digital Services availability and content depend on the broadcaster. Red button Green button TIMER... -
Page 19: Recording A Tv Programme Using The Epg
To search for programmes (Keyword/ Genre) Press / while the EPG screen is displayed. Press the yellow button to switch between “Keyword” and “Genre.” Select a genre or input a keyword, and press To input a keyword, see “Labelling a Folder/Title/File (Rename)”... -
Page 20: Setting The Timer Manually (Manual)
• To record the programme with recording” or “Series recording.” • If you press REC in step 2, “Single recording” can be set. • If one part of a Split Programme is set to be recorded, the other parts will be recorded automatically. -
Page 21: Checking/Changing/Cancelling Timer Settings (Timer List)
Checking/Changing/ Cancelling Timer Settings (Timer list) Checking/changing timer settings When you change the EPG timer settings, disappears and the function that adjusts the start/ end recording time automatically is disabled. Press TIMER. The “Timer list” display appears. • All: All the timer settings (The timer settings in Series Recording are displayed respectively.) •... -
Page 22: Recording A Tv Programme While Watching
Recording a TV Programme While Watching This section introduces the basic operation to record a current TV programme to the hard disk (HDD). z REC Press PROG +/– to select the programme position. Press z REC. Recording starts and stops automatically in 120 minutes. -
Page 23: Recording For Two Programmes
Recording for Two Programmes The recorder can record up to two programmes at once. Also, you can set timer recording two programmes at the same time. Press REC while watching a TV programme and recording another programme. Recording starts on the current programme. Press INFO to check the programme number/ station name and the tuner number (REC1/REC2). -
Page 24: Playback
Playback Playing Recorded Programmes Red button Press TITLE LIST. A Title name For the title set to be recorded manually, the programme station name and recording date and time are displayed (page 20). B Shows the current Drive. Press </ , to move to another Drive. -
Page 25: Playing From The Beginning Of The Programme You Are Recording (Chase Play)
Various playback options Buttons Operations (instant Replays the scene/briefly fast forwards the scene. replay/instant You can change the interval for instant replay/instant advance (page 35). advance) ./> When playing recorded titles: (previous/next) Goes to the beginning/end of the current title. When playing photo/music/video (data) files: Goes to the previous/next file. -
Page 26: Playing From The Usb Device
To play a specific portion repeatedly (Repeat A-B) Press OPTIONS to select “Playback” and then “Repeat A-B” during playback. Press at the starting point (point A) of the portion to be played repeatedly. Press OPTIONS to select “Playback” and then “Repeat A-B.” Continue playing to locate the ending point (point B) and press Repeat A-B play starts. - Page 27 Press TITLE LIST. The “Title list” appears. Press the same colour button on the remote. • Red button (“Home”): Goes back to the top layer. • Yellow button (“Media Type”): Switches the list by media type (TV/ Radio/Photo/Music/Video(Data)). Select “USB_Front” or “USB_Rear,” and press A Current folder B Media Type...
-
Page 28: Playing Mp3/Video (Data) Files
Playing MP3/video (data) files Follow steps 1 to 3 of “Playing photo files” on page 26. Select a music or video (data) file, and press Playback starts. To stop playback Press x (stop). Various playback options See “Various playback options” on page 25. To play a file repeatedly See “Playing repeatedly (Repeat)”... -
Page 29: Erasing And Labelling
Erasing and Labelling Erasing a Folder/Title/ File (Erase) Press TITLE LIST. Select the folder/title/file you want to erase using M/m. To erase multiple folders/titles/files, press the green button (“Select”). Press OPTIONS to select “Erase,” and press The display asks for confirmation. Select “Yes,”... - Page 30 To use the number buttons on the remote Press the number button while the input row is highlighted. • To switch the characters, press the number button repeatedly. • To insert a space, press SUBTITLE. • To switch the character types, press /. Only the characters displayed on the on-screen keyboard can be input with this recorder.
-
Page 31: Copying To An External Hdd Device
Copying to an External HDD Device Before Copying the Recorded Titles You can copy the recorded titles to a connected external device as a backup copy. Connecting an external HDD device Connect the external HDD device to the USB jack on the recorder. Hard disk recorder to USB jack HDD device... -
Page 32: Settings And Adjustments
Settings and Adjustments Using the System Menu Press SYSTEM MENU when you need to change the settings of the recorder. The default settings are underlined. Press SYSTEM MENU. Select a menu icon using </,, and press Title list (page 24, 26, 29) Displays the titles stored on the HDD or the connected USB device. -
Page 33: Recorder Settings (Setup)
Recorder Settings (Setup) AV Setting TV Type Select the playback picture size according to the type of connected TV. Select this when connecting to a 4:3 screen TV without a wide mode function. 16:9 Select this when connecting to a widescreen TV or TV with a wide mode function. -
Page 34: Language
If the HDMI OUT jack is connected to equipment not compatible with Dolby Digital signals, the PCM signals will be automatically output even when you select “On.” Audio Description Outputs the audio description. Turns off the function. AD Mixing Level Adjusts the mixing level of the main sound and the audio description. -
Page 35: Playback Settings
Playback Settings Instant Replay Sets the interval for instant replay (“15 Sec.”/“30 Sec.”/“60 Sec.”). Instant Advance Sets the interval for instant advance (“30 Sec.”/“60 Sec.”/“120 Sec.”). Slideshow Time Sets the time each frame is displayed (“3 Sec.”/“5 Sec.”/“10 Sec.”) Time Shift Duration Sets Time Shift recording time (“30 Min.”/“1 Hour”/“2 Hours (SD Only)”). -
Page 36: Aerial Reception Settings (Channel)
Aerial Reception Settings (Channel) Channel Scan Full Rescan Erases all the registered channels and scans the channels again. Enter your four-digit password using the number buttons. Select “Yes” using </,, and press The recorder starts scanning the channels. Select “Save” using M/m, and press Update Scan Scans for newly available channels. -
Page 37: Other Settings (Others)
Other Settings (Others) Diagnostics System Message When the recorder has failed to record a title, an error message is displayed. System Information Displays the system information. Signal Information Displays the signal information. Disk Disk Information You can check used/remaining space on the HDD and USB device. -
Page 38: Maintenance
Maintenance Software Update You can check the current software version of the built-in digital tuner and keep it up to date with the latest software. To update the software, enter your four-digit password. Over Air Updates the software Download automatically. Normally, select this position. -
Page 39: Additional Information
Should any problem persist, consult your nearest Sony dealer. Power The power does not turn on. , Check that the AC adaptor is connected securely to the DC IN jack on the rear panel of the recorder. -
Page 40: Sound
Sound There is no sound. , Re-connect all connections securely. , The connecting cable is damaged. , The input source setting on the audio component or the connection to the audio component is incorrect. , The recorder is in reverse play, fast- forward, slow motion, or pause mode. -
Page 41: Remote Control
Playback The recorder does not start playback from the beginning. , Resume play was activated (page 24). The music/photo/video (data) files do not play. , The files are not recorded in a format that the recorder can play (page 43). Time Shift Mode does not work. -
Page 42: Notes About This Recorder
The BRAVIA Sync features do not operate. , Your TV is not compatible with the BRAVIA Sync features. , “Control for HDMI” is set to “Off” in the “Connection” setup (page 37). , The recorder is connected to the TV via an amplifier. -
Page 43: Specifications
General Power requirements: AC adaptor: DC 12 V 3.3 A SVR-HDT500: DC 12 V 2.2 A SVR-HDT1000: DC 12 V 2.3 A Power consumption: SVR-HDT500: 30 W SVR-HDT1000: 31 W Dimensions (approx.): 320 × 50.5 × 231 mm (width/height/ depth) incl. - Page 44 While holding down TV [/1, enter the TV manufacturer’s code using the number buttons. If more than one code number is listed, try entering them one at a time until you find the one that works with your TV. Manufacturer Sony Grundig Hitachi LG/Goldstar Loewe Nokia Panasonic...
-
Page 45: Notices And Licenses For Software Used In This Product
Source code for these executables and libraries, as well as other executables and libraries, can be obtained using the following link: http://www.sony.net/Products/Linux/ GNU GENERAL PUBLIC LICENSE Version 2, June 1991 Copyright (C) 1989, 1991 Free Software Foundation, Inc., 51... - Page 46 These requirements apply to the modified work as a whole. If identifiable sections of that work are not derived from the Program, and can be reasonably considered independent and separate works in themselves, then this License, and its terms, do not apply to those sections when you distribute them as separate works.
- Page 47 10. If you wish to incorporate parts of the Program into other free programs whose distribution conditions are different, write to the author to ask for permission. For software which is copyrighted by the Free Software Foundation, write to the Free Software Foundation;...
- Page 48 For example, if you distribute copies of the library, whether gratis or for a fee, you must give the recipients all the rights that we gave you. You must make sure that they, too, receive or can get the source code. If you link other code with the library, you must provide complete object files to the recipients, so that they can relink them with the library after making changes to the library and recompiling it.
- Page 49 These requirements apply to the modified work as a whole. If identifiable sections of that work are not derived from the Library, and can be reasonably considered independent and separate works in themselves, then this License, and its terms, do not apply to those sections when you distribute them as separate works.
- Page 50 7. You may place library facilities that are a work based on the Library side-by-side in a single library together with other library facilities not covered by this License, and distribute such a combined library, provided that the separate distribution of the work based on the Library and of the other library facilities is otherwise permitted, and provided that you do these two things:...
- Page 51 Permission is hereby granted to use, copy, modify, and distribute this software (or portions thereof) for any purpose, without fee, subject to these conditions: (1) If any part of the source code for this software is distributed, then this README file must be included, with this copyright and no-warranty notice unaltered;...
- Page 52 Therefore, by using, distributing, or modifying the FreeType Project, you indicate that you understand and accept all the terms of this license. 4. Contacts There are two mailing lists related to FreeType: • freetype@nongnu.org Discusses general use and applications of FreeType, as well as future and wanted additions to the library and distribution.
- Page 53 A “png_get_copyright” function is available, for convenient use in “about” boxes and the like: printf(“%s”,png_get_copyright(NULL)); Also, the PNG logo (in PNG format, of course) is supplied in the files “pngbar.png” and “pngbar.jpg (88x31)” and “pngnow.png” (98x31). Libpng is OSI Certified Open Source Software. OSI Certified Open Source is a certification mark of the Open Source Initiative.
- Page 54 Keep this important information about how to re-tune your Digital TV Recorder during the switchover Television in the UK is going digital, bringing us all more choices and new services. Starting in late 2007 and ending in 2012, television services in the UK will go completely digital, TV region by TV region. Please see the overleaf to find out when your area switches to digital.
- Page 55 If you are missing any channels, it may be that they are not available in your area, or that your aerial needs upgrading. If you have any questions, please contact Sony on 0844 84 66 555 or visit www.sony.co.uk/support or call Digital UK on 0845 6 50 50 50 or visit www.digitaluk.co.uk †Calls charged at BT rate of 3p per minute daytime and 1p per minute evenings and weekends.
-
Page 56: Index
Index Words in quotations appear in the on-screen displays. “AD Mixing Level” 34 Aerial 10 Alternate Programmes 20 “Audio” 34 “Audio Description” 34 Audio output 12 “Auto Service Update” 36 “Auto Standby” 35 “AV Setting” 33 Batteries 13 BRAVIA Sync 17 “Change Password”... - Page 57 Searching fast reverse/fast forward 25 locating the beginning of the title 25 locating the previous/ next file 25 Series Recording 19 “Setup” 33 “Signal Information” 37 “Slideshow Time” 35 “Software Update” 38 Split Programmes 18 “Standby Mode” 13 “Subtitle” 34 “System Information”...
- Page 60 About how to re-tune your TV during the digital TV switchover, see page 54. © 2011 Sony Corporation 4-265-096-13(1)