
Related Manuals for Sharp DV-RW550U


Summary of Contents for Sharp DV-RW550U
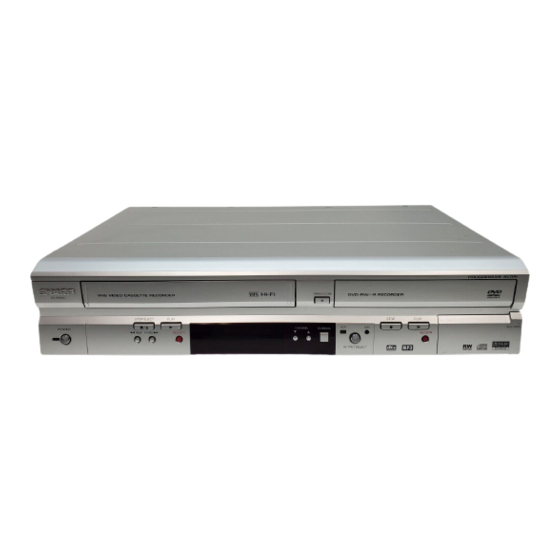
- Page 1 VCR/DVD RECORDER COMBINATION DV-RW550U OPERATION MANUAL Please read this Operation Manual carefully before using your VCR/DVD RECORDER COMBINATION. INSTRUCCIONES EN ESPAÑOL INCLUIDAS. The region number for this unit is 1.
-
Page 2: Before You Start
Serial No.: This symbol warns the user of uninsulated voltage within the unit that can cause dan- gerous electric shocks. This symbol alerts the user that there are important operating and maintenance instruc- tions in the literature accompanying this unit. DV-RW550U... -
Page 3: Important Safeguards
Important Safeguards 1. Read Instructions - All the safety and operating instructions should be read before the appliance is operated. 2. Retain Instructions- The safety and operating instructions should be retained for future reference. 3. Heed Warnings - All warnings on the appliance and in the operating instructions should be adhered to. - Page 4 • Do not remove the unit cabinet.Touching parts inside the cabinet could result in electric shock and/ or damage to the unit. For service and adjustment inside the cabinet, call a qualified dealer or service centre approved by SHARP. • Be sure to remove a disc and videotape, and unplug the AC power cord from the outlet before carrying the unit.
- Page 5 Others It is the intent of SHARP that this product be used in full compliance with the copyright laws of the United States and that prior permission be obtained from copyright owners whenever necessary. “Licensed under one or more of U.S. Pat. 4,972,484, 5,214,678, 5,323,396, 5,530,655, 5,539,829, 5,544,247, 5,606,618, 5,610,985, 5,740,317, 5,777,992, 5,878,080, or 5,960,037.”...
-
Page 6: Table Of Contents
Before you start ....2 Precautions ......2 Table of contents . -
Page 7: Features
This unit not only plays back DVDs, CDs and VHS tapes but also offers features for you to record on DVD discs and edit them after that.The following features are offered with this unit. Recording DVD MODE VCR MODE This unit is compatible with both DVD-RW, which is rewritable repeatedly, and DVD-R, which is available for one time recording only.Also, this unit allows you to record to the videotape. -
Page 8: Functional Overview
Front Panel ( * ) The unit can also POWER be turned on by pressing these buttons. POWER button / indicator (DVD/VCR) Press to turn on and off the unit. Red LED lights up when power is on. Cassette compartment (VCR) Insert a videotape here. - Page 9 Functional overview (cont’d) Remote Control VCR/DVD RECORDER COMBINATION ( * ) In DVD mode, the unit can also be turned on by pressing these buttons. 1. POWER button (DVD/VCR) Press to turn on and off the unit. 2. Number buttons (DVD/VCR) Press to select channel numbers.
-
Page 10: Installing Batteries In The Remote Control
Functional overview (cont’d) Installing batteries in the remote control Install two “AA” size batteries (supplied), matching their polarity to those indicated inside battery com- partment of the remote control. Note Incorrect use of batteries can result in hazards such as leakage and bursting. Please follow the instruction below. -
Page 11: Setting/Disc/Cd Menus
Functional overview (cont’d) Guide to Displays on-screen menu This unit uses the following on-screen menu for most operations: Easy Setting Menu, Advanced Setting Menu, Title List, and DISPLAY menu.They allow you to change the playback status of the disc during playback. The DISPLAY menu also gives you information on the playback status of the disc or a videotape. -
Page 12: Display Menu
Functional overview (cont’d) DISPLAY menu DVD mode press first. Press DISPLAY to call up the display menu.This menu will give you the information on the disc. Some operations are available while disc is played back. - - : - - : - - DVD-RW Video mode Stereo... -
Page 13: Display Message
Functional overview (cont’d) Front Panel Display Guide 1. Current status of the unit : Appears when a disc or a videotape play is paused. : Appears when playing back a disc or a videotape. : Appears when the timer programming or OTR has been set and is proceeding. -
Page 14: Connections
Antenna (Back of TV) Disconnect Plug in the AC power cord of this unit. Make one of the following connections, depending on the capabilities of the equipment you possess. Basic Audio AUDIO IN Audio cable (supplied) This unit DVD/VCR AUDIO OUT DVD/VCR S-VIDEO DIGITAL... -
Page 15: Connection To A Cable Box Or Satellite Box
Connection to a cable box or satellite box Connection A Cable Signal Select this connection when you want to view or record a scrambled channel.With this connection, channels cannot be changed on this unit. You can view or record ONLY the channels you have selected on the cable box or the satellite box. -
Page 16: Connection To An Audio System
Connection to an Audio System • When you change the connections, all devices should be turned off. • Refer to the operation manual accompanying external devices for more information. Method Stereo system Analog audio input jacks AUDIO Audio cable (supplied) This unit AUDIO OUT Connections... -
Page 17: Getting Started
The following will help you to understand easily how to record on DVD discs. Make sure batteries are in the remote control and you have connected this unit and the TV correctly. Step 1: Choose a disc type There are several types of recordable DVD discs to choose from. -
Page 18: Recording Speed
Step 3: Select the recording speed 0:58 1: Play back the recorded contents Hint You can select the title you want to play back from a displayed menu and immedi- ately start playback. Recorded contents are easi- ly accessible, with simple procedure of choosing a title on a chapter on the menu screen. -
Page 19: Channel Setting
Getting channels automatically Right after the purchase of the unit and whenever you move to a new area, we recommend available channels in your area be stored using “Auto Preset” in the Channel Preset of the setting menu. Press POWER to turn on the unit. -
Page 20: Adding/Deleting Channels
Adding/Deleting channels The channels you no longer receive or seldom watch can be deleted from the memory. You can also add channels manually into memory. Press SETUP. Easy Setting Menu or Advanced Setting Menu will appear. Select “Channel” using Cursor K / L, then press ENTER. -
Page 21: Selecting The Tv Stereo Or Sap
Selecting the TV Stereo or SAP You can select an audio channel to output from TV. Press SETUP. Easy Setting Menu or Advanced Setting Menu will appear. If Advanced Setting Menu is dis- played, proceed to STEP 3. Easy Setting Menu OSD Language English Clock... -
Page 22: Setting The Clock
Set the correct time before using Timer Recording. If a Public Broadcasting Service (PBS) station is available in your area, follow the Auto Clock Setting below. If not, follow the Manual Clock Setting on pages 23. Auto Clock Setting Make sure: •... -
Page 23: Manual Clock Setting
Manual Clock Setting SKIP 2 Press SETUP. Easy Setting Menu or Advanced Setting Menu will appear. If Easy Setting Menu is displayed, proceed to STEP 3. Advanced Setting Menu Playback Recording Display Select Video Clock Channel Disc Easy Setting Menu Select “Clock”... -
Page 24: Setting The Daylight Saving Time
Setting the Daylight Saving Time When Daylight Saving Time is ON, the unit clock will automati- cally move forward 1 hour on the first Sunday in April and move back 1 hour on the last Sunday in October. Press SETUP. Easy Setting Menu or Advanced Setting Menu will appear. -
Page 25: Selecting The Tv Aspect Ratio
Selecting the TV aspect ratio You can select the TV aspect ratio to match the formats of what you are playing back on the unit and your TV screen (4:3 standard or 16:9 widescreen TV). Press SETUP. Easy Setting Menu or Advanced Setting Menu will appear. -
Page 26: Recording
Information on DVD recording Information This unit can record on DVD-RW and DVD-R discs. DVD-RW discs allow you to record programs repeatedly, and the recorded contents can be erased. DVD-R discs allow you to record programs only once, and the recorded contents cannot be erased. You can record programs on DVD-R discs only in Video mode, while recording format for DVD-RW discs can be either Video mode or VR mode. -
Page 27: Restrictions On Recording
Information on DVD recording (cont’d) Restrictions on recording You cannot record copy-protected materials using this unit. Copy-protected materials includes DVD- Video discs and some satellite broadcasts. If copy-protected material is encountered during a recording, recording will be paused or stop automat- ically and an error message will be displayed on screen. -
Page 28: Formatting A Disc
Choosing the recording format of a blank disc When inserting a blank disc, the unit starts to initialize it automati- cally. After that, you can record on the disc with a recording format selected in the setting menu. SKIP 2 Press SETUP. -
Page 29: Reformatting A Disc
Reformatting a disc VR mode is the default recording format for DVD-RW. You can change it to Video mode from the setting menu. Press SETUP. Easy Setting Menu or Advanced Setting Menu will appear. Select “Disc” using Cursor K / L, then press ENTER. -
Page 30: Auto Chapter
You can set specific time interval for chapter marks. Press SETUP. Easy Setting Menu or Advanced Setting Menu will appear. If Advanced Setting Menu is dis- played, proceed to STEP 3. Easy Setting Menu OSD Language English Clock Channel DVD-RW Recording Format VR mode Timer Programming Auto Finalize... -
Page 31: Recording Audio Select (Xp)
Recording Audio Select (XP) You can enjoy high quality sound recording.This function works only when the recording speed is set at XP. Press SETUP. Easy Setting Menu or Advanced Setting Menu will appear. If Advanced Setting Menu is dis- played, proceed to STEP 3. Easy Setting Menu OSD Language English... -
Page 32: Basic Recording
Follow steps below to record TV programs. press first. Turn on the unit and load a recordable disc. Make sure that the TV input is set on the unit. This operation may take a while to be recognized. Select a recording speed using REC MODE. -
Page 33: Checking The Recording Picture And Sound Quality
Checking the recording picture and sound quality You can confirm the recording pic- ture and the sound quality for the recording speed you have selected before attempting to record on a DVD disc. press first. While the unit is in stop mode or recording mode with a DVD disc to record inserted, press... -
Page 34: One-Touch Timer Recording
This is a simple way to set the recording time in blocks of 30 minutes. Check that the disc has enough recordable space for the time you set. After finishing the recording, the recorder automatically goes into standby. press first. Turn on the unit and load a recordable disc. -
Page 35: Timer Recording
You can program the unit to record up to 8 programs, within a month in advance. Daily or weekly program recordings are also available. • Be sure to set the clock before programming a timer recording. • Insert a recordable disc or a videotape with an erase-protec- tion tab. - Page 36 Select a recording speed using Cursor K / L. Timer Programming Date Start Speed 1. JAN/01 12:57AM 1:57AM Refer to “Recording speed” on page 26. If you choose Auto, the unit automati- cally selects the best recording speed to make the best quality picture according to the remaining disc space.
- Page 37 If the timer program did not complete correctly, the error number appears on the timer pro- gramming list. Timer Programming Date Start JAN/01 12:57AM 1:57AM Each error number means: E1-22 Recording error other than E37-39 below E23-24 Unrecordable disc E25-28 Copy prohibited program Disc protected Disc full...
- Page 38 Notes on Timer Recording • If there is a power failure or the unit has been unplugged for more than 1 minute, the clock setting and all timer settings will be lost. Both DVD and VCR • If a programmed start and end time are the same, the recording will be set for 24 hours automatically.
-
Page 39: Hints For Timer Recording
Hints for Timer Recording The priority of overlapped settings s unit prioritizes recording as follows if the timer programmings are overlapped. A Timer Recording of lower priority will be canceled, start from the middle or stop on the way. Check the overlapped timer programmings and change the priority if necessary. A programming set first has priority When the starting time is same: A program with a lower program number... -
Page 40: Settings For An External Source
Settings for an external source Connection to an external source Connect the external source properly to the unit by using input jacks either LINE2 (Front) or LINE1 (Rear). When connecting an external equipment of monaural output to this unit, use AUDIO L jack of LINE1 (Rear) or LINE2 (Front). -
Page 41: Recording From An External Source
Settings for an external source (cont’d) Recording from an external source Before recording from an external source, see the instructions for the connection on page 40. 1. Turn on the TV and the unit, and be sure to select the input of the TV to which the unit is connected. -
Page 42: Dubbing Mode
You can copy a DVD disc to a videotape or copy a videotape to a DVD disc.This function will be pos- sible only if the DVD disc or the videotape is not copy protected. Before starting this function, pre- pare for the recording on the DVD-RW/-R disc or the videotape. - Page 43 VCR to DVD Select “VCR DVD” using Cursor K / L, then press ENTER. Dubbing Mode VCR DVD DVD VCR Press SETUP to exit Setting menu. press first. Select a recording speed using REC MODE. press first. Press PLAY B on the unit, and then press PAUSE F at the point you wish to start recording.
-
Page 44: Finalizing The Discs
You will need to finalize the discs recorded in Video mode to play them back on other DVD players. Finalizing may take several minutes up to an hour. (It can take up to 15 minutes for a disc recorded in Video mode and 60 minutes for a disc recorded in VR mode.) A shorter recording period on the... -
Page 45: Auto Finalize
Finalizing the discs (cont’d) Auto finalize You can finalize discs automatically using Auto Finalize function. This function automatically finalizes discs after all Timer Recordings are completed or when the disc space runs out. This function is available only for DVD-RW/-R recorded in Video mode. -
Page 46: Disc Playback
Information on DVD playback Before you attempt to play back DVD discs, read the following information. Playable discs This unit is compatible with the following discs. To play back a DVD, make sure that it meets the requirements for Region Codes and Color Systems as described below. Discs with the following logos can be played back on the unit. -
Page 47: Basic Playback
Playback press first. Press POWER on the remote control or the front panel of the unit. When you are playing back a DVD, turn on the TV and be sure to select the input to which the unit is connected. Press OPEN/CLOSE EJECT A to open the disc tray. - Page 48 press first. Press POWER on the remote control or the front panel of the unit. When you are playing back a DVD, turn on the TV and be sure to select the input to which the unit is connected. Press OPEN/CLOSE EJECT A to open the disc tray.
-
Page 49: Playing Back Discs Using The Disc Menu
Playing back discs using the disc menu A DVD disc contains a disc menu that describes the contents or allows you to customize the play- back. For example, the menu may offer choices for subtitle lan- guages, special features, or chapter selection. -
Page 50: Playing Back Discs Using The Title Menu
Playing back discs using the title menu Some DVDs have a title menu, which lists the titles available on them. It helps you to start play- back of a specific title. press first. Press TOP MENU. The title menu will appear. If the feature is not available, may appear on the TV screen. -
Page 51: Special Playback
Resume playback You can resume playback from where you stopped it last time. press first. During playback, press STOP C. The resume message will appear. Resume ON Fast forward / Fast reverse press first. During playback, press D or E. Every time you press D or E, approximate speed will be changed as follows. -
Page 52: Skipping Tv Commercials During Playback
Skipping TV commercials during playback You can skip TV commercials by pressing CM SKIP in order to enjoy the recorded programs without interruption. press first. During playback, press CM SKIP. Normal playback will start at 30- second advanced point from where you press CM SKIP. -
Page 53: Step By Step Playback
Step by step playback press first. During playback, press PAUSE F. Playback will be paused and sound will be muted. Slow forward / Slow reverse playback press first. During playback, press PAUSE k, then press D or E. Every time you press D or E, approximate speed will change as fol- lows. -
Page 54: Zoom
Zoom press first. During playback, press ZOOM. Zoom menu will appear. 0:00:00 DVD-Video There are four options (x1.0, x1.2, x1.5 and x2.0), which will be displayed excluding the current zoom rate. Disc Playback Special playback (cont’d) Select a desired zoom factor to zoom using Cursor K / L, then press ENTER. -
Page 55: Marker Setup
Marker Setup press first. This feature allows you to assign a specific point on a disc to be called back later. During playback, press DISPLAY. The display menu will appear. 0:00:00 DVD-Video Select icon using Cursor { / B,then press ENTER. Marker Setting menu will appear. -
Page 56: Search
Title/Chapter search press first. Using SKIP H / G During playback, press SKIP G to skip the current title or chapter and move to the next. To go back to the beginning of the current title or chapter, press SKIP H. Press it repeatedly to go to the previous titles or chapters. Using DISPLAY During playback, press DISPLAY. -
Page 57: Track Search
Track search press first. Using SKIP H / G During playback,press SKIP Gto skip the current track and move to the next. To go back to the beginning of the current track, press SKIP H. Press it repeatedly to go to the previous tracks. Using DISPLAY During playback, press DISPLAY. -
Page 58: Repeat/Random/Program Playback
Repeat/Random/Program playback Repeat playback press first. During playback, press DISPLAY. Display menu will appear. 0:00:00 DVD-Video Select icon using Cursor { / B , then press ENTER. Repeat menu will appear. Screen for DVD: 0:15:25 DVD-Video Title Chapter A - B Screen for Audio CD: 0:15:25 Audio CD... -
Page 59: Random Playback
Repeat/Random/Program playback (cont’d) Random playback With this function, you can play back a disc randomly instead of playing back in the original order. Press SETUP. Easy Setting Menu or Advanced Setting Menu will appear. Program playback You can program a playback sequence in your desired order. -
Page 60: Selecting A Format Of Audio And Video
Selecting a format of audio and video You can select a desired audio and video format. Selections depend on the contents of the disc you are playing back. Switching audio soundtracks When playing back a DVD-Video disc recorded with two or more soundtracks (these are often in different languages), you can switch between them during play-... -
Page 61: Switching Subtitles
Selecting a format of audio and video (cont’d) When playing back Audio CDs or MP3 files, you can switch among stereo, the left channel only and the right channel only. press first. During playback, press DISPLAY. Display menu will appear. Screen for Audio CD: 0:15:25 Audio CD... -
Page 62: Switching Camera Angles
Selecting a format of audio and video (cont’d) Switching camera angles Some DVD Video discs feature scenes shot from two or more angles.The disc package should be marked with an angle icon if it contains multi-angle scenes. press first. During playback, press DISPLAY. -
Page 63: Editing
Information on disc editing Guide to a Title List Title List allows you to check the titles recorded on the disc easily. You can choose a title to play back from this screen and easily edit the titles as you prefer. Original JAN/1 1:00AM CH12 XP Original... -
Page 64: Editing Discs In Vr Mode
Information on disc editing (cont’d) Editing discs in VR mode For discs with VR mode, you can use either “Original” menu or “Playlist” menu, which is created from the original for editing. Editing original titles The following items are available for editing of the original titles. -
Page 65: Editing Dvd-Rw Discs In Video Mode
Editing DVD-RW discs in Video mode Deleting titles You can delete titles which you do not need anymore. Be advised that the titles once deleted cannot be recovered. In Video mode, recordable disc space of DVD-RW disc will increase when the last title on the Title List is deleted. -
Page 66: Putting Names On Titles
Editing DVD-RW discs in Video mode (cont’d) Putting names on titles You can name titles and change the names from this menu. The names you put on the titles will be displayed on a Title List. Press SETUP. Select “Disc” using Cursor K / L, then press ENTER. -
Page 67: Guide To Edit Title Name
Editing DVD-RW discs in Video mode (cont’d) To enter a title name, follow the STEPs of “Guide to edit title name” on this page. character set Title List - Edit Title Name A B C a b c 1 2 3 JAN/1 1:00AM CH12 XP 0:00:59 area for entering title names... -
Page 68: Setting Or Clearing Chapter Markers
Editing DVD-RW discs in Video mode (cont’d) Setting or clearing chapter markers You can put chapter markers on each title and use them for the chapter search feature. You can specify time internal for chapter markers for titles last more than 5 minutes. Press SETUP. -
Page 69: Editing Dvd-Rw Discs In Vr Mode (Original)
Editing DVD-RW discs in VR mode (Original) Deleting titles Deleting titles When a title is deleted from an Original in VR mode, the record- able disc space will increase. Be advised that the titles once deleted cannot be recovered. Press SETUP. Select “Disc” using Cursor K / L, then press ENTER. -
Page 70: Setting Titles To Protect
Editing DVD-RW discs in VR mode (Original) (cont’d) Setting titles to protect To prevent accidental editing or title erasing, you can protect the contents in the Original menu. Press SETUP. Select “Disc” using Cursor K / L, then press ENTER. Disc menu will appear. -
Page 71: Releasing Titles From Protecting
Editing DVD-RW discs in VR mode (Original) (cont’d) Releasing titles from protecting You can cancel the titles-protecting feature. Press SETUP. Select “Disc” using Cursor K / L, then press ENTER. Disc menu will appear. Disc Playlist Original Format Finalize Disc Protect OFF Select “Original”... -
Page 72: Editing Dvd-Rw Discs In Vr Mode (Playlist)
Editing DVD-RW discs in VR mode (Playlist) Deleting titles In VR mode, even if a title is delet- ed from a Playlist, the original title will remain on the Original. The recordable disc space will not increase. Press SETUP. Select “Disc” using Cursor K / L, then press ENTER. -
Page 73: Deleting Parts Of Titles
Editing DVD-RW discs in VR mode (Playlist) (cont’d) Deleting parts of titles You can delete a specific part of a title. Even if a part of a title is deleted from the Playlist, the original title will remain as it was, and the recordable disc space will not increase. -
Page 74: Putting Names On Titles
Editing DVD-RW discs in VR mode (Playlist) (cont’d) Select “Delete” using Cursor K / L, then press ENTER. Confirmation window will appear. Playlist - Scene Delete JAN/1 1:00AM CH12 XP 0:00:59 Putting names on titles You can name the titles and change the names from this menu. - Page 75 Editing DVD-RW discs in VR mode (Playlist) (cont’d) Select a desired title using Cursor K / L / { / B, then press ENTER. Edit menu will appear. Playlist Title Delete Scene Delete Edit Title Name Chapter Mark Index Picture Title Dividing Title Combining JAN/1 1:00AM CH12 XP...
-
Page 76: Setting Or Clearing Chapter Markers
Editing DVD-RW discs in VR mode (Playlist) (cont’d) Setting or clearing chapter markers You can put chapter markers on each title and can use them for the chapter search feature. You can put a chapter marker anywhere you want until the total number of the markers reaches 999. - Page 77 Editing DVD-RW discs in VR mode (Playlist) (cont’d) Use SKIP H / G, E / D, PLAY B, and PAUSE F to decide the point for a new chapter marker. Or, use SKIP H / G to decide a chapter marker that you will delete.
-
Page 78: Setting Pictures For Thumbnails
Editing DVD-RW discs in VR mode (Playlist) (cont’d) Setting pictures for thumbnails You can set an image picture to each title as thumbnail. It helps you remember the contents of the title during playback.The default setting chooses the first scene of each title as the thumbnail. -
Page 79: Dividing A Title
Editing DVD-RW discs in VR mode (Playlist) (cont’d) Dividing a title You can divide a title into two new titles. Press SETUP. Select “Disc” using Cursor K / L, then press ENTER. Disc menu will appear. Disc Playlist Original Format Finalize Disc Protect OFF Select “Playlist”... -
Page 80: Combining Titles
Editing DVD-RW discs in VR mode (Playlist) (cont’d) Combining titles You can combine two titles into a single title. Press SETUP. Select “Disc” using Cursor K / L, then press ENTER. Disc menu will appear. Disc Playlist Original Format Finalize Disc Protect OFF Select “Playlist”... -
Page 81: Adding Titles To A Playlist
Editing DVD-RW discs in VR mode (Playlist) (cont’d) Adding titles to a Playlist You can add or delete a title on the Playlist as you prefer. You can add up to 99 titles to a Playlist. Press SETUP. Select “Disc” using Cursor K / L , then press ENTER. -
Page 82: Deleting A Playlist
Editing DVD-RW discs in VR mode (Playlist) (cont’d) Deleting a Playlist A Playlist can be deleted if no longer needed. Press SETUP. Select “Disc” using Cursor K / L, then press ENTER. Disc menu will appear. Disc Playlist Original Format Finalize Disc Protect OFF Select “Playlist”... -
Page 83: Editing Dvd-R Discs
Deleting titles You can delete titles which you no longer need.The recordable disc space will not change. The deleted titles cannot be recovered. Press SETUP. Select “Disc” using Cursor K / L, then press ENTER. Disc menu will appear. Disc Title List Format Finalize... -
Page 84: Putting Names On Titles
Editing DVD-R discs (cont’d) Putting names on titles You can name the titles and change the names from this menu. The names you put on the titles will be displayed on a Title List. Press SETUP. Select “Disc” using Cursor K / L, then press ENTER. - Page 85 Editing DVD-R discs (cont’d) Select “Edit Title Name” using Cursor K / L, then press ENTER. A window for entering a title name will appear. Title List - Edit Title Name A B C a b c 1 2 3 JAN/1 1:00AM CH12 XP 0:00:59 To enter a title name, follow...
-
Page 86: Changing The Setting Menu
Changing the Setting menu The following table shows the items which you can change the settings and their default settings. Refer to the following table for your convenience. Setting menu Items (highlight is the default) 1. Language setting Disc Menu Language Pages 87-88 Audio Language Subtitle Language... -
Page 87: Language Setting
Changing the Setting menu Press STOP C C if you are playing back a disc. Press SETUP. Easy Setting Menu or Advanced Setting Menu will appear. If Advanced Setting Menu is displayed, proceed to STEP 3. Select “Advanced Setting Menu” using Cursor K / L, then press ENTER. - Page 88 Changing the Setting menu Select a desired item using Cursor K / L, then press ENTER. Disc Menu Language (Default : English) Set the language for Disc Menu. Playback TV Aspect 4:3 Letter Box Parental Lock Disc Menu Language English Audio Language Original Subtitle Language...
-
Page 89: Display Setting
Changing the Setting menu Press STOP C if you are playing back a disc. Press SETUP. Easy Setting Menu or Advanced Setting Menu will appear. If Advanced Setting Menu is displayed, proceed to STEP 3. Select “Advanced Setting Menu” using Cursor K / L, then press ENTER. - Page 90 Changing the Setting menu Select a desired item using Cursor K / L, then press ENTER. OSD Language (Default : English) Set the language for OSD (On-Screen Display). You can also choose this setting from the Easy Setting Menu. Display OSD Language English FL Dimmer...
-
Page 91: Audio Setting
Changing the Setting menu Choose the appropriate Audio settings for your equipment. Press STOP C C if you are playing back a disc. Press SETUP. Easy Setting Menu or Advanced Setting Menu will appear. If Advanced Setting Menu is displayed, proceed to STEP 3. Select “Advanced Setting Menu”... - Page 92 Changing the Setting menu Settings for PCM (Default : 48kHz) • Select a setting using Cursor K / L, then Digital Out - PCM press ENTER. 48kHz 96kHz Your setting will be activated. 48kHz 96kHz Settings for Dolby Digital (Default : Stream) •...
-
Page 93: Settings For Parental Lock Level
Changing the Setting menu Settings for Parental lock level Some DVD-Video discs feature a Parental Lock level. Playback will stop if the disc’s general rating exceeds the level you set. It will require you to enter a password before the disc will be played back.This feature prevents your children from viewing inappropriate materials. - Page 94 Changing the Setting menu Settings for Parental lock level (cont’d) Select “Parental Lock” using Cursor K / L, then press ENTER. Parental Lock (Default : All) Set the Parental Lock level. Playback TV Aspect 4:3 Letter Box Parental Lock Disc Menu Language English Audio Language Original...
-
Page 95: Vcr Functions
Press POWER on the remote control or the front panel of the unit. When you are playing a video- tape, turn the TV on and be sure to select the input to which the unit is connected. press first. Insert a prerecorded video- tape, then press PLAY B to begin playback. -
Page 96: One-Touch Timer Recording
Recording and One-touch Timer Recording (cont’d) One-touch Timer Recording This feature allows you to set the recording length simply by pressing REC/OTR on the remote control or the front panel of the unit. press first. During normal recording, press REC/OTR to begin one- touch timer recording. -
Page 97: Time Search
Time search This feature allows you to go to a specific point on a videotape by entering the exact amount of time you wish to skip in order to reach the point. press first. Press SEARCH repeatedly so that the Time search menu appears. -
Page 98: Others
Before requesting service for this unit, check the table below for a possible cause of the problem you are experiencing. Some simple checks or a minor adjustment on your part may eliminate the problem and restore proper operation. Symptom The power does not turn on. There is no picture. - Page 99 Symptom There is no picture. Picture noise appears. There is no sound. Sound is noisy. This unit does not play back the disc. Playback image freezes for a second. The disc does not start playback from the beginning. The unit starts playing back the disc automatically.
- Page 100 Symptom The disc tray does not open when you press OPEN/CLOSE A. “Repairing” appears on the display. Repairing Picture noise appears. The tape does not play. Recording does not start immediately after you press REC/OTR. The remote control does not function. The motor rotates even when playback / recording is stopped.
-
Page 101: Rf Converter Output
* If you are still having trouble with this unit after checking Troubleshooting, write down the error code and the error description, and call a SHARP Authorized Service Center for inspection. (See Service Information on page 104.) You can watch the TV programs with the tuner of the unit. -
Page 102: Language Code
Language Code (Afan) Oromo 6159 Abkhazian 4748 Afar 4747 Afrikaans 4752 Albanian 6563 Amharic 4759 Arabic 4764 Armenian 5471 Assamese 4765 Aymara 4771 Azerbaijani 4772 Bashkir 4847 Basque 5167 Bengali;Bangla 4860 Bhutani 5072 Bihari 4854 Bislama 4855 Breton 4864 Bulgarian 4853 Burmese 5971... -
Page 103: Glossary
Analog audio An electrical signal that directly represents sound. In contrast, digi- tal audio can be an electrical sig- nal, but is an indirect representa- tion of sound. See also Digital audio. Aspect ratio The width of a TV screen relative to its height. -
Page 104: Specifications
Note: The specifications and design of this product are subject to change without notice. Service Information (For the U.S.) For the location of the nearest SHARP Authorized Service Center, or to obtain product literature, accessories, supplies or customer assistance, please call 1-800-BE-SHARP (1-800-237-4277) or visit SHARP’s website (http://www.sharpusa.com). -
Page 105: Español
Este símbolo previene al usuario del voltaje aislado dentro de la unidad que puede provo- car descargas eléctricas peligrosas. Este símbolo advierte al usuario que existen instrucciones de operación y de mantenimien- to en la literatura incluida en esta unidad. DV-RW550U... - Page 106 Importantes Medidas de Seguridad y Precauciones 1) Lea las instrucciones - Lea detenidamente todas las instruc- ciones de seguridad y operación antes de usar el producto. 2) Conserve las instrucciones - Conserve las instrucciones de seguridad y operación para consultas futuras. 3) Respete las advertencias - Observe estrictamente todas las advertencias impresas en el producto y las incluidas en el manual de instrucciones.
- Page 107 Estas instrucciones le ayudarán a entender fácilmente cómo grabar discos DVD. Asegúrese que las pilas están en el mando a distancia y que ha conectado correctamente esta unidad y el TV. Paso 1: Elija un tipo de disco Puede elegir entre distintos tipos de discos DVD grabables.
- Page 108 Paso 3: Seleccione la velocidad de grabación 0:58 1: Reproduzca el contenido grabado Sugerencia Puede seleccionar el título que desea reproducir de un menú indicado y empiece a reproducir inmedi- atamente. El contenido grabado se puede acceder fácilmente con un simple procedimiento de elegir un título en un capítulo en la pantalla del menú.
- Page 109 Reproducción con videograbadora Presione POWER en el mando a distancia o el panel frontal de la unidad. Cuando reproduzca una cinta, conecte el TV y asegúrese de seleccionar la entrada donde se conecta la unidad. press first. Coloque una cinta pregraba- da y presione PLAY B para empezar la reproducción.
- Page 110 Grabación y grabación con temporizador de un toque (VCR) Grabación Antes de grabar, asegúrese de que: • Se seleccionó el canal deseado presionando los botones numéricos en el mando a dis- tancia o CHANNEL K / L en el panel frontal de la unidad. •...
- Page 111 Note...
- Page 112 Product, and shall constitute full satisfaction of all claims, whether based on contract, negligence, strict liability or otherwise. In no event shall Sharp be liable, or in any way responsible, for any damages or defects in the Product which were caused by repairs or attempted repairs performed by anyone other than an authorized servicer.