Table of Contents
Advertisement
Advertisement
Table of Contents

Related Manuals for Craftsman 917.257651


Summary of Contents for Craftsman 917.257651
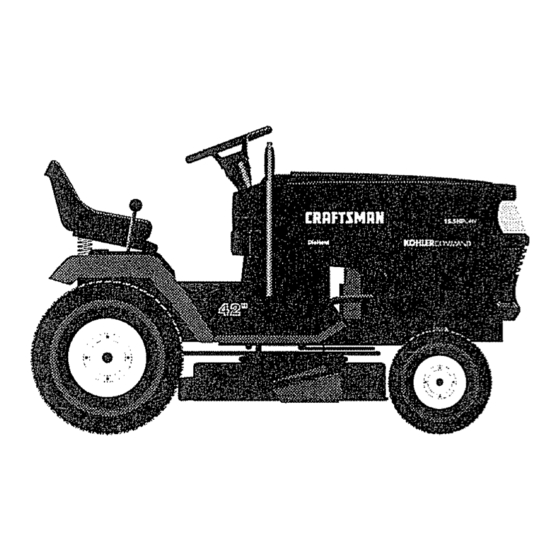
- Page 1 S A/ S MODEL o Assembly o Operation Customer Responsibilities o Service and Adjustments Repair Parts CAUTION: Read and follow 917.257651 all safety rules and instructions OWNER'S MANUAL before operating this equipment. ®...
- Page 2 Safe Operation IMPORTANT: THIS CUTTING MACHINE IS CAPABLE OF AMPUTATING HANDS AND FEET AND THROWING OBJECTS. FAILURE TO OBSERVE THE FOLLOWING SAFETY INSTRUCTIONS COULD RESULT IN SERIOUS INJURY OR DEATH, GENERAL OPERATION Read, understand, and foltow all instructions in the manual and on the machine before starting •...
- Page 3 For two (2) years from the date of purchase, if this riding equipment is maintained, lubricated and tuned up according to the instructions in the owner's manual, Sears will repair or replace, free of charge, any parts found to be defective _n material or workmanship..
-
Page 4: Table Of Contents
TABLE OF SAFETY RULES PRODUCT SPECIFICATIONS CUSTOMER RESPONSIBILITIES WARRANTY ;... TRACTOR ACCESSORIES ;... ASSEMBLY OPERATION UNDEX Accessories Adjustments: Brake ... 21 Carburetor ... 23 Mower Front*To-Back ... 20 Side-To-Side ... 20 Throttle Control Cable ...23 Air Filter, Engine ... Air Screen, Engine ... AssembZy ... -
Page 5: Accessories
PERFORMANCE Sears offers a wide variety of attachments that fit your tractor. Many of these are listed below with brief explanations of how they can help you. This list was current at the time of publication; however, it may change in future years - more attachments... - Page 6 CONTENTS OF HARDWARE PACK Parts Bag contents shown full size (1) Knob (1) Shoulder Bolt 5/16-18 (1) Washer 17/32 x 1-3/16 x 12 Gao (2) Lock Washers (2) Screws #10 x 5/8 (2) Weld Nuts #10 (2) Washers 3/16 x 3/4 x 16 Gauge CP_!It!!lII!llU (2) Hex Bolts 1/4-20 x 3/4 (¢...
- Page 7 Your new tractor has been assembled at the factory with exception of those parts left unassembled for shipping purposes To ensure safe and proper operation of your tractor all parts and hardware you assemble must be tightened securely the correct tools as necessary to insure proper tightness. TOOLS REQU1RED FOR ASSEMBLY A socket wrench set will make assembly easier wrench sizes are listed,...
- Page 8 HOW TO SET UP YOUR TRACTOR PREPARE BATTERY (See Fig. 2) u,m,ull CAUTION: Wear eye and face shield. & Wash hands or clothing accidentally in contactwith Do not smoke. Fumes from charged battery acid are explosive, Read the instructions battery vent caps, Always wear gloves, clothing and goggles to protect hands, skin and eyes.
- Page 9 INSTALL BATTERY (See Figs. 4 and 5) CAUTION: Do not short battery termi- nals, Before installing battery, remove rings, etc. metal bracelets, wristwatch Positive terminal must be connected first to prevent sparking tal grounding. Lift hood to raised position. Be sure battery drain tube has not come loose and is securely attached to drain in battery tray Lower battery into battery tray with terminals to front of tractor.
- Page 10 ,IH,I iNSTALL MULCHER PLATE (See Figs.7A & 7B) install two latch hooks to mulcher plate using screw, washer, lock washer, and weld nut as shown. NOTE: Pre-assemb[e weld nut to latch hook by inserting weld nut from the top with hook pointing down •...
- Page 11 i,J_=,J , KNOW YOUR TRACTOR READ THIS OWNER'S MANUAL Compare the i[lustrations with your tractor to familiarize yourself with the location of various controls and adjustments, Save this manual for future reference, THROTTLE/CHOKE CONTROL LIGHT SWITCH CLUTCH/BRAKE PEDAL HEIGHT ADJUSTMENT KNOB Our tractors conform to the safety standards of the American National Standards Institute°...
- Page 12 The operation of any tractor result in severe eye damage. your tractor or performing any adjustments or repairs. mask for over the spectacles or Standard safety glasses. HOW TO USE YOUR TRACTOR TO SET PARKING BRAKE (See Fig. 9) Depress clutch/brake pedal into full "BRAKE"...
-
Page 13: Carburetor
TO OPERATE MOWER (See Your tractor is equipped with an operator presence sensing switch Any attempt by the operator to leave the seat with the engine running and the attachment clutch engaged will shut off the engine. • Select desired height of cut Lower mower with attachment lift controt. - Page 14 TO START ENGINE (See Fig. 9) When starting engine for the first time or if engine has run out of fuel, it wilt take extra cranking time to move fuel from the tank to the engine,. Depress clutch/brake pedal and set parking brake, °...
- Page 15 i_ ,,,,i iii ... CUSTOME Ill ml FILL IN DATES REGULAR SERVICE Check Brake Operation Check Tire Pressure Check for Loose Fasteners Sharpen/Replace Mower Blades Lubrication Chart ,,check Battery Level!Recharge Clean Batter;/and Terminals CheckTransaxle Cooling Adjust Blade Belt(s) Tension Adjust Motion Drive Belt(s) Tension ,, ,, , .L,...
- Page 16 CUSTO TRACTOR Atways observe safety rules when performing any mainte- nance. BRAKE OPERATION ff tractor requires more than six (6) feet stopping distance at high speed in highest gear, then brake must be adjusted. (See "TO ADJUST BRAKE" in the Service and Adjust- ments section of this manual) TIRES Maintain proper air pressure in all tires (See "PROD-...
- Page 17 CUSTOM V-BELTS Check V-belts for deterioration and wear after 100 hours of operation and replace if necessary, adjustable Replace belts if they begin to s!ip from wear TRANSAXLE COOLING Keep transaxle free from build-up of dirt and chaff which can restrict cooling, ENGINE LUBRICATION Only use high quality detergent oil rated with API service...
- Page 18 CUSTOMER CLEAN AER SCREEN (See Fig. 17) Air' screen must be kept free of dirt and chaff to prevent engine damage from overheating. Clean with a wire brush or compressed air to remove dirt and stubborn dried gum fibers. CLEAN AIR INTAKE/COOLING To insure proper cooling, make sure the grass screen, cooling fins, and other external surfaces of the engine are...
- Page 19 SERVICE AN i,,,,,i,,, i ill i, i, ii i i i i CAUTION: BEFORE PERFORMING Depress clutch/brake Place gearshift lever in neutral (N) position. Place attachment clutch Turn ignition key "OFF" and remove key. Make sure the blades and all moving parts have completely stopped. Disconnect spark plug wire from spark plug and place wire where it cannot come in contact with plug.
-
Page 20: Side-To-Side
SERVMCE AND ADJUSTMENTS TO LEVEL MOWER HOUSING Adjust the mower while tracto_ is parked on level ground or driveway. Make sure tires are propedy "PRODUCT SPEC! FtCATIO NS" on page 3 of this manual). If tires are over or underinf]ated, you will not properly adjust your mower,. - Page 21 i , Ill SERVICE AN iml,i TO REPLACE MOWER BLADE (See Fig. 25) The mower blade drive belt may be replaced without tools. Park the tractor on level surface° Engage parking brake_, BELT REMOVAL - • Remove tractor from mower MOWER"...
- Page 22 SERWCE AND ADJUSTMENTS TO ADJUST STEERING WHEEL if steering wheel crossbars are not horizontal (left to right) when wheels are positioned straight forward, remove steer- ing wheel and reassemble per instructions in the Assembly section of this manual TOE=IN/CAMBER FRONT WHEEL The front wheel toe-in and camber are not adjustable on your tractor.
-
Page 23: Throttle Control Cable
SERVmCE AND ADJUSTMENTS ENGINE CONTROL ADJUST THROTTLE (See Fig. 31) The throttle control has been preset at the factor*/ and adjustment should not be necessary. Checkadjustment described below before loosening cabfe necessary, proceed as follows: With engine not running, move throttle control lever from slow (,.¢_.) to choke (\I) position lever from choke (1\1) to fast (,re,) post on... -
Page 24: Cleaning
Immediately prepare your tractor for' storage at the end of the season or if the tractor wilt not be used for 30 days or more CAUTION: Never store the tractor with gasoline in the tank inside a building where fumes may reach an open flame or spark, Allow the engine to cool before storing in any enclosure. -
Page 25: Air Screen
TROUIBLESHOOT NG PROBLEM CAUSE Will not start Out of fuel Engine not "CHOKED" properly Engine flooded Bad spark p_ug Dirty air fitter Dirty fuel filter Water in fuel Loose or damaged wiring Carburetor Engine valves out of adjustment Hard to start Dirty air filter Bad spark plug Weak or dead batiery... - Page 26 r,,i, ,u TROUBLESHOOTING PROBLEM CAUSE Engine continues to run Faulty operator-safety presence control system when operator leaves seat with attachment clutch engaged Poor cut - uneven Worn, bent or toose blade Mower deck not level Buildup of grass, leaves, and trash under mower Bent blade mandrel Clogged mower deck vent holes from buildup of grass, {eaves, and trash around mandrels...
-
Page 27: Schematic
OF THE LIGHTS WILL CHANGE WITH ENGINE SPEED. WILL DIM, AS THE ENGINE 1S ---4_) "--- REMOVABLE SPEEDED UP, THE LIGHTS WILL CONNECTIONS BECOME THEIR BRIGHTEST 917.257651 BLACK GROUNDING CONNECTOR BLACK SPARK _-PLUG 2B VOLTS AC MIN. @ 3600 RPM...