
Related Manuals for Yamaha NS-P41


Summary of Contents for Yamaha NS-P41
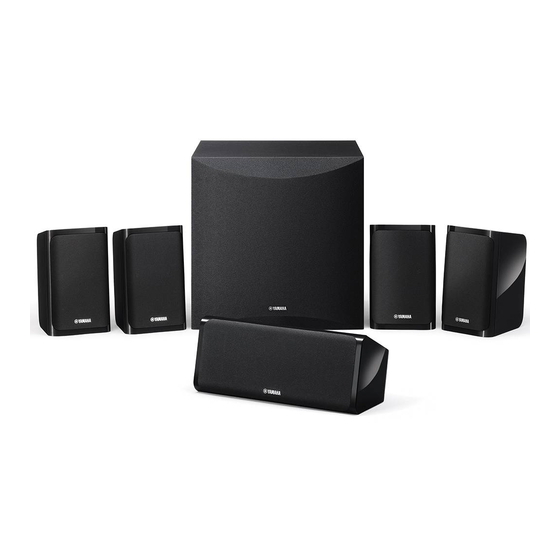
- Page 1 (NS-B40 + NS-C40 + NS-SW050) SPEAKER PACKAGE PACKAGE ENCEINTES OWNER’S MANUAL MODE D’EMPLOI MANUAL DE INSTRUCCIONES...
- Page 2 Owner’s Manual in a safe place for future reference. damaged in any way, such as power-supply cord or plug is damaged, liquid has been spilled or objects have This applies only to products distributed by YAMAHA fallen into the apparatus, the apparatus has been CORPORATION OF AMERICA.
- Page 3 Yamaha Installation service personnel. • Yamaha cannot be held responsible for injury to you or • Confirm that the finished installation is safe and secure. Also, damage of the products caused by improper use or carry out safety inspections periodically.
- Page 4 Pulling by from qualified Yamaha service personnel. the cord can damage it and cause electric shocks or a fire. • Do not do the following: •...
- Page 5 Maintenance WARNING • If the temperature or humidity changes drastically, water TO REDUCE THE RISK OF FIRE OR ELECTRIC SHOCK, droplets (condensation) may form on the unit surface. If water DO NOT EXPOSE THIS APPLIANCE TO RAIN OR droplets form, immediately wipe them off with a soft cloth. If MOISTURE.
-
Page 6: Table Of Contents
Contents Package contents..........1 Using the Subwoofer ......... 5 Adjusting the subwoofer before use ....5 Installing the speakers........1 ADVANCED YAMAHA ACTIVE SERVO Installing the front, center, and surround speakers ............2 TECHNOLOGY II..........6 Installing the subwoofer........2 TWISTED FLARE PORT ........6 Wall-mounting the speakers........2... -
Page 7: Installing The Speakers
Installing the speakers Installing the front, center, Wall-mounting the speakers and surround speakers You can mount the speakers on the wall as follows. Front speakers: Place the two front speakers on the Install screws into a solid wall or wall support left and right sides of the TV facing directly forward. -
Page 8: Connecting The Speakers
Connecting the speakers Caution: Make sure the power cables for the subwoofer and your other AV components are disconnected from the AC wall outlets before making any connections. Connection diagram Surround speakers Right Left Center speaker SPEAKERS FRONT SURROUND CENTER Amplifier ANTENNA (BD/DVD) -
Page 9: Connecting The Power Cables
(or “S”) for all of the NS-P40 speakers. Insert the bare wire. If you’re connecting the subwoofer to a Yamaha DSP Release the tab so that it closes securely on the amplifier or AV receiver, connect to its SUBWOOFER bare wire, not the insulation. -
Page 10: Using The Subwoofer
Using the Subwoofer Twisted Flare Port Outputs super-bass sound. VOLUME control Adjusts the volume level. Turn the control clockwise to increase the volume, and counterclockwise to decrease the volume. Power indicator Lights up Green when the POWER switch is turned ON;... -
Page 11: Advanced Yamaha Active Servo Technology Ii
ADVANCED YAMAHA ACTIVE SERVO TECHNOLOGY II In 1988, Yamaha brought to the marketplace speaker systems utilizing YST (Yamaha Active Servo Technology) to give powerful, high quality bass reproduction. This technique uses a direct connection between the amplifier and speaker, allowing accurate signal transmission and precise speaker control. -
Page 12: Troubleshooting
If this product doesn’t work as expected, look for a possible cause below. If the issue you are experiencing is not listed, or you cannot resolve it after reading through these instructions, disconnect the power cable and contact an authorized Yamaha dealer or service center. ■ Front, surround speakers (NS-B40) and center speaker (NS-C40) -
Page 13: Specifications
NS-B40 ............83 dB/2.83 V, 1 m specifications as of the publishing date. To obtain the latest NS-C40............84 dB/2.83 V, 1 m manual, access the Yamaha website then download the Dimensions (W x H x D) manual file. NS-B40 ..112 x 176 x 116 mm (4-3/8" x 6-7/8" x 4-5/8") NS-C40...276 x 111 x 118 mm (10-7/8"... - Page 14 à Ceci ne s’applique qu’aux produits distribués par YAMAHA l’intérieur de l’appareil, exposition de l’appareil à la CORPORATION OF AMERICA. pluie ou à l’humidité, fonctionnement anormal ou chute...
- Page 15 Yamaha qualifié. • N’exposez pas l’appareil à la pluie, ne l’utilisez pas près • Yamaha ne peut être tenu responsable des dommages d’une source d’eau ou dans un milieu humide et ne déposez corporels et matériels causés par une mauvaise manipulation pas dessus des récipients (tels que des vases, des bouteilles ou...
- Page 16 Perte de capacités auditives réparer l’appareil par le revendeur auprès duquel vous l’avez acheté ou par un technicien Yamaha qualifié. • N’utilisez pas l’appareil de manière prolongée à un niveau • Veillez à ne pas faire tomber l’appareil et à ne pas lui sonore trop élevé...
- Page 17 Avis Informations Indique des points qui doivent être observés pour À propos des fonctions et données inté- éviter un dysfonctionnement ou endommagement du grées au produit produit et une perte des données. • Il n’y a aucune distinction entre les haut-parleurs de gauche et Alimentation/cordon d’alimentation de droite.
- Page 18 Sommaire Contenu de l’emballage........1 Utilisation du subwoofer ........5 Réglage du caisson de graves avant utilisation..5 Installation des enceintes .........1 ADVANCED YAMAHA ACTIVE SERVO Installation des enceintes avant, centrale et surround ............2 TECHNOLOGY II..........6 Installation du subwoofer ........2 TWISTED FLARE PORT ........
-
Page 19: Installation Des Enceintes
Installation des enceintes Installation des enceintes avant, Suspension murale des enceintes centrale et surround Vous pouvez suspendre les enceintes au mur de la façon suivante. Enceintes avant: Placez les deux enceintes avant à Fixez les vis dans un mur solide ou dans un gauche et à... -
Page 20: Connexion Des Enceintes
Connexion des enceintes Attention: Vérifiez que les câbles d’alimentation du subwoofer et de vos autres éléments AV sont débranchés des prises secteur avant d’ e ffectuer la moindre connexion. Schéma des connexions Enceintes surround Droite Gauche Enceinte centrale SPEAKERS FRONT SURROUND CENTER Amplificateur... -
Page 21: Connexion Des Câbles D'alimentation
NS-P40. convenablement en serrant le fil dénudé et Si vous raccordez le subwoofer à un amplificateur DSP non l’isolant. ou un ampli-tuner AV Yamaha, utilisez sa sortie SUBWOOFER. Vérifiez que les fils sont bien maintenus en tirant doucement dessus. -
Page 22: Utilisation Du Subwoofer
Utilisation du subwoofer Twisted Flare Port Produit les sons très graves. Commande VOLUME Ajuste le niveau sonore. Tournez cette commande dans le sens des aiguilles d’une montre pour augmenter le volume, et dans le sens inverse des aiguilles d’une montre pour baisser le volume. Témoin d’alimentation S’allume en verte lorsque le commutateur POWER est en position ON ;... -
Page 23: Advanced Yamaha Active Servo Technology Ii
ADVANCED YAMAHA ACTIVE SERVO TECHNOLOGY II En 1988, Yamaha lance sur le marché des enceintes dotées de la technologie YST (Yamaha Active Servo Technology), un système assurant une restitution puissante et de haute qualité des basses fréquences. Grâce à une connexion directe entre l’amplificateur et l’... -
Page 24: En Cas De Problème
Yamaha. ■ Enceintes avant, surround (NS-B40) et enceinte centrale (NS-C40) Problème... -
Page 25: Fiche Technique
Dimensions (L x H x P) publication du manuel. Pour obtenir la version la plus NS-B40 .............112 x 176 x 116 mm récente du manuel, accédez au site Web de Yamaha puis NS-C40............276 x 111 x 118 mm téléchargez le fichier du manuel concerné. - Page 26 Yamaha. alimentación y desenchufe el cable de alimentación de la toma • Yamaha no se responsabiliza por sus lesiones o los daños a de CA. A continuación, solicite una inspección al distribuidor sus productos debidos a uso inapropiado o modificaciones a quien compró...
- Page 27 Tirar del cable puede unidad o al Servicio técnico de Yamaha. deteriorarlo, con el consiguiente riesgo de descargas eléctricas • No haga lo siguiente: o incendio.
- Page 28 Manipulación ADVERTENCIA PARA REDUCIR EL RIESGO DE INCENDIO Y • No coloque productos de vinilo, plástico o caucho sobre esta DESCARGA ELÉCTRICA, NO EXPONGA ESTA UNIDAD unidad. De lo contrario, el panel de la unidad podría A LA LLUVIA O A LA HUMEDAD. decolorarse o deformarse.
- Page 29 Utilizar el subwoofer.......... 5 Ajuste del altavoz de ultragraves antes de Instalar los altavoces ..........1 utilizarlo............5 Instalar los altavoces frontales, central, y ADVANCED YAMAHA ACTIVE SERVO surround ............2 Instalar el subwoofer..........2 TECHNOLOGY II..........6 Instalar los altavoces en la pared......2 TWISTED FLARE PORT ........
-
Page 30: Instalar Los Altavoces
Instalar los altavoces Instalar los altavoces frontales, Instalar los altavoces en la pared central, y surround Puede instalar los altavoces en una pared de la manera siguiente. Altavoces frontales: Sitúe los dos altavoces frontales Fije los tornillos a una pared firme o en un en los lados derecho e izquierdo del televisor totalmente hacia delante. -
Page 31: Conectar Los Altavoces
Conectar los altavoces Precaución: Antes de realizar las conexiones, compruebe que los cables de alimentación para el subwoofer y los otros componentes AV no estén conectados a las tomas de CA. Diagrama de conexión Altavoces Surround Derecho Izquierdo Altavoz central SPEAKERS FRONT SURROUND... -
Page 32: Conectar Los Cables De Alimentación
Si conecta el subwoofer a un amplificador DSP de no la parte del aislamiento. Yamaha o a un receptor AV, conéctelo a la salida Compruebe que la conexión sea segura SUBWOOFER. tirando ligeramente del cable. -
Page 33: Utilizar El Subwoofer
Utilizar el subwoofer Twisted Flare Port Da salida a sonidos ultragraves. Control VOLUME Ajusta el nivel del volumen. Gire el control a la derecha para subir el volumen y a la izquierda para bajarlo. Indicador de alimentación Se ilumina en verde si el interruptor POWER está en la posición ON;... -
Page 34: Advanced Yamaha Active Servo Technology Ii
ADVANCED YAMAHA ACTIVE SERVO TECHNOLOGY II En 1988, Yamaha comercializó unos sistemas de altavoces que utilizaban la tecnología YST (Yamaha Active Servo Technology, Tecnología avanzada de servo activo de Yamaha) para posibilitar una reproducción de graves potente y de alta calidad. Esta técnica utiliza una conexión directa entre el amplificador y el altavoz, permitiendo una gran precisión en transmisión de señales y control de altavoces. -
Page 35: Solucionar Problemas
Yamaha autorizado. ■ Altavoces frontales, surround (NS-B40), y central (NS-C40) - Page 36 Yamaha Global Site https://www.yamaha.com/ Yamaha Downloads http://download.yamaha.com/ Manual Development Group © 2018 Yamaha Corporation Published 06/2018 IPEI-A0 VAS0180 10-1 Nakazawa-cho, Naka-ku, Hamamatsu, 430-8650 Japan...