
Related Manuals for Motorola TETRA CEP400


Summary of Contents for Motorola TETRA CEP400
- Page 1 CEP400 TETRA Portable Terminal Basic User Guide Bedienungsanleitung Guide d'utilisation Guía básica del usuario Algemene gebruikershandleiding When printed by Motorola...
- Page 2 MENU...
-
Page 3: Table Of Contents
Contents Safety Information ......Disposal Information ....... . . Copyright Information . - Page 4 Getting Started ....... . 22 Battery ..........22 Installing the Battery .
- Page 5 Quick Reference Guide ......43 © Motorola Inc., 2009 MOTOROLA and the stylized M Logo are registered in the U.S. Patent and Trademark Office. All other product or service...
-
Page 6: Safety Information
The CEP400 is restricted to occupational use only to satisfy ICNIRP RF energy exposure requirements. Before using the products, read the RF energy awareness information and operating instructions in the Product Safety and RF Exposure booklet (Motorola Publication part number ) to ensure compliance with RF energy 6864117B25 exposure limits. -
Page 7: Icon Conventions
Accordingly, any copyrighted Motorola computer programs contained in the Motorola products described in this manual may not be copied, reproduced, modified, reverse-engineered, or distributed in any manner without the express written permission of Motorola. Furthermore, the purchase of Motorola products shall not be... -
Page 8: Cep400 Overview
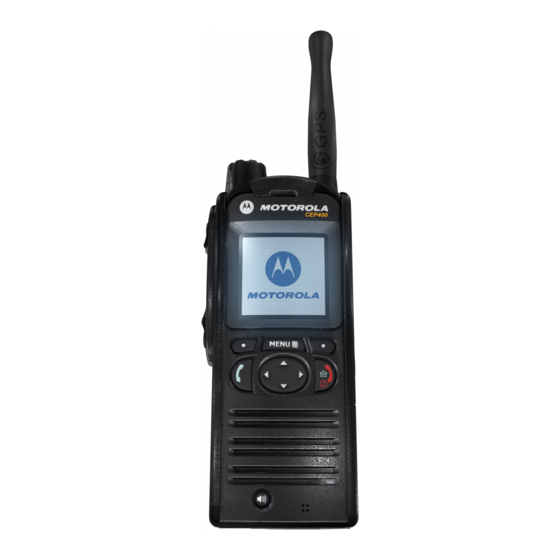
CEP400 Overview Controls and Indicators The numbers below refer to the illustration on the inside front cover. Number Description Antenna LED (Indicator) Top Microphone Activated during Simplex, high-audio calls such as Group Calls. External Antenna Connector Used with the digital car kit to connect the RF signal to the external antenna. - Page 9 Number Description Four Way Navigation Key Press up, down, left or right for list scrolling, while moving around the menu hierarchy, or for alphanumeric text editing. You can enter digits using the Navigation Up and Downs keys. Send Key Used to initiate or answer Duplex calls (such as Phone Calls), or send status and text messages.
-
Page 10: Audio Signal Tones
Audio Signal Tones = High Tone; = Low Tone; Description Type Repeated Idle • Back to Home display • Back to rotary volume use when rotary scroll Once timer expires • Back to coverage • Back to full service Clear to send Once Bad key press Once... - Page 11 Description Type Repeated Call disconnected or Once failed due to network Wrong number dialed No tone DMO (Direct Mode) Once Entering DMO Exiting Once Local site trunking — Once Entering/Exiting Every three Phone ring back seconds, until the (sending) called user answers or call is rejected Phone busy Every 0.5 seconds...
-
Page 12: Periodic Alert
Description Type Repeated Every 4 seconds, Simplex Private until the call is Pre-emptive Priority Call answered or (PPC) ring rejected. Every 4 seconds, until the call is Duplex Private PPC ring answered or rejected. Once, upon entering Limited service limited service. New mail received Once New Group Call... -
Page 13: Soft Keys
Soft Keys Press to select the option that appears in the display directly above the left or right soft key. Menu Key Menu key has two functions. Press to enter: MENU • The menu (when not in the menu). The CEP400 menus allow you to control your CEP400 settings. -
Page 14: Function Keys
Function Keys For information on the function assigned to each Side and Navigation Key please refer to your Service Provider. The required time you need to press function keys to activate a one- touch function is set as default to 1 second. This time may be set, however, by your Service Provider. -
Page 15: Speaker Control Key
Speaker Control Key Press to activate the earpiece (low audio), PHF (low audio) or speaker (high audio), depending on the menu settings. Type of Call Menu Setting Key Use Menu > Setup > Audio Speaker On/Off for Group > Audio Toggle > Spkr Cntrl and Private Calls Simplex call Menu >... -
Page 16: The Led Status Indicator
The LED Status Indicator The LED indicator shows the states of your CEP400. Indicator Status Solid green In use Flashing green In service Solid red Out of service Flashing red Connecting to a network/Entering DMO Transmit Inhibit (TXI) in service / Solid orange Channel busy in DMO First solid then... -
Page 17: List Of Menu Items
List of Menu Items Messages Inbox Outbox Templates Predefined Send Status Contacts <Name 1> <Name 2> Security PIN Protect Change Code Keylock Air Encrypt K Validity TMSCK Validity Covert Mode On/Off Vibrate Setup Vibrate Vibe then Ring Vibe Only Ring Only Details... - Page 18 List of Menu Items (Cont’d) Setup (cont’d) Audio Audio Profile Profile 1 Howling Supr Enabled Disabled Audio Toggle Always Loud Spkr Cntrl Volume Adj. Mode Individual Common Tones Keypad Tone All Tones Talk Permit No Tone Short Tone Normal Tone Clear to send Tone On Tone Off...
- Page 19 List of Menu items (Cont’d) More... Group Setup Scan Scanning On/Off Select List Active List Scan Lists <40 lists> My Groups <FolderName> [New Group] My Private Num My Info My Phone Num Recent Calls Dialed Received Missed Networks Networks Sel Home Only Select Net Trunked Mode...
-
Page 20: The Display
The Display When you use your CEP400, icons appear on the display to indicate the following conditions. Status Icons Status icons appear when your phone is engaged in certain activities or when you have activated certain features. Status Icon Description Trunked Mode Operation (TMO) Signal Strength Allows you to check signal strength. - Page 21 Status Icon Description All Tones Off / Duplex & Simplex Ring Muted Indicates that all alert tones are off in the CEP400 or both Simplex Ring volume is set to 0 and Duplex Ring volume is set to 0. Simplex Ring Muted Indicates that Simplex Ring volume is set to 0 and Duplex Ring volume is set to more then 0.
-
Page 22: Menu Icons
Menu Icons The following icons make it easy to identify the menu items at first glance. Menu Icon Description Main Menu Items/Context Sensitive Menu Appears above if the main menu items/context MENU sensitive menu are active. Messages • Send status messages, •... -
Page 23: Contact Icons
Inbox Icon Description Time and Date Stamp in Message View Indicates the time and date of message arrival. Delivery Status Received Indicates delivery status for Store & Forward messages. Contact Icons In the contact list display, the following icons may appear next to the contact numbers to indicate the type of stored number. -
Page 24: Getting Started
Getting Started Battery Installing the Battery 1. Remove the battery from its protective clear plastic case. 2. Insert the battery top into the compartment as illustrated. 3. Carefully press the battery bottom downward until it clicks into place. Replacing the Battery 1. -
Page 25: Charging The Battery
Charging the Battery Motorola approved chargers provide optimum performance. Other chargers may not fully charge your Motorola Lithium-Ion battery or may reduce the life of the battery. The CEP400 can be either On or Off during charging. 1. Insert the connector on the charger into the socket at the base of the CEP400. -
Page 26: Attaching The Antenna
Attaching the Antenna Turn the CEP400 Off before installing or removing the antenna. Insert the bottom of the antenna into the screw-in base on the top of the CEP400. Turn clockwise until snug. Do not force. Powering On/Off (On Off/End/Home Key) To power On, press and hold . -
Page 27: Unlocking The Cep400
The TXI Mode remains active at power On. You will be asked whether to leave the TXI Mode On or not. Ensure you have left the RF sensitive area before deactivating Transmit Inhibit. Press the Yes soft key to deactivate the TXI Mode. If the CEP400 was previously used in Trunked Mode, it will register to the network. -
Page 28: Selecting Tmo Or Dmo Operation
Selecting TMO or DMO Operation Entering TMO or DMO Enter TMO or DMO in one of the following ways: • From the Home display press Optns and select Direct Mode if the CEP400 is in TMO. • From the Home display press Optns and select Trunked Mode if the CEP400 is in DMO. -
Page 29: Group Calls
Group Calls A Group Call is a communication between you and others in a group. A group is a pre-defined set of subscribers enabled to participate in and/or invoke a Group Call. Groups are organized in maximum three folders. Each folder may contain folders and several groups. -
Page 30: Deleting Favorite Folder
Deleting Favorite Folder 1. Press and select More... > Group Setup > My Groups. MENU 2. Highlight a group folder name and press MENU 3. Select Delete Folder. 4. Press Yes to confirm. You cannot delete the last favorite folder. Selecting a Group When you navigate in the Favorite folders and select a DMO group, your terminal will switch between TMO and DMO (and vice-versa). -
Page 31: Tmo Group Calls
desired folder. The display shows the last selected group in that folder. TMO Group Calls In TMO the CEP400 is used with your Service Provider’s infrastructure. Making a TMO Group Call 1. From the Home display and if this is the required group, press and hold the PTT. -
Page 32: Dmo Group Calls
DMO, which are on the same frequency and group as your CEP400. In DMO it is only possible to place the following call types: Group Calls, Emergency Group Calls, Private and Private Simplex Calls. When you start a call, the members of the selected group who have their units turned on will receive the Group Call. -
Page 33: Private, Phone, And Pabx Calls
Private, Phone, and PABX Calls If you are in an on-going Group Call wish to make a new call, press to ignore the current call. Dial the number Creating a Contact 1. From the Home display using Direct Private Number Dialing One- Touch Button enter the number editor. -
Page 34: Dialing Via The Contact List
Dialing via the Contact List You can also use the contact list to select a number you previously stored. Press Contcs and search the stored number by scrolling ) or by entering up to 12 characters of the contact name using alphabetic search. If the contact has more than one number, use to select the number. -
Page 35: Receiving A Private Call
3. To end the call, press Your terminal can alert you of an incoming call. Select the alert settings in the Vibrate menu and Tones menu items. Phone and PABX Calls The Phone Call allows you to call a landline telephone number or a cellular mobile phone number. -
Page 36: Emergency Mode
Emergency Mode You can send and receive Emergency Group Calls in Trunked Mode or in Direct Mode. If your terminal is configured to operate through a gateway, Emergency calls can be placed through the gateway. You can initiate an Emergency Group Call to and receive it from: •... -
Page 37: Hot Microphone Feature
Due to no delivery confirmation in DMO, Alarm Sent information confirms only sending the alarm. Pressing the Emergency button, even if Transmit Inhibit is activated, causes the CEP400 to transmit immediately. The CEP400 must NOT be within the RF sensitive area when entering Emergency Mode. -
Page 38: Making An Emergency Group Call
Making an Emergency Group Call • Hot Microphone enabled – to initiate an Emergency Group Call, press and hold Emergency Button. • Hot Microphone disabled – to initiate an Emergency Group Call, press and hold Emergency Button. When the display has changed to Emergency Group Call hold PTT and wait for talk permit tone (if configured) and talk. -
Page 39: Messages
Messages Sending a Status Message Select the desired group, then press and select MENU Messages > Send Status. Select status and press or PTT. Sending a User-defined Message Press and select Messages > Templates. Scroll and MENU choose your required template. Select Send, or press or PTT. -
Page 40: Handling Unread (New) Messages
Handling Unread (New) Messages Press and select Messages > Inbox. Scroll to the message MENU and select Read soft key. To read a long message, press More to read the next page and Back to return to the previous page. Press and select to Store / Delete / Delete All / Reply / MENU... -
Page 41: Tips & Tricks
Tips & Tricks Home Key Not sure where you are? Want to get back to Home display? Press Backlight Control You can either disable backlight (covert operation) or have it automatically turned on, by pressing any key. Third option is semi- auto, which means that only switching on the radio, pressing assigned button to the backlight feature and charging can trigger backlight. - Page 42 “My Groups” Folders You can select any group (TMO or DMO) and add it to your personal folder. In the Home display, press to quickly access your “My Groups” folders. Options (in the Home Display) You can easily change folder, select groups, switch between TMO and DMO (and vice-versa), and other functions via the Home display Options.
- Page 43 • To automatically set date and time press and select MENU Setup > Time & Date > System Update. Pick one out of three options accordingly to your needs: • Off – System Update is turned off • Time only – time is updated •...
-
Page 45: Quick Reference Guide
CEP400 Using the CEP400 Menu System Making a TMO Emergency Group Call Enter TMO. Press and hold the • To enter the menu, press MENU Emergency button. Emergency alarm is • To scroll through the menu, press Quick Reference Guide sent automatically. - Page 46 Making a DMO Simplex Private Call Tips & Tricks • Unified Contact List Enter DMO. From the Home display You can keep several numbers (Private, • Home Key using Direct Private Number Dialing Mobile, Home, Work, PABX, Other) for Not sure where you are? Want to get One-Touch Button enter the number the same person under the same back to Home display? Press...