Table of Contents
Advertisement
Advertisement
Table of Contents

Related Manuals for Sanyo SCP-4900


Summary of Contents for Sanyo SCP-4900
- Page 1 SCP-4900 Operating Guide (Draft) Dual Band...
-
Page 2: Table Of Contents
Table of Contents Getting to Know your Phone ..........6 Front View of Phone................. 6 Viewing the Display Screen..............8 Turning your Phone ON and OFF ............9 Unlocking the Phone................9 Using the Battery..................10 Understanding Roaming ..........12 Understanding How Roaming Works............. - Page 3 Using Smart Punctuation................ 28 Entering Symbols and Numbers............. 28 Entering SMILEYS.................. 29 Adjusting Volume ............30 Changing Ringer/Key Volume ..............30 Silencing the Ringer ................30 Adjusting Volume During a Conversation ..........31 Muting a Call.................... 31 Managing Messaging ............. 32 Setting Up Your Voicemail...............
- Page 4 Adding a Phone Number or Address to an Internal Phone Book Entry47 Adding a Call Alarm From the Internal Phone Book ......48 Call Alarm Alerts ..................48 Call Alarm Menu..................48 Editing an Internal Phone Book Entry ..........49 Selecting a Ringer/Image Type for an Entry .........
- Page 5 Changing the Menu Language..............64 Setting TTY Mode ..................64 Setting Your Phone’s Security ........65 Accessing the Security Menu ..............65 Locking Your Phone ................. 65 Unlocking Your Phone ................65 Locking the Keypad ................. 66 Unlocking the Keypad ................66 Changing the Lock Code................
- Page 6 Using the Calculator................78 Using World Clock..................78 Using the Voice Services of Your Phone ......79 Using Voice-Activated Dialing ..............79 Programming Voice Dial Tag to Your Phone .......... 79 Using Voice Memo ..................80 Setting Up Screen Call ................82 Knowing Performance and Safety Guidelines ....
-
Page 7: Getting To Know Your Phone
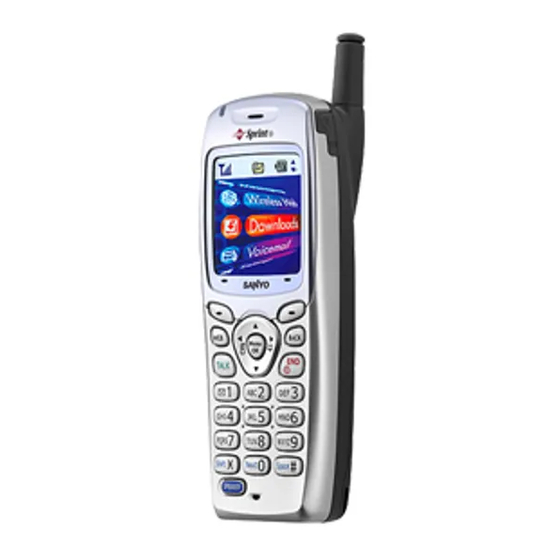
Getting to Know your Phone Front View of Phone 3. Antenna 17. LED (green/red lamp) 16. Earpiece 1. Volume key 15. Headset Jack Sprint PCS 2. Memo key Jul 24, 02(Mon) 12:30pm 14. LCD (display) Email 4. Soft key (left) 13. - Page 8 1. Volume key: Lets you adjust the receiver volume during a call, or ringer volume in Standby mode. Lets you off the ringer while ringing. 2. Memo key: Long press for Memo recording, and short press for Memo playing when the clamshell is open.
-
Page 9: Viewing The Display Screen
Viewing the Display Screen This list identifies some of the more common symbols you’ll see on your display screen. shows your current signal strength. The more lines you have, the stronger your signal. means your phone cannot find a signal. tells you a call is in progress. -
Page 10: Turning Your Phone On And Off
Soft Keys You can select the menus, which are described at the bottom line of the display by pressing the corresponding soft keys (left/right). In this User Manual, the explanation for selecting such menus are as shown below: Press MSG. (Press the soft key corresponding to MSG.) Turning your Phone ON and OFF Turning your Phone ON:... -
Page 11: Using The Battery
Using the Battery Installing the Battery Your Sprint PCS Phone comes with a Lithium Ion battery. Follow these steps to install 1. Place the battery into the space beneath the antenna with the metal contacts at the bottom, facing downward. 2. - Page 12 Using the Travel Charger Use only an approved charger with your phone. 1. Plug the Travel Charger into a wall outlet. 2. Plug the other end into the Travel Charger into the bottom of your phone, with the battery installed. Charging when your phone is turned on: The battery icon appears on the display while charging.
-
Page 13: Understanding Roaming
Understanding Roaming Understanding How Roaming Works Recognizing Icons on the Display Screen Your phone’s display screen always lets you know when you’re off the Sprint PCS Network and whether your phone is operating in analog or digital mode. The following chart indicates what you’ll see depending on where you’re using your phone. -
Page 14: Setting Your Phone's Roam Mode
Setting Your Phone’s Roam Mode Your Sprint PCS Phone allows you to control your ability to roam. By using the Roaming menu option, you determine which signals your phone accepts. Set Mode Choose from three different settings on your dual-band phone to control your roaming experience: 1. - Page 15 To Place Roaming Calls With Call Guard On: 1. From the Standby mode, dial 1 + area code + the seven-digit number. (You can also initiate a call from the Internal Phone Book, Call History or Sprint PCS Web Messages.) 2.
-
Page 16: Making And Answering Calls
Making and Answering Calls Making Calls 1. Make sure your phone is On. 2. Enter a phone number. (If you make a mistake while dialing, press Back to erase one digit at a time. Press and hold Back to erase the entire number.) 3. -
Page 17: Dialing Options
Using the Speakerphone The speakerphone feature lets you hear audio through the speaker and talk without holding the phone. When the speakerphone is activated, use the volume control keys on the side of the phone to adjust the volume. To activate the speakerphone during a call: Press SPEAKER. -
Page 18: In-Call Options
In-Call Options During a call, your phone displays menu options by pressing Menu. To select an option, highlight it and press OK. Mute or Unmute Select Mute to mute your phone’s microphone. Select Unmute to reactivate the microphone. Speaker On or Speaker Off to route the phone’s audio through the speaker. You can adjust the speakerphone volume using the volume keys on the side of the phone. -
Page 19: End-Of-Call Options
highlight it and press OK. Options Call Guard to answer the call when you are in roaming.( This feature appears when you are in digital area and analog service area.) See “Call Guard” on pages 13-14. Answer to answer the call. Answer:Speaker to answer the call whei Speakerphone mode. -
Page 20: Saving A Phone Number
Saving a Phone Number Your Sprint PCS Phone can store up to 300 Internal Phone Book entries. Phone Book entries can store up to a total of 500 phone numbers and the entry’s name can contain 16 characters. To save a number from the main menu: 1. -
Page 21: Dialing And Saving Phone Numbers With Pauses
Dialing and Saving Phone Numbers With Pauses You can dial or save phone numbers with pauses for use with automated systems, such as voicemail or credit card billing numbers. If you select a hard pause, the next set of numbers is stopped dialing until you select Send Tone or press TALK or SPEKAER. To display Send Tone, press Menu, highlight Send Tone and press OK. -
Page 22: Calling Emergency Numbers
Calling Emergency Numbers You can place calls to 911 displaying your phone number , even if your phone is locked or your account is restricted. 1. Dial 9 1 1 and press TALK or SPEKER 2. After connecting the call, press Menu. 3. -
Page 23: Using Auto Answer
Using Auto Answer This feature sets the phone to automatically pick up after 5 or 15 seconds. This feature only works with the hands-free car kit and headset (must be purchased separately). To activate this feature: 1. From the Standby mode, press Menu to display the main menu. 2. -
Page 24: Navigating Through Menus And Entering Text
Navigating Through Menus and Entering Text Menu Navigation Your Sprint PCS Phone allows you to scroll through menus quickly and easily. The directional arrow icon displayed in the top right corner of each menu screen keeps track of your position in the menu at all time. To navigate through the menu: 1. -
Page 25: Viewing The Menus
Viewing the Menus Menu Diagram Menus let you check or change your phone settings. The following outling shows your phone’s menu structures. 1. Call History 1. Outgoing Call 2. Incoming Call 3. Missed Call 4. Erase History 2. Phone Book 1. - Page 26 4. Location 5. Roaming 6. Security 7. Airplane Mode 8. Others 8. Calendar 9. Voice Service 1. Voice Memo 2. Screen Call 3. Voice Dial 10. Tools/Extras 1. PC Sync 2. Calculator 3. World Clock 4. Crab Catch 11. Phone Info 1.
-
Page 27: Selecting A Character Input Mode
Selecting a Character Input Mode Your Sprint PCS Phone™ provides convenient ways to enter words, letters, punctuation and numbers. To change the character input mode: 1. In a text entry field, press right softkey to display the “Input Mode” menu. Highlight your desired mode from T9 Word, Alphabet, SYMBOL, NUMBER, or SMILEYS and press OK. -
Page 28: Entering Characters Using T9 Text Input
In Spanish mode, characters scroll in the following order. Spanish Sequence Key Capital letter Small letter ・ , @ 1 ¿ ? ¡ ! * # AÁBC2 aábc2 DEÉF3 deéf3 GHIÍ4 ghií4 JKL5 jkl5 MNÑOÓ6 mnñoó6 PQRS7 pqrs7 TUÚÜV8 tuúüv8 WXYZ9 wxyz9 Space... -
Page 29: Using Smart Punctuation
Tip: Press Shift * to change: abc – Unshifted Abc – One-character-shifted ABC – Caps Lock These settings are shown on the display. Using Smart Punctuation “Smart punctuation” is available using in T9 mode. It’s a quick and easy way to type e-mail domains, possessive forms and contractions. -
Page 30: Entering Smileys
Entering NUMBER To enter numbers, select the NUMBER mode and press the appropriate key (see “Selecting a Character Input Mode” on page 26). 1. Press right soft key. 2. Highlight N U M B E R . 3. Press OK. 4. -
Page 31: Adjusting Volume
Adjusting Volume Changing Ringer/ Key Volume 1. From the Standby mode, press menu to display the main menu. 2. Highlight Settings, and press OK. 3. Highlight Sounds, and press OK. 4. Highlight Ringer/Key Vol., and press OK. 5. Select menu under the Ringer Volume, Start-up/Pw-off or Key Beep. 6. -
Page 32: Adjusting Volume During A Conversation
Adjusting Volume During a Conversation Whether you need to hear more or less of a conversation, adjust up or down of the side volume key during a call. You can also adjust this volume setting in between calls. To adjust volume in between calls: 1. -
Page 33: Managing Messaging
Managing Messaging Setting Up Your Voicemail All unanswered calls to your Sprint PCS Phone are automatically transferred to voicemail, even if your phone is in use or turned off. Therefore, you will want to set up your Sprint PCS voicemail box and personal greeting as soon as your Sprint PCS Phone is activated. -
Page 34: Retrieving Your Voicemail Message
Retrieving Your Voicemail Messages You can review your messages directly from your Sprint PCS Phone or from any other touch-tone phone. To dial from your Sprint PCS Phone, you can either speed dial your voicemail box or use the menu keys. Using One-Touch Message Access: Press and hold 1 . -
Page 35: Displaying Web Messages
Displaying Web Messages To display a Web Message from the message notification alert, see “New Web Messages” on page 33. To display a Web Message from the main menu: 1. From the Standby mode, press Menu to display the main menu. 2. -
Page 36: Web Message Options
Web Message Options After you display a Web Message, press Menu to display Web Message options. To select an option, highlight it and press OK. Call Back to dial the phone number of the sender (if applicable). Call: Speaker On to dial the phone number of the sender with Speaker Phone mode (if applicable). -
Page 37: Prepending A Phone Number From A Web Message
Prepending a Phone Number from a Web Message After you display a Sprint PCS Web Message that contains call back number, press Menu to display message options. If you happen to be outside your local area code and need to add a prefix to a phone number: 1. - Page 38 Prepend to add numbers to the beginning of the phone number. (See “Prepending a Phone Number From a Web Message” on page 36.) “Email Address” options: Display Address to display the e-mail address. Save Address to save the e-mail address if it is not already in your Internal Phone Book.
-
Page 39: Adding A Folder To The Web Message
Adding a Folder To the W eb Message When the message contains any word of 3 to 14 letters, you can classify the message to your defined folder. If 10 user defined folder exist, “Add Folder” menu disappears. 1. Press left of the Navigation key. 2. -
Page 40: Changing The Displaying Font Size Of A Web Message
Changing the Displaying Font Size of a Web Message After you display a Sprint PCS Web Message, press Menu to display message options. To adjust the displaying font size: 1. Highlight Font Size by scrolling and press OK. 2. Highlight your desired font size and press OK. Erasing Individual, All or All Old Web Messages To erase a message: After you display a Sprint PCS Web Message, press Menu to display message options. -
Page 41: Classifying Web Messages
Classifying Web Messages Your Sprint PCS Phone allows you to classify received messages into 10 User-defined Folders. If new messages contain the keyword set by you, they are stored into the folder. You can store up to 200 messages. To create a folder from the folder list display: 1. - Page 42 Editing the Folder 1. Press left of the Navigation key. 2. Highlight the folder you want to edit and press Options. 3. Highlight Edit Folder and press OK. 4. Select the box under the desired option to edit and press OK. Options: Folder Name to edit the folder name.
-
Page 43: Managing Call History
Managing Call History Viewing Call History (Incoming, Outgoing and Missed) You’ll find your Call History invaluable. It is a list of the last 10 phone numbers or Internal Phone Book entries for calls you placed, accepted or missed. Call History makes redialing a number fast and easy. -
Page 44: Prepending A Phone Number From Call History
Prepending a Phone Number From Call History If you need to make a call from Call History and you happen to be outside your local area code, you can add the appropriate prefix by following these steps: 1. Highlight a call history entry and press Menu. 2. -
Page 45: Erasing Call History
Erasing Call History To erase individual Call History entries, see “Call History Options” on page 42. To erase Call History: 1. From the Standby mode, press Menu to display the main menu. 2. Highlight Call History and press OK. 3. Highlight Erase History and press OK. 4. -
Page 46: Using Your Internal Phone Book
Using your Internal Phone Book Adding a New Internal Phone Book Entry Your Sprint PCS Phone can store up to 300 Internal Phone Book entries. Phone Book entries can store up to a total of 500 phone numbers and the entry’s name can contain 16 characters. -
Page 47: Finding Internal Phone Book Entries
Finding Internal Phone Book Entries There are several ways to display your Internal Phone Book entries. Follow the steps outlined in the sections below to display entries from the Internal Phone Book menu. Finding Names You can review all the entries stored in your Internal Phone Book or find an entry quickly by following these simple steps: 1. -
Page 48: Internal Phone Book Entry Options
Internal Phone Book Entry Options When you display an Internal Phone Book list, highlight your desired entry and press OK, then select the box under your desired label category and press Options (left softkey). Call to dial the phone number. (If you are roaming and have the Call Guard feature activated, you are required to take an extra step to proceed. -
Page 49: Adding A Call Alarm From The Internal Phone Book
Adding a Call Alarm From the Inte rnal Phone Book A Call Alarm reminds you when you need to make an important phone call. (See “Call Alarm Alerts” on page 48.) To add a Call Alarm from the Internal Phone Book: 1. -
Page 50: Editing An Internal Phone Book Entry
Editing an Internal Phone Book Entry To make changes to an entry: 1. Display an Internal Phone Book entry. 2. Highlight your desired entry and press OK. To select the box under the option, and press OK. Name to change the entry’s name. Enter the new name and press OK. (See “Entering Characters by Tapping the Keypad”... -
Page 51: Selecting A Ringer/Image Type For An Entry
Selecting a Ringer/Image Type for an Entry You can assign a ringer/image type to an Internal Phone Book entry so you can identify the caller by the ringer or graphics type. To select a ringer type for an entry: 1. Press right of the Navigation key. 2. -
Page 52: Storing Special Numbers In The Phone Book
Tip: If you can’t recall your lock code, try using the last four digits of either your Social Security number or Sprint PCS Phone Number or try 0000. If none of these work, call Sprint PCS Customer Care at 1-888-211-4PCS (4727). Storing Special Numbers in the Phone Book Using the Pause Feature Generally, when you call an automated system like voicemail boxes or credit card... -
Page 53: Using Different Dialing Methods
5. Press OK to see the details. To make a call from the list, press TALK or SPEAKER ( or press Options, highlight Call or Call: Speaker On and press OK.)at the step 4 or 5 above. Using Different Dialing Methods Prepend Dialing Prepend dialing allows you to alter a phone number in your Phone Book by adding additional numbers. -
Page 54: My Sprint Pcs Phone Number
4. To select a corresponding speed dial number from 2-9, highlight an unassigned number and press OK. 5. Highlight the entry from the list. 6. Press OK. 7. Select the phone number you want to set a speed dial, and press OK. To use speed dial: 1. -
Page 55: Changing Your Phone's Setting
Changing your Phone’s Setting Adjusting the Ringer/Key volume To change the ringer/key volume: 8. From the Standby mode, press Menu to display the main menu. 9. Highlight Settings, and press OK. 10. Highlight Sounds, and press OK. 11. Highlight Ringer/Key Vol., and press OK. 12. -
Page 56: Ringer Types
Ringer Types Ringer types help you identify incoming calls and messages. You can assign ringer types to individual Internal Phone Book entries, types of calls and types of messages. Programmed Ringers include a variety of standard ringer types and familiar music. ●... -
Page 57: Selecting Ringer Types For Page/Text Messages
Selecting Ringer Type for Text Messages To select a ringer type for text message: 1. From the Standby mode, press Menu to display the main menu. 2. Highlight Settings, and press OK. 3. Highlight Sounds, and press OK. 4. Highlight Ringer Type, and press OK. 5. -
Page 58: Setting Tone Length Or Start-Up/Power-Off Tone
Setting Tone Length or Start-up/Power-off Tone You can determine the length of your key beep (you hear this when you press any key) or type of the Start-up/Power off tone (sounds when you turn the phone on/off on this feature. 1. -
Page 59: Changing The Greeting
Changing the Greeting The greeting can be up to 15 characters and is displayed on the first line of your phone’s display screen in Standby mode. To change your greeting: 1. From the Standby mode, press Menu to display the main menu. 2. -
Page 60: Changing The Contrast
Changing the Contrast To adjust the contrast on the phone’s display: 1. From the Standby mode, press Menu to display the main menu. 2. Highlight Settings, and press OK. 3. Highlight Display, and press OK. 4. Highlight Contrast, and press OK. 5. -
Page 61: Setting The Display For The Standby Mode
Note: Sprint PCS Wireless Web TM Connection kit must be purchased for downloading the data from Setting the Display for the Standby Mode This feature enables you to select a variety of items to display on the Standby mode. Follow these steps: 1. -
Page 62: Setting Sleep Mode
Setting Sleep Mode 1. From Standby mode, press Menu to display the main menu. 2. Highlight Settings and press OK. 3. Highlight Display and press OK. 4. Highlight Sleep Mode. 5. Highlight your desired option , and press OK. To deactivate this feature, highlight Off at the step 5 above Setting Main Menu Design Your phone allows you to switch the main menu design. -
Page 63: Setting Pop-Up Message
Setting Pop-up Message You can set up whether to be notified or not by pop-up message when you receive Text message or Voicemail during Application or Browser. 1. From the Standby mode, press Menu to display the main menu. 2. Highlight Settings, and press OK. 3. -
Page 64: Abbreviated Dialing
2. Highlight Settings and press OK. 3. Highlight Others and press OK. 4. Highlight Auto Answer and press OK. 5. Select the menu under Car/HS Use or Speaker Phone. 6. Highlight either 5 Seconds or 15 Seconds and press OK. To deactivate this feature, select Off at step 5 above. -
Page 65: Changing The Menu Language
Changing the Menu Language When you first turn your phone on, the menus are displayed in English. To change the menu language to Spanish, follow these steps. 1. From the Standby mode, press Menu to display the main menu. 2. Highlight Settings, and press OK. 3. -
Page 66: Setting Your Phone's Security
Setting Your Phone’s Security Accessing the Security Menu You must enter your lock code to view the Security menu. To access the Security menu: 1. From the Standby mode, press Menu to display the main menu. 2. Highlight Settings and press OK. 3. -
Page 67: Locking The Keypad
Locking the Keypad Locking the keypad helps avoid accidental key presses without blocking incoming calls or messages. This feature can only be activated when your phone is in Standby mode. To lock your keypad: 1. From the Standby mode, press Menu to display the main menu. 2.Highlight Key Guard and press OK. -
Page 68: Resetting Your Phone
Resetting Your Phone Resetting the phone restores all the factory defaults, including the ringer types and display settings. The Internal Phone Book, Call History, Scheduler and Messages are not affected. To reset your phone: 1.From the Security Menu display (See “Accessing the Security Menu on page 65), highlight Reset Phone, and press OK. -
Page 69: Resetting And Locking Your Phone Through Sms
2. Highlight Special #s, and press OK. 3. Highlight the box under the entry number, and press OK. 4. Enter the phone number and press OK. Press Options (right softkey), then highlight From Phone Book or Voicemail and press OK. To insert pauses into a number: 1. -
Page 70: Changing The Passcode
Changing the Passcode To change the passcode for the special formatted SMS messages. 1. From the Standby mode, press Menu to display the main menu. 2. Highlight Settings ,and press OK. 3. Highlight Security , and press OK. 4. Enter lock code. 5. -
Page 71: Personal Information Management
Personal Information Management Checking My Profile This phone can store your personal data in “Phone Info” menu. These are including My Name, Birthday, Blood Type, Address, Phone(home), HEmail (home), Phone# (work) Email (work). Editing My Profile To edit or select your personal data From the Standby mode, press Menu to display the main menu. -
Page 72: Display The Phone's Information
Display the phone’s Information You can see the detailed information of signal or icon from the Phone Info menu. 1. From the Standby mode, press Menu to display the main menu. 2. Highlight Phone Info and press OK. 3. Highlight Help and press OK. 4. -
Page 73: Managing Schedules
Managing Schedules Calendar Use the Calendar to remind you of events or important calls you need to make. You can schedule up to 100 events, 15 Call Alarms and 20 To-Do Items. Setting the Time/Date In no service area or Analog service area, it’s necessary to set actual time and date to use Calendar function. -
Page 74: Adding An Event To The Scheduler
Adding an Event to the Scheduler Your Scheduler helps organize your time and reminds you of important events. To add an event: 1. From the Standby mode, press Menu to display the main menu. 2. Highlight Calendar and press OK. 3. -
Page 75: Adding A Call Alarm To The Schedular
Adding a Call Alarm to the Scheduler To add a Call Alarm from the Scheduler: 1. From the Standby mode, press Menu to display the main menu. 2. Highlight Calendar and press OK. 3. Highlight the day you want to add an event to by using the Navigation key and press 4. -
Page 76: Viewing Events And Call Alarms
Snooze to repeat the alarm in ten minutes. Save Phone# to save the scheduled phone number if it is not already in your Internal Phone Book or if the caller’s phone number has already been stored in the any Phone Book entry, Alternate appears instead of Save Phone#. Erase to delete the call alarm (even if it is a repeating event). -
Page 77: Adding To Do Items
Adding To Do Items Your phone can store and manage 20 To Do items. To add an entry to your To Do List: 1. From Event display, and press OK. 2. Press Options to display the options. 3. Highlight To Do List, and press OK. 4. -
Page 78: Viewing And Clearing Memory
Viewing and Clearing Memory To view available and used memory space: 1. From the Standby mode, press Menu to display the main menu. 2. Highlight Calendar and press OK. 2. Press OK. 3. Press Options to display the options. 4. Highlight View Memory, and press OK. 5. -
Page 79: Playing Games
Playing Games To play a game on your Sprint PCS Phone: 1. From the Standby mode, press Menu to display the main menu. 2. Highlight Tools/Extras, and press OK. 3.Highlight Crab Catch, and press OK. 4.Select Normal or Off for the ringer volume setting. (Normal setting equivalent to the ringer volume you set before. -
Page 80: Using The Voice Services Of Your Phone
Using the Voice Service of your Phone Using Voice-Activated Dialing You can use a Voice Dial tag to automatically dial a phone number in your Internal Phone Book. To use a Voice Dial tag to call a phone number: 1. From the Standby mode, press TALK shortly. 2. -
Page 81: Using Voice Memo
Erasing Voice Dialing Entries To erase an individual Voice Dialing entry: 1. Highlight the desired entry (See previous “Reviewing Voice Dialing Entries”). 2. Press Options to display the options. 3. Highlight Erase, and press OK. 4. Highlight Yes, and press OK. To erase all Voice Dialing entries: 1. - Page 82 To stop recording: 1. Wait for 18 seconds or press OK while recording. 1. Press END/ and disconnect the call while recording in Use State. It also stops recording when the other party hangs up the call. Tip: If you receive an incoming call while recording or when the service area has changed, recording is stopped automatically.
-
Page 83: Setting Up Screen Call
Erasing Memos To erase an individual Voice Memo: 1. From the Standby mode press Menu to display the main menu. 2. Highlight VoiceService, and press OK. 3. Highlight Voice Memo, and press OK. 4. Highlight Play or Play Speaker, and press OK. 5. - Page 84 2. Highlight VoiceService, and press OK. 3. Highlight Screen Call, and press OK. 4. Highlight Auto, and press OK. 5. Highlight On, and press OK. If you want to change the answer time, enter your desired number (from 1 to 16 seconds) by using numeric keys or up/down of the Navigation key.
- Page 85 Recording Custom Announcement 1. Follow the step 1to 4 above. 2. Highlight Custom , and press Options (right softkey). 3. Highlight Record, and press OK. 4. Press OK to start 1 recording. 5. After the 1 recording, press OK again to start 2 recording.
-
Page 86: Knowing Performance And Safety Guidelines
Knowing Performance and Safety Guidelines Getting the Most Out of Your Reception Keeping Tabs on Signal Strength The quality of each call you make or receive depends on the signal strength in your area. Your phone informs you of the current strength by displaying a number of bars next to the signal strength icon. -
Page 87: Maintaining Safe Use Of And Access To Your Phone
Note: For the best care of your phone, only Sprint PCS authorized personnel should service your phone and accessories. Faulty service may void the warranty. Maintaining Safe Use of and Access to Your Phone FAILURE TO FOLLOW THE INSTRUCTIONS OUTLINED MAY LEAD TO SERIOUS PERSONAL INJURY AND POSSIBLE PROPERTY DAMAGE Using Your Phone While Driving Talking on the phone while driving (or operating the phone without a hands-free device) is... -
Page 88: Caring For The Battery
aids, to determine if they are adequately shielded from external RF signals. Note: Always turn off the phone in health care facilities and request permission before using the phone near medical equipment. Turning Off Your Phone Before Flying Turn off your phone before boarding any aircraft. To prevent possible interference with aircraft systems, the U.S. -
Page 89: Acknowledging Special Precautions And The Fcc Notice
warranty and may cause damage. In order to avoid damage, charge the battery only in temperatures that range from 32º F to 113º F (0º C to 45º C). Don’t use the battery charger in direct sunlight or in high humidity areas, such as the bathroom. - Page 90 against harmful interference in a residential installation. This equipment generates, uses, and can radiate radio frequency energy and, if not installed and used in accordance with the instructions, may cause harmful interference to radio communications. However, there is no guarantee that interference will not occur in a particular installation. this equipment does cause harmful interference to radio or television reception, which can the interference by one or more of the following measures: Reorient or relocate the receiving antenna.
- Page 91 strict federal guidelines. Variations in SARs do not represent a variation in safety. All phones must meet the federal standard, which incorporates a substantial margin of safety. As stated above, variations in SAR values between different model phones do not mean variations in safety.