Table of Contents

Related Manuals for LG LD-2120WH


Summary of Contents for LG LD-2120WH
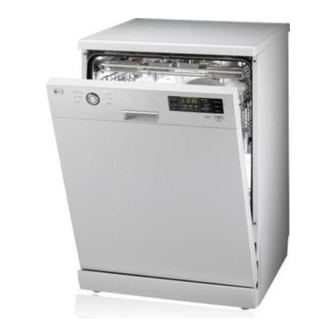
- Page 1 DISHWASHER OWNER'S MANUAL MODEL : LD-2120WH / LD-2120SH / LD-2120MH LD-2120WHB / LD-2120SHB / LD-2120MHB LD-2120WHU / LD-2120SHU / LD-2120MHU Please read this manual carefully before operating your dishwasher. Retain it for future reference.
-
Page 2: Table Of Contents
CONTENTS SAFETY AND CAUTION INSTALLATION INSTRUCTIONS PARTS NAME FUNCTION OF CONTROL BUTTON HOW TO USE AND OPERATE OPERATING SEQUENCE PROGRAM USER MAINTENANCE INSTRUCTIONS TROUBLE SHOOTING GUIDE SPECIFICATION... -
Page 3: Safety And Caution
SAFETY AND CAUTION IMPORTANT SAFETY INSTRUCTIONS WARNING - When using your dishwasher, follow basic precautions, including the following: • Please read this manual carefully before During use using the dishwasher for the first time. • Only suitable household utensils should •... -
Page 4: Child Safety
SAFETY AND CAUTION Child Safety • Controls may be locked using “Child Lock” mode to prevent from all the setting from being changed by a child. • Keep children away from detergents and rinse-aids. • Do not allow children to operate the dishwasher. •... -
Page 5: Installation Instructions
INSTALLATION INSTRUCTIONS If dishwasher is to be installed in a corner, WARNING a minimum 5cm of space is required Any electrical work required to install this between the washer and an adjacent appliance should be carried out by a cabinet or a wall. qualified electrician or competent person. - Page 6 INSTALLATION INSTRUCTIONS Step 3 : Step 4 : PREPARE DISHWASHER FOR INSTALL THE DISHWASHER IN INSTALLATION CUPBOARD Lay the dishwasher on its back. Before sliding the dishwasher into the cupboard opening, all necessary final Adjust the legs to the needed height of height adjustment and balancing adjustment cabinet as shown in below figure.
-
Page 7: Drain Line Connection
INSTALLATION INSTRUCTIONS Step 5 : DRAIN LINE CONNECTION If the end of drain hose does not fit to When the drain hose is connected to a the drain line, use a piece of rubber separate stand pipe, it is essential that an connector(not supplied) that must be air tight connection is made. -
Page 8: Water Supply Connection
INSTALLATION INSTRUCTIONS Step 8 : Step 6 : HOW TO LEVEL THE PRODUCT WATER SUPPLY CONNECTION Connect the water supply hose to the valve After installing the product, if you feel some behind dishwasher and the water tap as sticky or hear a frictional sound between the shown in figure. -
Page 9: Parts Name
PARTS NAME 1. Control Panel 10. Adjust Leg 11. Upper Rack 2. Door Handle 12. Cutlery Rack 3. Front Cover 13. Detergent & Rinse Aid Dispenser 4. Lower Cover 14. Vapor Vent Cover 5. Process Monitor 15. Upper Spray Arm 6. -
Page 10: Function Of Control Button
FUNCTION OF CONTROL BUTTON TIME LEFT DELAY START INDICATOR • Before starting, the display window shows the running time of • If you want to delay • Refill with the selected program. the start of selected specil salt • After starting, the display window shows the remaining time. program, press this •... -
Page 11: How To Use And Operate
HOW TO USE AND OPERATE 1. Loading your Dishwasher Be careful large items do not to prevent the detergent dispenser lid For the best washing performance, it is from opening important that the dishwasher is loaded according to instructions. 3. Using the Cutlery Basket Before loading items into the dishwasher, you must scrape off large particles in particular non soluble items such as bones,... -
Page 12: Loading The Upper Rack
HOW TO USE AND OPERATE 4. Loading the Upper Rack 5. Adjusting the Upper Rack (Not on all models) The upper rack is best loaded with more Your upper rack can be raised or lowered to delicate items, small plates, long cutlery, cater for different size of crockery. -
Page 13: Adding Detergent
HOW TO USE AND OPERATE 6. Adding Detergent Dispenser • Detergent must be put into the detergent chamber before starting every program except the Pre-Wash. Push latch to open • Please follow the manufacturer’s instructions printed on the manual when determining the correct dosage. -
Page 14: Adding Rinse Aid
HOW TO USE AND OPERATE 7. Adding Rinse Aid Dispenser For filling To fill the Rinse Aid chamber, rotate the round cap counter clockwise and remove. Fill the container to the maximum level with a good quality Rinse Aid, then replace and lock the cap. -
Page 15: Salt Filling
HOW TO USE AND OPERATE 8. Salt Filling This model has a water softener to soften hard water. So you should read these notes carefully for correct operation. In order to provide satisfactory rinsing results, the dishwasher requires soft water, i.e.,containing little or no lime, otherwise water stains will be left behind on the dishes and interior containers. - Page 16 HOW TO USE AND OPERATE For refilling When the salt is exhausted, the salt refill lamp is lighted on automatically during operation. Then the salt should be refilled after finished the cycle. But it is recommended the salt refill should always be done (as mentioned previous page) before starting next operation to thin and drain away any excess salt solution immediately.
-
Page 17: Operating Sequence
OPERATING SEQUENCE Press the “Power” button The indicator lights of the program and all the phases the program consists of will come on. Check that there is rinse Before starting, the display window shows aid and salt the running time of the selected program. After starting, the display window shows The corresponding indicator lights will the remaining time. -
Page 18: Program
PROGRAM According to the water temperature, pressure, voltage, running time may be varied. Running time doesn’t contain “Cool dry - 60 min”. WASH RINSE Cool Program Main Heating Pre Wash Rinse 1 Rinse 2 Rinse 3 Wash Rinse The program sequence is optimized and adapted in accordance Auto with how dirty the dishes are. -
Page 19: User Maintenance Instructions
USER MAINTENANCE INSTRUCTIONS To prevent trouble and poor operating, it is important to check and care for the filters and spray arms at intervals. Filters Upper Spray Arm • Remove the lower rack first. • Pull the upper rack forwards. •... -
Page 20: Trouble Shooting Guide
TROUBLE SHOOTING GUIDE If a problem occurs in your machine, call for service. Before you call for service, check the below instructions to see whether the problem can be solved by yourself first. Problem Possible Causes The lamps do not come •... - Page 21 MEMO...
- Page 22 MEMO...
- Page 23 MEMO...
- Page 24 LD-2120WH LD-2120WHB LD-2120SH LD-2120SHB LD-2120MH LD-2120MHB LD-2120WHU LD-2120SHU LD-2120MHU Capacity 12 Place settings Weight See rating label Power Supply See rating label Power Consumption See rating label Water Feed Pressure 50 ~ 800 kPa P/No.: 3828DD7001M...