Table of Contents
Advertisement
Available languages
Available languages
Quick Links
Advertisement
Chapters
Table of Contents

Related Manuals for Kenmore 51293


Summary of Contents for Kenmore 51293
-
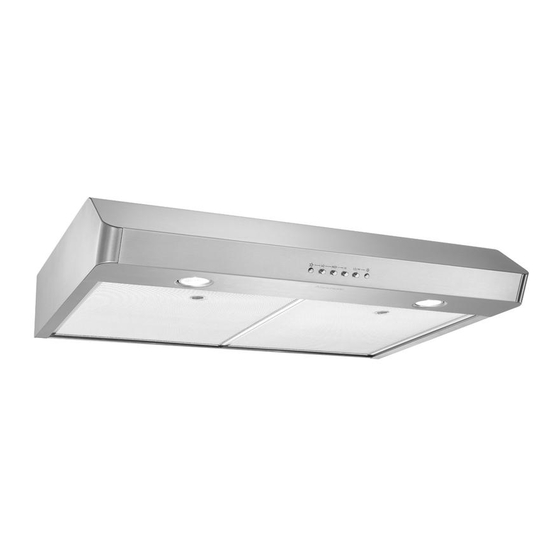
Page 1: Range Hood
Use & Care / Installation Manual Manual de Uso y Cuidado / Instalación English / Español Model/Modelo 51293 Kenmore Elite ® Range Hood Campana de cocina P/N 99045656-002A Sears Brands Management Corporation, Hoff man Estates, IL 60179 USA www.kenmore.com www.sears.com... -
Page 2: Table Of Contents
READ AND SAVE THESE INSTRUCTIONS TABLE OF CONTENTS KENMORE LIMITED WARRANTY When this appliance is installed, operated and maintained SECTION ................PAGE according to all supplied instructions, the following warranty Warranty ................2 coverage applies. To arrange for warranty service, call Safety Instructions ............... -
Page 3: Safety Instructions
SAFETY INSTRUCTIONS INTENDED FOR DOMESTIC COOKING ONLY. WARNING WARNING TO REDUCE THE RISK OF FIRE, ELECTRIC SHOCK, OR TO REDUCE THE RISK OF INJURY TO PERSONS IN THE INJURY TO PERSONS, OBSERVE THE FOLLOWING: EVENT OF A RANGE TOP GREASE FIRE, OBSERVE THE FOLLOWING:* 1. -
Page 4: Operation
OPERATION CLEANING WARNING: To reduce the risk of electric shock, LIGHT disconnect from power supply before cleaning. SWITCH SWITCH Hybrid fi lters Clean frequently using hot water and a mild detergent or in your dishwasher. The hybrid fi lters should be washed approximately every month depending on the amount of usage. -
Page 5: Parts Included With Hood
PARTS NOT INCLUDED WITH HOOD PARTS INCLUDED WITH HOOD OPTIONAL PARTS (purchase separately) Hybrid Grease Filters Non-Ducted Recirculation Filters (2 per hood) (Non-ducted hoods only) (2 per hood) Part No. S97020466 3¼” x 10” 7-inch Round Damper Damper / Duct Connector (For use with 7-inch Round Duct) Sears Part No. -
Page 6: Equivalent Duct Length Chart
EQUIVALENT DUCT LENGTH CHART Kenmore range hoods are designed to perform effi ciently when attached to long runs of duct. As a point of reference, this hood will function at approximately 80% of its rated air fl ow when 30 equivalent feet of 7" round ductwork is attached. -
Page 7: Install Ductwork
INSTALL DUCTWORK (DUCTED INSTALLATION ONLY) 1. Determine whether hood will discharge vertically (3¼” x 10” or 7” Round) or horizontally (3¼” x 10” OOF CAP 3¼" 10" only). 7" ROUND DUCT 2. Run ductwork between the hood location and a roof OR VERTICAL cap or wall cap. - Page 8 3. Remove the screw holding the damper assembly, remove the tape strip and and put the damper assembly aside. Save this screws, it will be used later TAPE 7” ROUND to hold the blower cover plate DUCT PLATE Remove both tape strips holding the 7” round duct plate, and put the duct plate aside.
- Page 9 DUCTED INSTALLATIONS ONLY 10. Remove 3¼” x 10” vertical, 3¼” x 10” horizontal (both are the rectangular central knockout plates, see hatched areas), or 7-inch round knockout plate as appropriate for your ducting method (see F 1 A and IGURES 1 B).
-
Page 10: Prepare The Hood Location
PREPARE THE HOOD LOCATION NOTE: Before starting installation, read all the steps FRAMED CABINET FRAMELESS CABINET of these instructions. Use the illustration beside to identify your kitchen cabinet type. This manual covers 2 kinds of installation: the standard (without EZ1 brackets) and the EZ1 one-person installation system (using included template and brackets). - Page 11 4. Drill a 1/8” dia. pilot hole for house wiring, 6. Draw the border for the exhaust ducting by linking its at B location on template. marks (16 for round duct and 4 for rectangular duct), then cut the opening in the cabinet bottom (vertical 5.
- Page 12 FRAMELESS CABINET Refer to the marking on the brackets to determine the correct installation side and orientation. 7/64” Align the corresponding bracket to the cabinet Use a pencil to mark 3 holes. side, while placing rear end of bracket against ...
-
Page 13: Install The Hood (Ez1 Brackets)
Install the hood (EZ1 brackets) NOTE: The following procedure applies to both framed or frameless cabinet installations. 1. Run house power cable between service panel and hood location. 2. There are 2 pairs of recessed holes on each side of the top of the hood (on rear: A and B, on front C and D on illustration beside);... -
Page 14: Standard Installation (Without Ez1 Brackets)
Standard Installation (without EZ1 brackets) 1. Use these diagrams for proper placement of ductwork 3¼” x 10” and electrical cutout in cabinet or wall. VERTICAL DUCTING For a non-ducted installation, DO NOT cut a duct CENTER LINE access hole, only cut the hole for electrical wiring WOOD SHIMS RECESSED BOTTOM... -
Page 15: Install The Hood (Standard Installation)
Install the Hood (Standard Installation) NOTE: Two installers are recommended because of the weight of this hood. 1. Run house power cable between service panel and hood location. For hood with power cable access located on back of hood, run the house power cable into the hood through the strain relief previously installed in step 8 on page 8. -
Page 16: Connect The Wiring
CONNECT THE WIRING WARNING: Risk of electric shock. Electrical wiring must be done by qualifi ed personnel in accordance with all applicable codes and standards. Before connecting wires, switch power off at service panel and lock service disconnecting means to prevent power from MOTORS being switched on accidentally. -
Page 17: Service Parts
SERVICE PARTS KEY NO. PART NO. DESCRIPTION QUANTITY S97020031 ECIRCULATION COVER PLATE TAINLESS STEEL INCL SCREWS SR680508 7'' R OUND DUCT PLATE INCLUDING SCREWS S97020534 3¼” 10” D AMPER ASSEMBLY INCLUDING SCREWS S97020412 APACITOR S97020842 CW ( LOWER ASS INCLUDING ITEMS AND HARDWARE SR99420635 LIP FOR FANPELLER... -
Page 18: Master Protection Agreements
MASTER PROTECTION AGREEMENTS Congratulations on making a smart purchase. Your new Kenmore product is designed and manufactured for ® years of dependable operation. But like all products, it may require preventive maintenance or repair from time to time. That’s when having a Master Protection Agreement can save you money and aggravation. -
Page 19: Garantía
LEA Y CONSERVE ESTAS INSTRUCCIONES TABLA DE CONTENIDO GARANTÍA LIMITADA DE KENMORE Si se instala, opera y mantiene este electrodoméstico SECCIÓN ............PÁGINA conforme a todas las instrucciones suministradas, se Garantía ................19 aplica la siguiente cobertura de garantía. Instrucciones de seguridad ..........20 Para disponer servicio bajo garantía, llame al... -
Page 20: Instrucciones De Seguridad
INSTRUCCIONES DE SEGURIDAD PREVISTO PARA COCINAR DOMÉSTICO SOLAMENTE. ADVERTENCIA ADVERTENCIA PARA REDUCIR EL RIESGO DE INCENDIO, CHOQUE PARA REDUCIR EL RIESGO DE LESIONES A PER- ELÉCTRICO, O LESIÓN A PERSONAS, OBSERVE LO SONAS EN CASO DE INCENDIO DE GRASA EN LA SIGUIENTE: ESTUFA, OBSERVE LO SIGUIENTE:* 1. -
Page 21: Operación
OPERACIÓN LIMPIEZA ADVERTENCIA: Para reducir el riesgo de una descarga eléctrica, desconecte el suministro INTERRUPTOR INTERRUPTOR eléctrico antes de limpiar la unidad. DEL VENTILADOR DE LA LUZ Filtros híbridos Limpie frecuentemente los fi ltros con agua caliente y un detergente suave. Los fi ltros se pueden lavar en lavaplatos. -
Page 22: Piezas Incluidas Con La Campana
PIEZAS NO INCLUIDAS CON LA CAMPANA PIEZAS INCLUIDAS CON LA CAMPANA PIEZAS OPTATIVAS (compra separada) Filtros de grasa híbrido (2 por campana) Filtros de recirculación (Campana sin conducto unicamente) (2 por campana) Pieza Sears N.° S97020466 Conjunto de la clapeta de retención 3¼”... -
Page 23: Cuadro De Largo Equivalentes De Conducto
CUADRO DE LARGO EQUIVALENTE DE CONDUCTO Las campanas de cocina Kenmore fueron diseñadas para su desempeño efi ciente cuando se las sujeta a largos recorridos de conducto. Como punto de referencia, esta campana funcionará a aproximadamente el 80% de su fl... -
Page 24: Instale Los Conductos
INSTALE LOS CONDUCTOS ( NSTALACIONES CANALIZADAS ÚNICAMENTE) 1. Determine si la campana evacuará verticalmente (conducto redondo de 3¼” x 10” o 7”) u horizontalmente APUCHÓN PARA TEJADO (conducto de 3¼” x 10” únicamente). 3¼” 10” ONDUCTO DE 7” REDONDO 2. Decida por dónde pasarán los conductos entre la ARA EVACUACIÓN VERTICAL campana y el exterior. - Page 25 3. Retire el tornillo que sujeta el conjunto de la clapeta, retire su tira de cinta, y reserve el conjunto de la CONECTOR DE clapeta de retención. Guarde el tornillo ya que ello CINTA CONDUCTO volvera a usar después para sujetar la placa. REDONDO DE 7”...
- Page 26 INSTALACIÓN CON CONDUCTOS ÚNICAMENTE 10. Retire la placa punzonada vertical de 3¼” x 10”, la placa punzonada horizontal de 3¼” x 10” (ambos están las placas punzonadas rectangular centrales, veanse las zonas rayadas), o la placa punzonada redonda de 7 pulgadas, según el modo de evacuación elegido (véanse las F 1 A y 1 B).
-
Page 27: Prepare La Localización Para La Campana
PREPARE LA UBICACIÓN DE LA CAMPANA NOTA: Antes de empezar la instalación, lea todas las ARMARIO CON ARMAZÓN ARMARIO SIN ARMAZÓN etapas de estas instrucciones. Use la ilustración de la derecha para reconocer su tipo de armario de cocina. Este manual cubre 2 tipos de instalación: la normal (sin soportes EZ1) y la instalación EZ1 por una persona (usando la plantilla y los soporte provistos). - Page 28 4. Taladre un orifi cio piloto de 1/8” de diámetro para el 6. Dibuje el borde de la evacuación de salida uniendo cableado de la vivienda, en el punto B de la plantilla. los puntos (16 puntos para un conducto redondo de 7”...
- Page 29 ARMARIO SIN ARMAZÓN Consulte las marcas de los soporte para establecer el lado y la orientación correctos de la instalación (marcas en ingles solamente: front = frente, left = izquierda, lean on rear wall = appoyar contra la pared de atrás). 7/64”...
-
Page 30: Instale La Campana (Soportes Ez1)
Instale la campana (Soportes EZ1) NOTA: El procedimiento siguiente se aplica a las instalaciones en armarios con armazón y sin armazón. 1. Lleve el cable de alimentación de la vivienda del tablero de servicio al lugar de la campana. 2. Hay 2 pares de orifi cios rebajados en cada lado de la parte superior de la campana (en la parte trasera: A y B, en la parte delantera C y D en la ilustración de derecha);... -
Page 31: Instalación Normal (Sin Soportes Ez1)
Instalación normal (sin soportes EZ1) 1. Use el diagrama adecuado de abajo para colocar los EVACUACIÓN VERTICAL conductos y la alimentación eléctrica en el armario DE 3¼” x 10” o en la pared. LÍNEA CENTRAL Para una instalación sin conductos, NO corte el CALZOS DE MADERA orifi... -
Page 32: Instale La Campana (Instalación Normal)
Instale la campana (Instalación normal) NOTA: Debido al peso de esta campana, se aconseja quela instalen dos instaladores. 1. Lleve el cable de alimentación de la vivienda del tablero de servicio al lugar de la campana. Si el orifi cio de acceso del cable alimentación de la campana este en su parte trasera, lleve el cable de alimentación de la vivienda a la campana a través de la descarga... -
Page 33: Conecte El Cableado
CONECTE EL CABLEADO ADVERTENCIA: Riesgo de descarga eléctrica. El cableado eléctrico debe hacerlo personal cualifi cado de acuerdo con los códigos y normas aplicables. Antes de conectar los hilos, corte la corriente en el tablero de servicio y bloquee éste para evitar que se ponga en HILO DE marcha accidentalmente. -
Page 34: Piezas De Servicio
PIEZAS DE SERVICIO CLAVE PIEZA N.° DESCRIPCIÓN CANTIDAD N.° S97020031 LACA DE CUBIERTA DE RECIRCULACIÓN CERO INOX INCL TORNILLOS SR680508 7'' ( LACA DE CONDUCTO REDONDO DE INCLUYE TORNILLOS S97020534 3¼” 10” ( ONJUNTO DE CLAPETA DE INCLUYE TORNILLOS S97020412 ONDENSADOR S97020842 .°... -
Page 35: Acuerdos De Protección Maestros
ACUERDOS DE PROTECCIÓN MAESTROS Felicitaciones por haber realizado una compra inteligente. Su nuevo producto Kenmore ® está diseñado y fabricado para ofrecer años de funcionamiento confi able. Pero como todo producto, es posible que requiera mantenimiento preventivo o reparaciones periódicamente. Es entonces cuando tener un Acuerdo Maestro de Protección le puede ahorrar dinero y...