Haier HLP21N User Manual
Top-load portable compact
Hide thumbs
Also See for HLP21N:
- Installation and user manual (96 pages) ,
- User manual (82 pages) ,
- Service manual (26 pages)
Table of Contents
Advertisement
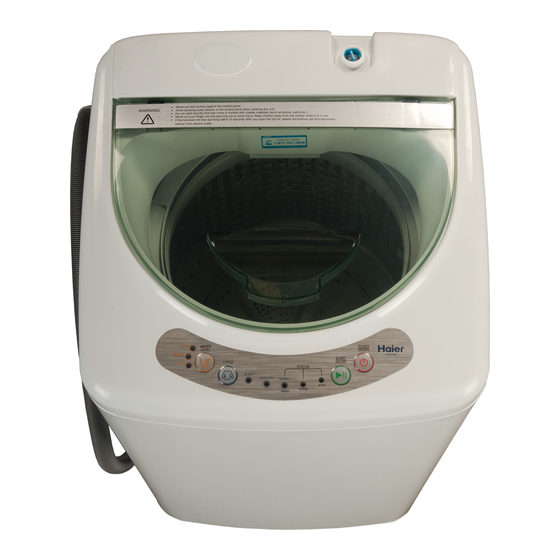
Top-Load Portable Compact Clothes Washer
Laveuse compacte à chargement par le haut
Lavadora compacta de carga superior
User Manual
Guide de l'utilisateur
Manual del usuario
HLP21N
Designed for
High-Efficiency;
use HE detergent.
Conçue pour
haute efficacité;
utiliser un
détergent HE.
Diseñada para un
alta eficiencia; use
detergente HE
(Alta eficiencia).
Advertisement
Chapters
Table of Contents

Related Manuals for Haier HLP21N


Summary of Contents for Haier HLP21N
- Page 1 User Manual Guide de l’utilisateur Manual del usuario HLP21N Top-Load Portable Compact Clothes Washer Laveuse compacte à chargement par le haut Lavadora compacta de carga superior Designed for High-Efficiency; use HE detergent. Conçue pour haute efficacité; utiliser un détergent HE.
-
Page 3: Table Of Contents
Vacationing Precautions .....................21 Moving or Storage Preparation ...................21 TROUBLESHOOTING ..................22 LIMITED WARRANTY ..................24 RECORD KEEPING Thank you for purchasing this Haier product. This user manual will help you ___________________________________ get the best performance from your Model number new washer. -
Page 4: Important Safety Instructions
IMPORTANT SAFETY INSTRUCTIONS WARNING To reduce the risk of re, electric shock, or injury to persons when using your appliance, follow the basic precautions, including the following: • Read all of the instructions before using this appliance. • Use this appliance only for its intended purpose as described in this user manual. -
Page 5: General Safety Precautions
GENERAL SAFETY PRECAUTIONS • Keep the area around your appliance free from combustible materials such as lint, paper, rags or chemicals. • Close supervision is necessary if this appliance is used by or near children. Do not allow children to play on, with, or inside this appliance. •... -
Page 6: Parts And Features
PARTS AND FEATURES Top Lid Access Panel Control Panel Water Inlet Valve Cabinet Wash Basket Cabinet Handle Power Jet Leveling Feet Outer Tub Cover Drain Port Balance Ring Power Cord (120 Volt/ 60 Hz) -
Page 7: Installation Instructions
INSTALLATION INSTRUCTIONS TOOLS NEEDED • • Pliers Measuring Tape • • Wrench Carpenter’s Level • Phillips Screwdriver PARTS SUPPLIED FRONT FACE TO FLOOR • • • Drain Hose Hook Water Hose Bottom Panel (flat washers pre-installed) • • • Bottom Panel Caster (4) Caster Wrench Screw (6) -
Page 8: Location Requirements
LOCATION REQUIREMENTS • T he washer must be installed on a solid floor to minimize vibration during the spin cycle. A concrete floor is best. • T he floor should be level with maximum slope of 1" (25 mm) under entire washer. • A suitable location is protected from direct sunlight and heat sources such as radiators, baseboard heaters, or cooking appliances. • Do not install on carpeting. • The location must have a grounded electrical outlet located within 4 ft. (1.2 m) of power cord on the back of the washer. -
Page 9: Drain System Requirements
DRAIN SYSTEM REQUIREMENTS WALL OR FLOOR STANDPIPE The height of the standpipe must be between 311/2” (80 cm) and 471/4”(120 cm) from the bottom of the washer. The minimum diameter of the standpipe must be 2" (5 cm). Wall Floor 31½ " – 47¼ " (80 cm – 120 cm) LAUNDRY TUB The laundry tub must have a minimum capacity of 20 gal. -
Page 10: Electrical Requirements
ELECTRICAL REQUIREMENTS WARNING The washer must be connected to a properly grounded 120 volt, 60 Hz., AC only, 15- or 20-amp, fused electrical supply. A time-delay fuse or circuit breaker is recommended. • If the electric supply provided does not meet the above requirements, contact a licensed electrician. -
Page 11: Step By Step Instructions
STEP BY STEP INSTRUCTIONS INSTALLING YOUR WASHER We recommend that your new washer be installed by a qualified appliance technician. If you feel that you have the skills to install the washer, please read the installation instructions carefully before installing. CAUTION: If, after completing these steps, you are unsure that the washer is properly installed, contact a qualified appliance technician. -
Page 12: Step 2 - Route Drain Hose (Optional)
3. Inspect and remove any remains of packing, tape or printed materials before using the washer. WARNING Suffocation Hazard To avoid danger of suffocation, keep plastic bag and other packing material away from babies and children. Do not use this bag in cribs, carriages and playpens. -
Page 13: Step 4 - Install Casters (Optional)
3. Using a Phillips screwdriver and the 6 bottom plate screws (provided), insert each screw through the bottom plate and into the bottom of the washer. Tighten the screws completely. FRONT Bottom Panel Screw FACE TO FLOOR STEP 4 - INSTALL CASTERS (OPTIONAL) 1. -
Page 14: Step 5 - Level The Washer
STEP 5 - LEVEL THE WASHER IMPORTANT: Proper leveling of the washer will help reduce noise and vibration. 1. Stand the washer upright. NOTE: If you installed casters, unlock them by lifting up on the tab. 2. Place washer in its final location. Check that the water and drain lines are not strained or pinched. Make sure that all four feet are firmly in contact with the floor and that the washer rests solidly in position. 3. -
Page 15: Step 6 - Secure The Drain Hose
CASTERS Using the caster wrench turn the locking nut on the caster clockwise or counterclockwise to adjust the height. Raise Lower Locking Nut STEP 6 - SECURE THE DRAIN HOSE 1. Put the drain hose hook end in a drain pipe or laundry tub. 2. - Page 16 2. Thread the white end of the inlet hose by hand onto the inlet valve on the back of the washer until snug. Then using pliers, tighten an additional two-thirds turn. IMPORTANT: To avoid damage to the hose coupling, do not overtighten. NOTE: To avoid damage to the washer inlet valve, do not use plumber’s tape or sealants on the valve threads.
- Page 17 OPTION 2 - PORTABLE NOTE: In order for this washer to meet the regulated energy standards, the faucet supplying the water must be set to cold. 1. Remove the aerator from your faucet nozzle. 2. Examine the faucet to determine if it has internal or external faucet threads. •...
-
Page 18: Step 8 - Complete Installation
7. Using 2 cable ties, fasten the water inlet hose to the drain hose so that the hoses will stay in place. Water Inlet Hose Cable Ties Drain Hose IMPORTANT: Place the extra hose length (slack) inside the sink to avoid strain and possible damage to the water faucet. -
Page 19: Control Panel And Features
CONTROL PANEL AND FEATURES CONTROL PANEL POWER WATER HIGH ON/OFF LEVEL MEDIUM START PAUSE CYCLE STATUS HEAVY QUICK WASH NORMAL SPIN RINSE WASH WASH CYCLE BUTTON • Use this button to select the desired cycle for your wash load. • The standard default settings of each cycle will be displayed;... -
Page 20: Cycle Guide
START/PAUSE BUTTON • Press this button to start a selected cycle or to pause an operating cycle. NOTE: After starting the wash cycle, you must pause the operating cycle to change the Water Level setting. POWER BUTTON • Press the POWER button to turn on the washer. NOTE: If the washer is turned on, but START/PAUSE is not pressed, the power will automatically turn after 5 minutes. -
Page 21: Operating Instructions
OPERATING INSTRUCTIONS STEP 1 - PREPARE AND SORT LAUNDRY PREPARE LAUNDRY • Check garment labels for manufacturer’s washing instructions. • Empty pockets and turn them inside out. • Remove loose items (pins, bobby pins, coins, rings, earrings, napkins, etc.) from clothes to prevent scratching of the wash basket or clogging the drain pump. -
Page 22: Step 3 - Load The Washer
Powdered Detergent NOTE: For best results, add the detergent to the wash basket before adding laundry. 1. S tart wash cycle and allow the wash basket to fill with a small amount of water. Add powdered detergent directly into the wash basket. In a separate container, dissolve powdered detergent in warm water and pour the solution directly into the wash basket. -
Page 23: Care And Cleaning Guide
CARE AND CLEANING GUIDE WARNING Always unplug your washer to avoid electric shock before cleaning. Ignoring this warning may result in death or injury. Before using cleaning products, always read and follow manufacturer’s instructions and warnings to avoid personal injury or product damage. CLEANING AND MAINTENANCE GENERAL CARE •... -
Page 24: Troubleshooting
TROUBLESHOOTING WASHER DOES NOT OPERATE • Check that the power cord is plugged into a grounded 3 prong outlet. • Check that the electrical wall receptacle is of proper voltage. • Check if the circuit breaker needs to be reset or if the fuse needs to be replaced. •... - Page 25 Bleach stains - Do not pour or splash bleach directly on clothes. If you are using the dispenser and still notice stains, try using diluted bleach. • Excessive wear and tear - Follow manufacturer’s instructions for garment care. FOR MORE HELP, VISIT HAIER.COM OR CALL THE CONSUMER HELP LINE AT 1-877- -3639.
-
Page 26: Limited Warranty
For 12 months from the date of original retail A product whose original serial number has purchase, Haier will repair or replace any part been removed or altered. free of charge including labor that fails due to Any service charges not specifically identified a defect in materials or workmanship. - Page 27 Précautions à prendre avant un départ ..............46 Préparation avant un déménagement ou un entreposage ........46 DÉPANNAGE ..................... 47 GARANTIE LIMITÉE ................... 49 DOCUMENTS À CONSERVER Merci d’avoir acheté ce produit Haier. Ce manuel d’utilisation vous aidera ___________________________________ à obtenir la meilleure performance Numéro de modèle possible de votre nouvelle laveuse.
-
Page 28: Importantes Instructions De Sécurité
IMPORTANTES INSTRUCTIONS DE SÉCURITÉ AVERTISSEMENT A n de réduire le risque d’incendie, de choc électrique ou de blessures corporelles lors de l’utilisation de cet appareil, observer certaines précautions fondamentales, notamment : • Lire toutes les instructions avant d’utiliser cet appareil. •... -
Page 29: Précautions Générales De Sécurité
PRÉCAUTIONS GÉNÉRALES DE SÉCURITÉ • L’espace autour de l’appareil doit être libre de toute matière combustible comme de la charpie, du papier, des chiffons ou des produits chimiques. • Une surveillance attentive s’impose lorsque cet appareil ménager est utilisé par ou à proximité d’enfants. Ne pas laisser des enfants jouer avec l’appareil, ni jouer dessus ou à... -
Page 30: Pièces Et Caractéristiques
PIÈCES ET CARACTÉRISTIQUES Couvercle supérieur Panneau d’accès Tableau de commande Tuyau d’arrivée Caisse Panier de lavage Poignée de la caisse Dispositif haute pression Pieds de nivellement (2) Cerclage de cuve externe Orifice de vidange Anneau d’équilibrage Cordon d’alimentation électrique (120 V/60 Hz) -
Page 31: Instructions D'installation
INSTRUCTIONS D’INSTALLATION OUTILS NÉCESSAIRES • • Pince Mètre ruban • • Clé Niveau • Tournevis à lame plate PIÈCES FOURNIES FRONT FACE TO FLOOR • • • Crochet de tuyau Tuyaux d’admission Panneau inférieur d’évacuation d’eau (rondelles plates préinstallées) • •... -
Page 32: Critères D'emplacement
CRITÈRES D’EMPLACEMENT • La laveuse doit être installée sur un plancher résistant pour réduire les vibrations durant le programme d’essorage. Un plancher en béton est idéal. • Le plancher doit être de niveau avec une pente maximale de 1” (25 mm) sous l’ensemble de la laveuse. -
Page 33: Critères Du Système De Vidange
CRITÈRES DU SYSTÈME DE VIDANGE TUYAU RIGIDE DE REJET À L’ÉGOUT AU MUR OU AU PLANCHER La hauteur du tuyau rigide de rejet à l’égout doit être comprise entre 311/2” (80 cm) et 471/4”(120 cm) à partir du bas de la laveuse. Le diamètre du tuyau rigide de rejet à l’égout doit être de 2"... -
Page 34: Spécifications Électriques
SPÉCIFICATIONS ÉLECTRIQUES AVERTISSEMENT La laveuse doit être branchée à une prise secteur correctement mise à la terre de 120 volts, 60 Hz, CA uniquement, protégée par fusible de 15 ou 20 ampères. Il est recommandé d’utiliser un disjoncteur ou un fusible temporisé. -
Page 35: Instructions Étape Par Étape
INSTRUCTIONS ÉTAPE PAR ÉTAPE INSTALLATION DE LA LAVEUSE Nous recommandons que l’installation de votre nouvelle laveuse soit réalisée par un technicien d’appareils électroménagers agréé. Si vous pensez être capable d’installer la laveuse, lire attentivement les instructions d’installation avant de procéder à l’installation. MISE EN GARDE : Si vous n’êtes pas certain que la laveuse est correctement installée après avoir effectué... -
Page 36: Étape 2 - Acheminer Le Tuyau D'évacuation (Facultatif)
AVERTISSEMENT Risque de suffoquer A n d’éviter tout risque d’étouffement, conserver le sac en plastique et autres matériaux d’emballage hors de portée des bébés et des enfants. Ne pas utiliser ce sac dans des berceaux, poussettes ou parcs pour enfants. Le sac en plastique peut bloquer les ori ces du nez et de la bouche et empêcher la respiration. -
Page 37: Étape 4 - Installation Des Roulettes (Facultatif)
3. À l’aide d’un tournevis Phillips et des 6 vis de la plaque inférieure (fournies), insérer chaque vis dans la plaque inférieure et sur le bas de la laveuse. Serrer complètement les vis. FRONT Vis du panneau inférieur FACE TO FLOOR ÉTAPE 4 - INSTALLATION DES ROULETTES (FACULTATIF) 1. -
Page 38: Étape 5 - Nivellement De La Laveuse
ÉTAPE 5 – NIVELLEMENT DE LA LAVEUSE IMPORTANT : Un bon aplomb de la laveuse permet de réduire les vibrations et bruits éventuels. 1. Redresser la laveuse en position verticale. REMARQUE : Si des roulettes ont été installées, les déverrouiller en soulevant la patte. -
Page 39: Étape 6 - Immobilisation Du Tuyau D'évacuation
ROULETTES À l’aide de la clé à roulettes, tourner l’écrou de verrouillage de la roulette dans le sens horaire ou antihoraire pour régler la hauteur. Relever Abaisser Écrou de blocage ÉTAPE 6 – IMMOBILISATION DU TUYAU D’ÉVACUATION 1. Placer l’extrémité du crochet du tuyau d’évacuation dans un conduit d’évacuation ou un évier de buanderie.