Advertisement
Quick Links
Introduction
Features
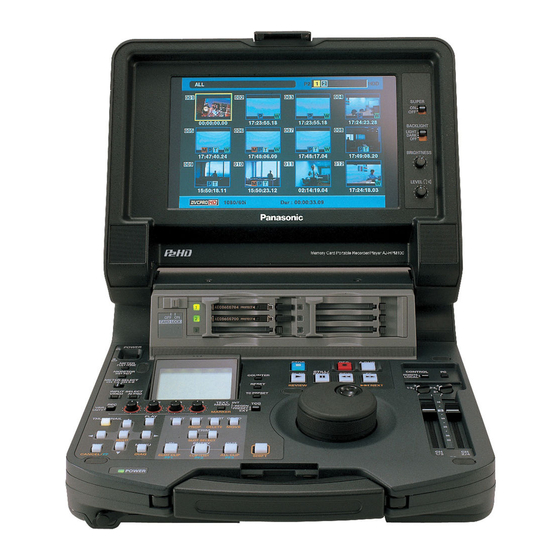
The AJ-HPM100 is a portable memory card recorder/player equipped with six P2 card (*) slots and a 9-inch color LCD monitor.
Capability to record and play back audio and video in the compressed DVCPRO HD, DVCPRO50, DVCPRO/DV and AVC-Intra
(option) formats on six P2 cards (*) allows you to use the unit like a conventional editing VTR player. The AJ-HPM100 comes with
the following features.
MEMO: A memory card with the "P2" logo (for example, the separately sold AJ-P2C008HG) is referred to as a "P2 card" in this
manual.
T C R
0 0 : 0 1 : 2 3 : 0 1
E V 9 9
P S T O P
14
Introduction: Features
Advertisement

Related Manuals for Panasonic AJ-P2C008HG


Summary of Contents for Panasonic AJ-P2C008HG
- Page 1 (option) formats on six P2 cards (*) allows you to use the unit like a conventional editing VTR player. The AJ-HPM100 comes with the following features. MEMO: A memory card with the “P2” logo (for example, the separately sold AJ-P2C008HG) is referred to as a “P2 card” in this manual.
- Page 2 AJ-P2C004HG Approx. 16 min. Approx. 8 min. Approx. 4 min. ■ Time code/Player function for editing provided AJ-P2C008HG Approx. 32 min. Approx. 16 min. Approx. 8 min. This unit has a built-in TCG (time code generator) and TCR AJ-P2C016RG Approx. 64 min. Approx. 32 min. Approx. 16 min.
- Page 3 ■ AVC-Intra Codec Option Supported The addition of an optional AVC-Intra Codec board AJ- YBX200G will enable use of the AVC-Intra Codec. Introduction: Features...
-
Page 4: Operating Modes
Moving Between Screens and Menu Operations Operating Modes This unit provide the three operating modes described below. Recording and Displays video and performs Use the THUMBNAIL and PLAY LIST buttons to select these playback modes recording or playback. modes. Lamps indicate which mode is currently engaged. Thumbnail mode Shows thumbnails of clips and manages clips. - Page 5 Menu Operations Press the MENU button in each mode to open the menu. Press the MENU button to open the menu. Perform menu operations as described below. Use the cursor buttons to place the cursor on menu items. ◆ NOTE: •...
- Page 6 Using the On-screen Keyboard Using the Full Keyboard Using the Ten Keypad The full keyboard appears when necessary. The ten keypad appears when necessary. Move the cursor to the character you want to enter and press Move the cursor to the character you want to enter and press the SET button.
- Page 7 Clip Management Thumbnail and Clip Management 15 14 9 10 11 12 13 This unit provides a thumbnail screen for managing clips. A clip is a single data item that contains video, audio, metadata and other additional information. Normally, a clip is one shot generated from the start of recording until recording stops.
- Page 8 Thumbnail Screen Names and Functions Display status Thumbnail Display status indicates the type of thumbnails Indicates the initial frame of the clip that represents it. displayed on the screen. ALL: All clips Clip no. SAME FORMAT: Clips with the same format Indicates the numbers assigned to P2 card clips.
- Page 9 P2 card slot number and hard disk drive status 2 3 4 5 6 P2 card and USB hard disk drive status is indicated as described below. The number of the P2 card slot that contains a P2 card is indicated in white. (white) The number of the P2 card slot of the P2 card that contains the clip at the cursor...
- Page 10 Changing Thumbnail Display The thumbnail screen can be customized to suit operating Use the cursor buttons to select the clip type that conditions and improve efficiency. should appear under [THUMBNAIL]. Switching the Type of Information That is Displayed ALL CLIP: Show all clips SAME FORMAT Show clips in the same format as...
- Page 11 TEXT MEMO IND.: Shows the text memo Setting Items to Display indicator Hides the text memo The thumbnail display can be customized to suit different indicator operating needs. The following describes procedures for changing thumbnail display indicators and data settings. WIDE IND.: Shows the wide indicator Hides the wide indicator...
- Page 12 Press the SET button. • Playback starts from the beginning of the clip regardless of a change in thumbnail location. ◆ NOTE: • Selecting [THUMBNAIL INIT] opens a confirmation screen. Select [YES]. Press the MENU button to end processing. Thumbnail editing Attach a text memo to video you want to edit.
- Page 13 Attaching Text Memos and Shot Marks A text memo can be attached in a clip to mark a specific Press the thumbnail menu button and choose location. The user can attach shot marks to distinguish clips [THUMBNAIL] – [TEXT MEMO CLIPS] from the from each other.
- Page 14 When the cursor is in the lower half of the LCD Attaching Shot Marks monitor, use the right and left (b a) cursor buttons to go to the thumbnail text memo you want to play Attach shot marks to distinguish clips from each other. back and press the PLAY button.
- Page 15 Viewing and Repairing Clip Information Clip no. Viewing Clip Information Thumbnail Detailed clip information can be displayed on the screen. Clip information Indicates the number of indicators, inserted text memos Open the thumbnail screen. and voice memos in a clip. The mark appears when the P2 card where the clip resides is write-protected.
- Page 16 THUMBNAIL: Frame location and size (frame GLOBAL CLIP ID: Global CLIP ID offset, height, width) of video that (This is a unique number. There is makes up the thumbnail no clip anywhere in the world with the same number.) Press the MENU button or the EXIT button to end USER CLIP NAME: The name a user assigns to a clip.
- Page 17 Select [OK] after revising (or press the ENTRY button). • This saves the revised metadata to the clip and the metadata display reappears. • Select [EXIT] to cancel the entry and return to the previous display. ◆ NOTE: • Latitude and longitude cannot be changed separately. To delete these entries, enter a blank for altitude.
- Page 18 P2 card. Download the latest version of P2 Select Method for Recording the USER viewer from the URL given below. English: https://eww.pavc.panasonic.co.jp/pro-av/ CLIP NAME Install P2 viewer on a PC, create a metadata upload file and Set the method for recording the USER CLIP NAME.
- Page 19 Select [TYPE 1] or [TYPE 2] and press the SET COUNT Value button. The count value is indicated as a four-digit number. When Recording method USER CLIP NAME to be recording method “TYPE 2” is selected for the USER CLIP recorded NAME in the clip metadata that is loaded, the COUNT value is Use clip metadata...
- Page 20 ■ Incrementing the COUNT value of the USER CLIP NAME for clips exceeding 4 GB In the following case, one shot is recorded as multiple clips and the COUNT value is automatically incremented and recorded for each shot. • When an 8 GB or larger P2 card is used in this unit and each continuous recording exceeds a preset time.
- Page 21 Use the cursor buttons to move the pointer and press Press EXIT to exit the metadata confirmation screen. the SET button. Deleting Metadata Use this function to check loaded metadata settings. Use the following procedure to delete metadata stored in this unit. Open the thumbnail screen.
- Page 22 Select [ON] and press the SET button. This setting records the loaded metadata simultaneous with video recording. The USER CLIP NAME is attached to metadata as specified by the recording method. Press the MENU button to end setup. Record video on this unit. ◆...
- Page 23 Checking Card Status Use the following procedure to display P2 card slot status and P2 card usage and other card information on the screen for checking. Selecting Information to Display Select whether remaining capacity or used capacity should appear in the P2 card information. Open the thumbnail screen.
- Page 24 Displaying Card Status Information After completing the settings described on the previous page, you can use the procedure described below to check the Write protect mark status of P2 cards in P2 card slots. A write-protected P2 card is indicated by the mark displayed here.
- Page 25 Card warning messages This warning appears when the following P2 cards are inserted. • [RUN DOWN CARD] The card has been overwritten the maximum number of times. • [DIR ENTRY NG CARD] Directory structure does not conform to standard specifications. Use Detailed P2 Card Status for more information.
- Page 26 Using Play List Play List Function The play list function allows you to create lists (play lists) that • Do not use and register multiple copies of a clip at the same time since that may result in incorrect recognition. register clip sections recorded on P2 cards to continuously play them back in list order.
- Page 27 Play List Screen Names and Functions Display status SLOT: Number of P2 card slot with card The following type of event screens are displayed. storing event clip PLAYLIST: Event list The number of the first and subsequent events that EVENT PROPERTY: Detailed event information cannot be played back are indicated in red.
- Page 28 Filename INSERT: Insert edit mode Shows the number of the P2 card slot where the Adds and edits events. current play list is stored and its filename. OVERWRITE: Overwrite mode Overwrites the track set by the INPUT P2 card slot number: Filename TRACK menu at the designated P2 cards slot and file name...
- Page 29 Stop Mode Setup You can set whether pressing the STOP button during play list playback should return you to the play list after playback or not. Use the following procedure to make the desired setting. Open the play list screen. Press the MENU button.
- Page 30 Buttons Used in Play List Operations 18,19 20,21 CONTROL REMOTE LOCAL UNITY UNITY ∞ 10 11,12 PLAY LIST button Press to switch to play list mode. This button lights in ▲▼ b a Cursor buttons the play list mode. In the play list, press this button to move the play list In the stop mode or when thumbnails are displayed, and time line pointer location.
- Page 31 6.IN + 9.OUT buttons 10.SHIFT + 9.OUT buttons Pressing the IN and OUT buttons simultaneously will In the overwrite edit mode, hold down the SHIFT button show the duration between the IN and OUT points. If and press the OUT button to change the P OUT an OUT point has not been registered, it will show the (player) and R OUT (recorder) points.
- Page 32 down the SHIFT button and press the INSERT button to REVIEW button delete the selected event. To review all events at the cursor position, hold down the SHIFT button and press the PLAY button. Playback starts 3 s before the IN point and stops 1 s after the INSERT button OUT point.
- Page 33 Creating Play Lists The workflow for creating a play list is given below. A play list can be up to 24 hours long. Preparing new play lists ↓ Registering events and adding existing play lists ↓ Saving play lists Preparing New Play Lists This section describes how to delete a play list stored in the Press the MENU button.
- Page 34 Audio Channel Replacement During Registering Events for Selected Editing Clips Follow the steps below to replace audio channels after event Use the following procedure to add selected clips to the play registration. list. This operation registers the start of a clip as the IN point and its end as the OUT point.
- Page 35 ➝For details, refer to “Changing Event IN and OUT Points” Press the SET button. (page 75). This registers an event where the start of the clip is the IN point and its end is the OUT point. Register an IN point. ◆...
- Page 36 ◆ NOTE: Importing and Adding to Existing • You cannot import a play list file whose format differs from the Play List Files format of the current play list. • If the number of selected events exceeds 100, the events that exceed the limit will not be imported.
- Page 37 Saving Play Lists Naming Play Lists Saving a Play List to a P2 Card Use the steps below to name play lists. Use the steps below to save a play list stored by the unit in the play list area of memory to a P2 card. Open the play list screen.
- Page 38 ◆ NOTE: • The filename is automatically generated and cannot be changed. Changing the filename on a PC will make it impossible to load. • Updated play list files cannot be loaded by older versions or devices. Store old versions of the play list in the unit before using them.
- Page 39 Editing Play Lists Play lists can be edited in a number of different ways. Opening an Existing Play List File Open the play list screen to view the play list in the play list Select [YES] in the confirmation screen and press area of memory in this unit.
- Page 40 Changing Event IN and OUT Points You can change the IN and OUT points for a play list event Register a new IN point. during video playback. Use the operation buttons or search dial to look for a location to start an event. Then hold down the IN button and press the ENTRY button.
- Page 41 • You cannot make changes that go beyond the start and end ◆ NOTE: points of a clip. • Pressing the following buttons will also finalize a change. • You cannot make changes that reverse the IN and OUT point - Pressing the cursor buttons.
- Page 42 Deleting Events You can use the following procedure to delete events in the • It is not possible to delete only the event if that event contains an EXTRA track. Delete the EXTRA track before deleting the event, play list. or delete the event and the EXTRA track.
- Page 43 Saving Events While editing a loaded play list file or the play list file has been saved using [FILE] – [SAVE AS], the file can subsequently be saved using the following procedure. Use [SAVE AS] for the first save operation. Open the play list screen.
- Page 44 Overwrite Editing of Play Lists When an event is registered, an event can be overwritten on video and audio, or on EXTRA track. Overwrite editing is performed by specifying the IN and OUT points of the event that will be overwritten (recorder side) and the event that will overwrite it (player side).
- Page 45 AUDIO], and select desired tracks. Then press the Setting Tracks for Overwriting SET button. Select tracks to overwrite. When V is selected, audio on the ◆ NOTE: channel other than that selected by video and EXTRA is • You can also use the INPUT SELECT AUDIO and VIDEO buttons to overwritten.
- Page 46 Press STOP to return to the play list screen. Press the EVENT button to return to the play list. The registered IN and OUT points appear as R IN ▼ The registered IN and OUT point thumbnails and TC (green) and R OUT ▼ (pink) at the top of the timeline. appear as P IN and P OUT points below the timeline.
- Page 47 The screen for revising IN/OUT points appears in P Revising R IN/R OUT while Viewing Video IN (P OUT) ➝ R IN (R OUT) ➝ OFF order. Press the PLAY button in the play list screen to display video. Press the IN (OUT) + GOTO buttons or operation buttons and press the IN (OUT) + ENTRY buttons where the revision will be made to reregister.
-
Page 48: Recalling Events
Recalling Events The IN and OUT points of a finalized event can be registered again to allow editing at the same location. (Recall function) Move the cursor to the event you want to recall. Press the REC button. Register the time code at the R IN/R OUT and P IN points of the selected event to clear the finalized status. - Page 49 Audio Split Editing Use audio split to shift the audio IN point relative to the video IN point (audio IN point split). Note that audio channels cannot be selected in this procedure. This function is performed on all channels together. Play list example 1 Play list example 2 New play list event...
- Page 50 Registering From Video Use the following procedure to newly register an event ◆ NOTE: containing an audio split. • In the split display, “–” indicates forward while “+” indicates reverse direction. ◆ NOTE: • A split can be registered from the start of the original clip to the •...
- Page 51 Adding and Registering Audio Split Point (Changing Registered Point) You can add an audio split to an event registered in the play Open the play list screen. list and change the audio split point. Use the cursor buttons to select the event where you want to add (or change) an audio split point.
- Page 52 Press the ENTRY button to finalize the change. ◆ NOTE: • Trimming cannot be performed beyond the start point of an original clip. • The IN, OUT and SPLIT buttons allow you to use the TRIM+/– button for trimming in the event register screen when the time code is displayed.
- Page 53 Simplified Voice-Over This function allows you to make voice-overs and give priority to the voice-over during playback. Recording is performed on one or two channels. The channel input during recording can be mixed with the playback sound. • The maximum number of voice-overs is 99. ◆...
- Page 54 Voice-Over From Still Image Status Find the location for the voice-over. Use the operation buttons or the search dial to find a location for a voice-over and press STILL Press the A.DUB button. This generates an A DUB PAUSE state while a still image is output at the still location.
- Page 55 Select the event you want to change. Displaying Voice-Over Events The voice-over appears in the play list screen as shown below. Play List Use the following procedure to change offset and • The voice-over is added to the line after an event with an duration.
- Page 56 Viewing Event Information Indicating Event Property You can use this function to view and confirm miscellaneous ◆ NOTE: event information. • Holding down the SHIFT button in step 2 while pressing the SPLIT button will also open the event information screen. •...
- Page 57 Event Review You can use this function to check the content of an event by playing if from its IN point to its OUT point. Open the play list screen. Use the cursor buttons to select the clip you want to review.
- Page 58 Playing Back Play Lists Setting the Playback Time Code (TC) During play list playback, you can select whether the time Use the cursor buttons to choose [SETTING] – code should be replaced and output as a continuous value or [REPLACE TC] – [START TC] and press the SET the time code of each clip should be output.
- Page 59 Playing Back the Play List Use the following procedure to play back the play list. Press the PLAY button. Playback starts from the cursor location and continues until the end of the play list or until all playable events have been played.
- Page 60 Creating New Clips From the Play List (Edit Copy) You can use the play list to create a new clip. ◆ NOTE: This function is called edit copy. • If there is not enough free space left on the P2 card where edit copy will save the data, “WARNING: LACK OF REC CAPCITY!”...
- Page 61 • A hard disk is a precision instrument whose read and write functions may fail in some operating environments. Please note that Panasonic accepts no liability whatsoever for data loss or other losses either direct or indirect arising from hard disk damage or other defects.
- Page 62 Switching to USB Host Mode Use USB host mode operations. ◆ NOTE: • While P2 cards played back in USB host mode will appear on the LCD monitor, the inputs and output on the rear panel will not CONTROL work. REMOTE LOCAL •...
- Page 63 You may use the drive mount converter when there is un Insert a P2 card invisible partition because the drive overlaps an already assinged network. Open the thumbnail screen. https://eww.pavc.panasonic.co.jp/pro-av/ Press the MENU button. When the export operation ends, “COPY COMPLETED!” appears. Use the cursor buttons to choose [HDD] –...
- Page 64 Displaying Hard Disk Information (Explorer Screen) Use this function to view hard disk information. Disk information The following information appears. Switch to the USB host mode. Hard disk that PARTITION: TYPE S/ makes it possible P2STORE Connect a USB hard disk. to read and write VENDOR: Name of vendor...
- Page 65 Displaying Clip Thumbnails on a Hard Disk You can display thumbnails and manage clips stored on the VERIFY: Verify setting and result at time of hard disk in the same way as clips on P2 cards. recording ON: FINISHED Verification was Open the explorer screen.
- Page 66 Importing Data from the Hard Disk to a P2 Card Importing Data in Partition units from TYPE Importing Data to a P2 Card in Clip Units S Hard Disks and P2 Store You can select a hard disk clip and import it to a P2 card. You can import (loading data from a hard disk to a P2 card) Insert the P2 card where the data will be imported to.
- Page 67 Using SD/SDHC Memory Cards This unit supports SD/SDHC memory cards. USED: Used capacity (bytes) BLANK: Free space (bytes) ◆ NOTE: TOTAL: Total capacity (bytes) • Current SETUP menu settings can be saved to and loaded from an NUMBER OF CLIPS: The number of clips on an SD SD memory card.
- Page 68 ◆ NOTE: • Repeat the procedures in steps 2 to 4 to format P2 cards in other P2 card slots. Press the MENU button to end processing. Using USB Connectors and SD/SDHC Memory Cards: Using SD/SDHC Memory Cards...
- Page 69 Setup Unit Setup The settings for this unit consist of SYSTEM, BASIC, OPERATION, INTERFACE, TIME CODE, VIDEO, AUDIO, DIF and MENU. The SYSTEM setting values are stored in the SYSTEM file. The other setting values are stored in the user setting file. Up to five user files (USER1 to USER5) can be saved.
- Page 70 Changing Settings The menus on the LCD monitor or a monitor (when the SUPER switch on the right side of the LCD monitor is set to “ON”) connected to the ANALOG COMPOSITE MONITOR OUT connector make it possible to change settings. Change Operations Change set values.
- Page 71 Assign a setting item to the PF button and perform the Press the PF button (1 to 3) required to bring up the following operation to change setting values. item to change. ➝For details on how to assign items to the PF button, refer to Each press of the button updates the setting value.
- Page 72 Item Settings SYSTEM The system menu specifies analog component (HD) output, analog composite output, phase adjustment of audio output, system frequency, phase of SD REF input of HD output, and system file lock. * An underlined setting indicates an initial value. Item Setting Settings and brief function description...
- Page 73 Item Setting Settings and brief function description SUPER SUPER DISP. DISP. 0000 Specifies whether or not HD output should advance 90H phase relative to SD REF input during SD REF input. 0001 0: Outputs HD at the same phase as SD REF. 1: HD output is output at a phase that is 90H advanced relative to SD REF.
- Page 74 BASIC This menu sets buttons available on the key panel in REMOTE mode, switches display of the CTL counter display between 12 and 24-hour clock display, sets superimposed display, character displays in superimposed display, SETUP-MENU and other displays, sets recording formats, sets the formats that can be added to the play list and sets the time of the internal clock. * An underlined setting indicates an initial value.
- Page 75 Item Setting Settings and brief function description SUPER SUPER DISP. DISP. When set to 59.94 Hz Specifies the vertical character position output via the VIDEO MON connector or displayed in the superimposed display of the LCD panel. 0000 0020 0022 CHARA V-POS When set to 50 Hz 0000...
- Page 76 Item Setting Settings and brief function description SUPER SUPER DISP. DISP. 0000 NORMAL Specifies the reference to synchronize the frames for recording. 0: The input video signal is automatically identified and serves as reference. 0001 SLTC 1: The time code which is input to the SD I IN connector is identified and serves as reference.
- Page 77 Time difference City/Region Time difference City/Region +07:00 Bangkok –08:00 Los Angeles +07:30 –07:30 +08:00 Beijing –07:00 Denver +08:30 –06:30 +09:00 Tokyo –06:00 Chicago +09:30 Darwin Islands –05:30 +10:00 Guam –05:00 New York +10:30 Lord Howe Island –04:30 +11:00 Solomon Islands –04:00 Halifax +11:30...
- Page 78 During IEEE1394 signal input, the EE mode is invoked regardless of this menu setting. 0000 Select whether recording and stopping should be performed automatically according to the Recording Marks in the HD SDI input signals from Panasonic camera-recorders. 0001 TYPE1...
- Page 79 TYPE-B battery selected in menu No. 180 BATTERY SEL item has dropped. 0018 12.4 TYPE-B END NOTE: • A setting that is larger than NEAR cannot be made. 0034 14.0 Panasonic camera-recorders, recording formats and Recording Mark Model Recording format Recording Mark TYPE Remarks AJ-HDC27F,H 720/**p over 60p TYPE1 AJ-HDX400P 1080/59.94i...
- Page 80 ID SEL NOTE: • Select [OTHER] for ID data for a VTR other than a DVCPRO. • Select [ORIG] only when specific Panasonic controllers (such as AJ-A850, separately sold accessory) are connected. TIME CODE This menu sets the time code.
- Page 81 Item Setting Settings and brief function description SUPER SUPER DISP. DISP. 0000 Specifies an operating mode that advances the internal time code generator. 0: The internal time code generator is advanced only during recording. 0001 FREE RUN MODE 1: When the power is on, the internal time code generator is advanced regardless of operating mode.
- Page 82 Item Setting Settings and brief function description SUPER SUPER DISP. DISP. 0000 Specifies whether or not LTC data will be superimposed on HD SDI output. HD EMBD LTC 0001 0: Not superimposed 1: Superimposed 0000 Specifies whether or not the internal time code generator value should be recorded in the VAUX area.
- Page 83 Item Setting Settings and brief function description SUPER SUPER DISP. DISP. 0000 Specifies whether or not horizontal outlines be emphasized in down-conversion. D/C ENH H 0001 +1dB 0: 0dB 1: +1dB 0000 Specifies whether or not vertical outlines be emphasized in down-conversion. D/C ENH V 0001 +1dB...
- Page 84 Item Setting Settings and brief function description SUPER SUPER DISP. DISP. Adjusts the PB level of SD SDI and analog composite output (– ∞ to 0 dB to +3 dB). 0000 0.0% NOTE: 1000 100.0% Pb LVL(SD) This setting is available when CMPNT is set in menu No. 650 STYLE. 1413 141.3% Adjusts the PR level of SD SDI and analog composite output (–...
- Page 85 Item Setting Settings and brief function description SUPER SUPER DISP. DISP. 0000 AUTO Specifies the aspect ratio of image displayed on the LCD panel. 0: Switches aspect ratio automatically. 0001 1: Displays 480i or 576i images in the 4:3 aspect ratio. 0002 16:9 (Displays 1080i or 720p video in the 16:9 aspect ratio.)
- Page 86 Item Setting Settings and brief function description SUPER SUPER DISP. DISP. 0000 BLANK Specifies the line that superimposes UMID data. 0001 NOTE: • You cannot select the same line as in menu No. 501 VITC POS-1 and No. 502 0006 VITCPOS-2.
- Page 87 Item Setting Settings and brief function description SUPER SUPER DISP. DISP. 0000 Specifies the input signal to be recorded on the audio CH1. 0: Audio input CH1 signal 0001 1: Audio input CH2 signal 0002 REC CH1 2: Audio input CH3 signal 0003 3: Audio input CH4 signal 0004...
- Page 88 Item Setting Settings and brief function description SUPER SUPER DISP. DISP. 0000 Turns on and off the CH2 microphone power supply. CH2 MIC PWR 0001 0: Does not use the microphone power supply. 1: Uses the jack switch to turn the microphone power supply on and off. 0000 Sets a mix of analog and SDI audio output.
- Page 89 This menu is used for setting up the digital video interface. * An underlined setting indicates an initial value. Item Setting Settings and brief function description SUPER SUPER DISP. DISP. 0000 S100 Specifies the transfer speed of digital video interface output. 0001 S200 0:100 Mbps...
- Page 90 Item Setting Settings and brief function description Remarks SUPER SUPER DISP. DISP. 0000 USER2 Specifies the user file that saves USER 1 settings. Setting available 0: Saved to USER 2 for USER1 only 0001 USER3 1: Saved to USER 3 0002 USER4 2: Saved to USER 4...
- Page 91 Saving Menu Settings to SD Memory Cards Use the steps below to write SETUP menu settings to or load A completion message appears when the load from SD memory cards. The unit can handle up to four files progress bar closes. and enables the input of titles.
- Page 92 The format confirmation screen appears. • Press the SET button to start formatting. • To cancel formatting and return to the previous screen, press the EXIT button. A completion message appears when the format progress bar closes. Setup: Item Settings...
- Page 93 Error Messages When a warning occurs in this unit, the error number is DIAG menu indicated on the counter display. Open the DIAG menu to view a description of the error on the counter display or a LCD This menu shows deck information. Deck information includes monitor.
- Page 94 WARNING information display • A warning message is displayed whenever a warning occurs. When no warnings have been detected, “NO WARNING” is displayed. • When multiple warnings occur, turn the search dial to check the descriptions of each warning. If “T&S&M” is selected in setup menu No. 006 (DISPLAY SEL), a message appears in the mode display whenever a warning or error occurs.
- Page 95 Counter Priority Monitor display Description Deck operation display Displayed while clip information is being read or when clip configuration has changed. No operations can be performed while this display is on the screen. [Meaning] Operation BUSY • A card has been inserted or removed. BUSY continues •...
- Page 96 Display Priority Description Deck operation Character code Displayed when data was corrupted due to a P2 card error during recording. STOP This error is displayed after recording ends and until the start of the next operation. CARD This error is not displayed during playback. (* indicates the slot number where the ERROR<******>...
- Page 97 Item Message Description Measure USER CLIP NAME Characters in the clip name had to be deleted in The user clip name plus the counter value can only MODIFIED! adding the counter value. contain up to 100 bytes. Characters in the clip name are automatically deleted when the total exceeds 100 bytes.
- Page 98 Item Message Description Measure DIFFERENT The play list contains files in different versions. Play list files in a different version cannot be imported. PLAYLIST VERSION! INCLUDE ILLEGAL The play list contains illegal events. Repair or delete as necessary. EVENT! WRITE PROTECTED! The specified card is write protected. Insert write-enabled media.
- Page 99 Error information Error Description Operation Remarks Message Displayed when an error occurs in reading and writing card data. STOP E-30 TURN POWER OFF To continue operation, turn the power off and then back on again. Displayed when a system controller command was not complied to. STOP E-37 COMM ERROR...
- Page 100 List of Shortcuts Thumbnail GUI Play list GUI Shortcut keys Name Description Name Description Finalizes overwrite edited unfinalized FINALIZE/ event / Turns the overwrite edited RECALL event at the cursor position into unfinalized status. SHIFT+FF/UP Moves to first thumbnail Moves to first event SHIFT+REW/DOWN BOTTOM Moves to last thumbnail...
- Page 101 Thumbnail off and playback from thumbnail Play list event/INSERT registration Shortcut keys Name Description Name Description IN+ENTRY ENTRY IN POINT Registers CUEUP point to IN button ENTRY IN POINT Registers event IN point ENTRY OUT ENTRY OUT OUT+ENTRY Registers CUEUP point to OUT button Registers event OUT point POINT POINT...
- Page 102 Information ENGLISH Thank you for purchasing this product. Please read these notes in combination with the Operating Instructions. n Addition to “AUDIO” Setup: Item Settings (page 125) Item Setting SUPER SUPER Settings and brief function description DISP. DISP. 0000 Specifies audio processing for the IN and OUT points during voice-overs. A DUB FADE 0001 FADE...