
Related Manuals for Philips FW-V220/21


Summary of Contents for Philips FW-V220/21
- Page 1 V220 V220 VCD MP3-CD Mini Hi-Fi System Video CD ver. 2.0 3139 115 20823 pg 01-032/V220/21-Eng 28/05/2001, 09:03 AM...
- Page 2 ATENCIÓN sea el requerido para su aparato Minisistema de Audio FW-V220/21 110–127 / 220–240V~; 50–60 Hz 44 W Philips Mexicana, S.A. de C.V. Norte 45, # 669, Col. Industrial Vallejo Tel. 5728-4200 Philips Electronics HK, Ltd. ______________________________ 28/05/2001, 09:03 AM...
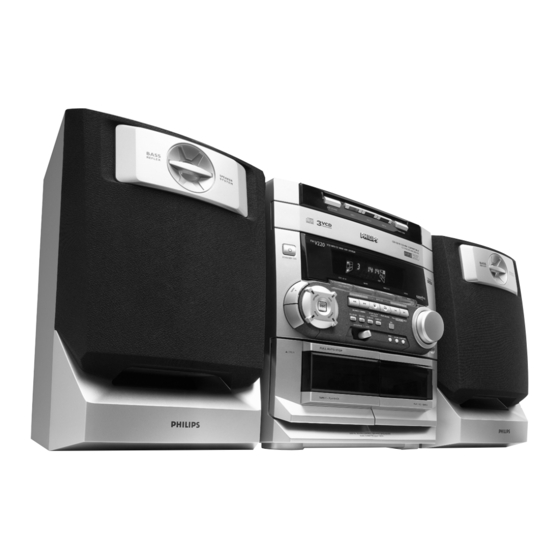
- Page 3 DISC CHANGE C H A N G E R VCD MP3-CD MINI HIFI SYSTEM STANDBY-ON C D 1 • 2 • 3 PAL/NTSC L OPEN PLAY/REC TAPE 1 ∞ pg 01-032/V220/21-Eng DISC 1 DISC 2 DISC 3 OPEN • CLOSE CD / CD - R / CD - RW COMPATIBLE CD SYNCHRO RECORDING BAND...
- Page 4 This position has been underlined by tests showing the superior performance of the various Philips players, as well as by the positive experiences of millions of individual consumers around the world.
- Page 5 Index English ------------------------------------------------ 6 -------------------------------------------------------- 33 Bahasa Melayu ----------------------------------- 58 Bahasa Indonesia -------------------------------- 85 3139 115 20823 pg 01-032/V220/21-Eng 28/05/2001, 09:03 AM...
-
Page 6: Table Of Contents
Contents General Information Environmental Information ... 7 Supplied Accessories ... 7 Safety Information ... 7 Preparation Rear Connections ... 8-9 Inserting batteries into the Remote Control 9 Controls Controls on the player and remote control ... 9-11 Operating the System Plug and Play ... -
Page 7: General Information
IMPORTANT: PLEASE NOTE THAT THE VOLTAGE SELECTOR LOCATED AT THE REAR OF THIS SYSTEM IS PRESET AT 220V FROM THE FACTORY. FOR COUNTRIES THAT OPERATE AT 110-127V, PLEASE ADJUST TO 110-127V BEFORE YOU SWITCH ON THE SYSTEM. ¶ The type plate (which contains the serial number) is located at the rear of the player. -
Page 8: Rear Connections
Preparations Rear Connections AM Loop Antenna Connection Connect the supplied loop antenna to the AM ANTENNA terminal. Place the AM loop antenna far away from the system and adjust its position for the best reception. FM Wire Antenna Connection Connect the supplied FM wire antenna to the FM AERIAL (FM ANTENNA) 75 Ω... -
Page 9: Inserting Batteries Into The Remote Control
Video Out Connection Connect the VIDEO OUT terminal at the rear of the system to the TV or VCR VIDEO IN for viewing or recording. Adjusting the Operating Voltage Before connecting the AC power cord to the wall outlet, make sure that the voltage selector at the rear of the system is set to the local power line voltage. - Page 10 Controls TUNER / (BAND) – to select Tuner mode. When in tuner mode, press to select the waveband: FM or MW. TAPE / (TAPE 1• 2) – to select Tape mode. When tape playback is stopped, press to select either tape deck 1 or 2. AUX (VIDEO) –...
- Page 11 º KEY CONTROL ( I È i ) – to change the key to suit your vocal range (for VCD operation only). I ... to decrease vocal key level. È ... to restore vocal key to original setting. i ... to increase vocal key level. ⁄...
-
Page 12: Operating The System
Operating the System VCD MP3-CD MINI HIFI SYSTEM STANDBY-ON C D 1 • 2 • 3 PAL/NTSC PROGRAM Important: Before you operate the system, complete the preparation procedures. Plug and Play The system provides PLUG and PLAY feature that allows you to store all available radio stations automatically upon power up. -
Page 13: Switching On
Demonstration mode The system has a demonstration mode that shows the various features offered by the system. To disable the demonstration mode ¶ Press and hold Ç (on the system only) for 5 seconds when the system is in demonstration mode. -
Page 14: Sound Control
Operating the System DIM OFF - normal brightness with Spectrum Analyser On DIM 1 - normal brightness with Spectrum Analyser Off DIM 2 - half brightness with Spectrum Analyser On DIM 3 - half brightness with Spectrum Analyser Off and all LEDs on the system will be switched off. -
Page 15: Cd / Vcd / Mp3-Cd
DISC CHANGE C H A N G E R VCD MP3-CD MINI HIFI SYSTEM STANDBY - ON C D 1 • 2 • 3 PAL/NTSC SEARCH•TUNING PROGRAM MICROPHONE - LEVEL Warning! This system is designed for conventional discs. Do not use any accessories such as disc stabilizer rings or disc treatment sheets, etc., which may damage the disc mechanism. -
Page 16: Loading A Disc
CD / VCD / MP3-CD Note: – For mixed mode discs, only one mode will be selected for playback depending on the recording format. Loading a Disc Press VCD to select VCD/CD mode. Press OPEN•CLOSE. ➜ The disc changer tray slides out. Load a disc with the printed side up in the right tray. -
Page 17: Searching For A Particular Passage During Playback
VCD/CD. Selecting a desired track during playback ¶ Press í or ë (or digit 0-9 on the remote control) until the desired track appears on the display. ➜ The selected track number and elapsed playing time appear on the display. ¶... -
Page 18: Erasing The Programme
CD / VCD / MP3-CD Press Ç to stop programme playback. Note: – If you press any other DISC DIRECT PLAY buttons, the system will play the selected disc or track and the stored programme will be cleared. Erasing the programme playback is stopped) ¶... -
Page 19: Playing A Video Cd With Pbc
SINGLE ELAPSED PLAY XX/TT MM:SS Notes: – "XX" is the current track. – "TT" is the total tracks. – "MM" is in minutes. – "SS" is in seconds. When OSD is switched off; there is no information indicated on the TV screen. Playing a Video CD with PBC VCD with PBC (Playback Control) will be indicated on the display of the set and on your... -
Page 20: Zoom
CD / VCD / MP3-CD Zoom This feature enables you to view a still picture frame in an enlarge mode. After you have pressed PAUSEÉ Å to have a still picture on the TV screen. Press ZOOM once to enlarge the still picture by 2 times. -
Page 21: Vocal
Vocal This feature allows you to fade out the original vocal from a karaoke VCD. This feature is used together with Echo mode. You can also use it to select the different audio modes. G STEREO – same effect as the original recorded disc. -
Page 22: Tuner
Tuner VCD MP3-CD MINI HIFI SYSTEM STANDBY-ON C D 1 • 2 • 3 PAL/NTSC SEARCH•TUNING PROGRAM MICROPHONE - LEVEL Note: – For 'PLUG & PLAY' feature, please refer to page Tuning to radio stations Press TUNER (BAND) to select TUNER mode. ➜... -
Page 23: Tuning To Preset Radio Stations
Manual programming Press TUNER (BAND). Press TUNER (BAND) again to select the desired waveband : FM or MW. Press PROGRAM for less than one second. ➜ The PROG flag starts flashing. ➜ The next available preset number will be displayed for selection. Press à... -
Page 24: Tape
Tape VCD MP3-CD MINI HIFI SYSTEM STANDBY-ON C D 1 • 2 • 3 PAL/NTSC SEARCH•TUNING PROGRAM MICROPHONE - LEVEL L OPEN PLAY/REC TAPE 1 Loading a tape Press OPEN. The tape deck door opens. Load the tape with the open side downward and the full spool to the left. -
Page 25: Tape Playback
Tape Playback Press TAPE (TAPE 1•2) to select TAPE mode. ➜ "TAPE 1" or "TAPE 2" will be displayed and followed by "T1 222 " or "T2 222". Load the tape into the selected tape deck. Press PLAY É Å to start playback. ➜... -
Page 26: Recording
Recording VCD MP3-CD MINI HIFI SYSTEM STANDBY-ON C D 1 • 2 • 3 PAL/NTSC SEARCH•TUNING PROGRAM MICROPHONE - LEVEL L OPEN PLAY/ REC TAPE 1 Notes: – If you do not intend to record via the microphone, unplug the microphone to avoid accidental mixing with other recording source. -
Page 27: Dubbing Tapes
Dubbing tapes (from tape deck 1 to tape deck 2) Press TAPE ( TAPE 1•2 ) to select tape deck 2. Load the prerecorded tape into tape deck 1 and a blank tape into tape deck 2 with full spool to the left. -
Page 28: Clock/Timer
Clock/Timer VCD MP3-CD MINI HIFI SYSTEM STANDBY-ON C D 1 • 2 • 3 PAL/NTSC SEARCH•TUNING PROGRAM MICROPHONE - LEVEL View Clock You can view the clock (if it is set) if the system is in Standby mode or when any sound source is selected (VCD, TUNER, etc.). -
Page 29: Maintenance
Cleaning the DISC lens ¶ After prolonged use, dirt or dust may accumulate at the disc lens. To ensure good playback quality, clean the disc lens with Philips CD Lens Cleaner or any commercially available cleaner. Follow the instructions supplied with cleaner. -
Page 30: Specifications
Specifications AMPLIFIER Output power ... 2 x 20 W RMS ... 1000 PMPO Signal-to-noise ratio ... ≥ 67 dBA (IEC) Frequency response ... 80 – 15,000 Hz Input sensitivity AUX In ... 700 mV Microphone ... 3.5 mV Output Speakers ... ≥ 6 Ω Headphones ... -
Page 31: Troubleshooting
WARNING Do not open the player as there is a risk of electric shock! Under no circumstances should you try to repair the player yourself, as this will invalidate the warranty If a fault occurs, first check the points listed below before taking the player for repair. If you are unable to remedy a problem by following these hints, consult your dealer or service centre. -
Page 32: Troubleshooting
Troubleshooting GENERAL System does not react when any button is pressed. No or poor sound. Reversed left and right sound. Lack of bass sound or apparently imprecise physical location of musical instruments. Remote control has no effect on the system. Timer is not working.