
Related Manuals for ABB PGC5000 Series


Summary of Contents for ABB PGC5000 Series
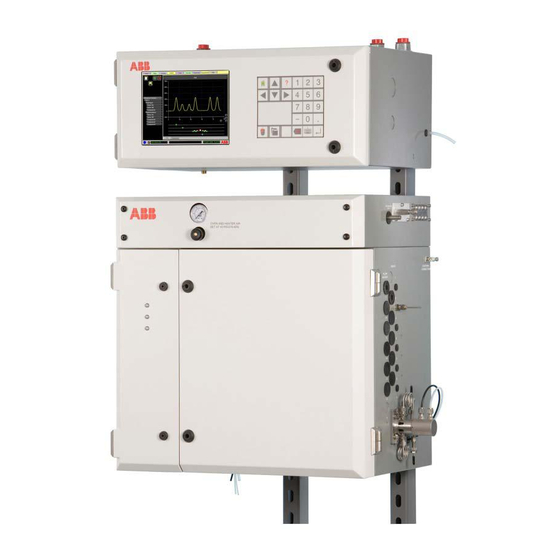
- Page 1 Service Instructions SI/PGC5000-EN Rev. B PGC5000 Series Process Gas Chromatographs Measurement made easy...
- Page 2 We are an established world force in the design and manufacture of measurement products for industrial process control, flow measurement, gas and liquid analysis and environmental applications. As a part of ABB, a world leader in process automation technology, we offer customers application expertise, service and support worldwide.
-
Page 3: Table Of Contents
PGC5000 PGC5000 Series Service Instructions Contents Contents Glossary .............. 5 5.7.1 System backup and recovery....30 5.7.2 System backup error messages ....31 Safety and symbols ..........6 Restarting the analyzer .......... 32 Upgrading software ..........33 Introduction ............7 5.10... - Page 4 PGC5000 PGC5000 Series Service Instructions Contents 6.17 Replacing power distribution board ..... 50 7.7.3 Replacing the wedges ....... 68 7.7.4 Replacing the o-rings ........ 68 Subassembly repair ........... 52 7.7.5 Replacing the valve plate ......70 Column repair ............52 Replacing diaphragm valves ........
-
Page 5: Glossary
PGC5000 PGC5000 Series Service Instructions 1 Glossary 1 Glossary Access Control List Absence of Condition BIOS Basic Input/Output System Controller Area Network Central Processing Unit Discharge Ionization Detector Digital Signal Processor Digital Temperature Controller Electronic Pressure Controller Electrostatic Discharge Flame Ionization Detector... -
Page 6: Safety And Symbols
PGC5000 PGC5000 Series Service Instructions 2 Safety and symbols 2 Safety and symbols The following symbols are used in this manual to alert the user to possible hazards and to provide additional information. Indicates that referenced items are Indicates that the referred item can be... -
Page 7: Introduction
3 Introduction 3 Introduction 3.1 General The PGC5000 Series Process Gas Chromatograph (analyzer) separates and measures the individual components of gas or liquid samples. It automatically samples and analyzes process streams, using the analyzer’s Master Controller to control analytical functions. -
Page 8: Liquid Version
PGC5000 PGC5000 Series Service Instructions 3 Introduction 3.4.1 Liquid version The liquid version incorporates a liquid sample valve (LSV) as the input to the analysis. The duration of an analysis depends on the application and consists of the following: The liquid sample valve injects a fixed volume of sample into a vaporizing chamber. -
Page 9: Maintenance
PGC5000 PGC5000 Series Service Instructions 4 Maintenance 4 Maintenance 4.1 Equipment and supplies required Factory Data Sheets from the Data Package Flow measuring device 4.2 Preventive maintenance The oven design is specifically designed to eliminate the need for extensive and complex maintenance. Where preventive maintenance procedures require particular time frames or intervals, maintain an inspection log and inspection data. -
Page 10: Cleaning
4.3 System backup Before attempting any maintenance on a PGC5000 Series analyzer confirm a current backup of the operating system and configuration files are available. If unavailable, follow the instructions in the Diagnostics and Troubleshooting section of this manual to complete the process following the procedures in File Management section of the manual. -
Page 11: Diagnostics And Troubleshooting
Tab>Status sub-tab (see Figure 5.1, which shows the DTC1 screen). The indicator boxes, when filled (black), indicate the named action. The hex codes represent error codes. When submitting an issue to ABB support, always include a screen capture, or record and include the filled indicator boxes and hex codes shown on the display. Include with your report all screens that apply (i.e., Oven, EPC DTC, and zones). - Page 12 Correct by changing the node ID of one of the node ID. duplicate boards. Extra Device Oven A board that responded to the Contact ABB for more information. Remove Oven Controller is not listed in the board. system configuration. PIC Comm Error DTC# DSP and PIC supervisor have Replace DTC Digital PCB.
-
Page 13: Power
PGC5000 PGC5000 Series Service Instructions 5 Diagnostics and troubleshooting Source Group Issue Resolution Zone In Band EPC, Status only. Not applicable. Carrier# Zone Fail Zero EPC, Possible defective EPC sensor Correctly zero the zone. Replace EPC sensor Carrier# board. Zone zeroed before as necessary. -
Page 14: System Board Battery
PGC5000 PGC5000 Series Service Instructions 5 Diagnostics and troubleshooting If the LEDs are not illuminated, check power to the unit. If the top LED is GREEN and flashing, the system is initializing. For all other instances use the table below. - Page 15 PGC5000 PGC5000 Series Service Instructions 5 Diagnostics and troubleshooting The Health Monitor lights display the status of the system (see Figure 5.4). Fig. 5.4. SBC Health Monitor LEDs The Health Monitor lights are identified as follows: • CR30 = Health Monitor. 1 Second Blink rate if healthy CR24 = Heart Beat.
-
Page 16: Oven Controller Pcb
PGC5000 PGC5000 Series Service Instructions 5 Diagnostics and troubleshooting The Network Activity lights display network activity and configuration. The lights are viewed from top to bottom (see Figure 5.5). Full duplex 10 Megabit Link Transmit Receive 100 Megabit Collision Fig. 5.5. Network Connectivity Indicator Lights 5.3.2 Oven controller pcb... -
Page 17: Dtc Digital Pcb, Version 1
PGC5000 PGC5000 Series Service Instructions 5 Diagnostics and troubleshooting these LEDs blink green; they may appear solid during heavy traffic. If a CAN communication error is detected, an LED will turn red. CAN A transmit CAN A receive CAN B transmit... - Page 18 PGC5000 PGC5000 Series Service Instructions 5 Diagnostics and troubleshooting amber temperature zone setup amber amber temperature conversion setup amber amber A/D converter setup amber amber amber number valves detection amber reload CANopen from EEPROM CAN PDO setup start DTC initialization...
-
Page 19: Dtc Digital Pcb, Version 2
PGC5000 PGC5000 Series Service Instructions 5 Diagnostics and troubleshooting 5.3.4 DTC digital pcb, version 2 This DTC digital PCB has eight LEDs (CR1 to CR8) on the upper left-hand edge for basic troubleshooting. CR1 through CR6 are Green; CR7 and CR8 are Red. Their display condition (On, Off, Solid or Blinking) indicates the board state. -
Page 20: Detector Canbus Node Identification
5.3.5 Detector CANbus node identification The Detector CANbus node identification is set at the factory by jumpers per ABB Bulletin 851J003. This bulletin is supplied with all replacement detector amplifiers. The bulletin covers all jumper settings required for any detector amplifier. To ensure correct jumper settings are applied to the new detector amplifier, take a picture of the original detector amplifier and reference this picture when applying jumpers to the new board. -
Page 21: Indicator Troubleshooting Procedures
PGC5000 PGC5000 Series Service Instructions 5 Diagnostics and troubleshooting 5.4 Indicator troubleshooting procedures Most system errors are identified by the Condition Monitoring System, resulting in indicator activation. If an indicator is placed in one or more of the user defined Status Tab scopes, it reflects in the Master Rollup Indicator located at the bottom left corner of the Local User Interface (LUI) or Remote Client display (see Figure 5.8). - Page 22 Reset indicator at Status Tab Manual failure POST failure Power On Self-Test fails Cycle power. If POST error persists, Displays RED text on MC note error and contact ABB Support. screen Network Comm Communication to an Subscriber comm path incomplete, Failure Active Subscriber fails IP address correct.
- Page 23 System power Oven.DTC#.Tz.# exceeded oven T-rating Check temperature probe as MUST be cycled described in Over Temp Resolution to clear fault. in this section. Contact ABB for more information. Low Temp Temperature out of range Check setting at Setup Oven.DTC#.Tz.# (low) Tab>Oven>DTC# Button.
- Page 24 PGC5000 PGC5000 Series Service Instructions 5 Diagnostics and troubleshooting INDICATOR ISSUE RESOLUTION (CHECK & CORRECT) RESET SOURCE DTC Digital Input Electronic Section Purge Check purge pressure setting at Ovn#DTC#.15 Alarm Input oven’s front panel gauge. Adjust as necessary. Check instrument air supply pressure.
- Page 25 PGC5000 PGC5000 Series Service Instructions 5 Diagnostics and troubleshooting INDICATOR ISSUE RESOLUTION (CHECK & CORRECT) RESET SOURCE Low-Low Concentration is below Information Only. Adjust Limits under When Component Concentration Low-Low Setpoint the Setup tab as needed. reported. Concentration is below Information Only.
- Page 26 PGC5000 PGC5000 Series Service Instructions 5 Diagnostics and troubleshooting INDICATOR ISSUE RESOLUTION (CHECK & CORRECT) RESET SOURCE Calibrating Schedule running an Information Only. Schedule analysis on Calibration Stream Validating Schedule runnign an Information Only. Schedule analysis on a Validation Stream...
-
Page 27: Operation Troubleshooting
PGC5000 PGC5000 Series Service Instructions 5 Diagnostics and troubleshooting INDICATOR ISSUE RESOLUTION (CHECK & CORRECT) RESET SOURCE Vol Flow High Volumetric Flow exceeds Information Only. FastLoop High Limit Vol Flow High High Volumetric Flow exceeds Information Only. FastLoop High High Limit... -
Page 28: No Peaks
PGC5000 PGC5000 Series Service Instructions 5 Diagnostics and troubleshooting Contaminated or missing carrier gas, hydrogen fuel or burner air. Verify the supplied cylinders are analytical grade. Replace cylinders one at a time; activate the pressure zones and relight the flame. Observe the baseline to isolate possible contaminated cylinder. -
Page 29: Individual Peak Missing On Report
Possible defective air purge regulator Leak in column train. Leak check analyzer. Contact the ABB factory for assistance in testing the functionality of the EPC Proportional Valves as well as Pressure Sensors in the EPC block. 5.6.10 Reduced peak size The chromatogram or peaks have reduced in size from that of a previous analysis. -
Page 30: Flame Out Led On
PGC5000 PGC5000 Series Service Instructions 5 Diagnostics and troubleshooting Purge, atmospheric vents plugged. Inspect and clear vents. Tubing to and from pressure switches leaking or disconnected. Inspect and replace if necessary. Purge orifice is obstructed. Remove obstruction. 5.6.12 Flame out led on (flame will not ignite) Flame Out LED on and continued attempts to light the flame have failed.. -
Page 31: System Backup Error Messages
PGC5000 PGC5000 Series Service Instructions 5 Diagnostics and troubleshooting If only option names show, you do not have enough rights to use the backup and restore options. Stop all schedules before creating a recovery USB or backing up the stream files to a USB flash drive. -
Page 32: Restarting The Analyzer
PGC5000 PGC5000 Series Service Instructions 5 Diagnostics and troubleshooting message to appear. Select the USB Eject icon and wait for the Eject Complete message to appear and then remove the USB flash drive. EJECT – Selecting the USB Flash Drive or the SD Card icon allows you to safely eject the USB Flash Drive or SD Card from the Single Board Computer PCB in the Master Controller. -
Page 33: Upgrading Software
PGC5000 Series Service Instructions 5 Diagnostics and troubleshooting 5.9 Upgrading software Software upgrades may be available through the ABB Support on a need basis. Please follow the reporting guidelines as described in the Section 8 of these instructions. 5.10 Optional discharge ionization detector The Discharge Ionization Detector (DID) consists of a detector unit and a power supply (see Figure 5.11). -
Page 34: Low Signal
PGC5000 PGC5000 Series Service Instructions 5 Diagnostics and troubleshooting reaction gas is connected, there is an air leak, or there is no reaction gas flow. Turn off the power to the plasma and check the gas supply. Check for leaks and check flow rate. -
Page 35: High Baseline
PGC5000 PGC5000 Series Service Instructions 5 Diagnostics and troubleshooting 5.10.5 High baseline Bad gas: When operating in the HID mode, background signal is directly linked to the quality of the gases being used. Therefore, at a minimum, it is important to have an oxygen scrubber, a water scrubber, and a hydrocarbon scrubber in line when you are operating in HID mode. -
Page 36: Component Repair
PGC5000 PGC5000 Series Service Instructions 6 Component repair 6 Component repair 6.1 General 6.1.1 Preparation and procedures The following instructions assume that all equipment has been properly installed and checked, that the analyzer has been application engineered, and that temperature controllers, alarm switches and other adjustments have been properly set. -
Page 37: Master Controller Cabinet
PGC5000 PGC5000 Series Service Instructions 6 Component repair 6.2 Master controller cabinet The Master Controller houses the following components, located as shown in Figure 6.1. • Single Board Computer (SBC) and Card Cage Assembly Oven Controller PCB • Power Supply •... -
Page 38: Oven Controller Pcb
PGC5000 PGC5000 Series Service Instructions 6 Component repair If equipped with a Wago module, ensure electrical CAN connection is removed from the top of the controller board before sliding board out. Release board clips at top and bottom. Slide board out. -
Page 39: Front Panel Pcb
PGC5000 PGC5000 Series Service Instructions 6 Component repair 6.3.1 Front panel pcb Transformers for the backlight converter are protected on this. Be careful when opening and closing the Master Controller door to ensure safety. Removal and replacement procedure for the PCB assembly (see Figure 6.3). -
Page 40: Oven Component Locations
PGC5000 PGC5000 Series Service Instructions 6 Component repair 6.4 Oven component locations 6.4.1 Class B oven component locations, version 1 The oven components are mounted on the inside of the door and within the electronics compartment. The compartment or compartments are on the left side of the version 1 Class B oven. See Figure 6.4 for component locations. -
Page 41: Class C Oven Components
PGC5000 PGC5000 Series Service Instructions 6 Component repair 6.4.3 Class C oven component locations The Class C Oven incorporates PCBs mounted on the inside of the front and side doors and on walls of the electronics compartment (see Figure 6.6). Before removing any boards ensure power is off and cable routing is noted. Some boards may require address and termination changes. -
Page 42: Removing The Epc Control Assy
PGC5000 PGC5000 Series Service Instructions 6 Component repair Be sure that the EPC Control Assembly has cooled to ambient temperature (approximately one hour) before proceeding. Use an ESD wrist strap and proper grounding procedures before handling any components in the EPC Control Assembly. -
Page 43: Installing The Epc Control Assy
PGC5000 PGC5000 Series Service Instructions 6 Component repair 10. On the wall inside the left side of the oven, remove the lock nut on the pipe nipple which retains the EPC Panel cables (see Figure 6.7, which shows Class C oven). -
Page 44: Removing A Sensor Pcb
PGC5000 PGC5000 Series Service Instructions 6 Component repair 6.6.4 Removing a sensor pcb The Zones are arranged in the EPC Control Assembly enclosure with Zone 1 on the left and Zone 5 on the right (see Figure 6.8). Proportional Valve... -
Page 45: Installing A New Sensor Pcb
18. Ensure that the flame-proof or explosion-proof surfaces of the cover or the body of the Control Assembly are not damaged. 19. Reinstall the EPC Control Assembly cover and insert the ten screws and tighten them to 16 in.-lb, using ABB Tool TL1000/TL1002. -
Page 46: Installing A New Proportional Valve
10. Reinstall the EPC Control Assembly cover and insert the ten screws and tighten them to 16 in.-lb, using ABB Tool TL1000/TL1002. Ensure that the flame-proof or explosion-proof surfaces of the cover or the body of the Control Assembly are not damaged. -
Page 47: Removing The Heater
Ensure that the flame-proof or explosion-proof surfaces of the cover or the body of the Control Assembly are not damaged. 10. Reinstall the EPC Control Assembly cover and then insert the ten screws and tighten them to 16 in.-lb, using ABB Tool TL1000/TL1002. -
Page 48: Fpd Electrometer
PGC5000 PGC5000 Series Service Instructions 6 Component repair 6.8 Flame photometric detector electrometer In the Class B oven, the FPD Electrometer is attached to inside of electronics compartment door (left side of oven) on the center section of the door. In the Class C Oven, it is attached to inside of upper electronics compartment door (left side of oven), on the upper section of the door. -
Page 49: Replacing Optional Zone Board
PGC5000 PGC5000 Series Service Instructions 6 Component repair 6.11 Replacing the optional zone board In both the Class B and Class C oven, a maximum of two optional Zone Boards are attached to the DTC Master Analog board. Note cable routing and markings (locate pin 1 on the cable). -
Page 50: Replacing Dtc Digital Pcb, V2
PGC5000 PGC5000 Series Service Instructions 6 Component repair Remove the DTC Digital PCB. Remove hex head screws attaching the heat sink from the outside of the oven door. Remove the remaining hex head bolts on the inside of the door. - Page 51 PGC5000 PGC5000 Series Service Instructions 6 Component repair Reinstall fuse and blanks in unused plugs. Attach new board to mounting bracket using hex head screws. Reattach all plugs and tighten. Test. SI/PGC5000-EN, rev B...
-
Page 52: Subassembly Repair
PGC5000 PGC5000 Series Service Instructions 7 Subassembly repair 7 Subassembly repair 7.1 Column repair 7.1.1 Column removal If analyzer is running and a column is to be replaced, stop the analysis. Reduce Isothermal Oven temperature by reducing oven air pressure to zero psig. -
Page 53: Cutting Capillary Columns
11. Set carrier pressure and purge column for at least 30 minutes and leak check. NOTE: SNOOP™ IS NOT recommended for leak checking capillary columns. 12. Perform the PGC5000 series startup procedure as described in the Operation Guide (OI/PGC5000). 7.1.4 Cutting capillary columns The procedure for cutting glass or metal capillary columns is the same, except that a small sharp file may be used to score metal columns. -
Page 54: Fid Cell Access
PGC5000 PGC5000 Series Service Instructions 7 Subassembly repair 7.2.1 FID cell access If power is applied to the analyzer, turn it off. Turn off oven air to the Isothermal Oven and allow all temperature zones to cool. Turn off carrier and other utility gases, as applicable. -
Page 55: Replacing The Igniter Assembly
PGC5000 PGC5000 Series Service Instructions 7 Subassembly repair Roll each end of the green wire of the new polarizer between your forefinger and thumb, causing the wire ends to be tightly spiral wrapped. Using the 40 watt soldering iron and approved high temperature solder, “tin” the wire ends. -
Page 56: Replacing The Fid Cable Assembly
7 Subassembly repair 7.2.7 Replacing the fid cable assembly This procedure requires a special tool, Insertion Tool ABB P/N TL799M013-1, to assist in passing the cable through the insulation between the Electronic Housing and the Oven. Cut the cable just below where it passes through the Oven into the Electronics Housing and remove the cable from the Oven. -
Page 57: Removing The Filaments
PGC5000 PGC5000 Series Service Instructions 7 Subassembly repair It is the customer’s responsibility to ensure that the area is safe and hazard free, and will remain so the entire time the analyzer is open. This responsibility includes ensuring adequate ventilation in analyzer shelter and obtaining proper work permits, etc. -
Page 58: Leak Test
PGC5000 PGC5000 Series Service Instructions 7 Subassembly repair Repeat this measurement for each of the other three filament wires. If all resistance measurements are correct, go to "Connecting the Filaments." If any resistance is too low, go to step 8. -
Page 59: Repairing The Multiport Tcd
PGC5000 PGC5000 Series Service Instructions 7 Subassembly repair 7.4 Repairing the multiport thermal conductivity detector This repair should only be attempted by people who are properly trained and possess the expertise for this repair. 7.4.1 Accessing the detector Turn off power to the analyzer. - Page 60 PGC5000 PGC5000 Series Service Instructions 7 Subassembly repair ABB recommends using an alcohol such as Methanol to check for leaks as it dries quickly and leaves no residue. 15. Power down the oven. 16. Isolate carrier and utility gases. 17. Slowly loosen and remove cell vent caps.
-
Page 61: Repairing The Flame Photometric Detector
PGC5000 PGC5000 Series Service Instructions 7 Subassembly repair 7.5 Repairing the flame photometric detector 7.5.1 Replacing the photomultiplier assembly It is the customer’s responsibility to ensure that the area is safe and hazard free, and will remain so the entire time the analyzer is open. This responsibility includes ensuring adequate ventilation in analyzer shelter and obtaining proper work permits, etc. -
Page 62: Replacing The Burner Block O-Rings
PGC5000 PGC5000 Series Service Instructions 7 Subassembly repair 7.5.3 Replacing the burner block o-rings Refer to Figure 7.7 when performing this procedure. Perform steps 1 through 4 of "Replacing the Burner Block." To remove a particular O-Ring, carefully remove the associated connector and then remove the O-Ring. -
Page 63: Liquid Sample Valve Repair
PGC5000 PGC5000 Series Service Instructions 7 Subassembly repair 7.6 Liquid sample valve repair The analyzer’s sample lines are connected to the liquid sample valve as shown in Figure 7.8. Sample Line LSV Body LSV Body Mounting Mounting Clamps Clamps Sample Line Fig. -
Page 64: Lsv Disassembly On The Analyzer
7.9.2 LSV reassembly on the analyzer In all steps the lubricant used is High Vacuum Grease, ABB part number 006904-1. Clean the seals with acetone and air dry them. Clean the sample chamber with acetone and air dry it. - Page 65 PGC5000 PGC5000 Series Service Instructions 7 Subassembly repair Lightly lubricate the tensioning nut O-Ring and the Tensioning Nut threads, internal threads and bore of the body with High Vacuum Grease. Install the O-ring onto the Tensioning Nut. Screw the tensioning nut into the body until the bottom of the nut grooves is approximately flush with the ears on the back of the body.
-
Page 66: Removing Lsv From The Analyzer
PGC5000 PGC5000 Series Service Instructions 7 Subassembly repair 17. Slide the first cleaned seal over the stem using the “A” end of Seal Insertion Tool TL-791A006B. The 30° angle (pointed end) of the seal must face the Belleville springs. Figure 7.11 shows the orientation of the seal. -
Page 67: Cp Valve Repair
PGC5000 PGC5000 Series Service Instructions 7 Subassembly repair Reconnect all tubing on the Liquid Sample Valve. Close the isothermal oven door. 7.7 CP valve repair This section describes how to replace the CP Valve slider, wedges, valve plate, and o-rings. The bulletin applies to both the 40 psig and 60 psig valves (see Figure 7.12). -
Page 68: Replacing The Wedges
PGC5000 PGC5000 Series Service Instructions 7 Subassembly repair Insert the Carrier Assembly on the Valve Plate. 10. Close the back Carrier Assembly latch. This ensures the Carrier Assembly is locked into the hole in the piston stem. 11. Close the front Carrier Assembly latch. - Page 69 PGC5000 PGC5000 Series Service Instructions 7 Subassembly repair Remove the Carrier Assembly from the Valve Plate and Valve Body, being careful to keep the latches in their open position. Push the piston rod into the Valve Body to release the piston, being careful not to scratch any valve surfaces.
-
Page 70: Replacing The Valve Plate
PGC5000 PGC5000 Series Service Instructions 7 Subassembly repair 26. Close the front Carrier Assembly latch. 27. Install the Valve Body over the screws on the Mounting Plate and rotate the Valve Body clockwise to seat it. The port connections must face the same direction as when it was originally installed. -
Page 71: Removing A Valve
PGC5000 PGC5000 Series Service Instructions 7 Subassembly repair Turn off power and carrier gas. Open the isothermal oven door. Locate the valve to be replaced. Tag all valve connections. Service or replacement of the O-rings, plungers, or springs must be performed at the factory. Do not disassemble the valve unless system malfunction is definitely isolated to the valve. -
Page 72: Replacing The Diaphragm (1 Screw)
PGC5000 PGC5000 Series Service Instructions 7 Subassembly repair 7.8.4 Replacing the diaphragm (one screw type) Remove the hex head cap screw from the center of the valve cap (see Figure 7.18). Screw Port 1 Fig. 7.18. Typical 1 Screw Cap, Showing Port 1 Orientation Lift the cap from the two alignment pins. -
Page 73: Optional Discharge Ionization Detector
PGC5000 PGC5000 Series Service Instructions 7 Subassembly repair 7.9 Optional discharge ionization detector Replacing the reactor tube while it is in the oven is not advised. Due to the small pieces and awkward angles involved in the procedure, it is highly recommended the Discharge Ionization Detector (DID) be removed before attempting replacement. -
Page 74: Replacing The Exhaust Tube
PGC5000 PGC5000 Series Service Instructions 7 Subassembly repair Secure the shield with the Phillips head screw retained earlier. Remove, inspect, and replace if necessary, the PTFE ferrule in the reaction gas assembly before continuing. The plasma cell is marked with a dot on the end of the cell that installs in the detector body. -
Page 75: Replacement Parts
PGC5000 PGC5000 Series Service Instructions 8 Replacement parts 8 Replacement parts 8.1 Ordering information Since the particular application defines the component parts specific to any given system, please refer to the “Recommended Spare Parts Lists” in the analyzer’s Data Package to obtain the full and correct part number for the desired part or assembly. -
Page 76: Oven Configuration Identification
Fig. 8.3. Software Configuration Identification 8.1.5 How to order Please contact your local ABB sales or service representative for specific instructions on ordering parts. Always include the information listed in Equipment Identification and Configuration Identification in your request. The remainder of this section lists the replaceable parts and components by their location in the equipment. Part numbers and drawing numbers listed here are for identification purposes only. -
Page 77: Master Controller
PGC5000 PGC5000 Series Service Instructions 8 Replacement parts 8.2 Master controller 8.2.1 Back of door (see Figure 8.4) Description Part Number Front Panel PCB, version 1 852A004-1 Front Panel PCB, version 2 852A009-1 LCD Display, version 1 857Z002-1 LCD Display, version 2... -
Page 78: Class B1 Oven Components
PGC5000 PGC5000 Series Service Instructions 8 Replacement parts 8.3 Class b1 oven components This section lists components specific to the Class B1 Oven. Components common to all Class B ovens are in 8.5. 8.3.1 Left side components (see Figure 8.6) -
Page 79: Class B2 Oven Components
PGC5000 PGC5000 Series Service Instructions 8 Replacement parts 8.4 Class b2 oven components This section lists components specific to the Class B2 Oven. Components common to all Class B ovens are in 8.5. 8.4.1 Left side components (see Figure 8.8) -
Page 80: Class B Main Interior Components
PGC5000 PGC5000 Series Service Instructions 8 Replacement parts 8.5 Class b main interior, both versions (see Figure 8.10) Description Part Number Oven Heater Kit, 115 V 1000 W 800K007-1 Oven Heater Kit, 230 V 1000 W 800K007-2 Oven Heater Kit, 115 V 500 W... -
Page 81: Liquid Sample Valve
PGC5000 PGC5000 Series Service Instructions 8 Replacement parts 8.5.1 Liquid sample valve (see Figure 8.11) Description Part Number O-Ring Seal Kit 791K003N-1 0.125 inch Stem (per application) 791A008B-_ 0.125 inch Seal (per application) 791M001B-_ 0.062 inch Stem (per application) 791A009B-_ 0.062 inch Seal (per application) -
Page 82: Flame Ionization Detector
PGC5000 PGC5000 Series Service Instructions 8 Replacement parts 8.5.2 Flame ionization detector (see Figure 8.12) Description Part Number Maintenance Kit 799K003-1 3617156-2 Ignitor Assy 794A007B-2 Thermocouple Assy 794A008B-1 Polarizer Assy 794A009B-1 Column kits are application dependent–see Data Package for correct part... -
Page 83: Multiport Tcd
PGC5000 PGC5000 Series Service Instructions 8 Replacement parts 8.5.4 Multiport Thermal Conductivity Detector (see Figure 8.14) Description Part Number Filament Kit 865K001-1 Fig. 8.14. Multiport TCD 8.5.5 Flame photometric detector Description Part Number Transformer 3617648-1 Capillary Tubing, Burner Fuel 5514584-39... -
Page 84: Burner Block Components
PGC5000 PGC5000 Series Service Instructions 8 Replacement parts 8.5.6 Burner block components (see Figure 8.15) Description Part Number Burner Block Assy 867A008-1 Adapter, Jet 804M004-1 3617432-1 O-Ring 15/16-in OD, Fluorocarbon 45051-4-106 O-Ring 11/16-in OD, Teflon 45051-5-18 O-Ring 3/4-in OD, Fluorocarbon... -
Page 85: Optional Did Replacement Parts
PGC5000 PGC5000 Series Service Instructions 8 Replacement parts 8.5.8 Optional DID replacement parts (see Figure 8.17) Description Part Number 12V Power Supply 8230878-2210 Power Supply DID 835A001-1 Plasma Cell 885Z001-1 Top Nut O-ring 885Z002-1 SS Noise Shield 885Z003-1 Detector Exhaust Tube 885Z004-1 Fig. -
Page 86: Class C Oven
PGC5000 PGC5000 Series Service Instructions 8 Replacement parts 8.7 Class c oven The Class C Ovens have the same components as the Class B Ovens, although the quantities may differ. SI/PGC5000-EN, Rev B... - Page 87 PGC5000 PGC5000 Series Service Instructions Notes NOTES SI/PGC5000-EN, Rev B...
- Page 88 Oldends Lane notice. With regard to purchase orders, the agree Stonehouse particulars shall prevail. ABB does not accept any Gloucestershire GL10 3TA responsibility whatsoever for potential errors or ABB Limited possible lack of information in this document.