
Related Manuals for Sony PBD-D50


Summary of Contents for Sony PBD-D50
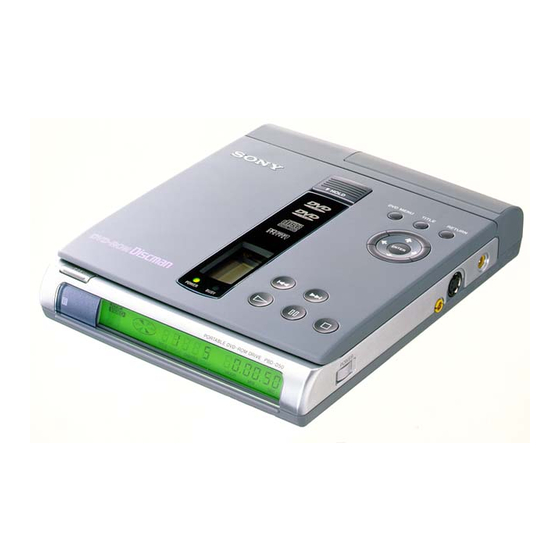
- Page 1 3-862-692-22(1) Portable DVD-ROM Drive Operating Instructions PBD-D50 ©1998 by Sony Corporation...
- Page 2 The supplied interference Audio/Video WARNING WARNING cable must be used with the equipment in order to comply with the limits for a To prevent fire or shock hazard, digital device pursuant to EN 55022. do not expose the player to rain or moisture.
- Page 3 The latest information about this unit is in Welcome! the “Readme.txt” on the supplied floppy disk. Thank you for purchasing the Sony Portable DVD-ROM Drive. Before operating the unit, please read this manual thoroughly and retain it for future reference.
-
Page 4: Table Of Contents
Table of contents Overview 6 This unit can play the following discs 8 Using as a DVD-ROM drive Installing the software 13 1 Checking the SCSI ID 14 2 Connecting to the PC 15 3 Installing the driver 16 4 Checking if installation is complete 18 Using with MS-DOS 19 Operating a DVD-ROM drive 20... - Page 5 Preventing accidental pressing of the buttons 59 Basic settings (INITIAL SETUP) 60 Limiting playback by children (Parental Control) 64 Using the audio amplifier 68 Additional Information Using the rechargeable battery pack 71 Precautions 75 Notes on discs 77 Specifications 78 Troubleshooting 80 Glossary 85 Self-diagnosis function 87...
-
Page 6: Overview
Overview p Using as the portable DVD-ROM drive You can use this unit as a DVD-ROM drive using with the supplied SCSI PC card. You can use this unit without the AC power adapter while using the optional battery pack. •... - Page 7 • Complete the set up uisng “Getting started” (pages 25 to 28). • For basic operations, see “Playing a DVD VIDEO” (pages 29 to 36) and “Playing a CD/VIDEO CD” (pages 37 to 44). • For additional features, see pages 45 to 69. •...
-
Page 8: This Unit Can Play The Following Discs
This unit can play the following discs This unit only With PC DVD-ROMs CD-ROMs CD-Rs PHOTO CDs CD EXTRAs (CD +) DVD VIDEOs VIDEO CDs AUDIO CDs (CD-DA) Depending on the disc, optional software or an MPEG playing card may be required for playback. - Page 9 Notes on DVD VIDEO discs Region code of DVD VIDEOs you can play Region code indications such as are labelled on some DVD VIDEOs to indicate which type of unit can play the discs. Unless “2” is included in the indications or is labelled on the DVD VIDEOs, you cannot play the discs on this unit.
- Page 10 Logo marks of DVD VIDEOs Logo marks on DVD VIDEO discs or cases are shown as below. These marks show available contents or functions. Some DVD VIDEOs do not have these marks even though you may be able to use these functions. For more details of the marks, refer to the instruction of the DVD VIDEO disc.
- Page 11 Notes on VIDEO CDs with PBC (Playback Control) functions This unit conforms to Ver. 1.1 and Ver. 2.0 of VIDEO CD standards. You can enjoy two kinds of playback according to the disc type. You can Disc type Enjoy video playback (moving pictures) as well as VIDEO CDs without music.
- Page 12 Terms for discs • Title The longest sections of a picture or a music piece on a DVD VIDEO; a movie, etc. for a picture piece on a video software or an album, etc. for a music piece on an audio software. Each title is assigned a title number enabling you to locate the title you want.
-
Page 13: Installing The Software
Installing the software You can use this unit as a DVD-ROM drive with SCSI PC card. You can play back not only a DVD-ROM, but also a CD-ROM and a CD-R. When you use this unit as a DVD-ROM drive, the buttons (other than the POWER button and the OPEN button on the unit) do not work on either the unit or the remote. -
Page 14: Checking The Scsi Id
1 Checking the SCSI ID To set the SCSI terminator Before connecting to your PC, it is necessary to set the It is not necessary to set SCSI ID using the DIP switch on the rear panel of the the SCSI terminator unit to prevent an overlap with the other units because the SCSI terminator of this unit is... -
Page 15: Connecting To The Pc
2 Connecting to the PC Note Do not pull on the plug of Before installing, follow the steps below to connect the the interface firmly. It SCSI PC card (supplied). may cause a malfunction. Insert the plug of the SCSI PC card into the SCSI connector. -
Page 16: Installing The Driver
3 Installing the driver Install the SCSI Miniport Driver and the DVD Driver after connecting this unit with your PC. There are two ways of installing the SCSI Miniport Driver; the standard installation and the manual installation. The following steps explain the standard installation. For more details on the manual installation, refer to the “Readme.txt”... - Page 17 If the “New Hardware” does not appear The PC card device driver on your PC does not work or the PC card device is not set to use the 32 bit support. 1 Double click the “PC card (PCMCIA)” icon on the Control Panel.
-
Page 18: Checking If Installation Is Complete
4 Checking if installation is complete Double-click the “My Computer” icon. When the icon shown below appears, you can use this unit. When using a CD-ROM drive, more than one icon appears. If the icon shown above does not appear, see “Troubleshooting.”... -
Page 19: Using With Ms-Dos
Note Using with MS-DOS Make sure to restart The DOS prompt of Windows 95 can read this unit, your PC after installing. but you cannot use this unit with MS-DOS as the If not, this unit may not DVD-ROM drive. (However, you can use MS-DOS for work as the DVD-ROM the CD-ROM drive.) drive. -
Page 20: Operating A Dvd-Rom Drive
Operating a DVD-ROM drive Notes Make sure, following the operations below, to connect • Make sure to turn on with other equipment and to turn the power on. If you this unit before turn the power on in the wrong order, you can not use connecting to your PC. - Page 21 Inserting the disc Press OPEN to open the disc cover. Note Insert a disc. If the disc is not inserted When inserting a disc, please take note of the correctly, it may cause a following. malfunction. • Insert the disc in a horizontal position. •...
- Page 22 Notes Removing the disc • Make sure the disc has Do not turn the power off while removing the disc. completely stopped rotating before Press OPEN to open the disc cover. removing the disc. • Do not open the disc Remove the disc.
- Page 23 To access to the area over 4 GB The data capacity of a single-layer and single-sided DVD disc is up to 4.7 GB, a dual-layer and double-sided DVD disc has up to 8.5 GB. After installing the driver using the supplied install disk, Windows 95 can read the DVD-ROM disc.
- Page 24 Note When you are finished using this unit If you disconnect the PC as the DVD-ROM drive card while the PC is working, an accidental Exit and close the application software of the malfunction may occur. DVD-ROM drive. Click the PC card icon on the right of the taskbar. PC card icon The Short Cut menu appears.
-
Page 25: Getting Started
Getting started Hooking up the system This section describes how to hook up the unit to a TV (with audio/video input connectors) and/or an amplifier. You cannot connect this unit to a TV without a video input connector. Be sure to turn off the power of each component before making the connections. - Page 26 Getting started If your TV has a EURO AV (SCART) connector Use the supplied Scart adapter. If your TV has an S video input connector Connect the component via the S VIDEO OUT connector using the S video cable (not supplied) instead of the video connecting cord.
- Page 27 Notes • If you do not use batteries correctly, it may cause damage from leakage and corrosion. Please follow the directions below: - Make sure the polarity is correct. - Do not use a new battery with an old one or mix different types of batteries.
-
Page 28: Necessary Setup Before Using The Unit
Getting started Necessary setup before using the unit Some initial setups are necessary for the unit depending on the TV or other components to be connected. For details on using the menu, see page 60. For details on each menu item, see pages 61 to 63. Note p To connect the unit to a normal TV This unit conforms to the... -
Page 29: Basic Operation
Basic operation Playing a DVD VIDEO POWER indicator π Make the appropriate settings on your TV. When using the battery pack Turn on the TV and select the video input so that Normally you cannot use you can view the pictures from this unit. the remote to turn on the unit. - Page 30 Basic operation Insert a DVD VIDEO disc. When inserting a disc, please take note of the following. • Insert the disc in a horizontal position. • Push down gently with two fingers. • Make sure the disc clicks into the position. Push on the disc here.
- Page 31 Various modes of playback ENTER Number buttons CLEAR ENTER ∏ PAUSE = PREV/+ NEXT · PLAY SEARCH SLOW MODE ENTER · ∏ What are title and Press chapter? See page 12. Pause ∏ Resume playback after ∏ or · Each time you press pause SEARCH MODE “TITLE SEARCH,”...
- Page 32 Basic operation Press Locate a point using 1 SEARCH MODE repeatedly the time code until “TIME SEARCH” appears on the TV screen. 2 The number buttons to enter a time code, then ENTER. Quickly locate a point =/+ and hold down until while monitoring you find the point.
- Page 33 Using the title menu On a DVD VIDEO, long sections of movies or music pieces are divided into smaller segments. Each of these segments is called “title.” When you play a DVD VIDEO which contains several titles, you can select the title you want using the title menu.
- Page 34 Basic operation Using the DVD menu Some DVD VIDEOs allow you to select the disc contents using the menu. When you play these DVD VIDEOs, you can select the item, the language for the sub-titles, the language for the sound, etc., using the DVD menu.
- Page 35 What is angle? Using the on-screen display See page 58. You can check the operating status of the unit and information about the disc using the on-screen display What is language for on the TV screen. the sound and sub- titles? See pages 61 and 62.
- Page 36 Basic operation The contents of the display change according to the on-screen display setting: - When “On-screen display 1” is selected, the playing time of the current title is displayed. - When “On-screen display 2” is selected, the remaining time of the current title is displayed. The contents of the display change according to the on-screen display setting: - When “On-screen display 1”...
-
Page 37: Playing A Cd/Video Cd
Playing a CD/VIDEO CD POWER indicator π When using the battery Make the appropriate settings on your TV. pack Turn on the TV and select the video input so that Normally you cannot use you can view the pictures from this unit. the remote to turn on the unit. - Page 38 Basic operation After doing Step 5 Insert the disc. The menu screen may When inserting a disc, please take note of the appear on the TV screen following. depending on the VIDEO CD. You can play the disc • Insert the disc in a horizontal position. interactively following the •...
- Page 39 Various modes of playback ENTER Number buttons CLEAR ENTER ∏ PAUSE = PREV/+ NEXT · PLAY SEARCH SLOW MODE ENTER · ∏ What are track, index, Press and scene? See page 12. Pause ∏ Resume playback after ∏ or · Each time you press pause SEARCH MODE...
- Page 40 Basic operation Press Quickly locate a point =/+ and hold down until while monitoring the you find the point. (There is no picture (Search) sound during Search mode.) You may not be able to play in slow motion with the PBC function.
- Page 41 Playing VIDEO CDs with PBC functions (PBC Playback — VIDEO CD only) When playing VIDEO CDs with PBC functions (Ver. 2.0 discs), you can enjoy simple interactive operations, operations with search functions, etc. PBC Playback allows you to play VIDEO CDs interactively, following the menu displayed on the TV screen.
- Page 42 Basic operation To cancel PBC Playback Follow the operation below to enjoy PBC Playback. of a VIDEO CD with PBC Refer to the instructions supplied with the disc, as the functions (and play the operating procedure may differ according to the VIDEO CD. disc in Continuous Play mode) Press...
- Page 43 Using the on-screen display You can check the operating status of the unit and the information about the disc using the on-screen display on the TV screen. DISPLAY Press DISPLAY. Each time you press the button, the on-screen display changes as follows: On-screen display on , On-screen display off p Display information of the on-screen display on mode...
- Page 44 Basic operation • During PBC Playback (VIDEO CD only) PBC status Disc type Current play mode Playing status Current scene number/ V DEO CD P BC ON P L A Y total number of scenes S ENE / TOT A L : 4 / 1 2 S ENE P L A Y : 0 : 0 0 : 2 3...
-
Page 45: Additional Operations
Additional operations Playing repeatedly (Repeat Play) Z You can play all the tracks on a disc, a single title/ chapter/track, or a specific portion repeatedly. To set Repeat Play, use the REPEAT or A-B button. REPEAT CLEAR Notes Repeating all the tracks on a disc •... - Page 46 Additional operations Note Repeating the current title or chapter The unit reverts to Continuous Play the next time playback starts In Continuous Play mode (page 29), you can repeat whenever you; only the current title or chapter. (You may not be able –...
- Page 47 Notes Repeating the current track • The unit reverts to In Continuous Play mode (page 37), you can repeat Continuous Play the only the current track. next time playback starts whenever you; - open the disc cover. While the track you want is being played, press - turn the power off.
- Page 48 Additional operations Notes Repeating a specific portion • The unit reverts to (A˜B Repeat) Continuous Play the next time playback You can play a specific portion of a title/chapter/track starts whenever you; repeatedly. This is useful, for example when you want - open the disc cover.
-
Page 49: Playing In Random Order (Shuffle Play)
Playing in random order (Shuffle Play) Z The unit can perform You can have the unit “shuffle” tracks and play them Repeat Play and Shuffle in a random order. To set Shuffle Play, use the Play together SHUFFLE button. During Shuffle Play, press REPEAT to display “SHUFFLE REPEAT.”... -
Page 50: Creating Your Own Programme
Additional operations Creating your own programme Creating your own programme (Programme Play) Z (Programme Play) Z You can arrange the order of the tracks on the disc and create your own programme. The programme can contain up to 20 tracks. PROGRAM Number buttons CLEAR... - Page 51 The programme remains Select the track you want to programme using the even after the number buttons, then press ENTER. Programme Play ends When you press · PLAY, you can play P M S E T UP the same programme N o .
- Page 52 Additional operations To change programming In Step 3, select the programme number of the track you want to change using the >/. buttons, then press CLEAR. Follow Step 2 for new programming. To cancel the programmed order To cancel a programmed track, select the track you want to clear using the >/.
-
Page 53: Resuming Playback From The Point Where You Stopped A Disc (Resume Play)
Resuming playback from the point where you stopped a disc (Resume Play) The unit can store the point where you stop playback and the current play mode. During playback or stop playback, you can set Resume Play to ON/OFF using the RESUME button. - Page 54 Additional operations Notes • You may not do Resume Play depending on the DVD VIDEO. • Depending on where you stopped the disc, the unit may resume playback from a different point. • The point where you stopped playback is cleared when you;...
-
Page 55: Changing The Sounds
Changing the sounds Changing the sounds With DVD VIDEOs on which multilingual sounds are recorded, you can select the language you want while playing the DVD VIDEO. With multiplex VIDEO CDs, you can select the sound from the right or left channel and listen to the sound of the selected channel through both the right and left speakers. -
Page 56: Using The Sub-Titles
Additional operations Using the sub-titles With DVD VIDEOs on which sub-titles are recorded, you can turn the sub-titles on and off and change the language of the sub-titles whenever you want while playing the DVD VIDEO. SUB-TITLE (SUB-TITLE) ON/OFF Turning the sub-titles on and off Notes •... - Page 57 Notes Changing the sub-titles • The sorts and number of languages for sub- Press SUB-TITLE while playing a DVD VIDEO. titles vary from disc to Each time you press the button, the indication and the disc. sub-title change as follows: •...
-
Page 58: Changing The Angles
Additional operations Changing the angles With DVD VIDEOs on which various angles (multi- angles) for a scene are recorded, you can change the angles whenever you want while playing the DVD VIDEO. ANGLE You can set the angle before reaching the position where you can change the angle While playing a DVD... -
Page 59: Preventing Accidental Pressing Of The Buttons
Preventing accidental pressing of the buttons You can prevent accidental pressing of the buttons on this unit (when carrying, for example). After setting the HOLD switch to ON, the buttons are locked. (You can still use the remote to operate.) HOLD Set HOLD to the direction of the arrow. -
Page 60: Basic Settings (Initial Setup)
Additional operations Basic settings (INITIAL SETUP) Z a n d s e t u p f o r i n g s s e t t s a r y n e c e s t h e a l l m a k e c a n Y o u... - Page 61 INITIAL SETUP items i n e u n d e a r e n g s s e t a u l D e f pDVD MENU Note r e c o r d e d m e n u D V D t h e f o r...
- Page 62 Additional operations pSUBTITLE Notes • You cannot use the sub- d e d r e c o r i t l s u b - t t h e f o r l a n g u a g t h e c h e s S w i t titles with some DVD...
- Page 63 pDIGITAL OUT Note s i g n a l a u d i o m e t h o d s i n g o u t p u t t t h e c h e s S w i t Select the setting P C M / M P E G / D O L B Y D I G I T A L c o n n e c t o r f r o m t h e...
-
Page 64: Limiting Playback By Children
Additional operations Limiting playback by children (Parental Control) Z d e p e n d i n g l i m i t e d c a n V I D E O s D V D s o m e P l a y i n g f u n c t i C o n t r o l... - Page 65 u s i n g l e v e l t h e S e l e c t ? / > / . / / p r e s s t h e n E N T E R . t h e e r , s m a l l...
- Page 66 Additional operations Country code list Code Country Code Country 2046 Austria 2363 Malaysia 2057 Belgium 2376 Netherlands 2079 Canada 2379 Norway 2092 China 2424 Philippines 2115 Denmark 2501 Singapore 2165 Finland 2149 Spain 2174 France 2499 Sweden 2109 Germany 2086 Switzerland 2219 Hong Kong...
-
Page 67: Control
Notes Changing/cancelling the Parental • When you play DVD Control VIDEOs without the Parental Control p l a y b a c k . s t o p d u r i n g S E T U P P r e s s function, playback cannot be limited on t h e... -
Page 68: Using The Audio Amplifier
Additional operations Using the audio amplifier Connecting to the audio amplifier a u d i o / t h e u s i n g f i e r a m p l i t h e a n d t h e C o n n e c t i e d ) - Page 69 Note Connecting to a digital component Refer to the instructions with a built-in MPEG Audio decoder or supplied with the Dolby Digital decoder component to be connected. C o n n e c t t h e c o m p o n e n t v i a t h e P C M / M P E G / D O L B Y ( n o t c a b l e...
- Page 70 Additional operations Connecting to a digital component such as an Notes • Refer to the amplifier with a digital input connector, DAT instructions supplied or MD with the component C o n n e c t t h e c o m p o n e n t v i a t h e P C M / M P E G / D O L B Y to be connected.
-
Page 71: Using The Rechargeable Battery Pack
Using the rechargeable battery pack a n d e d ) s u p p l i ( n o t h e a d p h o n u s e c a n Y o u t h e e n j o y e d ) s u p p l i... - Page 72 Attaching the battery pack c o v e r b a t t e r y t h e O p e n s o u n d s . c l i c k t h e u n t i l p a c k .
- Page 73 Notes Recharging the battery pack • If you turn on the unit t h e c o n n e c t p a c k , b a t t e t h e h i n g a t t a c A f t e r while charging, ( W h e n...
- Page 74 Detaching the battery pack p a c k . e r y b a t t t h e d e t a R E L E A S E B A T T S l i p a c k . b a t t e r t h e d r o p...
-
Page 75: Precautions
Do not use headphones/earphones while doesn’t operate properly after hours, driving, cycling, or operating any motorised please consult your nearest Sony dealer. vehicle. It may create a traffic hazard and is • While operating, do not move, shake, or illegal in some areas. It can also be otherwise allow any shock to the unit. - Page 76 • Do not touch the lens or surrounding area concerning your unit, please consult your and be sure to keep the disc cover closed nearest Sony dealer. except when inserting or removing discs to protect against dust. • If you accidentally touch the lens with...
-
Page 77: Notes On Discs
Notes on discs On handling discs • To keep the disc clean, handle the disc by its edge. Do not touch the surface. • Do not write on or stick paper or tape to the surface of the disc. • Do not use a disc with tape, seals, or paste on it as this may damage the unit. -
Page 78: Specifications
Specifications Specifications System Laser Diode Properties System DVD unit Portable DVD Unit Material Laser AlGaInP Semiconductor laser Wavelength Signal format system 650 nm PAL colour system Emission Duration Continuous Disc Laser Output Compatible discs Less than 1000 µW • DVD-ROM * This output is the value measured at a •... - Page 79 Outputs SCSI PC card specifications Operating temperature Jack name Jack type Maximum Load 5°C to 35°C (–41°F to 95°F) output impedance Operating humidity levels 20 % to 80 % (no condensation) Non-operating temperature Stereo 1 Vrms Audio/Vrms –20°C to 55°C (–4°F to 131°F) mini jack 47 kilohms Video/Vpp...
-
Page 80: Troubleshooting
Troubleshooting a n y e n c e e x p e r i y o u Sound jumps or data cannot be read. w h i l i e s u l t f i c d i f p l a y b a c k t h e w i t h... - Page 81 Motion pictures do not play on your There is no picture. c o n n e c t e d u n i t t h e mC h e c k t h a t D V D - R O M , t h e mD e p e n d i n g e l y .
- Page 82 The remote does not function. The disc does not play. t h e b e t w e e n o b s t a c l mR e m o v e a n y d i s I n s e r d e .
- Page 83 Shuffle Play, Programme Play, etc. The Parental Control function does cannot be performed. not work. D V D V I D E O t h e mD e p e n d i n g r e c o r d e d n o t C o n t r o l mP a r e n t a l...
- Page 84 Indications in the front panel display When a DVD VIDEO, VIDEO CD, or are too light. audio CD is inserted, “DVD-ROM” or t a l c r y s l i q u mT h e “CD-ROM” appears in the front panel r e a s p l display.
-
Page 85: Glossary
Glossary Chapter DVD VIDEO p i c t u r e S e c t i o n s p i c t u r e s . m o v i n g w i t h r e c o r d e d D V D a r e t h a t... - Page 86 Multilingual function VIDEO CD f o r l a n g u a g e S e v e r m o v i n g c o n t a i n s t h a t d i s c c o m p a c t p i c t l e s...
-
Page 87: Self-Diagnosis Function
81. The disc is dirty. Clean the disc with a soft cloth (page 77). To prevent a Please contact your Sony EGGGG malfunction, the self- dealer and present the five (GGGG are optional decision function is digits number displayed. -
Page 88: Index To Parts And Controls
Index to parts and controls t h e R e f Front and side panel DIGITAL OUT (OPTICAL) PHONES PCM/MPEG/ DOLBY DIGITAL 1 VOL (volume) dial (38) 4 =/+ (previous/next) v o l u m e . t h e A d j u s t buttons (31, 39) t h e... -
Page 89: Busy Indicator
6 OPEN button (29, 37) !• RETURN button (41, 64) u n i t T h e c o v e r . d i s c t h e O p e n s p r e c e d i t h e R e t u r n s w i t h o u t... -
Page 90: Rear Panel
Rear Panel 1 BATT RELEASE switch (74) p a c k . b a t t e r y t h e R e m o v e s 2 DIP switch p r e v e n t S C S I t h e S e t s o t h e r... - Page 91 Remote 1 DISPLAY button (35, 43) 7 CLEAR button p l a y i c u r r e n t t h e a y s D i s p l i t e m . e c t s e l t h e C a n c e...
- Page 92 !™ ?/>/.///ENTER buttons i n g s . s e t t i t e m s t h e S e l e c !£ SETUP button (60, 64) S E T U P . I N I T I A L t h e S e t s !¢...
-
Page 93: Language Code List
Language code list s e e i l s d e t a F o r i n g s s p e l l l a n g u a g e T h e Code Language Code Language Code Language 1027... - Page 94 Code Language Code Language Code Language 1363 Burmese 1501 Sangho 1531 Turkmen 1365 Nauru 1502 Serbo-Croatian 1532 Tagalog 1369 Nepali 1503 Singhalese 1534 Setswana 1376 Dutch 1505 Slovak 1535 Tonga 1379 Norwegian 1506 Slovenian 1538 Turkish 1393 Occitan 1507 Samoan 1539 Tsonga 1403...
-
Page 95: Initial Setup Items List
INITIAL SETUP items list s e t a u l D e f ( p a g e S E T U P I N I T I D V D M E N U ENGLISH T Y P E 4 : 3 D E U T S C H B O X ) -
Page 96: Index
Index P, Q A˜B Repeat 48 Fast Forward 31, 39 PAN SCAN 62 AC power adapter 15, 26 Fast Reverse 31, 39 Parental Control Angle 58 Front panel display 36, 44 Changing/ cancelling 67 ASPI manager 17 Setting 64 Auto Power Off 30, 38, 83 PBC functions 11, 41 Glossary 85 PBC Playback 11, 41, 86... - Page 97 Scart adapter 26 Scene 12, 39 SCSI ID 14 Search 32, 39 Self-diagnosis function 84, Shuffle Play 49 Slow-motion Play 31, 39 Sub-titles changing 57 turning on and off 56 Supplied accessories 7 Title 12, 86 Title menu 33 Track 12, 86 Troubleshooting 80 Usable discs 7 V, W, X, Y, Z...
- Page 100 Sony Corporation Printed in Japan...