
Related Manuals for Fujitsu PRIMERGY RX100 S6


Summary of Contents for Fujitsu PRIMERGY RX100 S6
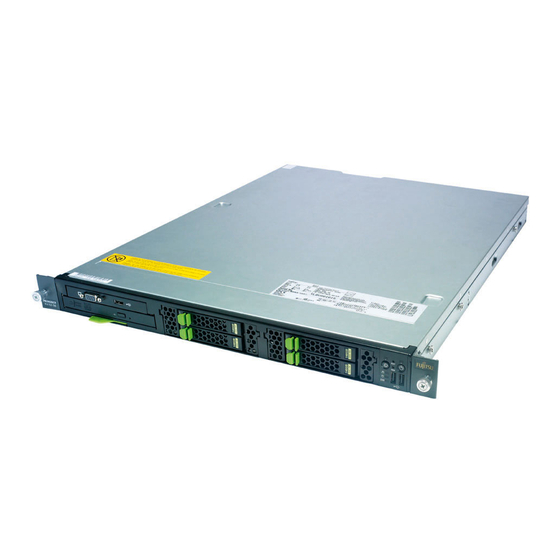
- Page 1 Options Guide - English PRIMERGY RX100 S6 Server Options Guide Edition February 2011...
-
Page 2: Copyright And Trademarks
– The contents of this manual may be revised without prior notice. – Fujitsu assumes no liability for damages to third party copyrights or other rights arising from the use of any information in this manual. – No part of this manual may be reproduced in any form without the prior written permission of Fujitsu. - Page 3 Before reading this manual For your safety This manual contains important information for safely and correctly using this product. Carefully read the manual before using this product. Pay particular attention to the accompanying manual "Safety Notes and Regulations" and ensure these safety notes are understood before using the product.
- Page 4 (hereafter, "high safety use"). Customers should not use this product for high safety use unless measures are in place for ensuring the level of safety demanded of such use. Please consult the sales staff of Fujitsu if intending to use this product for high safety use.
- Page 5 Only for the Japanese market: Although described in this manual, some sections do not apply to the Japanese market. These options and routines include: – USB Flash Module (UFM) – CSS (Customer Self Service) Options Guide RX100 S6...
- Page 6 Options Guide RX100 S6...
-
Page 7: Table Of Contents
Contents Introduction ......9 Concept and target groups ....9 Documentation overview . - Page 8 Contents Further options ......55 Front VGA module ......55 TPM .
-
Page 9: Introduction
The installation and removal of the hot-plug components is described in the Operating Manual supplied with the server. Documentation overview More information on your PRIMERGY RX100 S6 can be found in the following documents: – "Quick Start Hardware - PRIMERGY RX100 S6" leaflet "... - Page 10 – "PRIMERGY RX100 S6 Server Operating Manual" – "PRIMERGY RX100 S6 Server Options Guide" – "System Board D2863 for PRIMERGY RX100 S6 Technical Manual" – “BIOS Setup Utility for RX100 S6” manual PRIMERGY manuals are available in PDF format on the ServerView Suite DVD 2.
-
Page 11: Expansions And Conversions
Expansions and conversions Expansions and conversions Main memory There are four slots for main memory to be used for UDIMM (unbuffered DIMM) or RDIMM (registered DIMM) memory modules. Mixing both types of memory modules is forbidden. RDIMM memory modules are configurable for Xeon CPUs only. -
Page 12: Notational Conventions
Notational conventions USB Flash Module (UFM) The server can be equipped with a USB Flash Module (UFM). This module can be used as optional memory for software (e.g. VMware) or as a software dongle. Notational conventions The following notational conventions are used in this manual: Text in italics indicates commands or menu items. -
Page 13: Procedure
"Completion" on page Ê Start the operating system and make the appropriate configuration if necessary (see the Operating Manual). RX100 For the latest information on optional products provided for the see the configurator of this server: https://sp.ts.fujitsu.com/dmsp/docs/cnfgrx100s6.pdf Options Guide RX100 S6... - Page 14 Procedure Options Guide RX100 S6...
-
Page 15: Safety Instructions
Safety instructions The following safety instructions are also provided in the manual "Safety Notes and Regulations". This device meets the relevant safety regulations for IT equipment. If you have any questions about whether you can install the server in the intended environment, please contact your sales outlet or our customer service team. - Page 16 Safety instructions Before starting up CAUTION! During installation and before operating the device, observe the instructions on environmental conditions for your device. If the device is brought in from a cold environment, condensation may form both inside and on the outside of the device. Wait until the device has acclimatized to room temperature and is absolutely dry before starting it up.
- Page 17 Safety instructions CAUTION! Ensure that the power sockets on the device and the properly grounded power outlets are freely accessible. The On/Off button or the main power switch (if present) does not isolate the device from the mains power supply. To disconnect it completely from the mains power supply, unplug all network power plugs from the properly grounded power outlets.
- Page 18 Safety instructions CAUTION! Proper operation of the system (in accordance with IEC 60950-1/2 resp. EN 60950-1/2) is only ensured if the casing is completely assembled and the rear covers for the installation slots have been fitted (electric shock, cooling, fire protection, interference suppression).
- Page 19 Safety instructions CAUTION! Install the screw removed during installation/detaching Internal Options in former device/position. To use a screw of the different kind causes a breakdown of equipment. The installation indicated on this note is sometimes changed to the kind of possible options without notice. Batteries CAUTION! Incorrect replacement of batteries may result in a risk of explosion.
- Page 20 Safety instructions Working with CDs/DVDs/BDs and optical drives When working with devices with optical drives, these instructions must be followed. CAUTION! Only use CDs/DVDs/BDs that are in perfect condition, in order to prevent data loss, equipment damage and injury. Check each CD/DVD/BD for damage, cracks, breakages etc. before inserting it in the drive.
- Page 21 Safety instructions Do not contaminate the CD/DVD/BD surface with fingerprints, oil, dust, etc. If dirty, clean with a soft, dry cloth, wiping from the center to the edge. Do not use benzene, thinners, water, record sprays, antistatic agents, or silicone-impregnated cloth. Be careful not to damage the CD/DVD/BD surface.
- Page 22 Safety instructions Modules with Electrostatic-Sensitive Devices Modules with electrostatic-sensitive devices are identified by the following sticker: Figure 1: ESD label When you handle components fitted with ESDs, you must always observe the following points: Switch off the system and remove the power plugs from the power outlets before installing or removing components with ESDs.
-
Page 23: Preparation
Preparation CAUTION! Before removing or attaching covers, turn off the server, all peripheral devices, and any other connected devices. Also unplug all power cables from the outlet. Failure to do so can cause electric shock. Only for rack model: Use the anti-tilt plate to prevent the rack from tipping when installing the rack. - Page 24 Opening the server Figure 2: Pulling the server out of the rack Ê Unscrew the two knurled screws (1). Ê Pull the server as far as it will go out of the rack (2). Ê Release the locking mechanism (a or b) of both rails (3). Ê...
- Page 25 Opening the server Figure 4: Removing the top cover Ê Push the top cover as far as it will go in the direction of the arrow (1). Ê Lift off the top cover upward (2). Options Guide RX100 S6...
- Page 26 Opening the server Options Guide RX100 S6...
-
Page 27: Main Memory
Main memory CAUTION! Before installing/removing memory to/from the server, turn off the server, all peripheral devices, and any other connected devices. Also unplug all power cables from the outlet. Failure to do so can cause electric shock. A memory module consists of parts that are very vulnerable to damage by static electricity, and can easily be damaged by static electricity in the human body. -
Page 28: Population Rules
Population rules Population rules There are four slots for main memory. DIMM 2A DIMM 1A DIMM 2B DIMM 1B Figure 5: Slots of the main memory – Memory slot 1 / channel A (DIMM 1A) needs to be populated first. –... - Page 29 Population rules RDIMM memory modules Technology: DDR3 1066 / 1333 buffered single rank (SR), dual rank (DR) or quad rank (QR) RDIMM memory modules with ECC. Support for up to 4 RDIMM memory modules. ® RDIMM memory modules are only supported by Intel Quad-Core processors (Xeon 3400 series).
-
Page 30: Expanding The Main Memory
Expanding the main memory Expanding the main memory Ê Open the server as described in the chapter "Preparation" on page Figure 6: Opening the securing clips Ê Press the securing clips on both sides of the memory slot concerned outward (1). Figure 7: Installing a memory module Ê... -
Page 31: Accessible Drives And Lsp
Accessible drives and LSP CAUTION! Before installing/removing an accessible drive to/from the server, turn off the server, all peripheral devices, and any other connected devices. Also unplug all power cables from the outlet. Failure to do so can cause electric shock. When installing an accessible drive, hold it by the side. -
Page 32: Installing An Accessible 5.25-Inch Slimline Drive
Installing an accessible 5.25-inch slimline drive Installing an accessible 5.25-inch slimline drive Ê Open the server as described in the chapter "Preparation" on page Figure 8: Removing the dummy cover (bottom side) Ê Pull the dummy cover out of the bay (1). CAUTION! Keep the dummy cover for future use. - Page 33 Installing an accessible 5.25-inch slimline drive Figure 10: Installing the retaining spring Ê Fasten the retaining spring with two screws to the rear side of the accessible drive. Figure 11: Installing the accessible drive Ê Push the accessible drive into the bay (1) simultanously pressing the front of the drive slightly down until the retaining spring engages (2).
- Page 34 Installing an accessible 5.25-inch slimline drive Figure 12: Connecting the cables Ê Connect the power cable (1) to the accessible drive (see the cabling plans in the Appendix). Ê Connect the data cable (2) to the SATA connector on the accessible drive (see the cabling plans in the Appendix).
-
Page 35: Installing A Lsp
Installing a LSP Installing a LSP There is only one 3.5-inch bay. You can install either a LSP or a Front VGA module. Ê Open the server as described in the chapter "Preparation" on page Figure 14: Disengaging the dummy module Ê... - Page 36 Installing a LSP Figure 15: Removing the dummy module Ê Push the dummy module frontward and out of the bay. CAUTION! Keep the dummy module for future use. If the LSP is removed again and not replaced with a new one, then the dummy module must be reinstalled due to cooling, the applicable EMC regulations (regulations on electromagnetic compatibility) and fire protection.
- Page 37 Installing a LSP Figure 16: LSP Figure 17: Installing the LSP Ê Push the LSP into the bay from the front until the locking mechanism engages. Options Guide RX100 S6...
- Page 38 Installing a LSP Figure 18: Connecting the LSP cable to the LSP Ê Thread the LSP cable through the openings (1). Ê Connect the LSP cable (2) to the LSP (see the cabling plans in the Appendix). Figure 19: Connecting the LSP cable to the system board Ê...
-
Page 39: Expansion Cards And Bbu
Expansion cards and BBU CAUTION! Before installing/removing expansion cards to/from the server, turn off the server, all peripheral devices, and any other connected devices. Also unplug all power cables from the outlet. Failure to do so can cause electric shock. The circuit boards and soldered parts of internal options are exposed and can be damaged by static electricity. -
Page 40: Installing An Expansion Card
Installing an expansion card Installing an expansion card With two riser cards, the system board offers 2 x PCI Express x8 slots and 1x PCI Express x4 slot. Preferred slots Riser card PCI bus Slots / Length slots no. S26361-E402-A10 PCIe x8 1 slot / 1 standard or low-profile PCIe x8 slot, maximum length 175 mm... - Page 41 Installing an expansion card 2. PCI-Express x4 PCI bus type Max pcs per Slot no Forbidden controller system slot MegaRAID SAS9280-8e 6Gb/s Intel Pro 1000PT Quad 4 GB/s Port Server Adapter LP S26361-F3462-E201 (Kirkwood 2) Intel Pro/1000PT dual Server Adapter S26361-F3228-E201 (Redwater) Intel PRO/1000 PF...
- Page 42 Installing an expansion card Riser module 1 Riser module 1 offers slot 1. Ê Open the server as described in the chapter "Preparation" on page Figure 20: Removing the riser module 1 Ê Push the green lock bars of the riser module 1 in direction of the arrows (1). Ê...
- Page 43 Installing an expansion card Figure 21: Pulling out the slot cover - riser module 1 Ê Pull out the slot cover frontward (1) and remove it sideward (2). CAUTION! Keep the slot cover for future use. If the expansion card is removed and not replaced with a new card, the slot cover must be reinstalled due to cooling, to comply with applicable EMC regulations (regulations on electromagnetic compatibility) and to protect against fire.
- Page 44 Installing an expansion card Figure 23: Attaching the slot cover extension to the expansion card Ê Attach the slot cover extension to the slot cover of the expansion card (1). Ê Fasten the slot cover extension with one screw (2). Figure 24: Installing an expansion card -slot 1 Ê...
- Page 45 Installing an expansion card Figure 25: Installing the riser module 1 Ê Insert the riser card into the system board slot (1). Make sure that the two guiding bolts (A) at the right side of the riser holder engage correctly. Ê...
- Page 46 Installing an expansion card Riser module 2 Riser module 2 offers slot 2 and slot 3. Ê Open the server as described in the chapter "Preparation" on page Figure 26: Removing the riser module 2 Ê If necessary, remove the cables from the two cable clamps (1). Notice the cable routing.
- Page 47 Installing an expansion card Figure 27: Pulling out the slot cover - slot 2 Ê Pull out the slot cover (1). CAUTION! Keep the slot cover for future use. If the expansion card is removed and not replaced with a new card, the slot cover must be reinstalled due to cooling, to comply with applicable EMC regulations (regulations on electromagnetic compatibility) and to protect against fire.
- Page 48 Installing an expansion card Figure 28: Installing an expansion card -slot 2 Ê Carefully press the expansion card into the riser card slot (A), until it clicks into place (1). Make sure that the lug on the slot cover (B) clicks into place in the corresponding hole (2).
- Page 49 Installing an expansion card Figure 29: Attaching the mounting bracket to an expansion card Ê Attach the mounting bracket to the expansion card (1). Ê Fasten the mounting bracket with two screws (2). Figure 30: Installing an expansion card - slot 3 Ê...
- Page 50 Installing an expansion card Figure 31: Installing the riser module 2 Ê Insert the riser card into the system board slot (1). Make sure that the two guiding bolts (A) of the riser holder engage correctly. Ê If necessary, route the cables in the two cable clamps as before (2). Ê...
-
Page 51: Installing A Bbu
Installing a BBU Installing a BBU You can install one Battery Backup Unit (BBU). Ê Open the server as described in the chapter "Preparation" on page Figure 32: Removing two bolts from the BBU Ê Loosen the two screws and remove the two bolts from the BBU. Figure 33: Connecting the cable to the BBU Ê... - Page 52 Installing a BBU Figure 34: Position of the bolts and the foil Figure 35: Fastening the BBU to the housing Ê Position the BBU on the two bolts in the housing (1) with aligning the edges of the foil (A) and the BBU. Ê...
- Page 53 Installing a BBU Figure 36: Connecting BBU cable to controller Ê Install a controller as described in the section "Installing an expansion card" on page Ê Connect the BBU cable to the controller. CAUTION! Make sure that the connector side with two pin rows is on the top. Otherwise you risk short-circuits.
- Page 54 Installing a BBU Options Guide RX100 S6...
-
Page 55: Further Options
Further options CAUTION! Follow the safety instructions in chapter "Safety instructions" on page Front VGA module There is only one 3.5-inch bay. You can install either a LSP or a Front VGA module. Ê Open the server as described in the chapter "Preparation"... - Page 56 Front VGA module Figure 39: Sliding in the Front VGA module Ê Push the Front VGA module into the bay from the front (1). Ê Thread the cable through the openings (2). Figure 40: Connecting the Front VGA cable to the system board Ê...
-
Page 57: Tpm
The server can be equipped with a TPM (Trusted Platform Module). This module enables programs from third party manufacturers to store key information. Figure 41: TPM installation kit TPM (Trusted Platform Module) Special screw for TPM TPM spacer TPM screwdriver insert bit for TPM special screw The black TPM spacer is not used in this server. - Page 58 Figure 43: Fastening the TPM Ê Insert the TPM on the system board (1). Ê Fasten the TPM with the special screw for the TPM (2). Please use the TPM screwdriver insert bit to tighten the special screw. Do not fasten the screw too tightly (torque value of 0.6 Nm). Ê...
-
Page 59: Usb Flash Module (Ufm)
USB Flash Module (UFM) USB Flash Module (UFM) The server can be equipped with a USB Flash Module (UFM). Figure 44: UFM installation kit Figure 45: UFM cable USB Flash Module (UFM) UFM spacer UFM nylon screw UFM cable Options Guide RX100 S6... - Page 60 USB Flash Module (UFM) Ê Open the server as described in the chapter "Preparation" on page Figure 46: Preparing the UFM Ê Remove the nylon screw from the UFM (1). Ê Remove the UFM spacer (2). The UFM spacer is no longer required. Options Guide RX100 S6...
- Page 61 USB Flash Module (UFM) Figure 47: Position of the bolts in the chassis Figure 48: Positioning the UFM Ê Push the UFM between the two bolts (1) until the threaded bolt (2) engages in the screw hole. Options Guide RX100 S6...
- Page 62 USB Flash Module (UFM) Figure 49: Fastening the UFM Ê Fasten the UFM with the nylon screw. Figure 50: Connecting the UFM cable Ê Connect the UFM cable to the UFM (connector J2) and to the system board (connector J26). Ê...
-
Page 63: Completion
Completion CAUTION! Follow the safety instructions in chapter "Safety instructions" on page Closing the server Figure 51: Mounting the top cover Ê Place the top cover on the server (1). Make sure that each bolt is positioned in the corresponding nut. Ê... - Page 64 Closing the server Figure 52: Securing the two knurled screws Ê Secure the top cover with the two knurled screws at the rear side (1). If you have not removed the server from the rack, skip the instructions for mounting in the rack: Figure 53: Inserting the server Ê...
- Page 65 Closing the server Ê Insert the prepared server into the protruding interior telescope rails (2) until the rails engage. Ê Release the locking mechanism (a or b) of both rails (3). Ê Push the server as far as it will go into the rack (4). Ê...
- Page 66 Closing the server Options Guide RX100 S6...
-
Page 67: Appendix
Appendix 10.1 Cabling Part number From -to SNP:A3C40102754 System board to fans and ODD power SNP:A3C40102753 System board to front panel SNP:A3C40102758 System board to backplane SNP:A3C40108860 System board to ODD data SNP:A3C40102759 System board to backplane (SATA only) SNP:A3C40102800 System board to LSP SNP:A3C40102801 System board to front VGA module... - Page 68 Cabling Front panel 350W PSU HDD bay HDD bay Slim ODD SNP:A3C40102754 SNP:A3C40102753 SNP:A3C40108860 Figure 54: Basic cabling Options Guide RX100 S6...
- Page 69 Cabling Front panel 350W PSU HDD bay HDD bay Slim ODD SNP:A3C40102754 SNP:A3C40108860 SNP:A3C40102760 SNP:A3C40102753 SNP:A3C40102759 SNP:A3C40102758 SNP:A3C40102755 Figure 55: Cabling of the 2.5-inch SATA HDD variant Options Guide RX100 S6...
- Page 70 Cabling Front panel 350W PSU HDD bay HDD bay Slim ODD RAID card SNP:A3C40102754 SNP:A3C40108860 SNP:A3C40102753 SNP:A3C40102805 SNP:A3C40102758 T26361-Y3987-V2 Figure 56: Cabling of the 2.5-inch SAS HDD variant with iBBU Options Guide RX100 S6...
- Page 71 Cabling Front panel 350W PSU HDD bay HDD bay Slim ODD SNP:A3C40102754 SNP:A3C40108860 SNP:A3C40102753 SNP:A3C40102759 SNP:A3C40102758 SNP:A3C40102755 Figure 57: Cabling of the 3.5-inch SATA HDD variant Options Guide RX100 S6...
- Page 72 Cabling Front panel 350W PSU HDD bay HDD bay Slim ODD RAID card SNP:A3C40102754 SNP:A3C40108860 SNP:A3C40102753 SNP:A3C40114082 SNP:A3C40102758 T26361-Y3987-V2 Figure 58: Cabling of the 3.5-inch SAS HDD variant with iBBU Options Guide RX100 S6...
- Page 73 Cabling Front panel 350W PSU HDD bay HDD bay Backplane Front VGA module SNP:A3C40102754 SNP:A3C40108860 SNP:A3C40102755 SNP:A3C40102753 SNP:A3C40102759 SNP:A3C40102758 SNP:A3C40102801 Figure 59: Cabling of the 3.5-inch SATA HDD variant with Front VGA module Options Guide RX100 S6...
- Page 74 Cabling Front panel 350W PSU HDD bay HDD bay Backplane SNP:A3C40102754 SNP:A3C40108860 SNP:A3C40102755 SNP:A3C40102753 SNP:A3C40102759 SNP:A3C40102758 SNP:A3C40102800 Figure 60: Cabling of the 3.5-inch SATA HDD variant with LSP Options Guide RX100 S6...
-
Page 75: Index
Index top cover 24, 63, accessible drives 11, TPM 11, BBU 11, UFM 12, USB Flash Module 12, data manipulation electrostatic-sensitive devices (ESD) expansion card 11, Front VGA module 11, information, additional laser information light emitting diode (LED) lithium battery main memory meaning of the symbols notational conventions... - Page 76 Index Options Guide RX100 S6...