Table of Contents
Advertisement
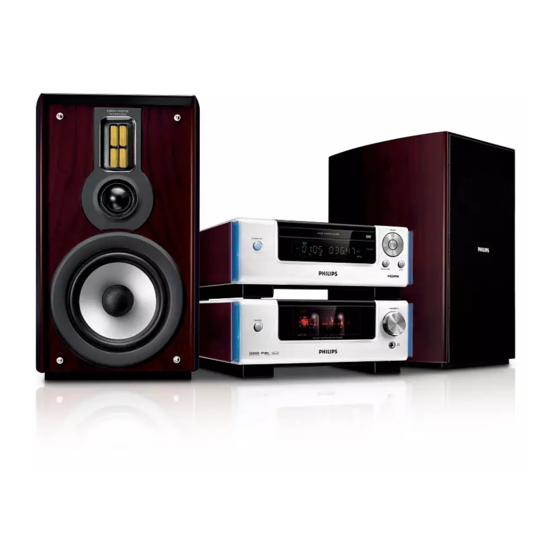
DVD Micro Theatre
Thank you for choosing Philips.
Need help fast?
Read your Quick Use Guide and/or
Owner's Manual first for quick tips
that make using your Philips product
more enjoyable.
If you have read your instructions
and still need assistance,
you may access our online help at
www.philips.com/usasupport
while with your product.
(and Model / Serial number)
Philips vous remercie de
votre confiance.
Besoin d'une aide
rapide?
Les Guide d'utilisation rapide et Manuel de
l'utilisateur regorgent d'astuces destinées à
simplifier l'utilisation de votre produit Philips.
Toutefois, si vous ne parvenez pas à résoudre
votre probléme, vous pouvez accéder à
notre aide en ligne à l'adresse
www.philips.com/usasupport
Veillez à avoir votre produit à
portée de main.
(et model / serial nombre)
MCD908
Gracias por escoger Philips
Necesita ayuda
inmediata?
Lea primero la Guía de uso rápido o el
Manual del usuario, en donde encontrará
consejos que le ayudarán a disfrutar
plenamente de su producto Philips.
Si después de leerlo aún necesita ayuda,
consulte nuestro servicio de
asistencia en línea en
www.philips.com/usasupport
y tenga a mano el producto.
(y número de model / serial)
Advertisement
Table of Contents

Related Manuals for Philips MCD908/37


Summary of Contents for Philips MCD908/37
- Page 1 Thank you for choosing Philips. Need help fast? Read your Quick Use Guide and/or Owner's Manual first for quick tips that make using your Philips product more enjoyable. If you have read your instructions and still need assistance, you may access our online help at www.philips.com/usasupport...
-
Page 2: English
Canada English: This digital apparatus does not exceed the Class B limits for radio noise emissions from digital apparatus as set out in the Radio Interference Regulations of the Canadian Department of Communications. Français: Cet appareil numérique n'emet pas de bruits radioélectriques dépassant les limites applicables aux appareils numériques de Class B prescrites dans le Règlement sur le Brouillage... -
Page 4: Important Safety Instructions
IMPORTANT SAFETY INSTRUCTIONS Clean only with dry cloth. materials Class II equipment symbol This symbol indicates that the unit has a double insulation system... - Page 5 HDMI (High Definition Multimedia Interface) is a digital interface that allows pure HD digital video transmission without the loss of image quality. The integrated control bus allows system control between the TV set and connected devices like a digital set top box. English ------------------------------------------------ 7 Français -------------------------------------------- 47 Español --------------------------------------------- 87...
-
Page 6: Language Code
Language Code Abkhazian 6566 Afar 6565 Afrikaans 6570 Amharic 6577 Arabic 6582 Armenian 7289 Assamese 6583 Avestan 6569 Aymara 6589 Azerhaijani 6590 Bahasa Melayu 7783 Bashkir 6665 Belarusian 6669 Bengali 6678 Bihari 6672 Bislama 6673 Bokmål, Norwegian 7866 Bosanski 6683 Brezhoneg 6682 Bulgarian... -
Page 7: Table Of Contents
General Information Features ... 9 Supplied accessories ... 9 Environment information ... 9 Installation ... 9~10 Maintenance ... 10 Connections Step 1: Placing the speakers ... 11 Step 2: Connecting speakers ... 12 Step 3: Connecting the control cable ... 12 Step 4: Connecting TV ... - Page 8 Contents System Menu Options Basic Operations ... 31 GENERAL SETUP PAGE ... 31~32 TV DISPLAY OSD LANGUAGE CLOSED CAPTIONS SCREEN SAVER DIVX CODE AUDIO SETUP PAGE ... 32~33 SPDIF SETUP DOLBY DIGITAL SETUP 3D PROCESSING HDCD NIGHT MODE VIDEO SETUP PAGE ... 33~35 COMPONENT TV MODE QUALITY...
-
Page 9: General Information
Features Your DVD Micro Theatre with 2.0 channel full digital amplifier creates the same dynamic sound qualities that you find in full-fledged cinemas and incorporates some of the best features in home theater technology. Other features include: Built-in Dolby Digital decoder, suppor ting DSC sound setting. -
Page 10: Supplied Accessories
– This instruction booklet and a Quick Start Guide If any item is damaged or missing, contact your retailer or Philips. Environmental information All unnecessary packaging has been omitted. We have tried to make the packaging easy to separate into three materials: cardboard (box), polystyrene foam (buffer) and polyethylene (bags, protective foam sheet). -
Page 11: Connections
Speaker (right) IMPORTANT! – The type plate is located at the bottom of the system. – Before connecting the AC power cord to the wall outlet, ensure that all other connections have been made. – Never make or change any connections with the power switched on. -
Page 12: Step 2: Connecting Speakers
Connections Step 2: Connecting speakers ● Connect the left and right speakers to the SPEAKERS (4Ω) terminals on the back of the power amplifier with the supplied speaker cables. Right speaker to “R” and left speaker to “L”, red wire to “+” and black wire to “-”. Fully insert the stripped portion of the speaker wire into the terminal as shown. - Page 13 Using Component Video jacks (Y Pb Pr) IMPORTANT! – The progressive scan video quality is only possible when using Y Pb Pr, and a progressive scan TV is required. Use component video cables (red/blue/green - not supplied) to connect the DVD system's COMPONENT (Pr/Cr Pb/Cb Y) jacks to the corresponding Component video input jacks (or labeled as Y Pb/Cb Pr/Cr or YUV) on the TV.
-
Page 14: Step 5: Connecting Fm/Am Antennas
(labeled as 75 ohm or RF In), you will need an RF modulator in order to view DVD playback on the TV. See your electronics retailer or contact Philips for details on RF modulator availability and operations. Use the composite video cable (yellow) to connect the DVD system’s VIDEO jack to the... -
Page 15: Step 6: Connecting The Power Cord
Step 6: Connecting the power cord After everything is connected properly, plug in the AC power cord to the power outlet. Never make or change any connection with the power switched on. Additional: Connecting additional equipment IMPORTANT! – Some discs are copy-protected. You cannot record the disc through a VCR or digital recording device. - Page 16 Connections Connecting to a TV with HDMI Jack E HDMI connects untouched and uncompressed digital transmission for the highest and crispest sound/image quality. It has plug and play capability using only one cable for both audio/video output. ● Use a HDMI cable (not supplied) to connect the HDMI jack on the DVD Player to HDMI IN on a HDMI compatible device (e.g.;...
-
Page 17: Functional Overview
DVD player and power amplifier ECO POWER/STANDBY-ON y – switches on the system or puts it on to Eco power/normal standby mode. Display – shows the current status of the DVD player. ÉÅ – starts or interrupts disc playback. PRESET +/- –... -
Page 18: Remote Control
Functional Overview Remote control – switches on the system or puts it on to Eco power/normal standby mode. – opens or closes the disc compartment Numeric Keypad (0-9) – inputs a track/title/chapter number of the disc. & ™ ¡ § ∞... - Page 19 VOLUME +/- – adjusts the volume upward/downward. – adjusts the hours and minutes in clock/timer setting mode. – switches the set timer ON or OFF. ¡ / ™ – Disc: skips to the previous/next chapter/title/ track – Tuner: selects a preset radio station. ÉÅ...
-
Page 20: Getting Started
Switch the DVD system on and then select DISC source. (See “Switching the system on/off”). Turn on the TV and set to the correct video-in channel. You should see the blue Philips DVD background screen on the TV. ➜ Usually these channels are between the lowest and highest channels and may be called FRONT, A/V IN, or VIDEO. -
Page 21: Setting Up Progressive Scan Feature
Setting up Progressive Scan feature (for Progressive Scan TV only) The progressive scan display twice the number of frames per seconds than interlaced scanning (ordinary normal TV system). With nearly double the number of lines, progressive scan offers higher picture resolution and quality. IMPORTANT! Before enabling the progressive scan feature, you must ensure:... -
Page 22: Step 3: Setting Language Preference
Getting Started Step 3: Setting language preference You can select your own preferred language settings. This DVD system will automatically switch to the selected language whenever you load a disc. If the language selected is not available on the disc, the disc’s default language will be used instead. -
Page 23: Switching The System On/Off
Switching the system on/off ● Press ECO POWER/STANDBY-ONB (B on the remote). ➜ A countdown of 10 seconds starts for preheating of the systme. Then, the system will switch to the last selected source. ● Press DISC, TUNER or AUX on the remote. ➜... -
Page 24: Dimming The Display Screen
Basic Operations Dimming the display screen ● Press DIM repeatedly to select different levels of brightness for the display screen. Demonstration mode The system has a demonstration mode that shows the various features offered by the system. To activate the demonstration ●... -
Page 25: Disc Operations
DVD Player front panel or B on the remote. ➜ You should see the blue Philips DVD background screen on the TV. Press OPEN•CLOSE ç to open the disc tray and load in a disc, then press the same button again to close the disc tray. -
Page 26: Using The Disc Menu
Disc Operations Using the Disc Menu Depending on the disc, a menu may appear on the TV screen once you load the disc. To select a playback feature or item ● Use 1 2 3 4 and OK or Numeric Keypad (0-9) on the remote. -
Page 27: Repeat A-B
Repeat A-B (DVD/VCD/CD/MP3/DivX/ WMA) Press A-B at your chosen starting point. Press A-B again at your chosen end point. ➜ The section A and B can be set only within the same chapter/track. ➜ The section will now repeat continuously. To exit the sequence, press A-B again. -
Page 28: Special Disc Features
Disc Operations For Super VCD/VCD/DivX/CD ➜ Single/Total Elapsed: displays the elapsed time of the current single/total track. ➜ Single/Total Remain: displays the remaining time of the current single/total track. ➜ Display Off: switches time display off. Special disc features Playing a Title (DVD) Press DISC MENU. -
Page 29: Playing Jpeg Picture Cd
Playing JPEG Picture CD General operation Load a JPEG Picture CD. ➜ The data disc menu appears on the TV screen. Use 3 4 to select a folder and press OK to open the folder. Press 3 4 or use the Numeric Keypad (0-9) to highlight a picture file. -
Page 30: Playing A Divx Disc
Disc Operations Playing a DivX disc This DVD player supports the DivX movie playback that you download from your computer onto a CD-R/RW (see “System Menu Options-DIVX(R) VOD registration code” for more information). Load a DivX disc. ➜ Playback will start automatically. If not press É... -
Page 31: System Menu Options
Basic operations Press SYSTEM to enter the Setup Menu. Press 1 2 to select a page to be set. Press 3 4 to highlight an option. Enter its submenu by pressing 2 or OK. Move the cursor by pressing 3 4 to highlight the selected item. -
Page 32: Screen Saver
➜ OFF: Screen saver is disabled. DIVX CODE Philips provides you the DivX Demand) registration code that allows you to rent and purchase videos using the DivX service. For more information, visit us at www.divx.com/ vod. -
Page 33: Dolby Digital Setup
DOLBY DIGITAL SETUP The option included in DOLBY DIGITAL SETUP is: “DUAL MONO”. DUAL MONO Select the setting that matches the number of speakers you have connected. ➜ STEREO: Left mono sound will send output signals to Left speaker and Right mono sound will send output signals to Right speaker. -
Page 34: Component
System Menu Options COMPONENT Sets the video output according to your video connection. This setting is not required if you are using the VIDEO jack (yellow) to connect the DVD micro system to your TV. ➜ S-VIDEO: Select this if you have connected the DVD micro system to your TV using S-Video jack. -
Page 35: Hdmi Setup
HDMI SETUP The options included in HDMI SETUP Page are: "HDMI" and "RESOLUTION". HDMI This option is used to enable/disable HDMI output. ➜ ON: Enables HDMI output. ➜ OFF: Disables HDMI output. RESOLUTION You can select the resolution of the picture according to your preference and the connected HDMI TV. -
Page 36: Password Setup Page
System Menu Options 3 PG – Parental Guidance suggested. 4 PG 13 – Material is unsuitable for children under age 5-6 PGR, R – Parental Guidance - Restricted; recommended that parents restrict children under 17 from viewing or allow to view only when supervised by a parent or adult guardian. -
Page 37: Other Functions
Radio Reception Tuning to radio stations Press STANDBY-ON B (B on the remote) to switch on the last selected source. Press SOURCE (TUNER on the remote) to select TUNER mode. Press TUNER on the remote again to select the desired band: FM or AM Press and hold ¡... -
Page 38: Setting The Clock
Other Functions Setting the clock In Standby mode, press and hold CLOCKon the remote until the time flashes on the display. ➜ ”CLOCK SET” is displayed briefly. Then, the hour digits flash on the display screen. Turn VOLUME -/+ clockwise or anticlockwise or press VOLUME +/- on the remote to set the hours. -
Page 39: Specifications
SYSTEM Power supply ... 120 V / 60 Hz Rated working power consumption (1/8 rated output power) ... ≤ 85W AUX input sensitivity ... ≤ 500mV Channel Separation ... ≥ 40dB Distortion ... 0.7% Eco power Standby ... < 1W Frequency response 100Hz-20kHz (+0.5/-2 dB) Video output ... -
Page 40: Troubleshooting
Do not open the system as there is a risk of electric shock. If a fault occurs, first check the points listed below before taking the system for repair. If you are unable to remedy a problem by following these hints, consult your dealer or Philips for help. - Page 41 The aspect ratio of the screen cannot be changed even though you have set the TV shape. No sound or distorted sound. The micro DVD player does not start playback. The DVD micro system does not respond when the buttons are pressed. Cannot activate some features, such as Angles, Subtitles, or multi-language Audio.
- Page 42 Troubleshooting The remote control does not function. The display is dark. Low hum or buzz sound. Low bass response. Unable to select Progressive Scan. No sound is output from the HDMI jack. ✔ Select the correct source (DISC or TUNER, for example) before pressing the function button.
-
Page 43: Glossary
Analog: Sound that has not been turned into numbers. Analog sound varies, while digital sound has specific numerical values. These jacks send audio through two channels, the left and right. Aspect ratio: The ratio of vertical and horizontal sizes of a displayed image. The horizontal vs. - Page 45 PHILIPS CONSUMER ELECTRONICS NORTH AMERICA P.O. Box 671539, Marietta, GA. 30006-0026 Meet Philips at the Internet http://www.philips.com http://www.philips.com/support MCD908 CLASS 1 LASER PRODUCT C Royal Philips Electronics N.V. 2007 All rights reserved. Printed in China PDCC-JS_JW-0704...