
Related Manuals for Haier AD12MS1ERA


Summary of Contents for Haier AD12MS1ERA
- Page 1 AD12MS1ERA AD12MS1ERA(D) AD18MS1ERA AD18MS1ERA(D) AD24MS2ERA AD24MS2ERA(D) AD28MS2ERA(S) AD28MS2ERA(S)(D) AD24MS1ERA AD24MS1ERA(D) AD28NS1ERA(S) AD36NS1ERA(S) AD48NS1ERA(S) No.0150513771 E...
- Page 3 DUCT TYPE AIR CONDITIONER OPERATION MANUAL AND INSTALLATION MANUAL AD12MS1ERA AD12MS1ERA(D) Contents AD18MS1ERA AD18MS1ERA(D) AD24MS2ERA AD24MS2ERA(D) AD28MS2ERA(S) AD28MS2ERA(S)(D) AD24MS1ERA AD24MS1ERA(D) AD28NS1ERA(S) AD36NS1ERA(S) AD48NS1ERA(S) Keep this operation manual for future reference.
- Page 4 Haier Industrial Park, No.1 Haier road, Qingdao,P.R.China EUROPEAN REGULATIONS IMPORTANT INFORMATION REGA- CONFORMITY FOR THE MODELS RDING THE REFRIGERANT USED Contains fluorinated greenhouse gases covered by the Kyoto Protocol All the products are in conformity with the following R410A European provision:...
- Page 5 Cautions Disposal of the old air conditioner Disposal of the packaging of your new air conditioner Safety Instructions and Warnings...
-
Page 6: Safety Precautions
Safety Precautions CAUTIONS FOR INSTALLATION CAUTIONS FOR TRANSFER OR REPAIR WARNING... - Page 7 Safety Precautions CAUTIONS FOR OPERATION WARNING CAUTION...
- Page 8 8. The indoor unit installation height is at least 2.5m. 9. A leakage breaker must be installed. 10.For AD12MS1ERA and AD12MS1ERA(D),AD18MS1ERA,AD18MS1ERA(D), AD24MS2ERA,AD24MS2ERA(D), AD28MS2ERA(S),AD28MS2ERA(S)(D),we can get the 4 different ESP through adjust the indoor unit PCB SW1-4 and SW1-5, please refer below:...
-
Page 9: Parts And Functions
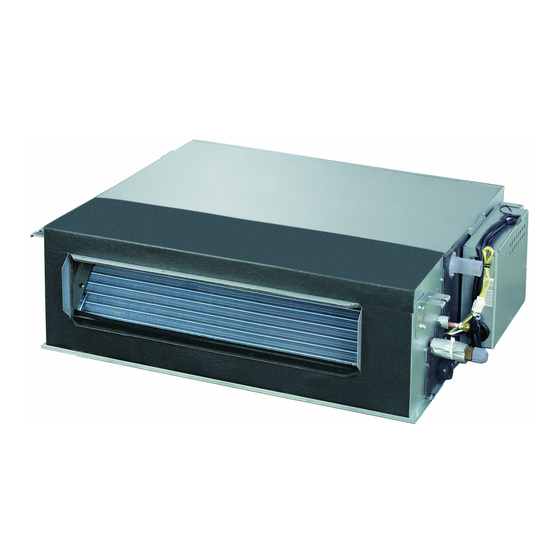
Parts and Functions AD12MS1ERA AD12MS1ERA(D) AD18MS1ERA AD24MS2ERA AD28MS2ERA(S) AD18MS1ERA(D) AD24MS2ERA(D) AD28MS2ERA(S)(D) AD24MS1ERA AD24MS1ERA(D) AD28NS1ERA(S) AD36NS1ERA(S) AD48NS1ERA(S) Attention:... - Page 10 Parts and Functions Buttons of the wire controller Fan speed switch Mode switch Swing switch Health switch TEMP switch Time switch Clock, timing and address setting Air change switch Timing switch Self-inspection ON/OFF switch switch Filter reset Reset key...
- Page 11 Parts and Functions Display of the wire controller Centralized display Air volume display Running display Standby display Running mode display Health function display Unit number display Centralized adress display System adress display Filter screen warning Temperature sign display Timing operation display Air change display Inspection status display...
- Page 12 Operation ON/OFF operation 1. Press "ON/OFF" switch. 2.Choose operation mode. 3.Press "TEMP" switch 4.Press "FAN SPEED" switch 5.Press "swing" switch on the line controller to swing the wind screen. 6.Press "ON/OFF"switch, off. Note Remarks...
- Page 13 Operation Present time setting 1.Press "CLOCK" switch 2.Press " " and " " to regulate the time. 3.Press "setting" switch. The setting is achieved. Notes Setting of power failure compensation function...
- Page 14 Operation Timing setting " " 1.Press "TIME" switch. 2.Set up "TIMER" 3.Time setting is achieved. Press"setting"switch. Cancel timing parts of wired controller explanation : Notes...
-
Page 15: Installation Manual For Wire Controller
Operation Query indoor malfunction history: How to change the function switches? Installation Manual For Wire Controller 1. Take down wire controller from the holder 2. Install the controller holder Note: 3.Wiring instruction Note: 4.Place wire controller on the holder, and pay attention not to pressing any wires. - Page 16 Installation Manual For Wire Controller 5. Wiring connections of wire controller: TYPE 1, FOR AD12/18MS1ERA,AD12/18MS1ERA(D),AD24MS2ERA,AD24MS2ERA(D),AD28MS2ERA(S),AD28MS2ERA(S)(D) There are three methods to connection wire controller and the indoor units: A.One wired controller can control max. up to 16 sets of indoor units, and 3 pieces of polar wire must connect the wire controller and the master unit (the indoor unit connected with wire controller directly), the others connect with the master unit through 2 pieces of polar wire( 3 pieces for model AD12/18MS1ERA, AD12/18MS1ERA(D), AD24MS2ERA, AD24MS2ERA(D)
-
Page 17: Heating Mode
Heating Mode "HOT KEEP" function Warming operation... -
Page 18: Care And Maintenance
Care and Maintenance Points to observe CAUTION Cleaning the air filter CAUTION Care and Cleaning of the unit Post-Season Care Pre-Season Care... -
Page 19: Troubleshooting
Troubleshooting Unit fails to start Cooling or heating is not sufficient Cooling is not sufficient... - Page 20 Troubleshooting The followings are not malfunction...
- Page 21 Troubleshooting...
-
Page 22: Precaution For Installation
Precaution for Installation WARNING CAUTION... -
Page 23: Is The Unit Installed Correctly
Is The Unit Installed Correctly Installation place Electric work When you change your address or the installation place For inspection and maintenance... - Page 24 (When installing at a place under a high humidity environment, pay sufficient attention to the prevention of dewing such as thermal insulation of the unit. ) Ceiling height shall have the following height. Installation space AD12MS1ERA AD12MS1ERA(D) AD28NS1ERA(S) AD18MS1ERA AD18MS1ERA(D) AD36NS1ERA(S)
-
Page 25: Installation Procedure
Installation Procedure Indoor Unit 1. Preparation for suspending the unit a.Size of hole at ceiling and position of hanging bolts AD12MS1ERA AD12MS1ERA(D) AD24MS1ERA AD24MS1ERA(D) AD18MS1ERA AD18MS1ERA(D) AD28NS1ERA(S) AD36NS1ERA(S) AD24MS2ERA AD24MS2ERA(D) AD48NS1ERA(S) AD28MS2ERA(S) AD28MS2ERA(S)(D) Dimensions A(mm) B(mm) C(mm) D(mm) E(mm) F(mm) - Page 26 Installation Procedure Drain Pipe Drain Piping Good piping Improper piping Unit model The size of drain opening For unit without water pump AD12MS1ERA AD12MS1ERA(D) AD18MS1ERA AD18MS1ERA(D) 21mm AD24MS2ERA AD24MS2ERA(D) AD28MS2ERA(S) AD28MS2ERA(S)(D) AD24MS1ERA AD24MS1ERA(D) 15.5mm AD28NS1ERA(S) AD36NS1ERA(S) 33mm AD48NS1ERA(S) For unit with water pump...
- Page 27 Installation Procedure Drain Pipe Drainage Test Procedures Installation Procedure Air Duct Installation work for air outlet ducts Note Connection of suction, exhaust ducts a.Fresh air inlet b.Exhaust (Make sure to use also the suction.)
- Page 28 Leak (minimum) Model breaker protector breaker(A) current(mA) rated capacity AD12MS1ERA AD12MS1ERA(D) AD18MS1ERA AD18MS1ERA(D) AD24MS1ERA AD24MS1ERA(D) AD24MS2ERA AD24MS2ERA(D) AD28MS2ERA(S) AD28MS2ERA(S)(D) AD28NS1ERA(S) AD36NS1ERA(S) AD48NS1ERA(S) Wiring connection Make wiring to supply power to the outdoor unit, so that the power for the indoor unit is supplied by terminals.
- Page 30 Address:Haier Industrial Park,Qianwangang Road,Eco-Tech Development Zone,Qingdao 266555,Shandong,P.R.C. Contacts: TEL +86-532-88936943; FAX +86-532-8893-6999 Website: www.haier.com...
-
Page 31: Table Of Contents
APARATO DE AIRE ACONDICIONADO DE TIPO CONDUCTOS MANUALES DE USO E INSTALACIÓN Contenido AD12MS1ERA Precauciones para el uso AD12MS1ERA(D) Avvertenze Denominación de los componentes Componentes y funciones Funcionamiento Manual de instalación del controlador de cableado AD18MS1ERA Modo Calefacción AD18MS1ERA(D) Mantenimiento Guía para la búsqueda de las averías... - Page 32 Haier Industrial Park, No.1 Haier Road, Qingdao, República Popular China CONFORMIDAD DE LOS MODELOS INFORMACIÓN IMPORTANTE ACER- SEGÚN LAS NORMATIVAS EUROPEAS CA DEL REFRIGERANTE UTILIZADO Todos los productos cumplen los requisitos de las siguientes Contiene gases fluorados de efecto invernadero normas europeas: regulados por el Protocolo de Kioto.
- Page 33 Precauciones para el uso • Antes de usar el climatizador lea el presente manual de instrucciones No apoye ningún objeto sobre el aparato • Las precauciones de seguridad que figuran a continuación ni se suba encima del mismo. se subdividen en PELIGRO y ATENCIÓN. La palabra PELIGRO corresponde a precauciones que, en caso de no No coloque bombonas de gas inflamable observarse, pueden comportar serias consecuencias como...
- Page 34 Especificaciones del cable de alimentación: Para los modelos 12, 18, 24: Monofásico H05RN-F 3G 4.0mm Especificaciones del cable de conexión: Para los modelos 12, 18, 24, 28, 36, 48 : H05RN-F 4G 1.3 mm AD12MS1ERA, AD12MS1ERA(D),AD18MS1ERA, • AD18MS1ERA(D), AD24MS2ERA,AD24MS2ERA(D), A través del AD28MS2ERA(S),AD28MS2ERA(S)(D) Interior están...
-
Page 35: Conductos
Denominación de los componentes AD12MS1ERA AD12MS1ERA(D) Carcasa de componentes Carcasa de componentes eléctricos eléctricos Marco de salida Marco de salida de aire de aire Bomba de drenaje Bandeja de Bandeja de Evaporadora Evaporadora desagüe desagüe Drain AD18MS1ERA AD24MS2ERA AD28MS2ERA(S) AD18MS1ERA(D) AD24MS2ERA(D) AD28MS2ERA(S)(D) -
Page 36: Componentes Y Funciones
Componentes y funciones Botones del controlador de cableado Interruptor de velocidad del Interruptor de modo ventilador Elija el modo de Permite cambiar la velocidad del funcionamiento. aire. Interruptor de oscilación Permite abrir y cerrar el deflector de Interruptor de modo aire. - Page 37 Componentes y funciones Pantalla del controlador de cableado Indicación centralizada Cuando se gobierna mediante el controlador centralizado, se muestra esta información. Indicación del volumen Indicación del modo de de aire funcionamiento Mostrar la velocidad Cuando el compresor está en establecida funcionamiento, se muestra esta información.
-
Page 38: Funcionamiento
Funcionamiento ENCENDIDO y APAGADO Pulse el interruptor ON/OFF (ENCENDIDO/APAGADO) de la línea directamente. El controlador de línea muestra el estado de funcionamiento de la última vez (el tiempo y el estado oscilación no se pueden mostrar). 1. Pulse el interruptor "ON/OFF" (ENCENDIDO/ APAGADO). - Page 39 Funcionamiento Establecer la hora actual • La temporización se basa en la hora real. Por tanto, la hora real se debe establecer por adelantado. • A continuación se indican los pasos para ajustar el reloj: 1. Pulse el interruptor "CLOCK" (RELOJ). "RELOJ"...
- Page 40 Funcionamiento Establecer la temporización • Temporización de APAGADO: una vez transcurrido el tiempo establecido, la unidad dejará de funcionar. • Temporización de ENCENDIDO: una vez transcurrido el tiempo establecido, la unidad comenzará a funcionar. Pulse el interruptor "ON/ OFF" (ENCENDIDO/ APAGADO) primero y, después, configure el modo de funcionamiento.
-
Page 41: Manual De Instalación Del Controlador De
Funcionamiento Consultar el historial de errores de funcionamiento de las unidades interiores: En el estado de encendido o apagado, pulse el botón [CHECK] (COMPROBAR). Entrará en el modo de consulta de errores de funcionamiento de todas las unidades interiores del grupo. A continuación [COMPROBAR] y [Nº DE UNIDAD] se mostrarán en la pantalla y los números de unidades interiores reales se mostrarán según una determinada secuencia (el número de unidad se muestra en los decimales). - Page 42 Manual de instalación del controlador de cableado 5. Conexiones de cableado del controlador de cableado: Tipo1,para AD12/18MS1ERA,AD12/18MS1ERA(D),AD24MS2ERA,AD24MS2ERA(D),AD28MS2ERA(S),AD28MS2ERA(S)(D) Interior 1 Interior 2 Interior N Interior 15 Interior 16 (unidad maestra) Controlador de Controlador de Controlador de Controlador de Controlador de cableado cableado cableado cableado...
-
Page 43: Modo Calefacción
Modo Calefacción Función “HOT KEEP” La función “HOT KEEP” se activa en los siguientes casos: • Cuando se activa el modo Calefacción: Para evitar que la unidad emita aire frío, cuando se pone en marcha el modo Calefacción el ventilador de la unidad interior se cierra si la temperatura ambiente es baja. -
Page 44: Mantenimiento
Mantenimiento PUNTOS QUE DEBEN OBSERVARSE Lleve el interruptor de la alimentación No toque el aparato con las manos No use agua caliente o líquidos volátiles. general a la posición OFF. mojadas. ATENCIÓN • No abra la rejilla de entrada del aire hasta que el ventilador no esté totalmente parado. •... -
Page 45: Guía Para La Búsqueda De Las Averías
Guía para la búsqueda de las averías Rogamos que realice los siguientes controles antes de dirigirse al Servicio de Asistencia. EL CLIMATIZADOR NO SE PONE EN MARCHA ¿El interruptor de la corriente ¿El suministro eléctrico de la ¿El sensor de las señales en ¿El magnetotérmico de está... - Page 46 Guía para la búsqueda de las averías Los siguientes fenómenos no constituyen anomalías de funcionamiento: Se oye ruido de agua que fluye. Al poner en marcha el climatizador, cuando el compresor se pone en marcha o se para durante el funcionamiento o cuando el climatizador se apaga, a veces se oye ruido de agua que fluye.
-
Page 47: Diagnóstico Mod. Inverter
Diagnóstico mod. Inverter Cuando se produce un fallo, el ventilador de la unidad interior deja de funcionar. En el caso de un error de la unidad exterior, el código de error es el número de veces que el LED parpadea + 20. Por ejemplo, si el código de error de la unidad exterior es 2, el controlador de cableado de la unidad interior mostrará... -
Page 48: Precauciones Para La Instalación
Precauciones para la instalación • Se ruega que lean las presentes “Precauciones de • Para las conexiones eléctricas, se ruega que sea un Seguridad” antes de proceder a la atenta ejecución del electricista autorizado quien realice la instalación, siguiendo trabajo de instalación. las normas de seguridad relativas a los equipos eléctricos, •... -
Page 49: Para Una Instalación Correcta
Para una instalación correcta Compruebe que se respetan las siguientes condiciones para un uso seguro y eficaz del climatizador. El trabajo de instalación va a cargo del vendedor, no instale el climatizador usted solo. LUGAR DE INSTALACIÓN No instale el climatizador cerca de un Instale el aparato en un lugar bien Instale la unidad exterior sobre un lugar en el que exista la posibilidad de... -
Page 50: Instalación De La Unidad Interior
(Si se instala el aparato en lugares de humedad elevada, presta la máxima atención a prevenir la formación del agua de condensación, por ejemplo aislando térmicamente el aparato de modo adecuado). f) Emplazamiento en que la altura del techo y la distancia a las paredes sea según lo que se indica a continuación: AD12MS1ERA AD12MS1ERA(D) AD28NS1ERA(S) 100mm... - Page 51 Instalación de la unidad interior 1.Medidas del orificio en el techo y posición de los pernos de anclaje AD12MS1ERA AD12MS1ERA(D) AD24MS1ERA AD24MS1ERA(D) AD18MS1ERA AD18MS1ERA(D) AD28NS1ERA(S) AD36NS1ERA(S) AD24MS2ERA AD24MS2ERA(D) AD48NS1ERA(S) AD28MS2ERA(S) AD28MS2ERA(S)(D) Pernos de anclaje Pernos de anclaje Abertura en el cielo raso...
-
Page 52: Tuberías De Desagüe Del Agua De Condensación
No sumergir el tubo en el agua Inclinación de 1/100 o más Aislamiento térmico NO CON bombas en la máquina E scurrir tamaño Model 1,5 mm~2 m AD12MS1ERA AD12MS1ERA(D) Soporte AD18MS1ERA AD18MS1ERA(D) 21mm AD24MS2ERA AD24MS2ERA(D) AD28MS2ERA(S) AD28MS2ERA(S)(D) Pendiente descendente superior al 1% AD24MS1ERA AD24MS1ERA(D) 15.5mm... -
Page 53: Prueba De Drenaje
Prueba de drenaje 1) Realice una prueba de drenaje después de haber completado las conexio- nes eléctricas. 2) Durante la prueba, verifique que el agua de condensación fluye con regu- Inserte el tubito del agua laridad en las tuberías y que no hay pérdidas de agua en las juntas. unos 20 o 30 mm dentro de la unidad. -
Page 54: Ad24Ms1Era Ad24Ms1Era(D)
Dispersión de Modelo Fase corriente protección alimentación corriente corriente AD12MS1ERA AD12MS1ERA(D) AD18MS1ERA AD18MS1ERA(D) AD24MS1ERA AD24MS1ERA(D) AD24MS2ERA AD24MS2ERA(D) AD28MS2ERA(S) AD28MS2ERA(S)(D) AD28NS1ERA(S) AD36NS1ERA(S) AD48NS1ERA(S) Esquemas eléctricos Primero conecte la alimentación a la unidad exterior, así es que la alimentación para la unidad interior viene suministrada por los bornes. -
Page 55: Prueba De Funcionamiento
Prueba de funcionamiento Haga funcionar el climatizador de acuerdo con lo que figura en el Manual de Instrucciones. Durante la prueba de funcionamiento, puntee las siguientes casillas: K ¿Las conexiones eléctricas de la unidad interior y de la exterior son correctas? K ¿El cable de conexión entre la unidad interior y la exterior está... - Page 56 Dirección: Parque Industrial Haier, Calle Qianwangang, Zona de Desarrollo Económico y Tecnológico, Qingdao 266555, Shandong, R.P.C. Contactos: TEL +86-532-88936943; FAX +86-532-8893-6999 Sitio web: www.haier.com...
- Page 57 CONDIZIONATORE DI TIPO CANALIZZABILE MANUALE D’USO E MANUALE D’INSTALLAZIONE Indice AD12MS1ERA Precauzioni per l’uso AD12MS1ERA(D) Limiti di funzionamento Denominazione dei componenti Parti e funzioni Funzionamento Manuale d’installazione per il telecomando Modalità Riscaldamento AD18MS1ERA Manutenzione AD18MS1ERA(D) Guida alla ricerca dei guasti...
- Page 58 Haier Industrial Park, N.1 Haier Road, Qingdao, Repubblica Popolare Cinese CONFORMITÀ AI REGOLAMENTI IMPORTANTI INFORMAZIONI RELATI- EUROPEI PER I MODELLI VE AL REFRIGERANTE UTILIZZATO Tutti i prodotti sono conformi alle seguenti disposizioni europee: Questo prodotto contiene gas serra fluorinato, - Direttiva bassa tensione 73/23/CEE trattato nel Protocollo di Kyoto - Compatibilità...
- Page 59 Precauzioni per l’uso • Si prega di leggere il presente manuale di istruzioni prima di utilizzare il climatizzatore. Non appoggiare alcun oggetto • Le precauzioni di sicurezza di seguito elencate si sull'apparecchio e non salirvi sopra. suddividono in PERICOLO e ATTENZIONE. La voce PERICOLO riguarda precauzioni che, se non seguite, Non collocare bombolette di gas possono portare a serie conseguenze, quali morte, gravi...
- Page 60 12, 18, 24 H05RN-F 3G 4.0mm Specifiche del cavo di collegamento: Per i modelli 12, 18, 24, 28, 36, 48 : H05RN-F 4G 1.3 mm • AD12MS1ERA, AD12MS1ERA(D),AD18MS1ERA, AD18MS1ERA(D), AD24MS2ERA,AD24MS2ERA(D), Impostando AD28MS2ERA(S),AD28MS2ERA(S)(D) il SW1 coperta sul computer di bordo giocare metri, 4 °, è...
-
Page 61: Denominazione Dei Componenti
Denominazione dei componenti AD12MS1ERA AD12MS1ERA(D) Scatola elettrica Scatola elettrica Vaschetta Vaschetta di scarico di scarico Pompa di scarico Uscita aria Evaporatore Uscita aria Evaporatore Drain AD18MS1ERA AD24MS2ERA AD28MS2ERA(S) AD18MS1ERA(D) AD24MS2ERA(D) AD28MS2ERA(S)(D) Scatola elettrica Scatola elettrica Vaschetta Vaschetta di scarico di scarico... -
Page 62: Parti E Funzioni
Parti e funzioni Tasti del comando Tasto FAN (Ventilatore) Tasto MODE Usato per cambiare la velocità del (Modalità) ventilatore Usato per selezionare la modalità Tasto SWING (Oscillazione) Usato per fare oscillare i deflettori Tasto HEALTH dell’aria (Benessere) Usato per controllare la fun- Tasto TEMP (Temperatura) zione ossigeno e ionizzatore Usato per modificare l’impostazione... - Page 63 Parti e funzioni Display del comando Centrale Quando l’unità è controlla- ta dal telecomando centra- lizzato, saranno visualiz- zate queste informazioni. Impostazione ventola Visualizza l’impostazione Funzionamento della velocità È visualizzato quando il compressore è in funzione. Impostazione modalità Standby Mostra la modalità...
- Page 64 Funzionamento Uso della funzione ON/OFF Premere il tasto ON/OFF per accendere direttamente il comando Sul display è visualizzata l’ultima modalità operativa (timer e oscillazione potrebbero non essere visualizzati). 1. Premere il tasto "ON/OFF". Il condizionatore avvia il funzionamento ed il LED del tele- comando è...
- Page 65 Funzionamento Impostazione dell’ora corrente • L’orario si basa sull’ora corrente. Quindi, l’ora corrente deve essere regolata in anticipo. • Di seguito è illustrata la procedura per regolare l’ora: 1. Premere il tasto "CLOCK" (Orologio). La dicitura-�CLOCK�-lampeggia e l’ora visualizzata è l’ora cor- rente.
- Page 66 Funzionamento Impostazione dell’ora • Orario di spegnimento OFF: Quando giunge l’orario impostato, l’unità si arresta. • Orario d’accensione ON: Quando giunge l’orario impostato, l’unità si avvia. Prima premere il tasto �ON/OFF�-e poi impostare la modalità. Regolare l’ora esatta prima di usare la funzione Timer.
- Page 67 Funzionamento Controllo cronologia guasti unità interna: In stato d’accensione o spegnimento, premere il tasto [CHECK] (Controllo) per accedere alla modalità di controllo guasti di tutte le unità interne del gruppo. Sarà visualizzato: [CHECK] (Controllo) [UNIT NO.] (Numero unità); il numero di unità inter- ne sarà...
- Page 68 Manuale d’installazione per il telecomando 5. Collegamento dei cavi elettrici del telecomando: Tipo1,per AD12/18MS1ERA,AD12/18MS1ERA(D),AD24MS2ERA,AD24MS2ERA(D),AD28MS2ERA(S),AD28MS2ERA(S)(D) Unità interna N Unità interna 1 Unità interna 2 Unità interna 15 Unità interna 16 (Unità master) Telecomando Telecomando Telecomando Telecomando Telecomando Cavo di controllo segnale del telecomando.
- Page 69 Modalità Riscaldamento Funzione “HOT KEEP” La funzione “HOT KEEP” viene attivata nei seguenti casi: • Quando viene avviata la modalità Riscaldamento: Per evitare che l’unità emetta aria fredda, quando viene avviata la modalità Riscaldamento il ventilatore dell’unità interna si ferma se la temperatura ambiente è...
- Page 70 Manutenzione PUNTI DA OSSERVARE Portare l’interruttore dell’alimentazione Non toccare l’apparecchio con le mani Non usare acqua calda o liquidi volatili. generale in posizione OFF. bagnate. ATTENZIONE • Non aprire la griglia di entrata dell’aria finché il ventilatore non è completamente fermo. •...
-
Page 71: Guida Alla Ricerca Dei Guasti
Guida alla ricerca dei guasti Si prega di effettuare i seguenti controlli prima di rivolgersi al Servizio Assistenza. IL CLIMATIZZATORE NON SI AVVIA L’interruttore della corrente è La fornitura elettrica della rete Il sensore dei segnali Il magnetotermico di attivato? (L’interruttore della è... - Page 72 Guida alla ricerca dei guasti I seguenti fenomeni non costituiscono anomalie di funzionamento: Si sente rumore di acqua che scorre. All’avviamento del climatizzatore, quando il compressore si avvia o si arresta duran- te il funzionamento o quando il climatizzatore viene spento, si avvertono talvolta dei rumori di acqua che scorre.
- Page 73 Diagnostica mod Quando il fallimento succede, il ventilatore dell'unità interna smette di funzionare. Il metodo del codice di controllo fallimento come segue. Guasto unità esterna. the failure code is outdoor failure LED flash times + 20. Ad esempio: il codice d’errore dell’unità esterna è 2. Il telecomando dell'unità interna visualizzerà 16 (usando il sistema esa- decimale).
- Page 74 Precauzioni per l’installazione • Si prega di leggere le presenti “Precauzioni di Sicurezza” • Per i collegamenti elettrici, si prega di fare in modo che un prima di procedere all’attenta esecuzione del lavoro di elettricista autorizzato esegua l’impianto, seguendo le norme installazione.
- Page 75 Per un’installazione corretta Accertarsi che siano rispettate le seguenti condizioni per un uso sicuro ed efficace del climatizzatore. L’opera di installazione è a carico del rivenditore, non installare il climatizzatore da soli. LUOGO DI INSTALLAZIONE Non installare il climatizzatore nelle Installare l’apparecchio in un luogo ben Installare l’unità...
- Page 76 Posizione dove l’altezza del soffitto e la distanza dalle pareti sia secondo quanto sotto indicato: AD12MS1ERA AD12MS1ERA(D) AD28NS1ERA(S) 100mm...
- Page 77 Installazione dell'unità interna 1.Dimensioni del foro sul soffitto e posizione dei bulloni di ancoraggio AD12MS1ERA AD12MS1ERA(D) AD24MS1ERA AD24MS1ERA(D) AD18MS1ERA AD18MS1ERA(D) AD28NS1ERA(S) AD36NS1ERA(S) AD24MS2ERA AD24MS2ERA(D) AD48NS1ERA(S) AD28MS2ERA(S) AD28MS2ERA(S)(D) Bulloni di ancoraggio Bulloni di ancoraggio Apertura nel soffitto Apertura nel soffitto Dimensioni...
- Page 78 1/100 o più Isolamento termico Per le machine senza pompa Scolate le dimensioni Modello 1,5 mm – 2 m Supporto AD12MS1ERA AD12MS1ERA(D) AD18MS1ERA AD18MS1ERA(D) 21mm AD24MS2ERA AD24MS2ERA(D) AD28MS2ERA(S) AD28MS2ERA(S)(D) Inclinazione verso il basso superiore a 1/100 AD24MS1ERA AD24MS1ERA(D) 15.5mm Isolamento (fornito dall’utente)
- Page 79 Test di drenaggio 1) Eseguire un test di drenaggio dopo aver completato i collegamenti elettrici. 2) Durante il test, verificare che la condensa scorra regolarmente nelle Inserire il tubicino dell'acqua per tubazioni e che non ci siano perdite d’acqua dai giunti. 20-30mm all'interno dell'unità.
-
Page 80: Collegamenti Elettrici
Dispersione Modello Fase di corrente di protezione alimentazione di corrente di corrente AD12MS1ERA AD12MS1ERA(D) AD18MS1ERA AD18MS1ERA(D) AD24MS1ERA AD24MS1ERA(D) AD24MS2ERA AD24MS2ERA(D) AD28MS2ERA(S) AD28MS2ERA(S)(D) AD28NS1ERA(S) AD36NS1ERA(S) AD48NS1ERA(S) Schemi elettrici Prima collegare l'alimentazione all'unità esterna, cosicché l'alimentazione per l'unità interna viene fornita dai morsetti. -
Page 81: Test Di Funzionamento
Test di funzionamento Far funzionare il climatizzatore secondo quanto riportato nel Manuale di istruzioni. Durante il test di funzionamento, spuntare le seguenti caselle: K I collegamenti elettrici dell'unità interna e dell'unità esterna sono corretti? K Il cavo di collegamento tra unità interna ed esterna è fissato saldamente? K I giunti delle tubazioni sono stati isolati termicamente? K Il funzionamento in modalità... - Page 82 Indirizzo: Zona industriale di Haier, Via Qianwangang, Zona di Sviluppo Ecologico e Tecnologico, Qingdao 266555, Shandong, Repubblica Popolare Cinese Contatti: TEL +86-532-88936943; FAX +86-532-8893-6999 Sito Web: www.haier.com...
- Page 83 CLIMATISEUR À CONDUIT MANUEL D'UTILISATION ET D'INSTALLATION Table des matières AD12MS1ERA AD12MS1ERA(D) Précautions d’utilisation Limites de fonctionnement Dénomination des composants Pièces et fonctions Utilisation Manuel d'installation de la commande AD18MS1ERA filaire AD18MS1ERA(D) Mode Chauffage Entretien AD24MS2ERA Guide de dépannage Diagnostic mod AD24MS2ERA(D) Précautions lors de l'installation...
- Page 84 Haier Industrial Park, No.1 Haier Road, Qingdao, RR. Chine CONFORMITÉ DES MODÈLES INFORMATIONS IMPORTANTES À LA LÉGISLATION EUROPÉENNE CONCERNANT LE LIQUIDE RÉFRI- GÉRANT UTILISÉ Contient des gaz à effet de serre fluorés Tous les appareils sont conformes aux directives Européennes couverts par le protocole de Kyoto.
-
Page 85: Précautions D'utilisation
Précautions d’utilisation • Veuillez lire ce mode d’emploi avant d’utiliser le climatiseur. • Les précautions de sécurité indiquées ci-après se divisent en Ne pas poser d'objets sur l'appareil et ne deux catégories : DANGER et ATTENTION. pas monter dessus. Le non-respect des précautions de la catégorie DANGER peut causer de graves conséquences (mort, blessures Ne pas placer ou utiliser de bombes graves, etc.). -
Page 86: Limites De Fonctionnement
Pour les modèles 12, 18, 24 : monophasé H05RN-F 3G 4.0mm Spécifications du câble de raccordement Pour les modèles 12, 18, 24, 28, 36, 48 : H05RN-F 4G 1.3 mm AD12MS1ERA, AD12MS1ERA(D),AD18MS1ERA, • AD18MS1ERA(D), AD24MS2ERA,AD24MS2ERA(D), AD28MS2ERA(S),AD28MS2ERA(S)(D) Par la mise en place de panneaux à... -
Page 87: Dénomination Des Composants
Dénomination des composants AD12MS1ERA AD12MS1ERA(D) Boîtier des composants Boîtier des composants électriques électriques Bac de vidange Bac de vidange La pompe de vidange Grille de la Grille de la sortie d'air Évaporateur sortie d'air Évaporateur Vidange AD18MS1ERA AD24MS2ERA AD28MS2ERA(S) AD18MS1ERA(D) AD24MS2ERA(D) AD28MS2ERA(S)(D) Boîtier des composants... -
Page 88: Pièces Et Fonctions
Pièces et fonctions Boutons sur la commande filaire Bouton Régime ventilateur Bouton Mode Permet de modifier la vitesse Choisissez le mode de du ventilateur fonctionnement Bouton Position Permet d'ouvrir et de fermer le Bouton Santé volet d'air Cette fonction permet de Bouton TEMP contrôler l'oxygène et l'ion négatif... - Page 89 Pièces et fonctions Écran de la commande filaire Affichage centralisé Lorsque l'unité est contrô- lée par une commande centralisée, cette informa- tion s'affiche. Affichage du volume d'air Affiche le réglage du Affichage régime fonctionnement S'affiche lorsque le com- presseur est en marche. Écran du mode de Affichage Veille fonctionnement.
- Page 90 Utilisation MARCHE/ARRÊT Appuyez sur l'interrupteur MARCHE/ARRÊT directement sur la ligne. La commande de ligne affiche le dernier état de fonction- nement (la minuterie et la position des volets ne sont pas forcément affichées). 1. Appuyez sur l'interrupteur "MARCHE/ARRÊT". Le climatiseur se met en marche et le voyant sur la com- mande filaire s'allume.
- Page 91 Utilisation Réglage de l'heure actuelle • Le minuteur se base sur l'heure réelle. Il faut donc commencer par régler l'heure. • Les étapes du réglage de l'horloge sont les suivantes : 1. Appuyez sur l'interrupteur "HORLOGE" "HORLOGE" clignote. L'heure affichée est l'heure réelle. 2.
- Page 92 Utilisation Réglage de l'heure • Minuteur ARRÊT : lorsque l'heure paramétrée est atteinte, l'unité cesse de fonctionner. • Minuteur MARCHE : lorsque l'heure paramétrée est atteinte, l'unité se met en marche. Appuyez d'abord sur le bouton "MARCHE/ARRÊT" et paramétrez le mode de fonctionnement.
- Page 93 Utilisation Demande de l'historique des dysfonctionnements intérieurs : Que l'appareil soit ou non sous tension, appuyez sur le bouton [CONTRÔLE], accédez au mode demande-dysfonctionne- ment pour toutes les unités intérieures du groupe. [CONTRÔLE] et [N° UNITÉ] s'affichent ensuite. Les numéros correspon- dants aux unités intérieures existantes s'affichent en séquence (les numéros des unités sont des nombres décimaux).
- Page 94 Manuel d'installation de la commande filaire 5. Connexions des câbles de la commande filaire : Type1, pour AD12/18MS1ERA,AD12/18MS1ERA(D),AD24MS2ERA,AD24MS2ERA(D),AD28MS2ERA(S),AD28MS2ERA(S)(D) Intérieur 1 Intérieur 2 Intérieur N Intérieur 15 Intérieure 16 (unité maître) Commande Commande Commande Commande Commande filaire filaire filaire filaire filaire Câblage de contrôle de la commande...
-
Page 95: Mode Chauffage
Mode Chauffage Fonction "HOT KEEP" La fonction "HOT KEEP" est activée dans les cas suivants: • Quand le mode Chauffage se met en marche: Pour éviter que l'unité ne souffle de l'air froid, quand le mode Chauffage se met en route le ventilateur de l'unité intérieure s'arrête si la température ambiante est basse. - Page 96 Entretien POINTS A OBSERVER Mettre l'interrupteur général sur OFF. Ne pas toucher l'appareil avec les mains Ne pas utiliser d'eau chaude ou de liqui- mouillées. des volatiles. ATTENTION • Ne pas ouvrir la grille d'entrée de l'air tant que le ventilateur n'est pas complètement arrêté. •...
-
Page 97: Guide De Dépannage
Guide de dépannage Effectuer les contrôles suivants avant de vous adresser au SAV. LE CLIMATISEUR NE DÉMARRE PAS L’interrupteur du courant est La fourniture électrique du Le capteur des signaux sur La protection magnétother- activé? (L’interrupteur du secteur est normale? l'unité... - Page 98 Guide de dépannage Les phénomènes suivants ne constituent pas d’anomalie de fonctionnement: On entend le bruit de l’eau qui coule. Au démarrage du climatiseur, quand le compresseur se met en marche ou s’arrête pen- dant le fonctionnement ou quand on éteint le climatiseur, on entend parfois des bruits d’eau qui coule.
-
Page 99: Diagnostic Mod
Diagnostic mod Lorsqu'une panne se produit, le ventilateur de l'unité intérieure s'arrête de fonctionner. La méthode de vérification sur le code de panne est comme suit. Défaillance de l'unité extérieure. Le code de défaillance de l'unité extérieure repose sur un voyant DEL qui clignote +20. -
Page 100: Précautions Lors De L'installation
Précautions lors de l'installation • Lire attentivement ces "Consignes de Sécurité" avant de pro- • Les branchements électriques doivent être réalisés par un céder à l'installation. électricien agréé, conformément aux normes de sécurité rela- • Les consignes ci-dessous sont divisées en : ATTENTION et tives aux appareils électriques, aux réglementations locales et AVERTISSEMENTS. -
Page 101: Pour Une Installation Correcte
Pour une installation correcte Respecter les conditions suivantes pour garantir une sécurité et une efficacité optimales lors de l'utilisation du climatiseur. Les travaux d'installation doivent être effectués par le vendeur, ne pas installer le climatiseur soi-même. CHOIX DE L'EMPLACEMENT Ne pas installer le climatiseur près d'un Installer l'appareil dans un lieu bien venti- Installer l'unité... -
Page 102: Installation De L'unité Intérieure
(si on installe l'appareil dans une pièce très humide, faire en sorte d'éviter la formation de condensation, par exemple en calorifu- geant l'appareil de manière appropriée). f) Position où la hauteur du plafond et l'écartement avec les murs sont conformes à ce qui est indiqué ci-dessous. AD12MS1ERA AD12MS1ERA(D) AD28NS1ERA(S) 100mm... - Page 103 Installation de l’unité intérieure 1. Dimensions du trou au plafond et position des boulons d'ancrage AD12MS1ERA AD12MS1ERA(D) AD24MS1ERA AD24MS1ERA(D) AD18MS1ERA AD18MS1ERA(D) AD28NS1ERA(S) AD36NS1ERA(S) AD24MS2ERA AD24MS2ERA(D) AD48NS1ERA(S) AD28MS2ERA(S) AD28MS2ERA(S)(D) Boulons d'ancrage Boulons d'ancrage Ouverture dans le plafond Ouverture dans le plafond...
-
Page 104: Tuyauteries Évacuation Condensats
1/100 ou plus Isolation thermique É En ce qui concerne les machines avec pompes Modèle goutter taille 1,5mm~2m Support AD12MS1ERA AD12MS1ERA(D) AD18MS1ERA AD18MS1ERA(D) 21mm AD24MS2ERA AD24MS2ERA(D) AD28MS2ERA(S) AD28MS2ERA(S)(D) Pente descendante sup. à 1/100 AD24MS1ERA AD24MS1ERA(D) 15.5mm Isolation (fournie par l'utilisateur) AD28NS1ERA(S) AD36NS1ERA(S) -
Page 105: Test De Drainage
Test de drainage 1) Effectuer un test de drainage après avoir terminé les raccorde- ments électriques. 2) Pendant le test, vérifier que les condensats s'écoulent régulière- Introduire le tube de l'eau sur ment dans les tuyauteries et qu'il n'y a pas de fuites d'eau aux 20-30 mm à... -
Page 106: Branchements Électriques
Dispersion de Modèle Phase Disjoncteur Disjoncteur magnétothermique d’alimentation courant AD12MS1ERA AD12MS1ERA(D) AD18MS1ERA AD18MS1ERA(D) AD24MS1ERA AD24MS1ERA(D) AD24MS2ERA AD24MS2ERA(D) AD28MS2ERA(S) AD28MS2ERA(S)(D) AD28NS1ERA(S) AD36NS1ERA(S) AD48NS1ERA(S) Schémas électriques Brancher d'abord l'unité extérieure afin que l'alimentation pour l'unité intérieure soit fournie par les bornes. -
Page 107: Test De Fonctionnement
Test de fonctionnement Faire fonctionner le climatiseur selon les instructions données dans la Notice. Pendant le test de fonctionnement, cocher les cases suivantes: K Les branchements électriques de l'unité intérieure et de l'unité extérieure sont corrects? K Le câble de raccordement entre unité intérieure et extérieure est bien fixé? K les joints des tuyauteries ont-ils été... - Page 108 Adresse: Parc industriel Haier, Route Qianwangang, Zone de développement éco-Tech, Qingdao 266555, Shandong, Chine Contacts : Tél +86-532-88936943; Fax +86-532-8893-6999 Web Site: www.haier.com...
- Page 109 KLIMAANLAGE VOM TYP ROHRLEITUNG ANLEITUNG ZUR BEDIEUNG UND INSTALLATION Inhalt AD12MS1ERA AD12MS1ERA(D) Vorsichtsmaßnahmen beim Gebrauch Betriebsgrenzen Bezeichnung der Geräteteile Teile und Funktionen Bedienung AD18MS1ERA Installationsanleitung für verdrahtete Steuereinheit AD18MS1ERA(D) Heizmodus AD24MS2ERA Instandhaltung Anleitung zur Fehlersuche AD24MS2ERA(D) Diagnose Invertermod. Vorsichtsmaßnahmen bei der Installation AD28MS2ERA(S) Für die fachgerechte Installation...
- Page 110 Haier Industrial Park, No.1 Haier Road, Qingdao, VR-China ÜBEREINSTIMMUNG MIT EUROPÄ- WICHTIGE INFORMATIONEN ZUM ISCHEN VORSCHRIFTEN FÜR DIE VERWENDETEN KÄLTEMITTEL MODELLE Enthält fluorierte Treibhausgase, die unter das Kyoto-Protokoll fallen Alle Produkte stimmen mit folgenden europäischen Bestimmungen überein: - Niederspannungsrichtlinie - Elektomagnetische Verträglichkeit...
- Page 111 Vorsichtsmaßnahmen beim Gebrauch • Bitte lesen Sie dieses Bedienungshandbuch vor dem Gebrauch des Klimageräts aufmerksam durch. Keine Gegenstände auf dem Gerät abstel- • Die nachfolgend aufgelisteten Sicherheitsmaßnahmen sind in len und nicht auf das Gerät steigen. GEFAHR und ACHTUNG unterteilt. Das Stichwort GEFAHR bezieht sich auf Sicherheitsmaßnahmen, deren Missachtung Keine Dosen mit entflammbarem Gas in die ernste Folgen, wie Tod, schwere Verletzungen usw.
- Page 112 H05RN-F 3G 4.0mm Spezifikationen des Anschlusskabels: Für die Modelle 12, 18, 24, 28 , 36, 48 : H05RN-F 4G 1.3 mm • AD12MS1ERA, AD12MS1ERA(D),AD18MS1ERA, AD18MS1ERA(D), AD24MS2ERA,AD24MS2ERA(D), Durch Festlegen der indoor AD28MS2ERA(S),AD28MS2ERA(S)(D) SW1 auf dem Computer Board spielen Werften, 4th, knnen man die Maschine mit einem verschiedenen 4-Gang-ext erner statischer Druck ausrüsten.
- Page 113 Bezeichnung der Geräteteile AD12MS1ERA AD12MS1ERA(D) Gehäuse mit elektrischen Gehäuse mit elektrischen Komponenten Komponenten Luftauslassrahmen Luftauslassrahmen Ablauf pumpe Verdampfer Ablaufwanne Verdampfer Ablaufwanne Ablauf AD18MS1ERA AD24MS2ERA AD28MS2ERA(S) AD18MS1ERA(D) AD24MS2ERA(D) AD28MS2ERA(S)(D) Gehäuse mit elektrischen Gehäuse mit elektrischen Luftauslassrahmen Komponenten Luftauslassrahmen Komponenten Ablauf pumpe...
- Page 114 Teile und Funktionen Tasten der verdrahteten Steuereinheit Lüfterdrehzahl Betriebsart Ändert die Geschwindigkeit des Wählen Sie hiermit die Lufstroms Betriebsart Schwenken Öffnet und schließt die Luftklappe Gesundheit Steuern Sie hiermit die Temperatur Sauerstoff-Funktion und negative Ionen Ändern Sie hiermit die eingestellte Temperatur Taste Zeit Hiermit regulieren Sie die eingestell-...
- Page 115 Teile und Funktionen Anzeige der verdrahteten Steuereinheit Zentralisierte Anzeige Diese Info wird Steuerung über die zentrale Steuer- einheit angezeigt. Anzeige des Luftvolumens Anzeige der eingestellten Betriebsanzeige Drehzahl Dies wird angezeigt, wenn der Kompressor in Betrieb ist. Anzeige der Betriebsart. Standby-Anzeige Zeigt die ausgewählte Ist das Gerät eingeschaltet...
- Page 116 Bedienung EIN/AUS-Betrieb Drücken Sie direkt den ON/OFF (Ein/Ausschalter) auf der Leitung. Die Steuereinheit zeigt den letzmaligen Betriebszustand an (Zeit und Schwenkstatus werden eventuell nicht ange- zeigt). 1. Drücken Sie den "ON/OFF" (Ein-/Ausschalter). Die Klimaanlage setzt sich in Betrieb und das Licht auf der verdrahteten Steuereinheit leuchtet.
- Page 117 Bedienung Aktuelle Zeiteinstellung • Die Zeit basiert auf der aktuellen Zeit. Daher sollte die aktuelle Zeit im voraus eingestellt werden. • Die Schritte zur Einstellung der Uhr sind wie folgt: 1. Drücken Sie die Taste "CLOCK" (Uhr). "CLOCK" (Uhr) blinkt und es wird die aktuelle Zeit angezeigt. 2.
- Page 118 Bedienung Zeiteinstellung • Timer OFF (Aus): Ist die eingestellte Zeit abgelaufen, hält das Gerät an. • Timer ON (Ein): Ist die eingestellte Zeit abgelaufen, startet das Gerät. Drücken Sie zuerst die Taste "ON/OFF" (Ein/Aus) und legen Sie dann die Betriebsart fest.
- Page 119 Bedienung Abfrage des Störungsverlaufs des Innengeräts: Ist das Gerät ein- oder ausgeschaltet, wird beim Drücken der Taste [CHECK] (Prüfen) der Störungsabfragemodus aller Innengeräte in der Gruppe aufgerufen. Es werden dann [CHECK] (Prüfen) und [UNIT NO.] (Gerätenr.) angezeigt, wobei die tatsächlichen Nummern der Innengeräte der Reihe nach angezeigt werden will (die Gerätenummern erscheinen als Dezi- malzahlen).
- Page 120 Installationsanleitung für verdrahtete Steuereinheit 5. Drahtverbindungen der verdrahteten Steuereinheit: Typ 1,für AD12/18MS1ERA,AD12/18MS1ERA(D),AD24MS2ERA,AD24MS2ERA(D),AD28MS2ERA(S),AD28MS2ERA(S)(D) Innengerät N Innengerät 1 Innengerät 2 Innengerät 15 Innengerät 16 Verdrahtete Verdrahtete Verdrahtete Verdrahtete (Hauptgerät Master) Steuereinheit Steuereinheit Steuereinheit Steuereinheit Verdrahtete Steuereinheit Kontrollverdrahtung der verdrahteten Steuereinheit, gepolt. Verdrahtete Steuereinheit Typ 2,für Innengerät N...
- Page 121 Heizmodus Funktion “HOT KEEP” Die Funktion “HOT KEEP” wird in den folgenden Fällen aktiviert: • Wenn der Heizmodus eingeschaltet wird: Um zu vermeiden, dass das Gerät beim Einschalten des Heizmodus Kaltluft abgibt, schaltet sich der Lüfter des Innengeräts bei niedriger Raumtemperatur aus. 2 oder 3 Minuten warten, danach läuft der Lüfter im Heizmodus normal weiter. •...
- Page 122 Instandhaltung WICHTIGE PUNKTE Den Schalter der Hauptversorgung auf Das Gerät nicht mit nassen Händen Kein heißes Wasser oder flüchtige OFF stellen. berühren. Flüssigkeiten verwenden. ACHTUNG • Das Luftansauggitter erst dann öffnen, wenn der Lüfter vollkommen still steht. • Nach dem Ausschalten des Geräts dreht sich der Lüfter durch die Trägheitskraft noch einige Zeit weiter. Reinigung des Filters 1.
-
Page 123: Anleitung Zur Fehlersuche
Anleitung zur Fehlersuche Vor Anforderung des Kundendienstes bitte folgenden Kontrollen durchführen. DAS KLIMAGERÄT SCHALTET SICH NICHT EIN Ist der Netzschalter einge- Ist die Netzstromversorgung Ist der Sensor für die Signale Hat der magnetothermische schaltet? (Der Netzschalter normal? am Innengerät dem Sonnen- Schutzschalter ausgelöst? steht nicht auf ON) licht oder starker Beleuchtung... - Page 124 Anleitung zur Fehlersuche Die folgenden Erscheinungen sind keine Betriebsstörungen: Geräusch von fließendem Wasser. Beim Einschalten des Klimageräts sind gelegentlich, wenn sich der Verdichter wäh- rend des Betriebs einschaltet oder ausschaltet oder wenn das Klimagerät ausge- schaltet wird, Geräusche von fließendem Wasser zu hören. Es handelt sich um den Kältemittelfluss in den Leitungen und nicht um eine Betriebsstörung.
- Page 125 Diagnose Invertermod. Beim Ausfall wird der Vertilator der Inneneinheit nicht mehr laufen.The Verfahren der ?berprüfung fuer Fehlercode ist wie folgt. Bei einem Ausfall des Außengeräts ist der Fehlercode die LED-Blinkzeit + 20. Ist der Fehlercode des Außengeräts z. B. 2, zeigt die verdrahtete Steuereinheit des Innengeräts 16 an (aufgrund der Hexa- dezimalmethode) Ta: Umgebungstemperatursensor Tm: Spulentemperatursensor...
- Page 126 Vorsichtsmaßnahmen bei der Installation • Bitte lesen Sie diese Hinweise zu den • Die elektrischen Anschlüsse müssen von einem autorisierten “Sicherheitsmaßnahmen” vor der Installation des Geräts Elektriker unter Einhaltung der Sicherheitsnormen für aufmerksam durch. Elektrogeräte, der örtlichen Bestimmungen und der •...
- Page 127 Für die fachgerechte Installation Sicherstellen, dass die nachfolgenden Bedingungen für den sicheren und wirksamen Gebrauch des Klimageräts eingehalten werden. Die Installation ist vom Händler auszuführen, das Gerät nicht auf eigene Faust installieren. INSTALLATIONSORT Das Klimagerät nicht an Orten Das Gerät an einem gut belüfteten Ort Das Außengerät auf einer für das installieren, an denen die entflammbare installieren.
- Page 128 (Wenn das Gerät in einem Raum mit hoher Luftfeuchtigkeit installiert wird, muss der Kondensatbildung vorgebeugt werden, beispielsweise indem das Gerät ausreichend thermisch isoliert wird). f) Die Deckenhöhe und der Abstand von den Wänden müssen den nachfolgend vorgeschriebenen Werten entsprechen: AD12MS1ERA AD12MS1ERA(D) AD28NS1ERA(S) AD18MS1ERA AD18MS1ERA(D)
- Page 129 Installation des Innengeräts 1. Abmessungen der Deckenöffnung und Position der Verankerungsschrauben AD12MS1ERA AD12MS1ERA(D) AD24MS1ERA AD24MS1ERA(D) AD18MS1ERA AD18MS1ERA(D) AD28NS1ERA(S) AD36NS1ERA(S) AD24MS2ERA AD24MS2ERA(D) AD48NS1ERA(S) AD28MS2ERA(S) AD28MS2ERA(S)(D) Abmessungen Abmessungen des Überstands des Überstands Verankerungsschrauben Verankerungsschrauben des Paneels des Paneels Deckenöffnung Deckenöffnung Abmessungen des Abmessungen des Überstands des...
- Page 130 Das Rohr nicht in Wasser tauchen Neigung mindestens 1/100 Wärmeisolierung Für Maschinen ohne Pumpe Modell Drain größe 1,5 mm~2 m Stütze AD12MS1ERA AD12MS1ERA(D) AD18MS1ERA AD18MS1ERA(D) 21mm AD24MS2ERA AD24MS2ERA(D) AD28MS2ERA(S) AD28MS2ERA(S)(D) Abwärtsneigung über 1/100 AD24MS1ERA AD24MS1ERA(D) 15.5mm Isolierung (vom Benutzer beigesteuert) AD28NS1ERA(S) AD36NS1ERA(S)
- Page 131 Entleerungstest 1) Nach der Fertigstellung der elektrischen Anschlüsse einen Entlee- rungstest durchführen. 2) Während des Tests sicherstellen, dass das Kondenswasser ord- Das Wasserröhrchen etwa 20–30 mm weit in das nungsgemäß in den Leitungen fließt und dass keine Wasserlecka- Innengerät einführen gen an den Verbindungsstücken vorliegen.
- Page 132 Abmessungen Erdung Netztrennschalter Magnetothermischer Netzkabelaliment Netztrennschalter Fehlerstrom Modell Phase Schutzschalter AD12MS1ERA AD12MS1ERA(D) AD18MS1ERA AD18MS1ERA(D) AD24MS1ERA AD24MS1ERA(D) AD24MS2ERA AD24MS2ERA(D) AD28MS2ERA(S) AD28MS2ERA(S)(D) AD28NS1ERA(S) AD36NS1ERA(S) AD48NS1ERA(S) Stromlaufpläne Zuerst den Anschluss der Stromversorgung an das Innengerät vornehmen, sodass die Versorgung für das Innengerät über die Klemmen geliefert wird.
- Page 133 Funktionstest Das Gerät gemäß den Angaben im Bedienungshandbuch betreiben. Während des Funktionstests die folgenden Kästchen abhaken: K Sind die elektrischen Anschlüsse des Innengeräts und des Außengeräts richtig ausgeführt? K Ist das Anschlusskabel zwischen dem Innengerät und dem Außengerät richtig befestigt? K Sind die Verbindungen der Leitungen wärmeisoliert? K Ist der Betrieb im Kühlmodus normal? K Funktioniert der Raumtemperaturfühler richtig?
- Page 134 Adresse: Haier Industrie-Park, Qianwangang Straÿ, Eco-Tech Entwicklungszone, Qingdao 266555, Shandong, VR China Kontakte: TEL +86-532-88936943; FAX +86-532-8893-6999 Webseite: www.haier.com...
- Page 135 KLIMATYZATOR KANAŁOWY INSTRUKCJA OBSŁUGI AD12MS1ERA Ostrzeżenia AD12MS1ERA(D) Względy bezpieczeństwa Części składowe Korzystanie z Klimatyzatora Tryb ogrzewania Konserwacja AD18MS1ERA Rozwiązywanie problemów AD18MS1ERA(D) AD24MS2ERA AD24MS2ERA(D) AD28MS2ERA(S) AD28MS2ERA(S)(D) AD24MS1ERA AD24MS1ERA(D) AD28NS1ERA(S) AD36NS1ERA(S) AD48NS1ERA(S) Prosimy o przeczytanie niniejszej instrukcji obsługi przed korzystaniem z klimatyzatora.
- Page 136 2011/65/EU 2012/19/EU GWP:2088 Deklaracja eśli kabel zasilający zostanie uszkodzony, jego wymiany musi dokonać producent, jego przedstawiciel usługowy lub podobnie wykwalifikowana osoba, aby uniknąć zagrożenia. iniejsze urządzenie nie jest przeznaczone do wykorzystania przez osoby (w tym dzieci) o ograniczonych zdolnościach fizycznych, sensorycznych lub umysłowych, a także nieposiadające odpowiedniego doświadczenia i wiedzy, chyba że są...
- Page 137 Ostrzeżenia Utylizacja starego klimatyzatorar Do utylizacji nadają się stare klimatyzatory, które są niesprawne i nie stwarzają zagrożenia. W trosce o bezpieczeństwo dzieci, urządzenia te muszą być odłączone od zasilania. Należy pamiętać, że w klimatyzatorach znajdują się czynniki chłodnicze, z którymi trzeba odpowiednio postępować. Niektóre materiały nadają...
- Page 138 Względy bezpieczeństwa W celu prawidłowej obsługi klimatyzatora uprzednio należy uważnie przeczytać poniższe informacje. Ostrzeżenia i zalecenia bezpieczeństwa podano na dwa sposoby, jako OSTRZEŻENIA i UWAGI. OSTRZEŻENIE dotyczy sytuacji, gdy niewłaściwa obsługa grozi śmiercią lub poważnymi obrażeniami. Również zapisy opatrzone słowem UWAGA ostrzegają o groźbie wystąpienia poważnych problemów, w zależności od sytuacji. Prosimy o uważne czytanie tych komunikatów, gdyż...
- Page 139 Względy bezpieczeństwa UWAGI NA TEMAT EKSPLOATACJIA OSTRZEŻENIE Do kratek wlotu i wylotu powietrza nie W razie jakichkolwiek oznak nieprawidłowej Nie należy wystawiać się na zbyt długotrwałe wolno wtykać żadnych przedmiotów. pracy (woni spalenizny itp.) należy natychmiast bezpośrednie oddziaływanie chłodnego zatrzymać klimatyzator i odłączyć zasilanie. strumienia powietrza.
- Page 140 łączącego jednostki powinien zostać zwiększony, zgodnie z lokalnymi normami. 8 Zużyte baterie trzeba utylizować w prawidłowy sposób. 9 Dla modeli AD12MS1ERA, AD12MS1ERA(D),AD18MS1ERA, AD18MS1ERA(D), AD24MS2ERA,AD24MS2ERA(D), można uzyskać 4 różne spręże poprzez dopasowanie AD28MS2ERA(S),AD28MS2ERA(S)(D) obwodu drukowanego jednostki wewnętrznej (SW 1-4 lub SW 1-5).
- Page 141 Części składowe AD12MS1ERA AD12MS1ERA(D) Skrzynka połączeń Skrzynka połączeń elektrycznych elektrycznych Rama wlotu powietrza Rama wlotu powietrza pompa spustowa Taca ociekowa Parownik Taca ociekowa Parownik Odplyw AD18MS1ERA AD24MS2ERA AD28MS2ERA(S) AD18MS1ERA(D) AD24MS2ERA(D) AD28MS2ERA(S)(D) Skrzynka połączeń Skrzynka połączeń Rama wlotu powietrza Rama wlotu powietrza...
- Page 142 Części składowe i dostępne funkcje Klawisze sterownika Wentylator Tryb pracy Zmiana wydajności wentylatora Wybór trybu pracy Kierownice Otwarcie i zamknięcie kierownic powietrza Tryb zdrowotny Sterowanie funkcją jakości powietrza i jonizacji Temperatura Zmiana nastawy temperatury Czas Nastawianie czasu Zatwierdzanie nastaw Wentylacja Sterowanie funkcją...
- Page 143 Części składowe i dostępne funkcje Wyświetlacz sterownika Sterowanie zewnętrzne W przypadku sterowania z zewnętrznego, scentralizowanego układu regulacji lub zablokowania sterownika pojawia się napis CENTRAL Wydajność Nastawiona prędkość wentylatora Praca Pracę sprężarki sygnalizuje komunikat OPERATION Gotowość Tryb pracy STANDBY sygnalizuje tryb awaryjny Wybrany tryb pracy lub awarię...
- Page 144 Korzystanie z klimatyzatora Włączanie i wyłączanie klimatyzatora Do włączania klimatyzatora służy klawisz sterownika ON/OFF. Na wyświetlaczu pojawi się ostatni tryb pracy (opcje trybu zegarowego i stan kierownic powietrza mogą nie być sygnalizowane). 1. Nacisnąć klawisz ON/OFF Klimatyzator się włączy, a na sterowniku zapali się kontrolka.
- Page 145 Korzystanie z klimatyzatora Nastawianie zegara Tryb zegarowy bazuje na zegarze czasu rzeczywistego. Dlatego należy go wcześniej nastawić. Nastawianie zegara odbywa się następująco: 1. Wcisnąć klawisz CLOCK (Czas) Miga napis „CLOCK” i wyświetla się godzina przyjmowana aktualnie przez sterownik. 2. Nastawić czas klawiszami TIME i TIME Każdorazowe wciśnięcie klawisza przyspiesza wskazanie o...
- Page 146 Korzystanie z klimatyzatora Praca zegarowa Timer OFF – po upływie nastawionego czasu klimatyzator się wyłączy. Najpierw należy włączyć Timer ON – po upływie nastawionego czasu klimatyzator się załączy. urządzenie klawiszem ON/OFF i wybrać tryb pracy. Trzeba też ustawić aktualną godzinę, zanim załączy się pracę zegarową.
- Page 147 Korzystanie z klimatyzatora Historia błędów jednostek wewnętrznych Wciśnięcie podczas pracy lub postoju urządzenia klawisza Trybu kontrolnego (CHECK) spowoduje sygnalizację raportu o błędach wszystkich jednostek wewnętrznych w danej grupie. Na wyświetlaczu pojawią się napisy „CHECK” i „UNIT NO.” oraz kolejne numery jednostek wewnętrznych (na pozycjach dziesiętnych). Jednocześnie wyświetlacz zegara pokaże kod błędu i ostatni czas jego wystąpienia –...
- Page 148 Tryb ogrzewania Funkcja podtrzymywania ogrzewania “HOT KEEP” Praca w trybie ogrzewania Ogrzewanie pompą ciepła Klimatyzator utrzymuje tryb ogrzewania Klimatyzator działa na zasadzie pompy ciepła, odbierając w następujących przypadkach. niskotemperaturowe ciepło z otoczenia i przekazując je z Po rozpoczęciu ogrzewania: pomocą obiegu czynnika chłodniczego do pomieszczenia Aby zapobiec nawiewaniu zimnego powietrza zaraz po ogrzewanego, przy odpowiednio wyższej temperaturze.
- Page 149 Rozwiązywanie problemów Przed wezwaniem serwisu należy sprawdzić poniższe objawy. Urządzenie się nie włącza Czy włącznik w obwodzie Czy jest napięcie w sieci Czy zadziałał bezpiecznik w Czy na odbiornik sygnału zasilania jest w pozycji obwodzie elektrycznym? elektrycznej? sterującego nie pada załączonej? promieniowanie słoneczne lub silne światło?
- Page 150 Rozwiązywanie problemów W przypadku awarii, wentylator jednostki wewnętrznej zatrzymuje się. Poniżej podano metodę sprawdzenia kodu awarii. Jeśli awaria dotyczy jednostki zewnętrznej, to kod równa się liczbie błysków diody LED powiększonej o 20. Przykładowo, 2 błyski sygnalizują kod awarii jednostki zewnętrznej 22. Sterownik wyświetla wtedy wartość 16 (w systemie szesnastkowym).
- Page 152 Adres: Haier Park Przemysÿwy, Qianwangang Road, Eco-Tech Strefa Rozwoju, Qingdao 266555,Shandong,P.R.C Contacts: TEL +86-532-88936943; FAX +86-532-8893-6999 Website: www.haier.com...