Table of Contents
Advertisement
Advertisement
Table of Contents

Related Manuals for LG K1


Summary of Contents for LG K1
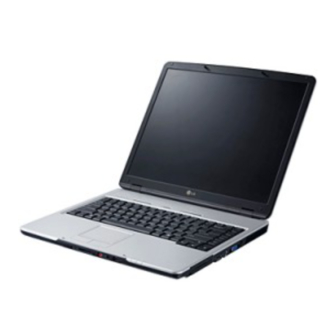
- Page 1 Service Manual (K1) LG Electronics...
- Page 2 Contents Ch 1. Service information Ch 2. Locations Ch 3. System information · Specification System Block Diagram · Fn key combinations · Status indicators · BIOS Flash · BIOS Setup · Ch 4. Symptom-to-part index Power system checkout · Numeric error codes ·...
-
Page 3: Important Service Information
Ch1. Service information Chapter 1. Service information 1-1. Important service information Strategy for replacing parts (FRU-Field Replaceable Units) Before replacing parts Make sure that latest BIOS and drivers are installed before replacing any parts (FRUs) listed in this Use the following strategy to prevent unnecessary expense for replacing and servicing parts 1. -
Page 4: Safety Notices
Ch1. Service information 1-2. Safety notices Warning Before the computer is powered-on after part (FRU) replacement, make sure all screws, springs, and other small parts are in place and are not left loose inside the computer. Verify this by shaking the computer and listening for rattling sounds. Metallic parts or metal flakes can cause electrical shorts. -
Page 5: Safety Information
Ch1. Service information 1-3. Safety information General safety Follow these rules to ensure general safety · Observe good housekeeping in the area of the machines during and after maintenance. · When lifting any heavy object 1. Ensure you can stand safely without slipping. 2. -
Page 6: Electrical Safety
Ch1. Service information Electrical safety Observe the following rules when working on electrical equipment. Important Use only approved tools and test equipment. Some hand tools have handles covered with a soft material that does not insulate you when working with live electrical currents. Many customers have, near their equipment, rubber floor mats that contain small conductive fibers to decrease electrostatic discharges. - Page 7 Ch1. Service information · Stand on suitable rubber mats (obtained locally, if necessary) to insulate you from grounds such as metal floor strips and machine frames. · Observe the special safety precautions when you work with very high voltages. These instructions are in the safety sections of maintenance information.
-
Page 8: Safety Inspection Guide
Insulation must not be frayed or worn. 4. Remove the cover. 5. Check for any obvious non-LG alterations. Use good judgment as to the safety of any non-LG alterations. 6. Check inside the unit for any obvious unsafe conditions, such as metal filings, contamination, water or other liquids, or signs of fire or smoke damage. -
Page 9: Handling Devices That Are Sensitive To Electrostatic Discharge
Ch1. Service information Handling devices that are sensitive to electrostatic discharge Any computer part containing transistors or integrated circuits (ICs) should be considered sensitive to electrostatic discharge (ESD). ESD damage can occur when there is a difference in charge between objects. -
Page 10: Laser Compliance Statement
Ch1. Service information 1-4. Laser compliance statement When a CD-ROM drive, DVD drive or the other laser product is installed, note the following : Caution Use of controls or adjustments or performance of procedures other than those specified here in might result in hazardous radiation exposure. -
Page 11: Read This First
1-6. Read this first Before you go to the checkout guide, be sure to read this section. Important Notes Only trained personnel certified by LG should service the computer. · Read the entire FRU removal and replacement page before replacing any FRU. - Page 12 Ch1. Service information The followings are not covered under warranty : CD panel cracked from the application of excessive force or from being dropped · Scratched (cosmetic) parts · Distortion, deformation, or discoloration of the cosmetic parts · Cracked or broken plastic parts, broken latches, broken pins, or broken connectors caused by excessive ·...
-
Page 13: Bottom View
Ch2. Locations Chapter 2. Locations Front view 1. Cover Latch 2. IEEE 1394 3. Status LED 4. 3 in 1 Card Reader 5. Audio Port Connectors 6. Stereo Speakers Bottom view 1. Battery Release Button 2. Battery Lock/Unlock Button 3. Battery Pack... -
Page 14: Left View
Ch2. Locations Rear view 1. Kensington Lock 2. Ventilator 3. Power Connector 4. Battery Pack Left view 1. RJ-11 Connector 2. RJ-45 Connector 3. Optical Storage Device 4. USB Port... -
Page 15: Right View
Ch2. Locations Right view 1. Express Card Slot 2. PC Card Slot 3. USB Port 4. S-Video Connector 5. VGA Port 6. Ventilator... - Page 16 Ch3. System information Chapter 3. System information Specification -CPU · Dothan 1.60GHz~1.86GHz · Celeron 1.20GHz~1.50GHz · μFCPGA - Main Chipset & Graphic · Intel 915GM, ICH6-M - Memory · 2 SODIMM · DDR2 PC2-4300 Capable(533MHz) - LCD · 15” XGA - HDD ·...
- Page 17 Ch3. System information - Indicator (LED) · AC-in, Power On, Charge, HDD, Caps Lock, Num Lock, Wireless - Power · 90 Watt 19V 4.74A Adapter - Audio · Realtek ALC655, Sound Blaster compatible - Battery · 6 Cell 5.2AHr, CYLINDRICAL(Li-Ion)
- Page 18 Ch3. System information ■ System Block Diagram...
-
Page 19: Fn Key Combinations
Ch3. System information Fn key combinations The following table shows the function of each combination of Fn with a function key. Function of Fn keys has nothing to do with Operating System. Monitor toggle. When the computer is attached to an external monitor, you can change the display [Fn]+[F2] output location with [Fn] + [F7] combination. -
Page 20: Status Indicators
Ch3. System information Status indicators The system status indicators show the status of the computer 1. Battery Indicator - Charging the battery: Green - When the battery is fully charged or the computer is not connected to an AC Adapter: OFF - When the battery power is under 10% of its maximum capacity: Orange - The battery is defective: Orange blinking 2. - Page 21 Ch3. System information BIOS Flash You can update BIOS using a floppy disk drive. Because this system is not equipped with any floppy disk drive, you have to use an external USB drive for a BIOS update. In order to boot up with an USB drive, please set Removable Device as the first boot up drive in the boot menu of BIOS setup.
- Page 22 Ch3. System information How to update flash ROM in Windows 1. Quit all running programs. 2. Start WINPHLASH.EXE. 3. Select the procedure you want : a. Backup BIOS and Flash BIOS with new settings b. Backup BIOS Only 4. Specify the locations for backup and new BIOS files in BIOS Setting Locations. a.
- Page 23 Ch3. System information 8. After the completion, ‘System BIOS was successfully updated’ appears on the screen, then the computer restarts. 9. After the restart, make sure the system BIOS is updated. 10. If your computer does not restart automatically, turn off your computer and then turn it back on by pressing power button.
- Page 24 Ch3. System information BIOS Release Process and Making Bootable CD 1. LGE(Korea) will send BIOS Image (*.iso) to each Service Centers when we have a new revision. (Please refer to the BIOS Table (Document No. SBE-HA-01) for latest BIOS) 2. Service center will make Bootable Image CD with Image file(*.iso) as below a.
- Page 25 Ch3. System information c. Select File Format as "Image Files(*.iso)". d. Open Image File(*.iso) which is sent from LGE...
- Page 26 Ch3. System information e. Tab Next then burning will be started f. Burn process completed as below, and tab “OK”...
- Page 27 Ch3. System information BIOS/EC Flash Process 1. Insert Bootable CD in PC, and Turn it on, then PC will boot by DOS mode as below (If the EC is not correct or old version, then automatically update EC first and reboot again) 2.
- Page 28 Ch3. System information 4. You can see the BIOS flash process as below 5. After flashing is completed, you can see the “PASS” on your screen, and reboot your PC...
-
Page 29: Bios Setup
2. to replace the backup battery 3. system configuration error occurs 4. to change the boot order 5. to set/change a password Press the power button. When the LG logo appears on the screen, press and enter the BIOS Setup Utility. -
Page 30: Using The Keys
Ch3. System information Using the keys The keys used in the BIOS Setup Utility and their functions are described at the bottom. · : General Help Display the descriptions of the keys used in the setup utility. · : Select Item Navigate and select items in the setup utility. -
Page 31: Bios Setup Menu
Ch3. System information BIOS Setup Menu Once you enter the BIOS Setup Utility, the Main menu will appear on the screen. The main menu displays the system information, including the basic configuration. Main menu Show System Overview information about BIOS version, CPU features, Memory size and setting of System Time and Date. - Page 32 Ch3. System information Security menu Install or clear Supervisor’s and User’s Password settings. Exit menu Choose decided status before leaving the BIOS menu.
-
Page 33: Main Menu
Ch3. System information Main menu System Time This item allows you to set the system time. The system clock will go on no matter you shut down the PC or get into sleep mode. The set format is [hour:minute:second]. System Date This item allows you to set the system date. -
Page 34: Advanced Menu
Ch3. System information Advanced menu Advanced Settings Primary IDE Master/ Slave The two items display the types of the primary master/slave IDE devices installed in the Notebook. Press [Enter] to bring up a window showing the detailed information of the device, including the device name, vendor, LBA mode, PIO mode and more. - Page 35 Ch3. System information Intel(R) SpeedStep(tm) tech. This item allows you to enable or disable Intel SpeedStep technology. When set to Disabled, the system always operates in a conserve power mode (the processor works at FSB400-600MHz or FSB533-800MHz). If you want optimize the processor, set this item to Enabled, so that the processor’s speed will be controlled by the use of your operating system and applications.
-
Page 36: Boot Menu
Ch3. System information Boot menu Boot Settings Quiet Boot This item enables you to show the vendor logo on the boot-up screen. Settings options: Disabled and Enabled. The default setting is Enabled. 1st, 2nd and 3rd Boot Device The three items allow you to set the sequence of boot devices where BIOS attempts to load the disk operating system. -
Page 37: Security Menu
Ch3. System information Security menu Security Settings Change Supervisor/User Password When you select the function, a message box will appear on the screen as below: Enter New Password Type the password you want, up to six characters in length and press [Enter]. The password typed now will replace any previously set password from CMOS memory. - Page 38 Ch3. System information When the Supervisor Password is set, the new item User Access Level and Password Check will be added in the menu. You can make further settings of access right in the User Access Level item. Setting options: No Access, View Only, Limited and Full Access. The Password Check item is used to specify the type of BIOS password protection that is implemented.
-
Page 39: Exit Menu
Ch3. System information Exit menu Exit Options Save Changes and Exit Save the changes you have made and exit the utility. Discard Changes and Exit Exit the utility without saving the changes you have made. Discard Changes Abandon your changes and reload the previous configuration before running the utility. Load Optimal Defaults Select this item to load the default settings for optimal system performance. -
Page 40: Power System Checkout
Ch4. Symptom-to-part index Chapter 4. Symptom-to-part index The symptom-to-part index in this section lists symptoms and errors and their possible causes. The most likely cause is listed first. Note If replacing a part (FRU) does not solve the problem, put the original part back in the computer. Do not replace a non-defective FRU. - Page 41 Ch4. Symptom-to-part index To check the AC adapter, do the following : 1. Unplug the AC adapter cable from the computer. Voltage (V dc) 2. Measure the output voltage at the plug of the +18.05 ~ +19.95 AC adapter cable. See the following figure : Ground 3.
- Page 42 Ch4. Symptom-to-part index · If the voltage is not correct, replace the AC adapter. · If the voltage is acceptable, do the following : 1. Replace the system board. 2. If the problem persists, check the AC adapter whether it is correct product or not. Note Noise from the AC adapter does not always indicate a defect.
- Page 43 Ch4. Symptom-to-part index · The Characteristics of the battery pack 1. Self-discharge The battery gradually loses its power over time without ever being used. 2. Periodic full discharge / charge Frequent recharge of the battery pack can reduce the capacity of the battery pack. When this happens, you can perform the full discharge / charge to improve the capacity.
- Page 44 Ch4. Symptom-to-part index · To check the battery pack, do the following : 1. Power off the computer. 2. Remove the battery pack and measure the voltage between battery terminals 1(-) and 5(+). See the following figure : Terminal Voltage (V dc) Ground(-) +0V ~ +12.6V 5(+)
- Page 45 Ch4. Symptom-to-part index ■ Repair Error Code Code English Description Product Issue NBDOA No Trouble Found NB998 NTF From Customer Return NB999 Others System / Power Issue NBP01 No Power NBP02 System Can’t Power On NBP03 System Hang Up During Booting NBP04 System Hang Up In POST NBP05...
- Page 46 Ch4. Symptom-to-part index HDD Issue NBH01 System Can't Detect HDD NBH02 HDD Has Noise During Accessing Data NBH03 HDD Breakdown NBH04 HDD's Capacity Is Incorrect NBH05 HDD Read / Write Error NBH06 HDD Can't Create Partition NBH07 HDD Performance Too Loo Code English Description ODD Issue...
- Page 47 Ch4. Symptom-to-part index CPU Issue NBCP1 CPU Speed Display Incorrectly NBCP2 CPU Breakdown NBCP3 CPU Socket Fail Battery Pack Issue NBB01 Battery Pack Can’t Charge NBB02 Battery Pack Can’t Charge To 100% NBB03 Battery’s Capacity Will Down To Empty Quickly NBB04 Battery Breakdown NBB05...
- Page 48 Ch4. Symptom-to-part index Code English Description I/O Issue NBI01 Internal L/R Speaker Fail NBI02 Internal Subwoofer Speaker Fail NBI03 Audio Noise NBI04 Audio Volume Problem NBI05 USB Port Function Fail NBI06 LPT Port Function Fail NBI07 VGA Port Function Fail NBI08 S-Video <TV-Out>...
- Page 49 Ch4. Symptom-to-part index Code English Description I/O Issue NBI28 Connect Quality Is Unstable Via WLAN NBI29 Quick Lanch Buttons <Instant Key> Function Fail NBI30 Status Indicator LED Fail NBI31 AC Adapter Connector Fail NBI32 Lid Switch Function Fail NBI33 Audio DJ Button Function Fail NBI34 Remote Controller Function Fail NBI35...
- Page 50 Ch4. Symptom-to-part index Code English Description BIOS Issue NBFB1 Flash BIOS Fail NBFB2 BIOS Version Error NBFB3 Can't Flash BIOS NBFB4 Flash KBC Firmware Fail NBFB5 KBC Firmware Version Error NBFB6 System Can't Boot After Flash BIOS NBFB7 System Can't Boot Result From Flash BIOS Fail NBFB8 System Can't Boot After Flash KBC Firmware OS / Software / Driver Issue...
- Page 51 Ch4. Symptom-to-part index Mechanism / Accessory Parts Issue NBM01 LCD Cover (A Casing) Damage NBM02 LCD Bezel (B Casing) Damage NBM03 Top Case (C Casing) Damage NBM04 Lower Case (D Casing) Damage NBM05 Middle Cover Damage NBM06 Hinge Cover Damage NBM07 Palm Rest Damage NBM08...
- Page 52 Ch4. Symptom-to-part index ■ Repair RMA Code Code English Description NBN01 No Problem Found NBMB1 Replace, SWAP Mainboard NBMB2 No Component, Replace Mainboard NBR01 DOA Return And Change New Product NBR02 SWAP New LCD Panel NBR03 SWAP New HDD NBR04 SWAP New OSD NBR05 SWAP New DRAM Module...
- Page 53 Ch4. Symptom-to-part index Code English Description NBR26 Update KBC Firmware NBR27 Reinstall OS NBR28 Customer's Device Is Poor Comparability With NB NBR29 System is unstable After Install Not Suitable Software NBR30 CPU / VGA Thermal Module Or Thermal Pad Damage NBR31 Update BIOS NBR32...
- Page 54 1. Power off the computer 2. Visually check each FRU for damage. Replace any damaged FRU. 3. Remove or disconnected all of the following devices : a. Non-LG devices. b. Printer, mouse, and other external devices. c. Battery pack. d. PC cards.
- Page 55 Ch5. Removing and replacing a part Chapter 5. Removing and replacing a part (FRU) Danger Before removing any FRU, power off the computer, unplug all power cords from electrical outlets, remove the battery pack, and then disconnect any interconnecting cables. Caution Before the computer is powered on after FRU replacement, make sure that all screws, springs, and other small parts are in place and are not loose inside the computer.
- Page 56 Ch5. Removing and replacing a part ■ 1010 Battery Pack 1. Push the battery latch in the direction shown below; then slide the battery pack out of the slot.
- Page 57 Ch5. Removing and replacing a part ■ 1020 Hard Disk Drive ※ Remove the following parts in order before replacing this part a. Battery Pack(1010) 1. Remove 2 screws. FRU No. Specification 1SZZBZ4040A M2.5 x L5.0 2. Remove HDD Cover.
- Page 58 Ch5. Removing and replacing a part 3. Remove HDD using a tag.
- Page 59 Ch5. Removing and replacing a part...
- Page 60 Ch5. Removing and replacing a part ■ 1030 Memory ※ Remove the following parts in order before replacing this part a. Battery Pack(1010) b. Hard Disk Drive(1020) 1. Remove 3 screws. FRU No. Specification 1SZZBZ4040A M2.5 x L5.0 2. Remove the CPU Cover.
- Page 61 Ch5. Removing and replacing a part 3. Remove the Memory.
- Page 62 Ch5. Removing and replacing a part ■ 1040 WLAN Card ※ Remove the following parts in order before replacing this part a. Battery Pack(1010) b. Hard Disk Drive(1020) c. Memory(1030) 1. Disconnect the WLAN Antenna Cable. 2. Remove the WLAN Card.
- Page 63 Ch5. Removing and replacing a part ■ 1050 Fan Assembly ※ Remove the following parts in order before replacing this part a. Battery Pack(1010) b. Hard Disk Drive(1020) c. Memory(1030) d. WLAN Card(1040) 1. Loose Fan Assembly Spring Screw.
- Page 64 Ch5. Removing and replacing a part 2. Disconnect the Fan Assembly connector. 3. Remove the Fan Assembly.
- Page 65 Ch5. Removing and replacing a part ■ 1060 CPU ※ Remove the following parts in order before replacing this part a. Battery Pack(1010) b. Hard Disk Drive(1020) c. Memory(1030) d. WLAN Card(1040) e. Fan Assembly 1. Loose CPU screw, then remove the CPU.
- Page 66 Ch5. Removing and replacing a part ■ 1070 ODD ※ Remove the following parts in order before replacing this part a. Battery Pack(1010) b. Hard Disk Drive(1020) c. Memory(1030) d. WLAN Card(1040) e. Fan Assembly(1050) f. CPU(1060) 1. Remove a screw. FRU No.
- Page 67 Ch5. Removing and replacing a part...
- Page 68 Ch5. Removing and replacing a part ■ 1080 Retainer ※ Remove the following parts in order before replacing this part a. Battery Pack(1010) b. Hard Disk Drive(1020) c. Memory(1030) d. WLAN Card(1040) e. Fan Assembly(1050) f. CPU(1060) g. ODD(1070) 1. Remove the Middle Cover Mylar. 2.
- Page 69 Ch5. Removing and replacing a part 3. Disconnect the Connector. 4. Remove the Retainer.
- Page 70 Ch5. Removing and replacing a part ■ 1090 Keyboard ※ Remove the following parts in order before replacing this part a. Battery Pack(1010) b. Hard Disk Drive(1020) c. Memory(1030) d. WLAN Card(1040) e. Fan Assembly(1050) f. CPU(1060) g. ODD(1070) h. Retainer(1080) 1.
- Page 71 Ch5. Removing and replacing a part 3. Disconnect the Keyboard Connector, then remove the Keyboard.
-
Page 72: Display Module
Ch5. Removing and replacing a part ■ 1100 Display Module ※ Remove the following parts in order before replacing this part a. Battery Pack(1010) b. Hard Disk Drive(1020) c. Memory(1030) d. WLAN Card(1040) e. Fan Assembly(1050) f. CPU(1060) g. ODD(1070) h. Retainer(1080) i. Keyboard(1090) 1. - Page 73 Ch5. Removing and replacing a part 2. Disconnect the LVDS / Inverter Cable.
- Page 74 Ch5. Removing and replacing a part 3. Remove the Display Module.
- Page 75 Ch5. Removing and replacing a part ■ 1110 Keyboard Deck ※ Remove the following parts in order before replacing this part a. Battery Pack(1010) b. Hard Disk Drive(1020) c. Memory(1030) d. WLAN Card(1040) e. Fan Assembly(1050) f. CPU(1060) g. ODD(1070) h. Retainer(1080) i. Keyboard(1090) j.
- Page 76 Ch5. Removing and replacing a part 2. Remove 3 screws. FRU No. Specification 1SZZBZ4042A M2.0 x L3.0 3. Remove 5 screws. FRU No. Specification 1SZZBZ4040A M2.5 x L5.0...
- Page 77 Ch5. Removing and replacing a part 4. Remove the Keydeck. 5. Disconnect the Touchpad Connector.
- Page 78 Ch5. Removing and replacing a part 6. Disconnect the Power Cable, then remove the Keydeck.
- Page 79 Ch5. Removing and replacing a part ■ 1120 Main Board ※ Remove the following parts in order before replacing this part a. Battery Pack(1010) b. Hard Disk Drive(1020) c. Memory(1030) d. WLAN Card(1040) e. Fan Assembly(1050) f. CPU(1060) g. ODD(1070) h. Retainer(1080) i. Keyboard(1090) j.
- Page 80 Ch5. Removing and replacing a part 2. Remove the Main Board. 3. Disconnect the DC-In / LAN / USB Cable.
- Page 81 Ch5. Removing and replacing a part 4. Disconnect the MDC Cable.
- Page 82 Ch5. Removing and replacing a part 5. Remove a screw. FRU No. Specification 1SZZBZ4040A M2.5 x L5.0 6. Remove a screw. FRU No. Specification 1SZZBZ4040A M2.5 x L5.0...
- Page 83 Ch5. Removing and replacing a part 7. Remove the USB Board.
- Page 84 Ch5. Removing and replacing a part 8. Remove a screw. FRU No. Specification 1SZZBZ4040A M2.5 x L5.0 9. Remove the DC-In Board.
- Page 85 Samsung, 512MB DDR2, TS64MSQ64V5J, RoHS MEMORY NMEMB 0IMMR00247A Hynix, 512MB DDR2, M2OHY2G3H3410G1B5Z, RoHS MEMORY NINVB 6708BI0102A TWS-400-9152 INVERTER NBATB 6911B00160A 6cell (18651) Li-ion Battery ; LG-brand BATTERY NACAB 6708BA0074A 65W; FSP065-AAC ADAPTOR NKBDB 3823BC0001A Korean layout, RoHS NKBDB 3823BC0003A UI, RoHS...
- Page 86 CPU heat sink NCVRE 3550BZ4013A ,VER.01-,MECH,NB,GE-7210A,DUMMYCARD NEWCARD,60.40*68.13*9.30mm,FOR MS- DUMMY 1016,701DE, NCVRF 3550BZ4012A ,VER.0A-,MECH,NB,GE-7210A,DUMMYCARD PCMCIA,85.64*55.20*6.5mm,FOR MS-1016,701DE, DUMMY NMLBB 6871BMSIMAB MS-10161L1 20 EVT mainboard for MS-1016L1, RoHS, LG NKBDB 3823BC0001A KBD, KOREA NKBDB 3823BC0002A KBD,ENGLISH NKBDB 3823BC0003A KBD,US INTER. NKBDB 3823BC0004A KBD,RUSSIAN...
- Page 87 Ch6. Part lists Location Part No Specification REMARK NKBDB 3823BC0014A KBD,CANADIAN FRENCH NKBDB 3823BC0015A KBD,TURKEY NKBDB 3823BC0016A KBD,ITALY NKBDB 3823BC0017A KBD,HUNGARY NKBDB 3823BC0018A KBD,GERMAN NKBDB 3823BC0019A KBD,BRAZIL NCVRG 3550BM4221A Hinge Cap HINGE CAP NHDDB 6744C00160A NHDDB 6744C00137A NCVRH 3301B00573A MS1003_SHIELDING_HDD_ASSY SIELDING NBRKB 4810BZ4103A...
- Page 88 Ch6. Part lists Location Part No Specification REMARK NCSNB 4850BZ4095A ,VER.01-,MECH,NB,SILICON,RUBBER LCD,1.6*5.5mm,FOR MS-1016,PANTONE 432C RUBBER W/ADHESIVE:T4000,RoHS COMPLIANCE NSCRC 1SZZBZ4041A ,MECH,SCREW,PLAT,CROSS RECESS,M2.5X0.45P,4.5mm,5mm,MACHINE SCREW,WITH SCREW NYLOK,PLATING ZINC,BLACK,FOR MS-1004,AISI-1018, NSCRB 1SZZBZ4040A ,MECH,SCREW,PLAT,CROSS RECESS,M2.5X0.45P,5mm,3mm,MACHINE SCREW,WITH SCREW NYLOK,PLATED NI,,FOR MS-1003,AISI-1018, 1SZZBZ4041A ,MECH,SCREW,PLAT,CROSS RECESS,M2.5X0.45P,4.5mm,5mm,MACHINE SCREW,WITH SCREW NYLOK,PLATING ZINC,BLACK,FOR MS-1004,AISI-1018, 1SZZBZ4042A ,MECH,SCREW,PLAT,CROSS RECESS,M2X0.4,4mm,3mm,MACHINE SCREW,WITH...
- Page 89 ※ For more information about screws, refer to ‘Chapter 5. Removing and replacing a part(FRU)’. Consult on page 71 Consult on page 56...
- Page 90 K1 Buffalo EXPLODED VIEW NHDDB NSCRF NSCRF NSCRF NBRKB NSCRF NCVRH...
- Page 91 K1 Buffalo EXPLODED VIEW NBRKF NBRKE NCABC NSCRC NSCRC NSCRC NCVRI NSCRC NHNGB NHNGC NINVB NSCRC NSCRC NSCRC NSCRC NSHTB NSCRD NSCRD NSHTC NCABD NSCRD NSCRD NSCRD NSCRD NSCRD NBRKD NLCDB NBRKC NSCRD NCSED NSCRC NSCRC NCSNB NCSNB NSCRC NSCRC...
- Page 92 0IMMR00233B Samsung, 512MB DDR2, TS64MSQ64V5J, RoHS MEMORY NMEMB 0IMMR00247A Hynix, 512MB DDR2, M2OHY2G3H3410G1B5Z, RoHS MEMORY NINVB 6708BI0102A TWS-400-9152 INVERTER NBATB 6911B00160A 6cell (18651) Li-ion Battery ; LG-brand BATTERY NACAB 6708BA0074A 65W; FSP065-AAC ADAPTOR NKBDB 3823BC0001A Korean layout, RoHS NKBDB 3823BC0003A UI, RoHS...
- Page 93 5901B09306A CPU heat sink NCVRE 3550BZ4013A ,VER.01-,MECH,NB,GE-7210A,DUMMYCARD NEWCARD,60.40*68.13*9.30mm, DUMMY FOR MS-1016,701DE, NCVRF 3550BZ4012A ,VER.0A-,MECH,NB,GE-7210A,DUMMYCARD PCMCIA,85.64*55.20*6.5mm, DUMMY FOR MS-1016,701DE, NMLBB 6871BMSIMAB MS-10161L1 20 EVT mainboard for MS-1016L1, RoHS, LG NKBDB 3823BC0001A KBD, KOREA NKBDB 3823BC0002A KBD,ENGLISH NKBDB 3823BC0003A KBD,US INTER. NKBDB 3823BC0004A KBD,RUSSIAN NKBDB...
- Page 94 K1 Buffalo EXPLODED VIEW Location LG P/N SPECIFICATION REMARKS NKBDB 3823BC0014A KBD,CANADIAN FRENCH NKBDB 3823BC0015A KBD,TURKEY NKBDB 3823BC0016A KBD,ITALY NKBDB 3823BC0017A KBD,HUNGARY NKBDB 3823BC0018A KBD,GERMAN NKBDB 3823BC0019A KBD,BRAZIL NCVRG 3550BM4221A Hinge Cap HINGE CAP NHDDB 6744C00160A HDD NHDDB 6744C00137A HDD...
- Page 95 K1 Buffalo EXPLODED VIEW Location LG P/N SPECIFICATION REMARKS NCSNB 4850BZ4095A ,VER.01-,MECH,NB,SILICON,RUBBER LCD,1.6*5.5mm,FOR RUBBER MS-1016,PANTONE 432C W/ADHESIVE:T4000,RoHS COMPLIANCE NSCRC 1SZZBZ4041A ,MECH,SCREW,PLAT,CROSS RECESS,M2.5X0.45P,4.5mm,5mm, SCREW MACHINE SCREW,WITH NYLOK,PLATING ZINC,BLACK,FOR MS-1004, AISI-1018, NSCRB 1SZZBZ4040A ,MECH,SCREW,PLAT,CROSS RECESS,M2.5X0.45P,5mm,3mm, SCREW MACHINE SCREW,WITH NYLOK,PLATED NI,,FOR MS-1003,AISI-1018, 1SZZBZ4041A ,MECH,SCREW,PLAT,CROSS RECESS,M2.5X0.45P,4.5mm,5mm,...