Table of Contents
Advertisement
Advertisement
Table of Contents

Related Manuals for Bosch TouchOne


Summary of Contents for Bosch TouchOne
- Page 1 TouchOne User’s Guide...
-
Page 2: Table Of Contents
Contents 1 Introduction 1.1 Product Summary 1.2 Version 1.3 Features not covered 2 General Usage 2.1 Home Screen 2.2 Keypad Screen 2.3 Arming the System 2.3.1 Arming in AWAY Mode 2.3.2 Arming in STAY Mode 2.3.3 Arming in STAY Mode 2 2.3.4 Disarming the System 3 Zones 3.1 Isolating Zones... - Page 3 4 Users 7 WiFi 4.1 Adding a User 7.1 Connect the TouchOne to a WiFi network 4.2 Deleting a User 7.2 Disconnect from a WiFi network 4.3 Renaming a User 4.4 Adding / Changing a User Photo 8 Display, Wallpaper & Sounds 4.5 Editing a User PIN...
-
Page 4: Introduction
Other less common features are accessed using the Keypad screen in the same way Please refer to the “Operation with in which you would interact with a Bosch TEXT LCD Codepad. As the interface is the TEXT LCD Codepad” section in same, please refer to the “Operation with TEXT LCD Codepad”... -
Page 5: Arming The System
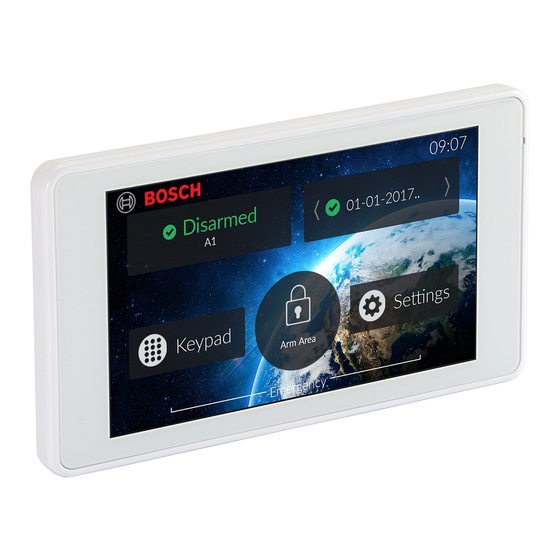
2.3 Arming the System Method One (Quick Arm) 1. From the Home Screen, touch the Arm Area button. 2.3.1 Arming in AWAY Mode Two beeps will sound and the Area Status Card changes. When you leave your premises and require all zones to be in a ready Note: if you have multiple areas enabled, you will need to enter state to detect intrusion, arm the your user code. -
Page 6: Arming In Stay Mode
Any Master automatically isolated is activated, the TouchOne beeps twice per second until the Code or Installer Code user can program zones to be automatically isolated in STAY entry timer expires or the system is disarmed. -
Page 7: Disarming The System
If the Entry Guard Time for STAY Mode is programmed and a zone that was not Button to open the System Status screen. automatically isolated is activated, the TouchOne beeps twice per second until the entry timer expires or the system is disarmed. If the alarm condition is not reset by... -
Page 8: Zones
For example, you need to isolate a zone as, before arming the system, on the TouchOne, a TEXT LCD Codepad or the RS Control Mobile App. The zone a PIR detector may be false alarming, or you need to leave a pet inside a particular name must be 12 characters or less. -
Page 9: Users
Users can be renamed to provide more meaningful information when being displayed the Master Code. Up to 32 user codes / radio user codes can be programmed to oper- on the TouchOne, a TEXT LCD Codepad or the RS Control Mobile App. The user ate the system. -
Page 10: Adding / Changing A User Photo
Users can have photos added to them to provide a faster means of identifying them back to the Users Screen. when you have many users on the system. This photo is only stored on the TouchOne. 4.6 Adding a Mobile Device 1. -
Page 11: Removing A Mobile Device
Bluetooth device you want to pair. 1. From the Home Screen, touch the Settings button. 8. A pairing dialog box will be shown on both the TouchOne and your mobile device. 2. Touch the Users menu item. Touch the pair button on both. -
Page 12: Renaming Outputs
7. Touch the Connect button. ment to change it. 8. Wait for up to 30 seconds for the TouchOne to connect to the WiFi network. If the 5. Touch the back button in the screen title bar to confirm the Change Date and Time network connection is successful, the network name will appear under Current Net- action and go back to the Settings Screen. -
Page 13: Disconnect From A Wifi Network
Please note: 8.2 Change the TouchOne Brightness It is strongly encouraged that the TouchOne is only connected to a network with at 1. From the Home Screen, touch the Settings button. least WPA encryption. 2. Touch the Display, Wallpaper & Sounds menu item. -
Page 14: Standby Screen
7. If you would like to select your own photos, insert a Micro SD card into the Micro SD 8.4 Standby Screen slot on the TouchOne as described in Figure 4. 8.4.1 Make the Screen sleep during Standby. 8. Touch the thumbnail of the desired slideshow images. A tick icon will be displayed on Please note: each thumbnail that is selected. -
Page 15: Show The Alarm Status On The Standby Screen
Language 9.1 Change the TouchOne Language From the Home screen, touch the “Ustawienia” button. The TouchOne supports multiple languages. As of version 2.0, the supported Touch the “Język” menu item. languages are: Touch the English menu item (this is displayed in English). -
Page 16: Tutorials
Instructions on carrying out the most common functions of the TouchOne are When facing the TouchOne in portrait orientation, the SD Card Slot is on the top left. available to watch in Video form on the TouchOne itself. Touching the [?] button at Insert the SD cards with its contacts facing towards you. - Page 17 8UM-TO2A-041601...