Table of Contents
Advertisement
Quick Links
SERVICE
DIGITA L LASER MFP
SCX-6345N
DIGITAL LASER MFP
SCX-6345 Series
SCX-6345N/XAA
Basic Model : SCX-6345N
Manual
The keynote of Product
The alternative of A3 copier models.
1. Print Speed:
Simplex Print: Up to 45 ppm/Ltr, 43 ppm/A4
Duplex Print: Up to 40 ppm/A4
2. Main Processor: SPGPv3(400MHz) + CIP4e
3. Device Memory(SDRAM):
256MB System Memory (FAX:16MB), Max. 384MB
Option : 128MB (DIMM Slot 1EA)
4. Toner(20K), Drum(60K)
5. Standard:
Copy
Direct Print & N/W Print
Direct Scan (USB)
DADF
HDD(40GB)
6. Option:
N/W Scan/OEK(Option Enable Key)
FAX/Smart DAA, Single LIU
SCF (550 sheet)
Finisher with Stapler
Ext. Memory: 256MB
Stand: Short/Tall
7. Machine Life: 1,000K Pages
Average Monthly Print Volume: 10K Pages
Advertisement
Table of Contents
Troubleshooting

Related Manuals for Samsung SCX-6345N/XAA


Summary of Contents for Samsung SCX-6345N/XAA
-
Page 1: Service Manual
DIGITAL LASER MFP SCX-6345 Series SCX-6345N/XAA Basic Model : SCX-6345N Manual SERVICE DIGITA L LASER MFP The keynote of Product The alternative of A3 copier models. 1. Print Speed: Simplex Print: Up to 45 ppm/Ltr, 43 ppm/A4 Duplex Print: Up to 40 ppm/A4 2. -
Page 2: Table Of Contents
Contents 1. Precautions 1.1 Safety Warning 1.2 Caution for safety 1.3 ESD Precautions 1.4 Super Capacitor or Lithium Battery Precautions 2. Product Specification 2.1 Product Overview 2.2 Prouduct Specification 2.3 General specifications 2.4 Printer specifications 2.5 Copier specifications 2.6 Scanner specifications 2.7 Facsimile specifications (optional) 2.8 Scan to Email 2.9 NW Scan (Scan to SMB/FTP/HTTP(S)) - Page 3 Continued 3.6 Paper Feeding 3-23 3.7 Toner Cartridge Specification 3-23 4. Alignment and Adjustments 4.1 Paper path 4.2 Clearing Paper Jams 4.3 Abnormal Image Printing and Defective Roller 4-12 4.4 User Mode 4-13 4.5 Service Mode 4-28 4.6 Consumables and Replacement Parts 4-50 4.7 Option Installing 4-59...
- Page 4 Continued 7. Exploded Views & Parts List 7.1 Main 7.2 Cover Unit 7.3 Main Frame 7.4 Base Frame 7.5 Main Drive 7.6 Exit Drive 7.7 Exit Ass'y 7.8 Fuser 7.9 Pick Up Ass°Øy 7-10 7.10 Side Duplex 7-11 7.11 MP Unit 7-12 7.12 MP Tray 7-13...
- Page 5 Continued 8. Block diagram 8.1 System Block Diagram 8.2 DADF Block Diagram 8.3 DADF Control Block Diagram 9. Connection Diagram 9.1 Connection Diagram 9.2 SCF Connection Diagram 9.3 DADF Connection Diagram 9.4 OP Main Connect Diagram 10. Finisher Unit 10.1 Summary of the Finisher Unit 10-1 10.2 System Configuration 10-2...
- Page 6 11.6 Samsung SyncThru Web Service: General Information (MFP) 11-17 11.7 Samsung SyncThru Web Service: Machine Settings (MFP) 11-18 11.8 Samsung SyncThru Web Service: Network Settings 11-19 11.9 Samsung SyncThru Web Service: Maintenance 11-20 11.10 Samsung SyncThru Web Service: Support 11-21 11.11 Samsung SyncThru Web Service: Service (MFP)
- Page 7 Continued 12. Option Install Guide 12.1 Option List 12-1 12.2 Option Installation Guide 12-2 13. Reference Information 13.1 Tool for Troubleshooting 13-1 13.2 Acronyms and Abbreviations 13-2 13.3 The Sample Pattern for the Test 13-8 13.4 Wireless LAN 13-9 13.5 Selecting a location 13-10...
-
Page 8: Safety Warning
High voltages and lasers inside this product are dangerous. This printer should only be serviced by a suitably trained and qualified service engineer. (2) Use only Samsung replacement parts There are no user serviceable parts inside the printer. Do not make any unauthorized changes or additions to the printer, these could cause the printer to malfunction and create electric shock or fire haz-ards. -
Page 9: Caution For Safety
Take care not to cut or damage the power cable or plugs when moving the machine. (9) Use caution during thunder or lightening storms. Samsung recommend that this machine be disconnected from the power source when such weather conditions are expected. Do not touch the machine or the power cord if it is still connected to the wall socket in these weather conditions. -
Page 10: Handling Precautions
1.2.4 Assembly / Disassembly Precautions Replace parts carefully, always use Samsung parts. Take care to note the exact location of parts and also cable routing before dismantling any part of the machine. Ensure all parts and cables are replaced correctly. -
Page 11: Disregarding This Warning May Cause Bodily Injury
- The equipment shall be installed near the socket outlet and shall be accessible. - Be sure to fix and plug in the power cable securely after the installation so that no one trips over it. Service Manual Samsung Electronics... -
Page 12: Esd Precautions
2. Be sure to replace the battery with the same or equivalent type recommended by the manufacturer. 3. Super capacitor or Lithium batteries contain toxic substances and should not be opened, crushed, or burned for disposal. 4. Dispose of used batteries according to the manufacture’s instructions. Service Manual Samsung Electronics... -
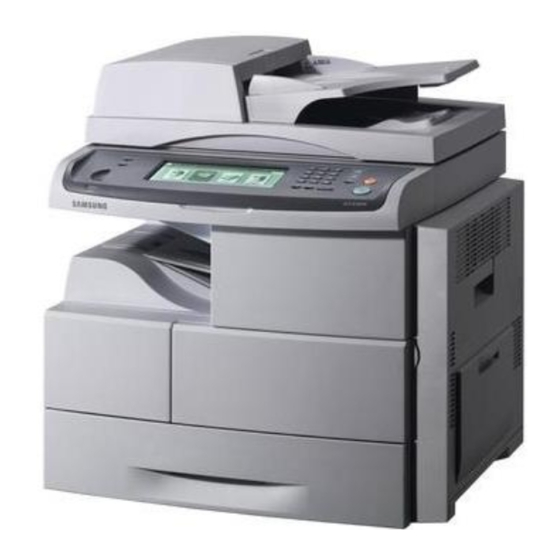
Page 13: Product Overview
- Improved Productivity through Super G3 and LAN Faxing with advanced copying capabilities - Networked digital copier/printer/scanner with its duplex printing and finishing capabilities, plus network scan technology 2) Sales Target - 20 ~ 100 Persons Workgroup (Corp., SMB) - Competitive TCO Service Manual Samsung Electronics... - Page 14 - Enhanced UI / Color Touch Screen LCD Enhanced Paper Handling High Capacity Feeder Multi-bin Stacker Multi-position Stapler - Document Server Scan / Copy / FAX to HDD File Management Paperless N/W Fax Internet FAX Fax Forward to Email / Folder IP FAX Service Manual Samsung Electronics...
-
Page 15: Prouduct Specification
Product Specifications 2.2 Prouduct Specification Service Manual Samsung Electronics... - Page 16 Product Specifications Service Manual Samsung Electronics...
-
Page 17: General Specifications
The number of pages may be affected by operating environment, printing interval, media type, media size and option. * Note: This machine comes with 128 MB of on-board memory and a 128 MB DIMM. To expand the memory of your machine, you must remove the existing DIMM and purchase a larger one. Service Manual Samsung Electronics... -
Page 18: Printer Specifications
Print: up to 600 x 600 (text, text/photo, photo) Zoom rate 25% ~ 400% (Platen), 25% ~ 200% (ADF) Multiple copies 1 to 999 pages a. Copy Speed is based on Single Document Multiple Copy. b. images per minute Service Manual Samsung Electronics... -
Page 19: Scanner Specifications
Memory 1 16 MB Halftone 256 levels Auto dialer up to 200 numbers (all numbers / Max group avail) a. Transmission time applies to memory transmission of text data with ECM compression using only ITU-T No.1 Chart. Service Manual Samsung Electronics... -
Page 20: Scan To Email
Original Size Auto, Manual, Mixed Size Image control Original type Text, Text/Photo, Photo Darkness 5 Levels Erase Background Yes (On/Off) Erase Background Yes (On/Off) Output Control Quality/File Size Normal Quality File Formats TIFF-S, TIFF-M, JPEG, PDF Service Manual Samsung Electronics... -
Page 21: Smarthru Workflow
Yes (Via SmarThru Server) N/A (Fax Resolution is too low) Yes (Via SmarThru Server) similar with Server Fax solution (Via SmarThru Server) Print Yes (Via SmarThru Server) HTTP/S Security SSL/TLS SSLV3.0, TLS V1.0 Authentication LDAP, Kerberos v5.0 IPv6 Service Manual Samsung Electronics... -
Page 22: Paper Handling
Min: 98.0 mm x 148 mm (3.86"x5.83") Max: 215.9 mm x 355.6 mm (8.5"x14.0") Media type Plain Paper, Thin Paper, Bond, Punched, Pre-Printed, Recycled, Envelope, Transparency, Label, CardStock, Letterhead,Thick,Cotton,Colored,Archive Mdeia Weight 16~43 lb. Paper empty sensor Paper size detection Service Manual 2-10 Samsung Electronics... - Page 23 128 ~ 400mm (5" ~ 15.7") for Multi pages scan Document Type MN standard except transparencies Original size detection Letter or A4, Legal, and Small Size Others High Capacity Feeder Envelope Finisher SEE "Finisher" Stapler SEE Stapler spec in "Finisher" Service Manual 2-11 Samsung Electronics...
-
Page 24: Model Comparison
Max. Docu. Size DADF Legal Legal Paper Handling Max. Paper Supply 2300 1050 640 x 240 20 characters X 2 lines User Interface Type Graphic / Touch-Screen with Backlight IEEE1284(ECP), Interface USB 2.0, N/W USB(without HUB mode) Service Manual 2-12 Samsung Electronics... -
Page 25: Pm(Preventive Maintenance) List
Lifetime Pick-Up Roller JC97-02259A 200,000 Fuser Unit JC96-03724A 200,000 Maintenance SCX-V6345A/SEE Quick Install Guide Kit1 Box,Cushion,Label Master Box (4box/1master box) Transfer Roller JC97-02287A 100,000 Maintenance Quick Install Guide SCX-V6345B/SEE Kit2 Box,Cushion,Label Master Box (4box/1master box) Service Manual 2-13 Samsung Electronics... -
Page 26: System Overview
Service Manual Samsung Electronics m m m a a a n n n u u u a a a l l l s s s Q Q Q y y y o o o u u u J J J c c c o o o m m m... -
Page 27: System Lay-Out
System Overview 3.1 System Lay-out Service Manual Samsung Electronics... -
Page 28: System Description
System SRAM PCI BUS System SRAM Network Network (K6R1016V1D) (K6R1016V1D) USB / USB / IEEE 1284 (40GB) IEEE 1284 (40GB) (FM336) (FM336) (note) This System Block diagram only for reference (will be updated with next version) Service Manual Samsung Electronics... -
Page 29: Main Controller
System Overview 3.2.2 Main Controller The Main Control Part comprises 1 CPU and 1 B D by adopting the dedicated Controller for Fax & LBP. The Scanner Part comprises ADF& CCD and connected with Main through Harness. Service Manual Samsung Electronics... - Page 30 - It preserves the Fax Receive Memory by using Battery. 4) System Data Memory (SRAM) This memory, which is for storing the operation variable & the setting parameter of SCX-6345N, keeps the information with using Backup Battery even in case of Power-off. Service Manual Samsung Electronics...
- Page 31 This Flash Memory can be upgraded through Network by using EWS or MIB. 3) RAM 16MB SDRAM is used as System Program buffer or Network Data buffer. 4) PHY ; STE100P PHY chip Converting Network signal into Digital signal, it supports MII and requires 10MHz clock input. Service Manual Samsung Electronics...
- Page 32 Service Manual Samsung Electronics m m m a a a n n n u u u a a a l l l s s s ( ( ( y y y o o o u u u ' ' ' c c c o o o m m m...
-
Page 33: Dadf Board
Motor Drive Block - Unipolar Motor Driver IC(SLA7066M): Most rollers are controlled by a SLA7066M motor drive. - Bipolar Motor Driver IC(A3977): For Exit motor Clock Generator(CY25814): SSCG converts crystal 12Mhz to 48MHz clock for MPU main clock. Service Manual Samsung Electronics... -
Page 34: Ope Board
- 640x240 Graphic LCD - CPU(S3C44B0): ARM7 Based 32bit RISC Processor. - Flash ROM(16MB): OP Operating program F/W - SDRAM(32MB): System Program and Data Buffer - CCFL Inverter: 24V input -> 400Vrms output to power LCD Back Light Service Manual Samsung Electronics... - Page 35 1) AC 110V (90V ~ 135V) 2) AC 220V (180V ~ 270V) 3) Input Current: 3.2 [Arms] 4) Output Power: 192W / Max. 270W DC 5V: 24W ~ 30W (0.6A ~ 6.0A) DC 24V: 168W ~ 240W (0A ~ 10A) Service Manual 3-10 Samsung Electronics...
- Page 36 1) AC 110V (90V ~ 135V) 2) AC 220V (180V ~ 270V) 3) Input Current: 14 [Arms] 4) Output Power: 1300 [W] (1300[W] / 90V ~ 135V = 9A ~ 12A) (1300[W] / 180V ~ 270V = 4.5A ~ 7A) Service Manual 3-11 Samsung Electronics...
- Page 37 1) DC 5V (4.75 ~ 5.25V) 2) DC 24V(21.6V 27.6V) General Output Voltage 1) MHV: -1200V 3% 2) Fu-Bias: 80V 5% 3) DEV: -500V 3% 4) THV(+): 1800V 3% 5) THV(-): -1100V 20% 6) DTS: -1800V 3% Service Manual 3-12 Samsung Electronics...
- Page 38 Data Transmission ¡¡ Data Receive Data Receive ¡¡ nBUSY nBUSY SCF TxD Line Busy SCF TxD Line Busy ¡¡ nCMDREQ nCMDREQ Command Request Command Request ¡¡ Reserved1 Reserved1 Reserved Reserved ¡¡ Reserved2 Reserved2 Reserved Reserved ¡¡ Service Manual 3-13 Samsung Electronics...
- Page 39 A Finisher PBA is a Finisher controlling in SCX-6345N for option. It also consists one controller(S3F443FX), two motor drive IC and LPEC1 for expandable I/O IC to control a finisher through Uart communication with a Main controller. Service Manual 3-14 Samsung Electronics...
-
Page 40: Engine Section
6) Transfer Unit TRANSFER Roller bears and carries the toner of OPC Drum into recording medium. 7) Fuser Consisted of IH Heater, Heat Roller, Pressurizing Roller, Thermistor and Thermostat, it fixes toner into recording medium. Service Manual 3-15 Samsung Electronics... -
Page 41: Communication Specifications
They call them wire a for Tip, wire b for Ring and wire a , wire b to pass the line path to the next priority phone. There is a special mechanical structure or switch in a wall jack. Service Manual 3-16 Samsung Electronics... - Page 42 The circuit below is the line connection section of Jungfrau fax module for worldwide RJ11 PSTN RJ11 Factory Default of Parallel Connection (A Dummy Jack will be inserted into the Ext RJ11.) RJ11 PSTN RJ11 Dummy Jack Service Manual 3-17 Samsung Electronics...
- Page 43 (Users can use fax just by connecting line cord into Line RJ11. ) RJ11 PSTN RJ11 Dummy Jack If an user want to use a 2 nd phone, he/she has to remove the dummy jack and connect the phone. RJ11 PSTN RJ11 Service Manual 3-18 Samsung Electronics...
- Page 44 How to use for the Countries of Serial Connection (Factory Default ) 1) A Dummy Jack will be inserted into the Ext RJ11. 2) Additional information sheet and a terminator will be supplied. RJ11 PSTN RJ11 Dummy Jack Service Manual 3-19 Samsung Electronics...
- Page 45 System Overview Service Manual 3-20 Samsung Electronics...
- Page 46 The dummy jack has no inner connection and it just for block Ext RJ11. 3) Dialing Characteristics Dial Pulse: Tech Mode Option Feature Make / Brake Ratio: 40msec/60msec or 33msec/66msec Pulse Speed: 1 PPS Minimum Pause: above 30msec Service Manual 3-21 Samsung Electronics...
-
Page 47: Scanning Section
Adjustable Paper Guide DADF Ready Indicator None Labels w/graphics None Book copying with DADF open Wear out items (rolls) easily Wear out items (rolls) should DADF Pad & replaceable w/o tools be serviced. Feed Roller Service Manual 3-22 Samsung Electronics... -
Page 48: Paper Feeding
Control panel is blank and not responding. 3.7 Toner Cartridge Specification Toner CRU will have a CRUM to differentiate Samsung and SEC versions as well as detect CRU presence. CRUM : Yes (Type IV RFID in Toner/OPC Cartridge) Life(Service) Time: The service life of a cartridge is based on an estimates printings with ISO 19752 Std. -
Page 49: Alignment And Adjustments
Using the Tech Mode; Clearing paper jam and test patterns. Much of this chapter is also included in the user's guide. 4.1 Paper path Simplex Pass Finisher Pass Duplex Pass MP Feed Cassette Feed SCF Feed SCF Feed SCF Feed Service Manual Samsung Electronics... -
Page 50: Clearing Paper Jams
Service Manual Samsung Electronics m m m a a a n n n u u u a a a l l l s s s ) ) ) y y y o o o u u u P P P c c c o o o m m m... -
Page 51: Clearing Document Jams
1. Remove the remaining documents from the DADF. 3. Close the document input tray. Then place the docu- ments back into the DADF. 2. Open the document input tray upward and pull the document gently out of the DADF. Service Manual Samsung Electronics... -
Page 52: Roller Misfeed
3. Close the scanner lid. Then load the removed pages back into the DADF. 2. Seize the misfed paper, and remove the paper from the feed area by carefully pulling it to the right using both hands. Service Manual Samsung Electronics... - Page 53 Once you remove the jammed paper here, open the side cover and then close it to clear the "Paper Jam0" message on the display. If there is any resistance, and the paper does not move immediately when you pull, stop pulling. Then: Service Manual Samsung Electronics...
- Page 54 Service Manual Samsung Electronics m m m a a a n n n u u u a a a l l l s s s ) ) ) y y y o o o u u u P P P c c c o o o m m m...
-
Page 55: In The Optional Tray
7. Pull the jammed paper out in the direction shown. To avoid tearing the paper, pull it out gently and slowly. If you cannot find the jammed paper, or if there is any resistance removing the paper, stop pulling and continue to step 5. Service Manual Samsung Electronics... - Page 56 Service Manual Samsung Electronics m m m a a a n n n u u u a a a l l l s s s ) ) ) y y y o o o u u u P P P c c c o o o m m m...
-
Page 57: In The Paper Exit Area
4.2.2.4 In the paper exit area 1. Open the side cover. 4. Close the front cover and the side cover Printing automatically resumes. 2. Open the front cover. 3. Gently pull the paper out through the exit area. Service Manual Samsung Electronics... -
Page 58: In The Duplex Unit Area
4-10 Samsung Electronics m m m a a a n n n u u u a a a l l l s s s ) ) ) y y y o o o u u u P P P c c c o o o m m m... - Page 59 Alignment & Adjustments 3. Remove the jammed paper. 4. Pull up on the stacker lever and then close the stacker cover. Service Manual 4-11 Samsung Electronics...
-
Page 60: Abnormal Image Printing And Defective Roller
4-12 Samsung Electronics m m m a a a n n n u u u a a a l l l s s s 4 4 4 y y y o o o u u u z z z c c c o o o m m m... -
Page 61: User Mode
The conrol panel provides access to various menus to seup the machine or use the machine's funcions. These menus can be accessed by pressing Menu. Refer to the following diagram. Menus available in Fax, Copy, or Scan mode vary. Default Value Service Manual 4-13 Samsung Electronics... - Page 62 Alignment & Adjustments Service Manual 4-14 Samsung Electronics...
- Page 63 Alignment & Adjustments Service Manual 4-15 Samsung Electronics...
- Page 64 Alignment & Adjustments Service Manual 4-16 Samsung Electronics...
- Page 65 Alignment & Adjustments Service Manual 4-17 Samsung Electronics...
-
Page 66: Machine Overview
4-18 Samsung Electronics m m m a a a n n n u u u a a a l l l s s s ) ) ) y y y o o o u u u P P P c c c o o o m m m... -
Page 67: Rear View
* The figure above shows an SCX-6345N with all available accessories. optional stacker & stapler network port optional stacker output tray optional stacker connection extension telephone socket (EXT) power switch telephone line socket (LINE) power receptacle USB port Service Manual 4-19 Samsung Electronics... -
Page 68: Control Panel Overview
4-20 Samsung Electronics m m m a a a n n n u u u a a a l l l s s s ) ) ) y y y o o o u u u P P P c c c o o o m m m... -
Page 69: Machine Setup Button
Close: closes the job status window and switches to previous view. 4.4.1.6 Status Status Description The machine is off-line. The machine is in Power Save mode. When data is received, or any button is pressed, it switches to on-line automatically. Service Manual 4-21 Samsung Electronics... -
Page 70: Touch Screen
4-22 Samsung Electronics m m m a a a n n n u u u a a a l l l s s s ) ) ) y y y o o o u u u P P P c c c o o o m m m... -
Page 71: Power Saver Button
When you press this button, the machine goes into interrupt mode which means it stops a printing job for urgent machine use. Note: Interrupt mode is resumed at default value (Off) after the machine is shut down or reset. Service Manual 4-23 Samsung Electronics... -
Page 72: Changing The Display Language
4-24 Samsung Electronics m m m a a a n n n u u u a a a l l l s s s ) ) ) y y y o o o u u u P P P c c c o o o m m m... -
Page 73: Setting Job Timeout
3. Login message appears, enter password with number keypad and press OK. 4. Press General tab. 5. Press down arrow to switch the screen, press Energy Saver. 6. Select appropriate option and time. 7. Press OK. Service Manual 4-25 Samsung Electronics... -
Page 74: Changing The Default Settings
4-26 Samsung Electronics m m m a a a n n n u u u a a a l l l s s s ) ) ) y y y o o o u u u P P P c c c o o o m m m... -
Page 75: Understanding The Keyboard
Note: If you enter the email address, then the keyboard for email pops up. After you enter the address, press OK to activate entered address. Press the arrow key on the side for rotating between From, To, CC, Bcc, Subject, Message in order. Service Manual 4-27 Samsung Electronics... -
Page 76: Service Mode
4-28 Samsung Electronics m m m a a a n n n u u u a a a l l l s s s ) ) ) y y y o o o u u u P P P c c c o o o m m m... - Page 77 Detail of each tab and items will be explained in the following chapters. 4.5.2.1 Logout Figure 2-2 General item window By pressing the Home button, exit Diagnostics mode. When exit Diagnostics mode, a popup window shall display. By default, Reset Counters is No, Reboot Copier is Yes. Service Manual 4-29 Samsung Electronics...
-
Page 78: Information Tab
4-30 Samsung Electronics m m m a a a n n n u u u a a a l l l s s s ) ) ) y y y o o o u u u P P P c c c o o o m m m... - Page 79 Alignment & Adjustments Service Manual 4-31 Samsung Electronics...
- Page 80 4-32 Samsung Electronics m m m a a a n n n u u u a a a l l l s s s ) ) ) y y y o o o u u u P P P c c c o o o m m m...
- Page 81 Tray 4 Firmware The items in the Software Version shall be same as those of Machine Status > Machine Infor > Machine Details > Software Version. 4.5.3.4 Usage Counters Figure 3-5 Usage Counter item window Service Manual 4-33 Samsung Electronics...
- Page 82 4-34 Samsung Electronics m m m a a a n n n u u u a a a l l l s s s ) ) ) y y y o o o u u u P P P c c c o o o m m m...
-
Page 83: Fault History Tab
Figure 4-1 Fault Log item window Fault log window shall display errors last error first. Figure 4-2 Fault Log item Clear All window Once user confirms to clear Fault Log, the list shall be empty. Service Manual 4-35 Samsung Electronics... - Page 84 4-36 Samsung Electronics m m m a a a n n n u u u a a a l l l s s s ) ) ) y y y o o o u u u P P P c c c o o o m m m...
- Page 85 Zero , Fault codes in the selected Fault Group having non zero counter shall be displayed When selected All , all Fault codes in the selected Fault Group shall be displayed. Display order of Fault code is upward. Service Manual 4-37 Samsung Electronics...
- Page 86 4-38 Samsung Electronics m m m a a a n n n u u u a a a l l l s s s ) ) ) y y y o o o u u u P P P c c c o o o m m m...
- Page 87 09 - 240 Drum PWM 09 - 140 Detack Bias Control 09 - 230 Transfer Roller Life Page Counter 05 - 700 ADF Roller Life Page Counter 05 - 710 ADF Rubber Pad Life Page Counter Service Manual 4-39 Samsung Electronics...
- Page 88 NVM name shall be displayed top of Default value string. When press OK, confirmation popup window shall displayed. Confirmation window shall display Touch OK to save the value or Cancel to return 4.5.5.1.2 NVM Initialization Figure 5-4 Copier item NVM Initialization window Service Manual 4-40 Samsung Electronics...
- Page 89 When press OK button, SR shall show the initialization progress status and result. When the result is get, pop up window shall be disappeared. When press Cancel button, return to the previous window 4.5.5.1.3 Engine/DADF Test Routines Figure 5-6 Copier item Engine/DADF Test Routines Find Component window Service Manual 4-41 Samsung Electronics...
- Page 90 Stop shall be enabled only when the selected item is running. Stop All shall be enabled when there is any running test item. Back button shall be disabled when there is any running test item. 4.5.5.2 Fax Figure 5-8 Fax item window Service Manual 4-42 Samsung Electronics...
- Page 91 For the behavior, refer to 4.5.5.1.1 Figure 5-10 Fax item NVM Read/Write Edit window For the behavior, refer to 4.5.5.1.1 4.5.5.2.2 NVM Initialize Figure 5-11 Fax item NVM Initialize Edit window For the behavior, refer to 4.5.5.1.2. Service Manual 4-43 Samsung Electronics...
- Page 92 4-44 Samsung Electronics m m m a a a n n n u u u a a a l l l s s s ) ) ) y y y o o o u u u P P P c c c o o o m m m...
- Page 93 Figure 5-15 Fax item Fax Routines Find window For the behavior, refer to 4.5.5.1.3 4.5.5.3 Network Figure 5-16 Network item window 4.5.5.3.1 NVM Initialization Figure 5-16 Network item NVM Initialization window For behavior, refer to 4.5.5.1.2 Service Manual 4-45 Samsung Electronics...
- Page 94 4-46 Samsung Electronics m m m a a a n n n u u u a a a l l l s s s ) ) ) y y y o o o u u u P P P c c c o o o m m m...
- Page 95 Alignment & Adjustments 4.5.5.4.2 Shading Test Figure 5-20 Other item Shading Test window 4.5.5.4.3 Scan Edge Test Figure 5-21Other item Scan Edge Test window 4.5.5.4.4 Memory Clear Figure 5-22Other item Memory Clear window Service Manual 4-47 Samsung Electronics...
- Page 96 Alignment & Adjustments 4.5.5.4.5 Print Report Figure 5-23Other item Print Report window 4.5.5.4.6 OEK S/N Sync. Figure 5-24 OEK S/N Sync. window Service Manual 4-48 Samsung Electronics...
- Page 97 Alignment & Adjustments Service Manual 4-49 Samsung Electronics...
-
Page 98: Consumables And Replacement Parts
4-50 Samsung Electronics m m m a a a n n n u u u a a a l l l s s s 4 4 4 y y y o o o u u u 5 5 5 c c c o o o m m m... -
Page 99: Clearing Memory
If you want to know the supplies' life within the machine, follow the next step. 1. Press Machine Setup on the control panel. 2. Press Machine Status. 3. Press down arrow to browse all the supply list, measurement, and remains. Service Manual 4-51 Samsung Electronics... -
Page 100: Clearing The Toner Empty Message
4-52 Samsung Electronics m m m a a a n n n u u u a a a l l l s s s - - - y y y o o o u u u 5 5 5 c c c o o o m m m... -
Page 101: Cleaning The Scan Unit
2. Open the scanner lid. 5. Close the scanner lid 3. Wipe the surface of the scanner glass and DADF glass until it is clean and dry. Service Manual 4-53 Samsung Electronics... -
Page 102: Maintaining The Toner Cartridge
4-54 Samsung Electronics m m m a a a n n n u u u a a a l l l s s s Y Y Y y y y o o o u u u z z z c c c o o o m m m... - Page 103 9. Close the front cover, then the side cover. 5. Remove the new toner cartridge from its bag. 6. Hold the toner cartridge by the handle and slowly insert the cartridge into the opening in the machine. Service Manual 4-55 Samsung Electronics...
- Page 104 4-56 Samsung Electronics m m m a a a n n n u u u a a a l l l s s s - - - y y y o o o u u u 5 5 5 c c c o o o m m m...
- Page 105 6. Thoroughly shake the drum cartridge side to side for five or six times. 9. Close the front cover, then the side cover. Note : If you do not reset the counter, Drum Warning may appear before the current drum cartridge's time is up. Service Manual 4-57 Samsung Electronics...
-
Page 106: Managing Your Machine From The Website
If you have connected your machine to a network and set up TCP/IP network parameters correctly, you can manage the machine via Samsung's SynchThru Web Service, an embedded web server. Use SynchThru Web Service to: View the machine's device information and check its current status. -
Page 107: Option Installing
4.7 Option Installing Your machine is a full-featured one that has been optimized to meet most of your printing needs. Recognizing that each user may have different requirements, however, Samsung makes several accessories available to enhance your machine's capabilities. This chapter includes:... - Page 108 2. Click the Windows Start menu. 3. For Windows 98/Me/NT 4.0/2000, select Settings and thenPrinters. 4 Select the Samsung SCX-6x45 Series PS printer. 5 Click the right mouse button on the machine icon and select Properties. 6. For Windows 98/Me, select Device Options. For Windows NT 4.0/2000/XP/2003, select Device Settings.
-
Page 109: Display Led And Error Messages
The machine is not in power saver mode button) Blue On The machine is in power saver mode Interrupt (LED button) Blue Off The machine is not in interrupt printing mode Blue On Then machine is in interrupt printing mode Service Manual 4-61 Samsung Electronics... -
Page 110: Error Message
4-62 Samsung Electronics m m m a a a n n n u u u a a a l l l s s s - - - y y y o o o u u u 5 5 5 c c c o o o m m m... - Page 111 Fuser error There is a problem in the fuser unit. Unplug the power cord and plug it back Fuser High Error Fuser Low Error Fuser unit error Service Manual 4-63 Samsung Electronics...
- Page 112 Monitor) in the cartridge is not properly connected. Invalid Drum cartridge. The drum cartridge you have installed is Install a Samsung-genuine drum not for your machine. cartridge, designed for your machine. Invalid Toner Cartridge The toner cartridge you have installed is Install a Samsung-genuine toner not for your machine.
- Page 113 Alignment & Adjustments Display Meaning Suggested solutions Non Genuine Drum, The drum cartridge installed is not a Install the Samsung-genuine drum Replace Drum genuine cartridge. cartridge. This message appears when you selected Continue at Non Genuine Drum, Replace Drum prompt.
- Page 114 The toner in the cartridge has run out. Replace the toner cartridge with a Toner1 The machine stops print job. Samsung-genuine toner cartridge. Toner Low The toner cartridge is almost empty. Ensure a replacement cartridge is in stock. Toner Page Count The toner page count is expired.
- Page 115 4. Cleaning-Frame Inside - Cleaning Kit : Mini Vaccum Cleaner. - Mal Affects : The toner can leak and pollute the interior, affecting the print quality. - Recommend an Engineer or highly experienced worker to clean. Service Manual 4-67 Samsung Electronics...
- Page 116 4-68 Samsung Electronics m m m a a a n n n u u u a a a l l l s s s - - - y y y o o o u u u 5 5 5 c c c o o o m m m...
- Page 117 Alignment & Adjustments 4.5.5.4.5 Print Report Figure 5-23Other item Print Report window 4.5.5.4.6 OEK S/N Sync. Figure 5-24 OEK S/N Sync. window Service Manual 4-48 Samsung Electronics...
-
Page 118: Disassembly And Reassembly
Service Manual Samsung Electronics m m m a a a n n n u u u a a a l l l s s s N N N y y y o o o u u u M M M c c c o o o m m m... -
Page 119: Screws Used In The Printer
Disassembly and Reassembly 5.1.1 Screws used in the printer Service Manual Samsung Electronics... - Page 120 Service Manual Samsung Electronics m m m a a a n n n u u u a a a l l l s s s N N N y y y o o o u u u M M M c c c o o o m m m...
- Page 121 Disassembly and Reassembly Service Manual Samsung Electronics...
- Page 122 Service Manual Samsung Electronics m m m a a a n n n u u u a a a l l l s s s N N N y y y o o o u u u M M M c c c o o o m m m...
-
Page 123: Customer Replaceable Units
If you do not want to replace the toner cartridge now you can select the Abort button. The machine will continue to operate but will NOT make copies or prints. 1. Open the right side cover Service Manual Samsung Electronics... - Page 124 The instructions that are packed with the new toner cartridge will tell you how to dispose of the used toner cartridge. WARNING: Only install the correct samsung Toner Cartridge in the machine. 5. Before unpacking the new toner cartridge, shake well to distribute the toner. Remove from packaging.
- Page 125 If, however, you have fitted a new toner cartridge without being instructed to do so by the machine display, the toner usage counters will need to be reset manually. This is done in the Access tools mode using the Supplies Management - Toner Cartridge Re-order Notification feature. Service Manual Samsung Electronics...
- Page 126 Service Manual Samsung Electronics m m m a a a n n n u u u a a a l l l s s s N N N y y y o o o u u u M M M c c c o o o m m m...
- Page 127 6. Hold the empy Drum Cartridge away from you to avoid spilling any toner residue and dispose of it according to the instructions contained in the new Drum Cartridge box. WARNING: Only install the correct samsung Drum Cartridge in the machine. 7. Unpack the new Drum Cartridge.
- Page 128 5-11 Samsung Electronics m m m a a a n n n u u u a a a l l l s s s N N N y y y o o o u u u M M M c c c o o o m m m...
- Page 129 WARNING: Ensure that you have the correct Staples your machine. Units for similar unit for your machine. Units for similar samsung machines may look the same but WILL samsung machines may look the same but NOT WORK. WILL NOT WORK.
-
Page 130: General Disassembly
5-13 Samsung Electronics m m m a a a n n n u u u a a a l l l s s s N N N y y y o o o u u u M M M c c c o o o m m m... - Page 131 Disassembly and Reassembly 4. Remove the screw cap of the side cover. 6. Take out the frame case. Screw cap 5. Remove the screw of the side cover. 7. Frame to the case, shown below. Service Manual 5-14 Samsung Electronics...
- Page 132 5-15 Samsung Electronics m m m a a a n n n u u u a a a l l l s s s N N N y y y o o o u u u M M M c c c o o o m m m...
- Page 133 Disassembly and Reassembly 12. Frame to the case, shown below. 14. Remove the two screws of the stand base by hand. 13. Remove the two screws. 15. Remove the five screws securing the rear cover ass y. Service Manual 5-16 Samsung Electronics...
- Page 134 5-17 Samsung Electronics m m m a a a n n n u u u a a a l l l s s s N N N y y y o o o u u u M M M c c c o o o m m m...
- Page 135 1. Pull the connector from the SET. 3. Release the stacker from the Finisher in the direction of arrow. 2. Pull the Finisher carefully from the SET with pushing 4. Use the latch to replace the staple unit the latch. Service Manual 5-18 Samsung Electronics...
- Page 136 5-19 Samsung Electronics m m m a a a n n n u u u a a a l l l s s s N N N y y y o o o u u u M M M c c c o o o m m m...
- Page 137 Disassembly and Reassembly 3. Open the front cover and remove the two screws. 5. Remove the two pins and six screws. 4. Remove the four screws. 6. Remove the three screws and unplug the three con- nectors. Service Manual 5-20 Samsung Electronics...
- Page 138 5-21 Samsung Electronics m m m a a a n n n u u u a a a l l l s s s N N N y y y o o o u u u M M M c c c o o o m m m...
- Page 139 Disassembly and Reassembly 5.3.6 PBA(Main BOARD) 1. Remove the one screw and pull the USB board. 3. Unplug the connectors from the main board and remove five screws. 2. Unplug the hook and pull the sub board. Service Manual 5-22 Samsung Electronics...
- Page 140 5-23 Samsung Electronics m m m a a a n n n u u u a a a l l l s s s N N N y y y o o o u u u M M M c c c o o o m m m...
-
Page 141: Transfer Roller
1. Push the latch in the two directions and pull the Transfer Roller. 5.3.9 Exit Roller 1. Remove the five screws and the exit cover. 2. Remove the four screws and pull the Exit Ass y in the direction of arrow. Service Manual 5-24 Samsung Electronics... -
Page 142: Lsu Unit
5-25 Samsung Electronics m m m a a a n n n u u u a a a l l l s s s N N N y y y o o o u u u M M M c c c o o o m m m... - Page 143 1. Remove the one screw, and release the one gear and 3. Remove the two screws. press in the yellow circle. 4. Release the MP Ass y from the SET in the direction 2. Remove the one screw and friction pad. of arrow. Service Manual 5-26 Samsung Electronics...
- Page 144 - Cover Parts (Refer to 5.3.1) 2. Open the Side Duplex Cover. 5. Lift the Upper Cover Unit. 3. Release the Transfer Roller, as shown below. 6. Remove the four screws securing the Exit Ass'y, as shown below. Service Manual 5-27 Samsung Electronics...
- Page 145 Ground Cable, as 11. Remove the Fuser Drive. shown below. 12. Remove the three Fixer securing the Clutchs and 9. Lift the LSU. then pull the all Clutchs, as shown below. Fixer Service Manual 5-28 Samsung Electronics...
- Page 146 15. Pull the Damper Units securing the both side of the Side Duplex Cover in the direction of arrow, as shown below. 18. Remove the one screw securing the Holder Pad Unit and remove it. Service Manual 5-29 Samsung Electronics...
- Page 147 19. Remove the four screws securing the MP Unit. 21. First turn over the frame, and then release the three Rollers, as shown below. 20. First lift the MP Unit, and then pull it in the direction of arrow, as shown below. Service Manual 5-30 Samsung Electronics...
-
Page 148: Troubleshooting
OP Panel - Main PBA error - LCD Panel error Refer to Indicate Ready or Error Massage Error Massage Power save <Chapter 4.8.2> Test Print printing Refer to "Solution Quality is of 6.2.3 Print Quality" Nomal? Service Manual Samsung Electronics... -
Page 149: Solution
Use only transparencies specifically designed for laser printers. Remove each the paper exit. transparency as it exits from the machine. Envelopes skew or fail to feed Ensure that the paper guides are against both sides of the envelopes. correctly. Service Manual Samsung Electronics... -
Page 150: Printing Problems
Check the power cord connections. Check the power does not print. switch and the power source. The machine is not selected as the Select Samsung SCX-6x45 Series PCL 6 as your default printer. default printer in your Windows. Check the machine for the following: •... - Page 151 Turn on Print As Image from the Acrobat some parts are printing options. missing in graphics, Note: It Will take longer to print when you print a text or illustrations. PDF file as an image. Service Manual Samsung Electronics...
-
Page 152: Printing Quality Problems
Service Manual Samsung Electronics m m m a a a n n n u u u a a a l l l s s s H H H y y y o o o u u u j j j c c c o o o m m m... - Page 153 Misformed characters • If characters are improperly formed and producing hollow images, the paper stock may be too slick. Try a different paper. • If characters are improperly formed and producing a wavy effect, the scanner unit may need service. For service, contact a service representative. Service Manual Samsung Electronics...
- Page 154 Service Manual Samsung Electronics m m m a a a n n n u u u a a a l l l s s s H H H y y y o o o u u u j j j c c c o o o m m m...
- Page 155 You can set this on a next few sheets option through Printer Settings Utility or Printer Tab in printer driver's properties. Refer to or loose toner, light the Software Section for detail. print, or contamination occurs. Service Manual Samsung Electronics...
-
Page 156: Copying Problems
Service Manual Samsung Electronics m m m a a a n n n u u u a a a l l l s s s H H H y y y o o o u u u j j j c c c o o o m m m... -
Page 157: Scanning Problems
• "Invalid handle." • The USB cable may be improperly connected or the power may be off. • "Scanning has failed." • Do not use parallel and USB cables at the same time. Service Manual 6-10 Samsung Electronics... -
Page 158: Network Scan Problems
I cannot view the Help file. To view the Help file, you need to have Internet Explorer 4 service pack 2 or above. I cannot use the Samsung Check your operating system. Supporting operating systems are Windows Network Scan Manager 98/Me/NT 4.0/2000/XP/2003. -
Page 159: Fax Problems
You may have chosen the wrong paper settings in the user option setting. bottom of each page or on other For details about paper settings. pages, with a small strip of text at the top. Service Manual 6-12 Samsung Electronics... -
Page 160: Common Windows Problems
6-13 Samsung Electronics m m m a a a n n n u u u a a a l l l s s s H H H y y y o o o u u u j j j c c c o o o m m m... -
Page 161: Common Linux Problems
If this is the case, you should wait for completion of the current job or should press Release port button, if you are sure that the present port's owner is not functioning properly. Service Manual 6-14 Samsung Electronics... - Page 162 6-15 Samsung Electronics m m m a a a n n n u u u a a a l l l s s s H H H y y y o o o u u u j j j c c c o o o m m m...
-
Page 163: Common Macintosh Problems
3. If not, check the F 71 on SMPS. [Solution] 1. 24V power and CCFL inverter harness connection are on normal, replace OPE_Main first and retry. 2. Keep on problem with 24V on, replace the Main controller. 3. Replace the SMPS. Service Manual 6-16 Samsung Electronics... - Page 164 6-17 Samsung Electronics m m m a a a n n n u u u a a a l l l s s s 7 7 7 y y y o o o u u u L L L c c c o o o m m m...
- Page 165 (the drum cartridge frame) 4. No. 4. : Open the front cover and check ribs that corresponds to the position of the voids. Remove if found. 5. If the problems are not solved, replace the drum cartridge. Service Manual 6-18 Samsung Electronics...
- Page 166 2. The drum cartridge is not guaranteed if using recycle paper. 3. Replace the drum cartridge when the life of it has been ended. 4. Clean the bushing part of the transfer roller. 5. If the problem is still not solved, replace the drum cartridge. Service Manual 6-19 Samsung Electronics...
- Page 167 Also printer name is not displayed in the menu of tray icon. [Solution] If IP address or USB port name for model A is linked to printer port of model B, Smart Panel for model B works improperly because model B is not connected. Service Manual 6-20 Samsung Electronics...
-
Page 168: Troubleshooting Flowchart
Troubleshooting 6.2.13 Troubleshooting flowchart Service Manual 6-21 Samsung Electronics... - Page 169 Troubleshooting Service Manual 6-22 Samsung Electronics...
- Page 170 Troubleshooting Service Manual 6-23 Samsung Electronics...
- Page 171 Troubleshooting Service Manual 6-24 Samsung Electronics...
- Page 172 Troubleshooting Service Manual 6-25 Samsung Electronics...
- Page 173 Troubleshooting Service Manual 6-26 Samsung Electronics...
- Page 174 Troubleshooting Service Manual 6-27 Samsung Electronics...
- Page 175 Troubleshooting Service Manual 6-28 Samsung Electronics...
- Page 176 Troubleshooting Service Manual 6-29 Samsung Electronics...
- Page 177 Troubleshooting Service Manual 6-30 Samsung Electronics...
- Page 178 Troubleshooting Service Manual 6-31 Samsung Electronics...
- Page 179 Troubleshooting Service Manual 6-32 Samsung Electronics...
- Page 180 Troubleshooting Service Manual 6-33 Samsung Electronics...
- Page 181 Troubleshooting Service Manual 6-34 Samsung Electronics...
- Page 182 Troubleshooting Service Manual 6-35 Samsung Electronics...
- Page 183 Troubleshooting Service Manual 6-36 Samsung Electronics...
- Page 184 Troubleshooting Service Manual 6-37 Samsung Electronics...
- Page 185 Troubleshooting Service Manual 6-38 Samsung Electronics...
- Page 186 Troubleshooting Service Manual 6-39 Samsung Electronics...
- Page 187 Exploded Views & Parts List 7. Exploded Views and Parts List(SCX-6345N/XAA) Contents Contents 7.1 Main 7.15 DADF Sub 7-16 7.2 Cover Unit 7.16 DADF Ass'y 7-17 7.3 Main Frame 7.17 Cassette 7-18 7.4 Base Frame 7.18 SCF 7-19 7.5 Main Drive 7.19 Fax...
-
Page 188: Main
Exploded Views & Parts List 7.1 Main Service Manual... - Page 189 Exploded Views & Parts List Main Parts List SA : SERVICE AVAILABLE, SNA : SERVICE not AVAILABLE Drawer# SEC_Code Description Location Service 7.1-0 SCX-6345N/XAA 7.1-1 JC96-03552B ELA HOU-FRAME MAIN Z4545 7.1-2 JC59-00025A UNIT-LSU Z4546 7.1-3 JB39-00065A CBF HARNESS-DRIVER GND 7.1-4...
- Page 190 Exploded Views & Parts List Main Parts List SA : SERVICE AVAILABLE, SNA : SERVICE not AVAILABLE Drawer# SEC_Code Description Location Service 7.1-40-3 JC61-00744A HOLDER-M-ADF RUBBER UPPER 7.1-40-4 JC63-01085A SHEET-GUIDE MP 7.1-40-5 JB73-00052A RMO-ADF RUBBER Z4373 7.1-40-6 JC73-00079A RPR-SEAL SIDE Z4563 7.1-40-7 JC73-00235A...
-
Page 191: Cover Unit
Exploded Views & Parts List 7.2 Cover Unit Service Manual... - Page 192 Exploded Views & Parts List Cover Unit Parts List SA : SERVICE AVAILABLE, SNA : SERVICE not AVAILABLE Drawer# SEC_Code Description Location Service 7.2-0 JC97-02285B MEA UNIT-COVER 7.2-1 JC97-02258B MEA UNIT-COVER TOP Z4583 7.2-1-1 JC63-00731B COVER-EXIT REAR Z4584 7.2-1-2 JC63-00739B COVER-GUIDE STACKER 7.2-1-3 6107-000014...
-
Page 193: Main Frame
Exploded Views & Parts List 7.3 Main Frame Service Manual... - Page 194 Exploded Views & Parts List Main Frame Parts List SA : SERVICE AVAILABLE, SNA : SERVICE not AVAILABLE Drawer# SEC_Code Description Location Service 7.3-0 JC96-03552B ELA HOU-FRAME MAIN Z4545 7.3-1 JC61-01315A FRAME-M_MAIN 7.3-2 JC61-01360A BRACKET-P-SUP SCAN F 7.3-3 JC63-00801A GROUND-P-OPE SIDE 7.3-4 JC63-00802A GROUND-P-OPC CONTACT...
- Page 195 Exploded Views & Parts List Main Frame Parts List SA : SERVICE AVAILABLE, SNA : SERVICE not AVAILABLE Drawer# SEC_Code Description Location Service 7.3-21-1 JC61-01357A HOUSING-M_TERMINAL 7.3-21-2 JC39-00544A CBF HARNESS-HVPS(8P) Z4574 7.3-21-3 JC96-04056A ELA HOU-VARISTOR Z4600 7.3-21-4 JC70-40912A ICT-SHAFT HV LARGE O1100 7.3-21-5 JC66-00979A...
-
Page 196: Base Frame
Exploded Views & Parts List 7.4 Base Frame Service Manual 7-10... - Page 197 Exploded Views & Parts List Base Frame Parts List SA : SERVICE AVAILABLE, SNA : SERVICE not AVAILABLE Drawer# SEC_Code Description Location Service 7.4-0 JC96-03746B ELA HOU-BASE FRAME 7.4-1 JC61-01337A BASE-P-PLATE 7.4-2 JC61-01312A PLATE-P-BEAM BASE 7.4-3 JC61-01342B HOUSING-BASE LEFT 7.4-4 JC61-01314A GUIDE-P-SHIELD SMPS 7.4-5...
- Page 198 Exploded Views & Parts List Base Frame Parts List SA : SERVICE AVAILABLE, SNA : SERVICE not AVAILABLE Drawer# SEC_Code Description Location Service 7.4-34 JC61-01338A BASE-P-PLATE REAR 7.4-35 JC96-03735A ELA HOU-SIZE SENSOR Z4759 7.4-35-1 JC96-02127A ELA HOU-CST SENSOR HAWK16 Z2263 7.4-35-2 JC61-01343A HOUSING-M_SIZE SENSOR...
-
Page 199: Main Drive
Exploded Views & Parts List 7.5 Main Drive Service Manual 7-13... - Page 200 Exploded Views & Parts List Main Drive Parts List SA : SERVICE AVAILABLE, SNA : SERVICE not AVAILABLE Drawer# SEC_Code Description Location Service 7.5-0 JC96-03528A ELA HOU-DRIVE MAIN Z4549 7.5-1 JC61-01368A BRACKET-P-MAIN 7.5-2 JC31-00038A MOTOR DC-MAIN(BLDC) M0011 7.5-3 JC61-01370A BRACKET-P-TONER MOTOR 7.5-4 JC96-03545A ELA HOU-TONER DRIVE...
-
Page 201: Exit Drive
Exploded Views & Parts List 7.6 Exit Drive Service Manual 7-15... - Page 202 Exploded Views & Parts List Exit Drive Parts List SA : SERVICE AVAILABLE, SNA : SERVICE not AVAILABLE Drawer# SEC_Code Description Location Service 7.6-0 JC96-03537A ELA HOU-DRIVE FUSER Z4548 7.6-1 JC61-01371A BRACKET-P-FUSER EXIT 7.6-2 JC31-00043A MOTOR STEP-SCAN Z4677 7.6-3 JC31-00020B MOTOR STEP-MAIN M2161 7.6-4...
-
Page 203: Exit Ass'y
Exploded Views & Parts List 7.7 Exit Ass'y Service Manual 7-17... - Page 204 Exploded Views & Parts List Exit Ass'y Parts List SA : SERVICE AVAILABLE, SNA : SERVICE not AVAILABLE Drawer# SEC_Code Description Location Service 7.7-0 JC96-03529A ELA HOU-EXIT Z4547 7.7-1 JC61-01302A GUIDE-M_EXIT LOWER 7.7-2 0604-001095 PHOTO-INTERRUPTER P0013 7.7-3 JC63-00821A ABSORBER-DAMPER S 7.7-4 JC66-01016A ROLLER-EXIT_LOWER...
-
Page 205: Fuser
Exploded Views & Parts List 7.8 Fuser Service Manual 7-19... - Page 206 Exploded Views & Parts List Fuser Parts List SA : SERVICE AVAILABLE, SNA : SERVICE not AVAILABLE Drawer# SEC_Code Description Location Service 7.8-0 JC96-03724A ELA HOU-FUSER Z4622 7.8-1 JC63-00756A COVER-M UPPER FUSER 7.8-2 JC97-02294A MEA UNIT-CLAW Z4623 7.8-2-1 6107-001257 SPRING-ES Z4544 7.8-2-2 JC61-01383A...
- Page 207 Exploded Views & Parts List Fuser Parts List SA : SERVICE AVAILABLE, SNA : SERVICE not AVAILABLE Drawer# SEC_Code Description Location Service 7.8-30 JC63-00755A COVER-M LOWER FUSER 7.8-31 JC68-01581A LABEL(P)-CAUTION HOT Z4601 7.8-32 JC63-00819A GROUND-P-PR 7.8-33 JC63-00761A COVER-M_GROUND 7.8-34 JC68-01134A LABEL(P)-BLANK(FUSER) Z4600 7.8-35...
-
Page 208: Pick Up Ass°Øy
Exploded Views & Parts List 7.9 Pick Up Ass’y Service Manual 7-22... - Page 209 Exploded Views & Parts List Pick Up Ass’y Parts List SA : SERVICE AVAILABLE, SNA : SERVICE not AVAILABLE Drawer# SEC_Code Description Location Service 7.9-1 JC61-01298A FRAME-M_BASE PICK UP 7.9-3 JC63-00743A GROUND-P-SHAFT PU 7.9-4 JC61-01350A LEG-M_ACT NO PAPER 7.9-5 JC61-01299A GUIDE-M_UPPER PICK UP 7.9-6 JC66-00942A...
-
Page 210: Side Duplex
Exploded Views & Parts List 7.10 Side Duplex Service Manual 7-24... - Page 211 Exploded Views & Parts List Side Duplex Parts List SA : SERVICE AVAILABLE, SNA : SERVICE not AVAILABLE Drawer# SEC_Code Description Location Service 7.10-0 JC96-03525B ELA HOU-SIDE DUPLEX Z4647 7.10-1 JC63-00775B COVER-SIDE Z4648 7.10-2 JC97-02264B MEA UNIT-TRAY Z4649 7.10-3 JC96-03532A ELA HOU-DUPLEX Z4717 7.10-3-1...
- Page 212 Exploded Views & Parts List Side Duplex Parts List SA : SERVICE AVAILABLE, SNA : SERVICE not AVAILABLE Drawer# SEC_Code Description Location Service 7.10-27 JC68-01246B LABEL(R)-GUIDE_DUPLEX 7.10-28 JC61-70910A SPRING ETC-RAIL Z4244 7.10-29 0604-001095 PHOTO-INTERRUPTER P0013 7.10-30 JC97-02687A MEA-ACTUATOR_DUPLEX Z4764 7.10-30-1 JC61-01335A HOLDER-M_ACTUATOR DP 7.10-30-2...
-
Page 213: Mp Unit
Exploded Views & Parts List 7.11 MP Unit Service Manual 7-27... - Page 214 Exploded Views & Parts List MP Unit Parts List SA : SERVICE AVAILABLE, SNA : SERVICE not AVAILABLE Drawer# SEC_Code Description Location Service 7.11-0 JC96-03557A ELA HOU-MP Z4561 7.11-1 JC61-01351A FRAME-M_MP LOWER 7.11-2 JC61-01352A FRAME-M_MP TOP 7.11-3 JC96-03533A ELA HOU-MP PICK UP Z4767 7.11-3-1 JC61-01410A...
-
Page 215: Mp Tray
Exploded Views & Parts List 7.12 MP Tray Service Manual 7-29... - Page 216 Exploded Views & Parts List MP Tray Parts List SA : SERVICE AVAILABLE, SNA : SERVICE not AVAILABLE Drawer# SEC_Code Description Location Service 7.12-0 JC97-02264B MEA UNIT-TRAY Z4649 7.12-1 JC63-00746B TRAY-COVER LOWER 7.12-2 JG66-40003A GEAR-PINION O1127 7.12-3 JC72-01005B PMO-SIDE GUIDE MP(L) G2299 7.12-4 JC72-01006B...
-
Page 217: Ope(Scx-6345N)
Exploded Views & Parts List 7.13 OPE(SCX-6345N) Service Manual 7-31... - Page 218 Exploded Views & Parts List OPE(SCX-6345N) Parts List SA : SERVICE AVAILABLE, SNA : SERVICE not AVAILABLE Drawer# SEC_Code Description Location Service 7.13-0 JC96-03546C ELA HOU-OPE 7.13-1 JC96-03753C ELA HOU-OPE COVER Z4720 7.13-1-1 JC63-01212A COVER-OPE 7.13-1-2 JC64-00287A KEY-JOB_STATUS Z4740 7.13-1-3 JC67-00209A LENS-STATUS 7.13-1-4...
-
Page 219: Platen Ass'y
Exploded Views & Parts List 7.14 Platen Ass'y Service Manual 7-33... - Page 220 Exploded Views & Parts List Platen Ass'y Parts List SA : SERVICE AVAILABLE, SNA : SERVICE not AVAILABLE Drawer# SEC_Code Description Location Service 7.14-0 JC96-03550B ELA HOU-PLATEN Z4656 7.14-2 JC96-03548B ELA HOU-SCAN LOWER Z4657 7.14-2-1 JC63-00767B COVER-SCAN LOWER 7.14-2-2 JC96-03547A ELA HOU-SCAN MOTOR Z4768 7.14-2-2-1...
- Page 221 Exploded Views & Parts List Platen Ass'y Parts List SA : SERVICE AVAILABLE, SNA : SERVICE not AVAILABLE Drawer# SEC_Code Description Location Service 7.14-3-4 JC68-00749A LABEL(P)-SHEET SHADING(B) 7.14-3-5 JB70-00148A IPR-HOLDER GLASS Z4327 7.14-3-6 JC97-02267B MEA UNIT-DUMMY UPPER Z4658 7.14-3-6-1 JC63-00758B COVER-ADF GLASS 7.14-3-6-2 JC68-01622B...
-
Page 222: Dadf Sub
Exploded Views & Parts List 7.15 DADF Sub Service Manual 7-36... - Page 223 Exploded Views & Parts List DADF Sub Parts List SA : SERVICE AVAILABLE, SNA : SERVICE not AVAILABLE Drawer# SEC_Code Description Location Service 7.15-0 JC96-03579B ELA HOU-DADF SUB Z4659 7.15-1 JC97-01844C MEA UNIT-COVER OPEN Z4772 7.15-1-1 JC63-00195B COVER-OPEN Z4660 7.15-1-2 JC72-01256B PMO-LEVER OPEN 7.15-1-3...
- Page 224 Exploded Views & Parts List DADF Sub Parts List SA : SERVICE AVAILABLE, SNA : SERVICE not AVAILABLE Drawer# SEC_Code Description Location Service 7.15-5-2 JC66-00958A LATCH-M_ARM FRT 7.15-5-3 JC61-01307B STOPPER-M_PAPER REAR 7.15-5-4 JC61-00788A GUIDE-M_DOC SENSOR 7.15-5-5 JC61-00482A SPRING ETC-PICKUP P2913 7.15-6 JC97-01843A MEA UNIT-GUIDE DUPLEX...
- Page 225 Exploded Views & Parts List DADF Sub Parts List SA : SERVICE AVAILABLE, SNA : SERVICE not AVAILABLE Drawer# SEC_Code Description Location Service 7.15-36 JC92-01691A PBA SUB-DADF Z4795 7.15-37 JC39-00241A CBF HARNESS-MOTOR M2053 7.15-38 JC72-01249A PMO-ACTUATOR SCAN S0055 7.15-39 JB61-00076A SPRING ETC-TORSION DOC (CC2-F) O1013 7.15-40...
-
Page 226: Dadf Ass'y
Exploded Views & Parts List 7.16 DADF Ass'y 2-10 2-11 1-11 1-10 1-12 1-18 1-13 1-14 1-16 1-19 1-15 1-17 Service Manual 7-40... - Page 227 Exploded Views & Parts List DADF Ass'y Parts List SA : SERVICE AVAILABLE, SNA : SERVICE not AVAILABLE Drawer# SEC_Code Description Location Service 7.16-0 JC96-03553B ELA HOU-DADF Z4665 7.16-1 JC96-03554B ELA HOU-COVER PLATEN Z4666 7.16-1-1 JC63-00772B COVER-PLATEN 7.16-1-2 JC61-00746B GUIDE-EXTENTION 7.16-1-3 JC72-01251B PMO-EXTENTION PLATEN...
-
Page 228: Cassette
Exploded Views & Parts List 7.17 Cassette 3 10 Service Manual 7-42... - Page 229 Exploded Views & Parts List Cassette Parts List SA : SERVICE AVAILABLE, SNA : SERVICE not AVAILABLE Drawer# SEC_Code Description Location Service 7.17-0 JC97-02273B MEA UNIT-CASSETTE Z4551 7.17-1 JC61-01411A FRAME-M_CASSETTE Z4683 7.17-2 JC63-00782B COVER-CASSETTE 7.17-3 JC61-01413A GUIDE-P-SIDE LEFT Z4684 7.17-4 JC67-00123A CAP-M_HANDLE LEFT Z4714...
-
Page 230: Scf
Exploded Views & Parts List 7.18 SCF Service Manual 7-44... - Page 231 Exploded Views & Parts List SCF Parts List SA : SERVICE AVAILABLE, SNA : SERVICE not AVAILABLE Drawer# SEC_Code Description Location Service 7.18-0 JC96-03530B ELA UNIT-SCF; Option Unit 7.18-1 JC61-01333A FRAME-P_TOPSCF 7.18-2 JC63-00771B COVER-M_FRONTSCF 7.18-3 JC61-01312A PLATE-P-BEAM BASE 7.18-4 JC61-01397B BASE-M_LEFTSCF 7.18-5 JC97-02290A...
- Page 232 Exploded Views & Parts List SCF Parts List SA : SERVICE AVAILABLE, SNA : SERVICE not AVAILABLE Drawer# SEC_Code Description Location Service 7.18-23 JC63-00754A SHEET-GUIDEFILMSCF 7.18-24 C61-01325A GUIDE-M_PULOWERSCF 7.18-25 JC61-01423A BRACKET-P-ARM FRIC 7.18-26 6107-001257 SPRING-ES Z4626 7.18-27 6107-001262 SPRING-TS 7.18-28 JC66-00959A LEVER-M_ARM FRICTION Z4613...
- Page 233 Exploded Views & Parts List SCF Parts List SA : SERVICE AVAILABLE, SNA : SERVICE not AVAILABLE Drawer# SEC_Code Description Location Service 7.18-58-6 JC66-00967A GEAR-M_PUIDLEASCF 7.18-58-7 JC66-00968A GEAR-M_PUIDLECSCF 7.18-58-8 JC72-00825A PMO-IMPELLER_DRV O1103 7.18-59 JC63-00770B COVER-M_REARSCF 7.18-60 JC97-02273B MEA UNIT-CASSETTE Z4551 7.18-61 JC61-01323A FRAME-P_BOTTOMSCF...
- Page 234 Exploded Views & Parts List 7.19 Fax Unit Service Manual 7-48...
-
Page 235: Fax
Exploded Views & Parts List Fax Unit Parts List SA : SERVICE AVAILABLE, SNA : SERVICE not AVAILABLE Drawer# SEC_Code Description Location Service 7.19-0 JC96-04081B ELA HOU-FAX; Option Unit 7.19-1 JC63-00822B COVER-M_LIUUPPER 7.19-2 JC63-00823B COVER-M_LIUBOTTOM 7.19-3 JC61-01396A BRACKET-P_LIU 7.19-4 JC92-01699A PBASUB-FAX_PARALLE 7.19-5 6003-000221... -
Page 236: Main
Exploded Views & Parts List 7.20-1 Main Service Manual 7-50... -
Page 237: Finisher
Exploded Views & Parts List Main Parts List SA : SERVICE AVAILABLE, SNA : SERVICE not AVAILABLE Drawer# SEC_Code Description Location Service 7.20-1-0 JC96-03908C ELA HOU-FINISHER; Option Unit 7.20-1-1 FRAME UNIT 7.20-1-2 STACKER UNIT 7.20-1-3 EXTENTION TRAY UNIT 7.20-1-4 JC81-03773A EJECTOR UNIT 7.20-1-5 COMPILE UNIT... -
Page 238: Frame Unit
Exploded Views & Parts List 7.20-2 Frame Unit Service Manual 7-52... - Page 239 Exploded Views & Parts List Frame Unit Parts List SA : SERVICE AVAILABLE, SNA : SERVICE not AVAILABLE Drawer# SEC_Code Description Location Service 7.20-2-0 FRAME UNIT 7.20-2-1 ASSY:SIDEPLATE:FRONT 7.20-2-2 ASSY:SIDEPLATE:REAR 7.20-2-3 BASE:LOWER 7.20-2-4 JC81-03487A AS-COVER TOP 7.20-2-5 STAY:DUPLEX GUIDE 7.20-2-6 JC81-03767A AS-COVER SCAN DUMMY 7.20-2-7...
-
Page 240: Stacker Unit
Exploded Views & Parts List 7.20-3 Stacker Unit Service Manual 7-54... - Page 241 Exploded Views & Parts List Stacker Unit Parts List SA : SERVICE AVAILABLE, SNA : SERVICE not AVAILABLE Drawer# SEC_Code Description Location Service 7.20-3-0 STACKERUNIT 7.20-3-1 JC81-03472A AS-TRAYSTACKER 7.20-3-2 STAY:STACKER 7.20-3-3 SIDEFRAME:STACKER 7.20-3-4 ROLLER:STACKER 7.20-3-5 LEAFSPRING:EARTH 7.20-3-6 SHIELD:STACKER 7.20-3-7 0604-001095 PISENSOR:GP1S73P2 P0013 7.20-3-8...
-
Page 242: Extension Tray Unit
Exploded Views & Parts List 7.20-4 Extension Tray Unit 1-10 1-11 1-13 1-12 1-8 1-10 1-16 1-12 1-11 1-13 1-11 1-13 1-12 1-12 1-11 1-13 1-13 1-12 1-12 1-13 Service Manual 7-56... - Page 243 Exploded Views & Parts List Extension Tray Unit Parts List SA : SERVICE AVAILABLE, SNA : SERVICE not AVAILABLE Drawer# SEC_Code Description Location Service 7.20-4-0 EXTENTIONTRAYUNIT 7.20-4-1 JC81-03769A AS-SUPPFINGERASSY_F 7.20-4-1-1-1 JC81-03483A AS-TRAYBERO 7.20-4-1-1-2 BKT:TRAY:BERO:ASSY 7.20-4-1-1-3 JC81-03494A AS-RACKPINIONZ18 7.20-4-1-1-4 SHAFT:RACKPINION 7.20-4-1-1-5 PARALLELPIN:2x10 7.20-4-1-1-6 JC81-03521A...
-
Page 244: Ejector Unit
Exploded Views & Parts List 7.20-5 Ejector Unit Service Manual 7-58... - Page 245 Exploded Views & Parts List Ejector Unit Parts List SA : SERVICE AVAILABLE, SNA : SERVICE not AVAILABLE Drawer# SEC_Code Description Location Service 7.20-5-0 JC81-03773A AS-EJECTORUNITASSY 7.20-5-1 FRMAE:FRONT:EJECT 7.20-5-2 T-SPRING:LATCH:SCU 7.20-5-3 HOOK:CAM:EJECT 7.20-5-4 JC81-03526A AS-GEARCAMSCU 7.20-5-5 E-RING:4 7.20-5-6 JC81-03495A AS-SPURGEARZ19 7.20-5-7 ASSY:BKT:DRIVING:EJECT 7.20-5-8...
- Page 246 Exploded Views & Parts List Ejector Unit Parts List SA : SERVICE AVAILABLE, SNA : SERVICE not AVAILABLE Drawer# SEC_Code Description Location Service 7.20-5-42 FRAME:RETURN:EJECT 7.20-5-43 FRAME:REAR:EJECT 7.20-5-44 ROTATOR:CAM:SCU 7.20-5-45 HOOK:SPRING:SCU 7.20-5-46 E-SPRING:CLUTCH:SCU 7.20-5-47 JC81-03772A AS-EJTBELTSUBASSY 7.20-5-48 SHAFT:BELTPULLEY:EJECT 7.20-5-49 JC61-00423A BUSH-6_D B0025 Service Manual...
-
Page 247: Compile Unit
Exploded Views & Parts List 7.20-6 Compile Unit 13-4 10-2 10-1 14-2 13-4 13-3 13-2 13-2 14-1 13-4 13-1 14-4 13-7 13-5 14-3 13-6 13-6 13-8 13-8 13-7 13-9 13-9 13-12 13-11 13-12 13-11 13-10 13-10 13-14 13-14 13-9 13-9 13-15 13-15 13-13... - Page 248 Exploded Views & Parts List Compile Unit Parts List SA : SERVICE AVAILABLE, SNA : SERVICE not AVAILABLE Drawer# SEC_Code Description Location Service 7.20-6-0 COMPILEUNIT 7.20-6-1 COVER:COMPILE:UPPER 7.20-6-2 SHAFT:PADDLE 7.20-6-3 E-RING:3 7.20-6-4 JC61-00424A BUSH-4_D K2867 7.20-6-5 ACTUATOR:HOME:PADDLE 7.20-6-6 JC81-03482A AS-PADDLECOMPILE 7.20-6-7 JC81-03510A AS-GEARPADDLEZ56...
-
Page 249: Feed Unit
Exploded Views & Parts List 7.20-7 Feed Unit Service Manual 7-63... - Page 250 Exploded Views & Parts List Feed Unit Parts List SA : SERVICE AVAILABLE, SNA : SERVICE not AVAILABLE Drawer# SEC_Code Description Location Service 7.20-7-0 FEEDUNIT 7.20-7-1 GUIDE:EXIT:UPPER:ASSY 7.20-7-2 ACTUATOR:FEED 7.20-7-3 T-SPRING:ACTUATOR:FEED 7.20-7-4 LEAFSPRING:FEED 7.20-7-5 ROLLER:IDLE:FEED 7.20-7-6 0604-001095 PHOTO-INTERRUPTER P0013 7.20-7-7 JC67-00125A ANTI-STATICBRUSH Z4715...
- Page 251 Exploded Views & Parts List Feed Unit Parts List SA : SERVICE AVAILABLE, SNA : SERVICE not AVAILABLE Drawer# SEC_Code Description Location Service 7.20-7-44 BKT:MOTOR:FEED:EXIT 7.20-7-45 JC81-03479A AS-MOTORHBASSY 7.20-7-46 ASSY:M/H:MIDSNR 7.20-7-47 JC81-03516A AS-BELTB30S2M244 7.20-7-48 JC81-03485A AS-ROLLERENT 7.20-7-49 JC81-03515A AS-PULLEYT33S2M 7.20-7-50 BKT:MOTOR:FEED:ENT 7.20-7-51 JC81-03478A...
-
Page 252: System Block Diagram
Block diagram 8. Block Diagram 8.1 System Block Diagram Service Manual Samsung Electronics... -
Page 253: Dadf Block Diagram
Block diagram 8.2 DADF Block Diagram Service Manual Samsung Electronics... -
Page 254: Dadf Control Block Diagram
Block diagram 8.3 DADF Control Block Diagram Service Manual Samsung Electronics... -
Page 255: Connection Diagram
Connection Diagram 9. Connection Diagram 9.1 System Connection Diagram CN57 OPE CN54 MODEM CN53 SCAN IF 1 CN59 SCAN IF 2 CN47 CN41 SERVO CN47 FDI Service Manual Samsung Electronics... -
Page 256: Scf Connection Diagram
Service Manual Samsung Electronics m m m a a a n n n u u u a a a l l l s s s _ _ _ y y y o o o u u u f f f c c c o o o m m m... -
Page 257: Dadf Connection Diagram
Connection Diagram 9.3 DADF Connection Diagram Service Manual Samsung Electronics... -
Page 258: Op Main Connect Diagram
Service Manual Samsung Electronics m m m a a a n n n u u u a a a l l l s s s _ _ _ y y y o o o u u u f f f c c c o o o m m m... - Page 259 Connection Diagram Service Manual Samsung Electronics...
-
Page 260: Summary Of The Finisher Unit
10-1 Samsung Electronics m m m a a a n n n u u u a a a l l l s s s C C C y y y o o o u u u 7 7 7 c c c o o o m m m... -
Page 261: System Configuration
Finisher Unit 10.2 System Configuration FINISHER FINISHER Service Manual 10-2 Samsung Electronics... -
Page 262: Specification
< Electrical Connection > (1) Control command : 3.3V (2) Connection : D-Sub Connector (Rear side) (3) Control specification : Gradco I/F Specification for Samsung < Power Supply > (1) Power Supply : Engine supplies 24V / 5V / 3.3V to Finisher (2) Input Power : 24V±10 , 5 ±5 , 3.3 ±5... - Page 263 Finisher Unit 10.3.4 Media (1) Paper orientation (2) Paper Size : Length (148.357mm) Width (98.216mm) (3) Paper Weight : 60.163g/ 16.53lb Service Manual 10-4 Samsung Electronics...
-
Page 264: Performance
10-5 Samsung Electronics m m m a a a n n n u u u a a a l l l s s s C C C y y y o o o u u u 7 7 7 c c c o o o m m m... - Page 265 3) It is out of spec that paper curl increasing by the time passing. <Curl measurement method > Media : Test paper Environment : Test environment Method : Measure the curl of 10 sheets on the flat board (grass) immediately after printed out, Service Manual 10-6 Samsung Electronics...
- Page 266 (Simplex / Duplex) - Registration and skew from Engine 3.0 mm - Standard test pattern of printing : Samsung's Printing Pattern 10.4.4 Stapling 10.4.4.1 Printing orientation (This finisher can't staple on a suitable position if printing direction is not as follows.)
- Page 267 Finisher Unit 10.4.4.2 Position of stapling 10.4.5 Machine life : 1,000,000 sheets or 5 years (Excluding Periodical replacement part) Service Manual 10-8 Samsung Electronics...
-
Page 268: Network Printer
11-1 Samsung Electronics m m m a a a n n n u u u a a a l l l s s s W W W y y y o o o u u u b b b c c c o o o m m m... -
Page 269: Printer Connection Method
(SW + HW) (Printer SW only) - PHY Board Type PHY B'd Printer Main B'd (HW only) (Printer + Network SW) - Network Printer on-board Type Printer Main B'd (Printer + Network SW & HW) Service Manual 11-2 Samsung Electronics... - Page 270 11-3 Samsung Electronics m m m a a a n n n u u u a a a l l l s s s W W W y y y o o o u u u b b b c c c o o o m m m...
- Page 271 Network Printer Server - Network Card (NPC3H) ML-3561N CLP-N600A CLP-600N CLP-N600B ML-00NF/00LF SCX-6x45 Series RJ- 45 Modular Jack Link LED Activity LED Printer I/F Connector - Link Sequence Activity LED Turning Off LINK LED Always On Service Manual 11-4 Samsung Electronics...
- Page 272 11-5 Samsung Electronics m m m a a a n n n u u u a a a l l l s s s W W W y y y o o o u u u b b b c c c o o o m m m...
-
Page 273: Network Card Firmware
Well Configuration of TCP/IP Protocol In Local Area Network with Server Computer - Server Computer Well Configuration of TCP/IP Protocol Samsung SyncThru Application in case of using TFTP. SyncThru Web Service (SWS) in case HTTP. Service Manual 11-6 Samsung Electronics... -
Page 274: Printer Management Solution
11-7 Samsung Electronics m m m a a a n n n u u u a a a l l l s s s W W W y y y o o o u u u b b b c c c o o o m m m... - Page 275 - SNMP V3 - 13 Languages (Hungarian, Brazilian Portuguese, Turkish) Plug-ins Jungfrau And upcoming Plug-in will be released in the samsung download model center Plug-ins can be installed on the SyncThru4.0 (Add- on functions) - Restrict user permission and monitor actual usage...
- Page 276 11-9 Samsung Electronics m m m a a a n n n u u u a a a l l l s s s W W W y y y o o o u u u b b b c c c o o o m m m...
- Page 277 Detecting and Displaying devices on the network Device information in the network Display general , Supply, Protocols, Status, Usage meters, Alert, Diagnostics information Detail information Detail information of device of device by double by double click click Service Manual 11-10 Samsung Electronics...
- Page 278 11-11 Samsung Electronics m m m a a a n n n u u u a a a l l l s s s W W W y y y o o o u u u b b b c c c o o o m m m...
- Page 279 Network Printer Server Upgrading Firmware to multiple devices Upgrading Firmware Reporting information of Alert and Consumables by HTML or Email Email and HTML Reporting Email and HTML Reporting Alert and Consumables Report Alert and Consumables Report Service Manual 11-12 Samsung Electronics...
- Page 280 11-13 Samsung Electronics m m m a a a n n n u u u a a a l l l s s s W W W y y y o o o u u u b b b c c c o o o m m m...
- Page 281 Network Printer Server Discovery results Checking discovery process Set up IP Set up IP Address Service Manual 11-14 Samsung Electronics...
- Page 282 11-15 Samsung Electronics m m m a a a n n n u u u a a a l l l s s s W W W y y y o o o u u u b b b c c c o o o m m m...
-
Page 283: Authentication Settings
SSL is enabled. Change password for Local User list shows user accounts both from users only. Domain and Local. The method of authentication is used according the type of user profile (Local or Domain). Service Manual 11-16 Samsung Electronics... -
Page 284: General Information (Mfp)
W W W y y y o o o u u u b b b c c c o o o m m m Network Printer Server 11.6 Samsung SyncThru Web Service: General Information (MFP) General Information... -
Page 285: Machine Settings (Mfp)
Network Printer Server 11.7 Samsung SyncThru Web Service: Machine Settings (MFP) Machine Settings - System Setup - Copy Setup - User Authentication Setup - E-mail Setup - E-mail Notification Setup - Reset - ... Service Manual 11-18 Samsung Electronics... -
Page 286: Samsung Syncthru Web Service: Network Settings
W W W y y y o o o u u u b b b c c c o o o m m m Network Printer Server 11.8 Samsung SyncThru Web Service: Network Settings Network Settings... -
Page 287: Samsung Syncthru Web Service: Maintenance
Network Printer Server 11.9 Samsung SyncThru Web Service: Maintenance Maintenance - Firmware Upgrade - Security Service Manual 11-20 Samsung Electronics... -
Page 288: Samsung Syncthru Web Service: Support
W W W y y y o o o u u u b b b c c c o o o m m m Network Printer Server 11.10 Samsung SyncThru Web Service: Support Support... -
Page 289: Samsung Syncthru Web Service: Service (Mfp)
Network Printer Server 11.11 Samsung SyncThru Web Service: Service (MFP) Service - http://NPC-IP-Address/service.html - Tech Mode Password - Data Setup - Machine Test - Report Service Manual 11-22 Samsung Electronics... -
Page 290: Samsung Syncthru Web Service: Authentication
W W W y y y o o o u u u b b b c c c o o o m m m Network Printer Server 11.12 Samsung SyncThru Web Service: Authentication General Setup... -
Page 291: Authentication (Local Authentication)
Network Printer Server 11.13 Samsung SyncThru Web Service: Authentication (Local Authentication) Local Authentication - Index - User Name - Auth ID - Password - E-mail Address - Phone Number Service Manual 11-24 Samsung Electronics... -
Page 292: Authentication (Network Authentication)
W W W y y y o o o u u u b b b c c c o o o m m m Network Printer Server 11.14 Samsung SyncThru Web Service: Authentication (Network Authentication) -
Page 293: Network Authentication
Network Printer Server Network Authentication (SMB Setup) - Default Domain - IP address or Host Name - SMB Server and Port - Backup Domain - IP address or Host Name - SMB Backup Server and Port Service Manual 11-26 Samsung Electronics... -
Page 294: Ldap Setup
11-27 Samsung Electronics m m m a a a n n n u u u a a a l l l s s s W W W y y y o o o u u u b b b c c c o o o m m m... -
Page 295: Ldap Server Setup
Network Printer Server 11.15 Samsung SyncThru Web Service: LDAP Server Setup LDAP Server Setup_1 - IP address or Host Name - LDAP Server and Port - Search Root Directory - Authentication Method - Match User’s Login ID to the Following LDAP attribute:... - Page 296 11-29 Samsung Electronics m m m a a a n n n u u u a a a l l l s s s W W W y y y o o o u u u b b b c c c o o o m m m...
- Page 297 Network Printer Server LDAP Server Setup_3 - Search Name Order - From: Field Security Options Service Manual 11-30 Samsung Electronics...
-
Page 298: Samsung Setip
- IP address setting with MAC address only - MAC address is written on printer’s backside Samsung SetIP Utility - Running on Microsoft Windows OS only - Automatic detection of Samsung network printers - Manual setting of undetected network printers Samsung SetIP: Application Service Manual... -
Page 299: Tcp/Ip Printing Protocol
Network Printer Server 11.17 TCP/IP Printing Protocol Samsung Network Printer Port Printing - TCP Port : 2000 - Port Monitor installation - OS : Windows95/98/NT/ME LPD (Line Printer Daemon) Printing - TCP Port : 515 - OS : Unix, Linux, Windows OS (Win NT, 2K ~) -
Page 300: Management Protocol
Maneger) Agent) Set Response Trap 11.19 HTTP Web Server Protocol - Used in Samsung SyncThru Web Admin Service - Used in SyncThru Web Service (Embedded Web Server) - Used in IPP 1.1 Protocol Service Manual 11-33 Samsung Electronics m m m a a a n n n u u u a a a l l l s s s W W W y y y o o o u u u b b b c c c o o o m m m... -
Page 301: Network Models
Network Printer Server 11.20 Network models Service Manual 11-34 Samsung Electronics... -
Page 302: Option List
12-1 Samsung Electronics m m m a a a n n n u u u a a a l l l s s s 2 2 2 y y y o o o u u u y y y c c c o o o m m m... -
Page 303: Option Installation Guide
Option Install Guide 12.2 Option Installation Guide Service Manual 12-2 Samsung Electronics... - Page 304 12-3 Samsung Electronics m m m a a a n n n u u u a a a l l l s s s 2 2 2 y y y o o o u u u y y y c c c o o o m m m...
- Page 305 Option Install Guide Service Manual 12-4 Samsung Electronics...
- Page 306 12-5 Samsung Electronics m m m a a a n n n u u u a a a l l l s s s 2 2 2 y y y o o o u u u y y y c c c o o o m m m...
- Page 307 Option Install Guide Service Manual 12-6 Samsung Electronics...
- Page 308 12-7 Samsung Electronics m m m a a a n n n u u u a a a l l l s s s 2 2 2 y y y o o o u u u y y y c c c o o o m m m...
- Page 309 Option Install Guide Service Manual 12-8 Samsung Electronics...
- Page 310 12-9 Samsung Electronics m m m a a a n n n u u u a a a l l l s s s 2 2 2 y y y o o o u u u y y y c c c o o o m m m...
- Page 311 Option Install Guide Service Manual 12-10 Samsung Electronics...
-
Page 312: Tool For Troubleshooting
13-1 Samsung Electronics m m m a a a n n n u u u a a a l l l s s s = = = y y y o o o u u u B B B c c c o o o m m m... -
Page 313: Acronyms And Abbreviations
CRU Memory IMAP Internet Message Access Protocol Center Ware Internet Printing Protocols CWDP Center Ware Device Discovery Images Per Minutes Software(Samsung equivalent of Samsung’s SyncThru) Internetwork Packet Exchange CWIS Center Ware Internet Services Image Quality DADF Duplex Auto Document Feeder... - Page 314 PS/3 PostScript Level-3 USDR Un-Shut Down Rate(=NSDR) Printing Video Controller in the SPGPm(Graphic Processor for XCMI Samsung’s Management Information Printer) Base Quality, Cost, and Delivery Warranty Action Remote Control Panel W x D x H Width x Depth x Height...
-
Page 315: Service Parts
ELA=Electrical Assembly, HOU =Housing MEA UNIT-COVER PA EXIT ASS’Y MEA= Mechanical Assembly, PA=Paper PMO-TRAY EXTENTION MP NE PMO= Processing Mold MP=Multi-Purpose(Bypass) tray NE=for NEC (common as Samsung Halk printer) MEC-CASSETTE ASS’Y(LETTER) MEC = Mechanic Combined unit COVER-M-FRONT M=Mold MPR-NAME/PLATE MPR= Machinery Press,... - Page 316 13-5 Samsung Electronics m m m a a a n n n u u u a a a l l l s s s = = = y y y o o o u u u B B B c c c o o o m m m...
- Page 317 PBA SUB-MP-SEN =>Sub Printed circuit Board Assembly for the MP-SEN(= Multi-Purpose (Bypass) tray-Sensor) A/S MATERAL-PICKUP,MP FOOT-ML80 HOLDER CATCH CST MC2 MC2=>McKInley2 (Samsung Project code name) IPR-GROUND PLATE A(OPC) OPC=Organic Photo-Conductive ELA M/M-AUD SPEAKER ELA M/M => Electrical Assembly M/M AUD=Audio...
- Page 318 13-7 Samsung Electronics m m m a a a n n n u u u a a a l l l s s s = = = y y y o o o u u u B B B c c c o o o m m m...
-
Page 319: The Sample Pattern For The Test
The life of the toner cartridge and the printing speed are measured using the pattern shown below. (The image is 70% of the actual A4 size). 13.3.1 A4 ISO 19752 Standard Pattern This test page is reproduced at 70% of the normal A4 size Service Manual 13-8 Samsung Electronics... -
Page 320: Wireless Lan
The most of main wireless networking companies are attending and the main companies are Lucent technologies, Cisco, Intel/Symbol, 3Com, Enterasys (Cabletron), Compaq, IBM, Nokia, Dell, Philips, Samsung elec- tronic, Sony, Intersil, and so on. This mark certifies mutual compatibility among product has Wi-Fi (IEEE 802.1) and it is certified as a standard of... -
Page 321: Selecting A Location
Clearance space Front: 482.6 mm (enough space so that the paper tray can be removed) Back: 100 mm (enough space for ventilation) Right: 300 mm (enough space for ventilation) Left: 100 mm (enough space for ventilation) Service Manual 13-10 Samsung Electronics...