
Related Manuals for Brother 884-B02


Summary of Contents for Brother 884-B02
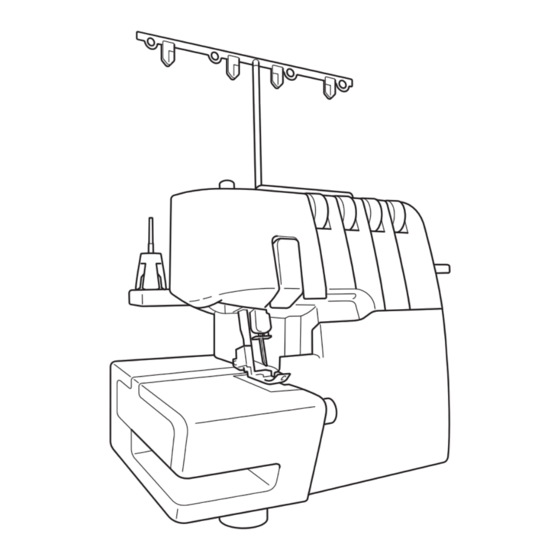
- Page 1 Operation Manual Compact Overlock Machine Product Code: 884-B02 / B03 Be sure to read this document before using the machine. We recommend that you keep this document nearby for future reference.
-
Page 2: Important Safety Instructions
IMPORTANT SAFETY INSTRUCTIONS When using the sewing machine, basic safety precautions should always be followed, including the following. Read all instructions before using. 18. Young children should be supervised to ensure that DANGER they do not play with this sewing machine. 19. - Page 3 SAVE THESE INSTRUCTIONS This machine is intended for household use. FOR USERS IN COUNTRIES EXCEPT EUROPEAN COUNTRIES This appliance is not intended for use by persons (including children) with reduced physical, sensory or mental capabilities, or lack of experience and knowledge, unless they have been given supervision or instruction concerning use of the appliance by a person responsible for their safety.
- Page 4 Be sure to observe the precautions described in the labels. Caution (U.S.A. and CANADA only) Label locations AVERTISSEMENT: PARTIES EN MOUVEMENT. POUR ÉVITER TOUTE BLESSURE: FERMER LE CAPOT AVANT DE COUDRE. [Product code: 884-B02] [Product code: 884-B03] DÉBRANCHER AVANT ENTRETIEN. Face plate sticker (U.S.A. and CANADA only)
-
Page 5: Table Of Contents
Contents Chapter 1: Names of parts and their functions ..............4 Accessories ........................5 Powering the machine ......................6 Turning direction of hand wheel ..................6 Opening/ Closing front cover ....................6 Attaching/ Removing presser foot ..................6 Trim trap ..........................7 Free-arm sewing (removing bed extension) ...............7 Retracting knife ........................8 Stitch length........................8 Stitch width .........................8... -
Page 6: Chapter 1: Names Of Parts And Their Functions
CHAPTER 1 NAMES OF PARTS AND THEIR FUNCTIONS Inside of the front cover <C> [Product code: 884-B02] [Product code: 884-B03] <B> <B> <A> <D> <A> <D> * The product code is shown on the machine rating plate. 1 Thread tree... -
Page 7: Accessories
0 Instruction DVD: XB2791001 (NTSC) XB2776001 (PAL) E Taping (Elastic) foot: SA212 (U.S.A., CANADA) X76663001 (OTHERS) F Trim trap: XB1530002 for product code 884-B02 Trim trap: XB2793001 for product code 884-B03 * The product code is shown on the machine rating plate. -
Page 8: Powering The Machine
(See CHAPTER1 "Turning direction This foot controller can be used on the machine of hand wheel".) with product code 884-B02 and 884-B03. 4. Push the button on the presser foot holder and * The product code is shown on the machine rating the standard presser foot will be released. -
Page 9: Trim Trap
Trim trap Free-arm sewing (removing bed extension) The optional trim trap <A> holds the trimmed fabric Free-arm sewing enables tubular pieces to be and thread produced when sewing. sewn more easily. 1. Remove the bed extension <A>. <B> <A> <A> NOTE: Be careful not to lose the removed bed extension. -
Page 10: Retracting Knife
Retracting knife Stitch length To sew without cutting the fabric edge, you need to The normal stitch length setting is 3 mm. To retract the knife as follows. change the stitch length, turn the stitch length adjustment dial on the right side of the body. CAUTION <A>... -
Page 11: Differential Feed
An example Differential feed When stretch material is sewn without using the This serger is equipped with two sets of feed dogs differential feed, the edge will be wavy. under the presser foot to move the fabric through the machine. The differential feed controls the movement of both the front and the rear feed dogs. -
Page 12: Tension Adjustment Dial
Tension adjustment dial There is a thread tension dial for each needle thread, the lower looper thread and the upper looper thread. The correct thread tension may vary according to the type and thickness of the fabric and the type of thread used. Thread tension adjustments may be necessary for any change in sewing materials. -
Page 13: Chart Of Thread Tension Adjustment, Two Needle (Four Thread)
Chart of thread tension adjustment, Two needle (Four thread) A: Reverse B: Surface C: Left needle thread D: Right needle thread E: Upper looper thread F: Lower looper thread Left needle Tighten left thread is needle thread. loose. (yellow) Right needle Tighten right thread is needle thread. -
Page 14: Chart Of Thread Tension Adjustment, One Needle (Three Thread)
Chart of thread tension adjustment, One needle (Three thread) A: Reverse B: Surface C: Needle thread D: Upper looper thread E: Lower looper thread Tighten Needle thread needle is loose. thread. (yellow or pink) Needle thread Loosen is tight. needle thread. (yellow or pink) Loosen... -
Page 15: Needle
To remove: Needle 1. Turn the main power and light switch to the OFF This machine uses a standard home sewing position. machine needle. 2. Turn the hand wheel so that the mark on The recommended needle is 130/705H (#80 or the hand wheel is aligned to the line on the #90). -
Page 16: Chapter 2 : Preparation Before Threading
CHAPTER 2 PREPARATION BEFORE THREADING Thread tree Before threading Raise the telescoping thread tree to its highest 1. Turn off the main power and light switch for position. Make sure that the thread holders are safety. in alignment above the spool pins as illustrated below. -
Page 17: Chapter 3: Threading
CHAPTER 3 THREADING 4. Pass the thread through the tension disc 4 CAUTION which is in the channel next to the blue tension adjustment dial. Turn off the machine before threading for safety. 5. Guide the thread down the channel and pass the thread through the threading points 5678 next to the blue color marks following Threading has to be done in the following order. - Page 18 3. Pass the thread through the eye of the lower looper. 4. Slowly turn the hand wheel, and make sure the returns to the original position. NOTE: If the lower looper thread breaks during sewing, cut and remove thread from both of the needles. Before re-threading the lower looper, make sure that the lower looper re-threading is done exactly as diagrammed.
-
Page 19: Threading The Upper Looper
5. Guide the thread down the channel and Threading the upper looper pass the thread through the threading Run the thread in the sequence illustrated, points 5678 next to the green color following the green color and the numbers next to marks following the numerical order in the each threading point. -
Page 20: Threading The Right Needle
Threading the right needle Threading the left needle Run the thread in the sequence illustrated below, Run the thread in the sequence illustrated, following the pink color and the numbers next to following the yellow color and the numbers next to each threading point. -
Page 21: Chapter 4: Sewing Materials, Threads And Needles Comparison Chart
CHAPTER 4 SEWING MATERIALS, THREADS AND NEEDLES COMPARISON CHART Stitch Length Material Stitch Thread Needle (mm) Fine materials: Overlock stitch 2.0-3.0 Spun #80-90 130/705H Georgette Cotton #100 Lawn Tetron #80-100 Organdy Tricot Fine materials: Narrow over lock/ R-2.0 Needle thread : 130/705H Georgette Rolled hemming... -
Page 22: Chapter 5: Sewing
CHAPTER 5 SEWING Narrow overlock stitch 2.0mm (5/64 Stitch selection inch) and Select the stitch pattern before you start sewing. Rolled hemming stitch 2.0mm (5/64 This sewing machine can sew fi ve different stitches inch) by following the simple steps below: Use as decorative or fi... -
Page 23: Chaining-Off
4. Holding all threads with your left hand, turn the 3. The fabric will be fed automatically. You need hand wheel slowly a few times toward you, only guide it in the required direction. and check to see that the threads entwine 4. -
Page 24: To Secure Chain
3. Lower the needles and the presser foot at the To secure chain same position. There are two methods available to secure the 4. Serge over the seam, taking care not to cut the chain. serged seam with a knife. 5. -
Page 25: If Threads Break During Sewing
If threads break during sewing Narrow overlock/ Rolled hemming stitch Remove the material and re-thread in the correct The Narrow overlock/Rolled hemming stitch is order, Lower looper, Upper looper, right needle and a decorative fi nish for lightweight to midweight then the left needle (to re-thread, see CHAPTER fabrics. - Page 26 Set the stitch length adjustment dial to "R to 2" position (for narrow overlock stitch: R to 2, for rolled hemming stitch: R). [Product code: 884-B02] <A> <A> <A> Selection mark [Product code: 884-B03] <A>...
-
Page 27: Chart Of Narrow Overlock/ Rolled Hemming Stitch
Chart of narrow overlock/ Rolled hemming stitch Rolled hemming stitch Narrow overlock stitch Stitch Style Underside of material Underside of material Top of material Top of material Materials See CHAPTER 4 "Sewing See CHAPTER 4 "Sewing materials, threads, and needles materials, threads, and needles comparison chart". -
Page 28: Chapter 6: Troubleshooting
CHAPTER 6 TROUBLESHOOTING This sewing machine is designed for trouble-free operation. However, the following chart indicates trouble which may occur if basic adjustments are not made properly. Trouble Cause Remedy 1. Does not feed Presser foot pressure too loose Turn the pressure adjustment screw clockwise to increase the presser foot pressure. -
Page 29: Chapter 7 Maintenance
CHAPTER 7 MAINTENANCE Cleaning CAUTION Turn off the machine before cleaning. Turn the hand wheel and move the needles down. Periodically clean dust, trimmed fabric and thread with the included cleaning brush. Oiling For smooth and silent operation, the moving parts (indicated with arrows) of the machine should be oiled periodically. -
Page 30: Chapter 8: Introduction Of Optional Feet
CHAPTER 8 INTRODUCTION OF OPTIONAL FEET 5. Lift the presser foot lever and insert the fabric CAUTION with the folded edge on the left in such a way that the needle pierces just the folded edge as Turn off the machine while replacing the presser it sews. - Page 31 Procedure 9. When stiching is fi nished, pull the fabric open 1. Attach the blind stitch foot (see CHAPTER 1 (fl at). "Attaching/ Removing presser foot"). 2. Set up the machine for 3 thread overlock with one needle in the left position. The right needle should be removed.
-
Page 32: Taping Foot
7. Align the blind stitch presser foot guide with the Machine setting (type of stitch): line on the right side of the stitch fi nger. By turning the screw forward the stitch guide will go to the right. By turning the screw backward the stitch guide will go to the left. -
Page 33: Pearl Sequence Foot
5. Set the stitch length control lever. How to adjust the machine - Tapes: between "3" and "4" 1. Adjust the stitch length according to the length - Elastics: "4" as <A> or <B>. For example, 4mm stitch length 6. Adjust the presser adjusting dial 2 means 4mm for <A>... -
Page 34: Piping Foot
How to set fabric and piping tape Piping foot Features By using the piping foot, you can obtain piping at the edge of material. The piping is useful to decorate on edge of wares (pajamas, sports ware), cover for furniture, cushion, bag, etc. <A>... -
Page 35: Gathering Foot
Test sewing Gathering foot Features You can create beautiful gathers using the gathering foot on various garment and home 1. Set the stitch length to 3mm. decorating applications. 2. Set the differential feed ratio to 2. 3. Set the stitch width to 5mm. 4. -
Page 36: Specifi Cations
SPECIFICATIONS Specifi cations Fine to heavy materials Sewing speed Maximum 1,300 stitches per minute Stitch width 2.3 mm to 7 mm (3/32 to 9/32 inch) Stitch length (pitch) 2 mm to 4 mm (5/64 to 5/32 inch) Needle bar stroke 25 mm (63/64 inch) Presser foot Free presser type... -
Page 37: Setting Record
SETTING RECORD THREAD TENSION NOTE FABRIC THREAD NEEDLE Left Right Upper- Lower- needle needle looper looper STITCH TYPE... - Page 38 Please visit us at http://support.brother.com/ where you can get product support and answers to frequently asked questions (FAQs). English 884-B02/B03 Printed in Taiwan XB2885-001...