Table of Contents

Related Manuals for Pioneer AVIC-F80BT


Summary of Contents for Pioneer AVIC-F80BT
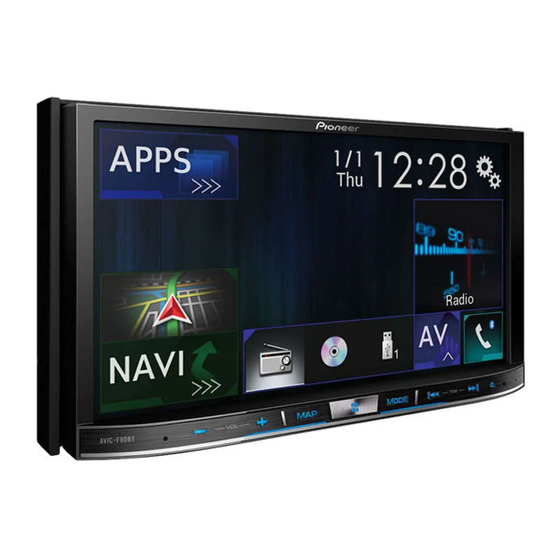
- Page 1 AVIC-F80BT AVIC-F980BT NAVIGATION AV PLAYER Operation Manual Be sure to read Important Information for the User first! Important Information for the User includes the important information that you must understand before using this product.
-
Page 2: Table Of Contents
Contents How to plan your route ........14 Connecting a registered Bluetooth device Operations common to all file types ....42 Thank you for buying this Pioneer product. Searching for a location by address ....14 manually ...........29 Audio file operations........42 Please read through these instructions so you Searching for Points of Interest (POI) .....15... - Page 3 Contents ■ Selecting songs not to be played ....51 Specifications..........78 Video settings ....61 Displaying the “MIXTRAX Settings” screen ..51 ■ Setting up the video player ......61 System settings ....52 Setting the video signal for the rear view camera ............62 Displaying the “System” setting screen ..52 Setting the video output format ......62 Setting the navigation information bar ....52 ■...
-
Page 4: Precaution
Precaution Batteries (battery pack or batteries installed) must not be Notes on internal memory Meanings of Symbols Used in This exposed to excessive heat such as sunshine, fire or the Manual like. Before removing the vehicle battery CAUTION This indicates model name that are supported X0000BT ... -
Page 5: Basic Operation
Basic operation Checking part names and Remote control Press to display the map screen. button Press and hold to switch to the camera view functions mode. p This function is available only when “ Back F80BT Camera Input” or “2nd Camera Input” is set to “On”. -
Page 6: Protecting Your Product Against Theft
Basic operation and high temperatures. completely opened or closed. If this product is operated Press to pause or resume playback. When removing or attaching the detachable faceplate, do while the LCD panel is opening or closing, the LCD panel For audio: Press and hold to perform fast so after turning off the ignition switch (ACC OFF). -
Page 7: On First-Time Startup
Basic operation Ejecting a disc p A USB cable is required for connection. 1 Press the button. 1 Pull out the plug from the USB port of the USB 2 Touch F80BT cable. 3 Touch the language that you want to use on the 1 Press the button. -
Page 8: How To Use The Screens
Basic operation How to use the screens Application menu screen Time and date setting screen Setting menu screen Top menu screen AV operation screen Map screen Phone menu screen Favorite source icons Navigation menu screen AV source selection screen... -
Page 9: Supported Av Source
Basic operation p By pressing the button on any screen you can display the top menu screen. p The character string “APPS” is replaced with “Apple CarPlay” when Apple CarPlay is running. p F80BT 2 Touch the source icon. The character string “APPS” is replaced with “Android p When you select “Source OFF”, the AV source is turned off. -
Page 10: How To Use The Navigation Menu Screen
Basic operation How to use the Navigation menu Common touch panel keys Operating the on-screen keyboard screen : Returns to the previous screen. : Closes the screen. Operating list screens Searches for your destination by the address or coordinates, or searches for the selected place of interest, etc. -
Page 11: Operating The Navigation Menu Screen
How to use the Navigation menu screen 2 Displays route alternatives, parts of the route to avoid, or Configures the navigation-related specific roads in your planned route to avoid. 3 Suspends and resumes the route guidance. settings. 4 Displays the route in its full length on the map, and displays You can also access the “SyncTool”... -
Page 12: How To Use The Map
How to use the map Most of the information provided by your navigation system Smart Zoom can be seen on the map. You need to become familiar with how Your navigation system features “Smart Zoom” that works in information appears on the map. two ways: ... -
Page 13: Understanding The Route Guidance
How to use the map Control keys on the scrolled map Scrolling the map to the position you Frequently shown route events want to see The following are some examples of the maneuvers that are Changes the map view mode. displayed. -
Page 14: Browsing The Data Field
How to use the map Searching for a destination p Touching and holding the field allows you to display the setting screen for the field. Refer to Data Fields on page 26 CAUTION p The estimated time of arrival is an ideal value calculated based on the speed limit value set in “Max. -
Page 15: Searching For Points Of Interest (Poi)
Searching for a destination p Depending on the search results, some steps may be p When a route is not set, POIs are searched for around the Searches around the current position. Or, around the last skipped. current position. known position if the current position is not available. p When the current position is not available either (no GPS sig- (The results will be listed in order of the distance from this 1 Press the MAP button and touch... -
Page 16: Selecting A Destination From Stored Locations
Searching for a destination p This information does not necessarily correspond to actual Selecting a destination from Smart History information. Utilise the information for your reference. stored routes Smart History suggests these previously used locations as des- 1 Press the MAP button and touch tinations based on your navigation habits, using parameters like 2 Touch [Useful Information]. -
Page 17: Searching For A Location By The Coordinates
Searching for a destination 6 Touch the entry. 2 Touch and drag the screen to scroll the map. Calculates the route prioritising the use of The searched location appears on the map screen. motorways when the key is activated. 3 Touch the location that you want to select as 7 Touch the right of the list to narrow down the your destination. -
Page 18: Checking And Modifying The Current Route
Checking and modifying the current route Shows the selected location on the map. 4 Touch [Back to GPS Position] and then touch Modifying the route 4 Displays the shortcuts. [Delete Start Point]. Delete All: When navigation is already started, there are several ways to The starting position for route calculation returns to the current Deletes all waypoints and the destination. -
Page 19: Checking Detour Routes
Checking and modifying the current route For information about route calculation conditions, refer Cancelling the current route to Route Planning Method on page 24 guidance 5 Touch [Select]. The selected route is applied as your current route. If you no longer need to travel to your destination, follow the steps below to cancel the route guidance. -
Page 20: Registering And Editing Locations And Routes
Registering and editing locations and routes 1 Set a route to your destination. Storing a location in “Saved p In the on-screen keyboard, touching enables you to Refer to Searching for a destination on page 14 store the location as your home or workplace location. Location”... -
Page 21: Saving A Location As An Alert Point
Registering and editing locations and routes Checking use- ful information Saving a location as an alert Editing the stored alert points about your trip point Stored alert points can be edited. 1 Press the MAP button. Important 2 Scroll the map and move the cursor over the Displaying the “Useful stored alert point, and then touch The warning for road safety cameras (like speed cameras) is... -
Page 22: Recording Your Travel History
Checking useful information about your trip Refer to Displaying the “Useful Information” menu on page Renames the trip log. Trip Monitor: Checks the statistical data of your trips (for example, start Change Color: time, end time, average speed, etc.). Changes the colour by selecting another colour from the 3 Touch [Trip Monitor]. -
Page 23: Customising Preferences Of The Navigation
Checking useful information about your Customising trip preferences of the navigation Refer to Displaying the “Useful Information” menu on page Setting the initial odometer value Before you use the fuel consumption feature, enter the initial 2 Touch [Fuel Consumption]. Customising the navigation odometer value from which you want to start measuring the 3 Touch... -
Page 24: Information On Each Option Of "Settings
Customising preferences of the navigation Refer to the manual for AVICSYNC on our website To enhance the route accuracy, correctly select a vehicle Calculates a route with the shortest travel time to your Trip Monitor: type that is similar to the condition of your vehicle. destination as a priority. -
Page 25: Unpaved Roads
Customising preferences of the navigation Car Shuttle Trains Early Indication of Maneuvers “Warnings” settings When this function is turned off, the route is calculated prioritiz- You can select whether you want an immediate announcement ing the avoidance of car shuttle trains. for the next manoeuvre or to receive the information when the Important Car shuttle trains are used to transport vehicles for relatively... -
Page 26: Map Display
Customising preferences of the navigation Route Progress Bar Turn to the suggested new direction and the route will be “Navigation Map” settings automatically recalculated. You can turn on the route progress bar to display the current p This function will become effective when the contents are route as a straight line located on the right side of the map. -
Page 27: Setting The Alert Point Warnings
However, you are in the daytime. p For details, access the following URL and refer to “HOW TO fully responsible for ensuring that this feature is legal in the UPDATE?” GUIDE. country where you intend to use it. http://pioneer.naviextras.com... -
Page 28: Expanding The Use Of The Navigation Functions
AVICSYNC App, Pioneer is not liable for any issues that may arise from (Android) that has the AVICSYNC App installed. refer to the information on our website. -
Page 29: Bluetooth ® Connection
Customising Bluetooth connection ® preferences of The default setting is “On”. Displaying the “Bluetooth” the navigation 1 Display the “Bluetooth” screen. screen Refer to Displaying the “Bluetooth” screen on page 29 2 Touch [Auto Connect] to switch “On” or “Off”. 1 Press the button. -
Page 30: Entering The Pin Code For Bluetooth Wireless Connection
Bluetooth connection Hands-free ® phoning p You need to store the version update file to the USB storage Entering the PIN code for device in advance. Bluetooth wireless connection CAUTION Never turn this product off and never disconnect the phone To connect your Bluetooth device to this product, you need to while the software is being updated. -
Page 31: Displaying The Phone Menu Screen
Hands-free phoning The following items are available: CAUTION Touch to reject the call. : Received call list For your safety, avoid talking on the phone as much as : Dialled call list Minimising the dial confirma- possible while driving. ... -
Page 32: Using The Voice Recognition Function
Hands-free phoning Setup for iPod / iPhone or However, the actual transmission distance may be shorter Setting the private mode smartphone than the estimated distance, depending on the usage environment. During a conversation, you can switch to private mode (talk ... -
Page 33: Ipod / Iphone Compatibility
Setup for iPod / iPhone or smartphone — The smartphone connection (USB and Bluetooth) is disconnected. p The setting may not be operable right after it is changed. iPod / iPhone compatibility This product supports only the following iPod / iPhone models and iPod / iPhone software versions. -
Page 34: Information On The Connections And Functions For Each Device
Setup for iPod / iPhone or smartphone Information on the connections and functions for each device The settings and cables required for connecting each device, and the available sources are as follows. iPod / iPhone with a 30-pin connector Device connection method When connecting via Bluetooth When connecting via CD-IU201V (sold When connecting via CD-IU201S (sold... - Page 35 Setup for iPod / iPhone or smartphone Android device Connection requirement — Connect to USB port 2 for using Android Auto or AVICSYNC App. Available sources Android Auto — (*2)(*3) AVICSYNC App (*4) (*4) (*1) Select “On” for “Android Auto” for using Android Auto. (*2) Available only when an Android Auto-compatible device is connected.
-
Page 36: Radio
Radio Starting procedure Displaying the “Radio settings” Displays the preset channel list. screen Select an item on the list ( “1” to “6” ) to 1 Display the AV source selection screen. switch to the preset channel. 1 Display the “System” setting screen. Selects the FM1, FM2, FM3 or AM band. -
Page 37: Disc
Radio Disc 2 Touch [TA Interrupt] to switch “On” or “Off”. 9kHz (default) 10kHz Audio source screen 1 Receiving news announcements Setting the alternative frequency The news can be received from the last selected frequency, search interrupting the other sources. The default setting is “Off”. - Page 38 Disc Video source screen 2 Plays tracks in random order. Hides the touch panel keys. This function is available for music CD. To display again the keys, touch anywhere on the screen. : Does not play tracks in random order. Performs frame-by-frame playback.
-
Page 39: Starting Procedure
Disc Switches the media file type to CD (audio data (CD-DA)). Video source screen 2 Switches the subtitle/audio language. Refer to Switching the subtitle/audio language on Searching for the part you page 39 Displays the DVD menu keypad. want to play ... -
Page 40: Compressed Files
Disc Compressed files p The way to display the menu differs depending on the disc. Audio source screen 1 (Example: USB) Plays files in random order. If you touch , the touch panel keys disappear and the icon is displayed. : Does not play files in random order. - Page 41 Compressed files Video source screen (Example: Disc) Hides the touch panel keys. Hides the touch panel keys. To display again the keys, touch To display again the keys, touch anywhere on the screen. anywhere on the screen. Rotates the displayed picture 90°...
-
Page 42: Starting Procedure (For Disc)
Compressed files Refer to Plugging and unplugging a USB storage device on Switches the media file type. Still image screen page 7 Refer to Switching the media file type on page 2 Display the AV source selection screen. Switches the subtitle/audio language. -
Page 43: Video File Operations
Compressed files iPod p This function is available for the external storage device p This setting is available during playback of the JPEG files. Audio source screen 1 (USB, SD) only. 1 Display the “Video Setup” screen. 1 Touch 2 Touch the “Tag” tab. 3 Touch the desired category to display the file list. -
Page 44: Connecting Your Ipod
iPod Displays the link search screen. Changes the audiobook speed. Hides the touch panel keys. Refer to Selecting a song from the list related to To display again the keys, touch the song currently playing (link search) on page : Normal playback anywhere on the screen. -
Page 45: Starting Procedure
iPod Refer to Selecting the video for the rear display on page p This function is not available when using iPod function with Playing back songs similar to the cur- an iPhone 6 Plus, iPhone 6, iPhone 5s, iPhone 5c, iPhone 5, rent song or iPod touch (5th generation). -
Page 46: Apple Carplay
Apple CarPlay allows access to applications other than those listed, subject to limitations while driving. PIONEER IS NOT RESPONSIBLE AND DISCLAIMS LIABILITY FOR THIRD PARTY (NON-PIONEER) APPS AND CONTENT, INCLUDING WITHOUT LIMITATION ANY INACCURACIES OR INCOMPLETE INFORMATION. 2 Touch [Driving Position]. -
Page 47: Android Auto
The volume menu is displayed for four seconds. If the menu PIONEER IS NOT RESPONSIBLE AND DISCLAIMS If this function is set to on, Android Auto will launch automat- disappears, press the VOL (+/–) button again. The menu... -
Page 48: Bluetooth Audio Player
Android Auto Bluetooth audio player ™ p You cannot adjust the volume of the main sound on the — A2DP and AVRCP (Audio/Video Remote Control Profile): Playback screen 1 screen. Press the VOL (+/–) button to adjust the volume of Playing back, pausing, selecting songs, etc., are possible. -
Page 49: Hdmi Source
HDMI source AUX source F80BT Hides the touch panel keys. To display again the keys, touch anywhere on the screen. Hides the touch panel keys. 5 Touch [AUX]. To display again the keys, touch anywhere on the screen. Setting the video signal When you connect this product to an AUX equipment, select the suitable video signal setting. -
Page 50: Av Input
AV input 3 Touch [AV]. Hides the touch panel keys. 4 Touch the item. To display again the keys, touch The following items are available: anywhere on the screen. Auto, PAL, NTSC, PAL-M, PAL-N, SECAM. 6 Touch [AV]. Starting procedure (for camera) You can display the image output by the camera connected to video input. -
Page 51: Mixtrax
MIXTRAX Starting procedure Exits the MIXTRAX screen. Specifies the BPM. 1 Insert the SD memory card into the SD card Displays the LinkGate screen. slot or plug the USB storage device into the Touch the desired item. Songs USB connector. related to the selected item are ... -
Page 52: System Settings
Displaying the “System” set- p If this function does not work correctly, contact your dealer ting screen or an authorised Pioneer Service Station. p When you start to set, all the default key settings is automati- cally cleared. 1 Press the button. -
Page 53: Setting The Ever Scroll
System settings p When the screen changes to full-screen rear view camera p This setting is available only when you stop your vehicle in a Setting the ever scroll image during normal driving, switch to the opposite setting safe place and apply the handbrake. in “Reverse Gear Setting.”. -
Page 54: Setting The Second Camera
System settings 2 Using packing tape or similar, place markings Setting the reversed image Selecting the system language as follows. The default setting is “Off”. p If the embedded language and the selected language setting p This setting is available only when you stop your vehicle in a are not the same, text information may not display properly. -
Page 55: Setting The Dimmer
System settings Dimmer Level: Setting the dimmer duration 7 Press and hold the button. Adjusts the brightness of the display. (+1 to +48) The adjustment results are saved. optional Temperature: Adjusts the colour temperature, resulting in a better white Setting the dimmer You can adjust the time that the dimmer is turned on or off. -
Page 56: Updating Firmware
System settings 2 Touch [System Information]. Speed Pulse Updating firmware The speed pulse value detected by this product is shown. 3 Touch [3D Calibration Status]. Illumination CAUTION Displays the status of headlights or small lamps of the Clearing the status vehicle. -
Page 57: Audio Adjustments
Audio adjustments Displaying the “Audio” setting Adjusting source levels Adjusting the cutoff frequency screen value SLA (source level adjustment) lets you adjust the volume level of each source to prevent radical changes in volume when switch- You can adjust the cutoff frequency value of each speaker. ing between sources. -
Page 58: Adjusting The Speaker Output Levels Finely
Audio adjustments 5 Touch [<] or [>] to input the distance between p If you trail a finger across the bars of multiple equaliser Adjusting the speaker output bands, the equaliser curve settings will be set to the value of the selected speaker and the listening position. -
Page 59: Using The Automatic Sound Levelizer
Audio adjustments power to car phones or mobile phones in the vehicle, or 2 Fix the microphone for acoustical measurement 13 Store the microphone carefully in the glove box remove them in advance. Surrounding sounds may prevent in the centre of the headrest of the driver’s seat, or another safe place. -
Page 60: Theme Menu
Theme menu Refer to Displaying the “Theme” setting screen on page 60 The set colour will be recalled from the memory the next time Displaying the “Theme” setting you touch the same key. 3 Touch [Background]. screen 4 Touch Selecting the theme colour 1 Press the button. -
Page 61: Replicating The Settings
Theme menu Video settings Refer to Inserting and ejecting an SD memory card on page Changing to the splash screen stored Setting up the video player on the external storage device Refer to Plugging and unplugging a USB storage device on This setting is available only when “Disc”... -
Page 62: Setting The Video Signal For The Rear View Camera
Video settings p The lower the level is set, the tighter the restriction is p Make a note of the code as you will need it when you deregis- Setting the aspect ratio applied. ter from a DivX VOD provider. p The default setting is “8”. -
Page 63: Favourite Menu
Video settings Favourite menu Other functions p This function is available when “Source OFF” is selected on Registering your favourite menu items in shortcuts allows you to Setting the time and date the AV source, and a source for the rear display other than quickly jump to the registered menu screen by a simple touch on “Disc”, “USB1”, “USB2”, and “SD”... -
Page 64: Selecting The Video For The Rear Display
2 Touch , followed by , and then touch and F80BT Pioneer Service Station. p Video files on the external storage device are not available as hold a source for the rear display when [Android Auto] is acti- Refer to Setting the password on page 64. -
Page 65: Restoring This Product To The Default Settings
— There is no sound during still, slow motion, or frame-by- be found here, contact your dealer or the nearest authorised frame playback with DVD-Video. Pioneer service facility. Restoring this product to the The system is paused or performing fast reverse or forwards during the disc playback. -
Page 66: Error Messages
The location display is not possible due to hardware failure. iPhone. charging. — Contact your dealer or an authorised Pioneer Station for — Update the iPod software version. — Disconnect the smartphone from the cable, and wait until assistance. - Page 67 Appendix Error. If you have replaced your car or steering wheel con- Unable to write to flash memory Incompatible SD The playback history for VOD contents cannot be saved for The SD memory card is not supported by this product. trol, please press “Reset”...
-
Page 68: Positioning Technology
The time set in this product is not correct. p The position of the speed detection circuit vary depending — Check if GPS signals are received and the time is correctly on the vehicle model. For details, consult your authorised set. Pioneer dealer or an installation professional. -
Page 69: Handling Large Errors
Appendix p Some types of vehicles may not output a speed signal while When driving among high buildings driving at just a few kilometres per hour. In such a case, the current location of your vehicle may not be displayed cor- rectly while in traffic jam or in a car park. - Page 70 Appendix If there is a parallel road. If you take a ferry. If you drive in zigzags. If there is another road very nearby, such as in the case of an If you are driving on a long, straight road or a gently curving elevated motorway.
- Page 71 Appendix If you enter or exit a multi-storey car park or similar structure If you join the road after driving around a large car park. using a spiral ramp. If you put on chains, or change your tyres for ones with a different size.
-
Page 72: Route Setting Information
Appendix The number of roundabout exits displayed on the screen Route setting information Ambient conditions for playing a disc may differ from the actual number of roads. At extremely high temperatures, a temperature cutout Route highlighting protects this product by switching it off automatically. Route search specifications ... -
Page 73: Detailed Information For Playable Media
Appendix Playback of discs may become impossible with direct expo- Operations may vary depending on the kind of an external Playing DualDisc sure to sunlight, high temperatures, or depending on the storage device (USB, SD). storage conditions in the vehicle. ... -
Page 74: Media Compatibility Chart
Appendix MP3 compatibility DRM rental files cannot be operated until playing back is This product may not play back files, depending on the started. application used to encode the files. Ver. 2.x of ID3 tag is prioritised when both Ver. 1.x and Ver. 2.x ... -
Page 75: Bluetooth
.f4v owned by Bluetooth SIG, Inc. and any use of such marks by Compatible audio codec: MP3, Dolby Digital PIONEER CORPORATION is under license. Other trademarks Compatible video codec: H.264/H.263 Bit rate (MP3): 8 kbps to 320 kbps (CBR), VBR and trade names are those of their respective owners. -
Page 76: Wma/Wmv
DivX iTunes Pioneer accepts no responsibility for data lost from an iPod, even if that data is lost while using this product. iTunes is a trademark of Apple Inc., registered in the U.S. and Please back up your iPod data regularly. -
Page 77: Using App-Based Connected Content
Content application(s) or service by its provider. Pioneer is not liable for any issues that may arise from incorrect or flawed app-based content. The content and functionality of the supported applications are the responsibility of the App providers. -
Page 78: Notice Regarding Open Source Licences
In that case, please consult your dealer or the ranges shown in Specifications on page 78. Audio nearest authorised Pioneer Service Station. Do not use the LCD screen at temperatures higher or lower than the operating temperature range, because the LCD Maximum power output ........... - Page 79 Appendix Usable discs ......DVD-VIDEO, VIDEO-CD, CD, CD-R, WAV signal format ............Linear PCM CD-RW, DVD-R, DVD-RW, DVD-RDL FLAC decoding format ..Ver. 1.3.0 (Free Lossless Audio Codec) Frequency response ..5 Hz to 44 000 Hz (with DVD, at sampling H.264 video decoding format ..Base Line Profile, Main Profile, frequency 96 kHz) High Profile Signal-to-noise ratio ....
- Page 80 TEL: 65-6378-7888 PIONEER ELECTRONICS AUSTRALIA PTY. LTD. 5 Arco Lane, Heatherton, Victoria, 3202, Australia TEL: (03) 9586-6300 PIONEER ELECTRONICS DE MEXICO S.A. DE C.V. Blvd. Manuel Avila Camacho 138, 10 piso Col.Lomas de Chapultepec, Mexico, D.F. 11000 Tel: 52-55-9178-4270, Fax: 52-55-5202-3714 先鋒股份有限公司...