Table of Contents
Advertisement
®
Operating & Installation
Instructions
Heat Pump Tumble Dryer
(Domestic use)
NH-P8ER1
Model No.
Thank you for purchasing this product.
- Read these instructions carefully for optimum performance and
safety before use.
EN
- Keep this manual for future reference.
NH-P8ER1_WGB_En.indd
1
2015/08/24
10:55:53
Advertisement
Table of Contents

Related Manuals for Panasonic NH-P8ER1


Summary of Contents for Panasonic NH-P8ER1
- Page 1 ® Operating & Installation Instructions Heat Pump Tumble Dryer (Domestic use) NH-P8ER1 Model No. Thank you for purchasing this product. - Read these instructions carefully for optimum performance and safety before use. - Keep this manual for future reference. NH-P8ER1_WGB_En.indd...
- Page 2 We thank you for the confidence you have shown us by purchasing this dryer. Your new dryer complies with the requirements of modern laundry care; it will dry your laundry quickly, leaving it soft and smooth with special programmes to take care of delicate laundry.
-
Page 3: Table Of Contents
TABLE OF CONTENTS SAFETY PRECAUTIONS INTRODUCTION 10 APPLIANCE Specifications Accessories 12 Control panel description 14 INSTALLATION AND CONNECTION GETTING 14 Selecting a location STARTED 15 Positioning the appliance 17 Installation 18 Condensate discharge 19 Electrical connections 20 Moving and transport 20 Subsequent transport 21 BEFORE THE FIRST USE DRYING... -
Page 4: Safety Precautions
SAFETY PRECAUTIONS Read and follow these safety precautions. WARNING May cause serious injury or death. For the safety of you and your family This appliance can be used by children aged 8 years and above and persons with reduced physical, sensory or mental capabilities or lack of experience and knowledge if they have been given supervision or instruction concerning use of the appliance in a safe way and understand... - Page 5 WARNING Keep away from fire. Do not put flammable materials or clothes with such things attached in the drum. Keep them away from the appliance. (To prevent explosion or fire) • For example: Solvent-based cleaning agents, kerosene, petrol, benzine/thinner, alcohol, etc. To prevent injury, do not touch the drum until it completely stops.
- Page 6 WARNING WARNING Make sure that no objects are left in any of the pockets. Pay particular attention to cigarette lighters and matches. They may cause fire. To prevent electric shock, overheating, combustion, or fire Use a socket that satisfies the rating requirement solely for this appliance.
- Page 7 WARNING WARNING Do not hold or pull on the mains lead when removing the mains plug from the mains socket. Unplug the mains lead before cleaning. Correct use Items such as foam rubber (latex foam), shower caps, waterproof textiles, airtight fabrics, rubber backed articles and clothes or pillows fitted with foam rubber pads should not be dried in the appliance.
- Page 8 WARNING WARNING The appliance must not be installed behind a lockable door, a sliding door or a door with a hinge on the opposite side to that of the appliance, in such a way that a full opening of the appliance door is restricted. This will prevent children from being locked in the drum.
- Page 9 WARNING CAUTION May cause injury or property damage. Correct use This appliance is only suitable for textiles which are suitable for tumble drying. Do not obstruct the openings of the bottom face with carpet, etc. Fabric softeners, or similar products, should be used as specified by the fabric softener instructions.
-
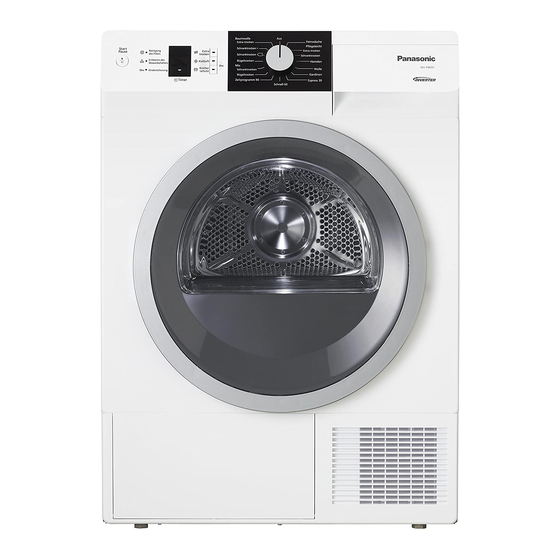
Page 10: Appliance
APPLIANCE (DRYER DESCRIPTION) FRONT Programme selector dial Control panel Water container Door Net filter Heat pump filter Air vent Rating plate BACK Condensate discharge tube Mains lead Adjustable feet (x4) NH-P8ER1_WGB_En.indd 2015/08/24 10:55:54... -
Page 11: Specifications
SPECIFICATIONS Model No. NH-P8ER1 Rated voltage 220 - 240 V Rated frequency 50 Hz Maximum energy rated power input 700 - 780 W Product weight 52 kg Maximum mass of dry cloth 8 kg Product dimensions 600 mm (W) x 600 mm (D) x 850 mm (H) This product contains fluorinated greenhouse gases. -
Page 12: Control Panel Description
CONTROL PANEL DESCRIPTION Start/Pause key a, b, c: INDICATORS Time key (Start delay) Use this key to start or These light when it is Use to select the delay stop the programme. When necessary to clean the filter, before start of the drying selected, the light on the empty the water container programme. - Page 13 a , b , c : ADDITIONAL MOST USED PROGRAMMES ON/OFF and FUNCTION keys programme SELECTOR Use to extend or adjust the dial basic programmes. NH-P8ER1_WGB_En.indd 2015/08/24 10:55:54...
-
Page 14: Installation And Connection
INSTALLATION AND CONNECTION SELECTING A LOCATION 10 cm 5 cm 10 cm You need a space at least 60 cm wide, with at least 10 cm of clearance on both sides and above, and 5 cm of clearance behind the appliance. See the diagram above for an example. Failure to heed the minimum clearance requirements may cause the dryer to overheat. -
Page 15: Positioning The Appliance
POSITIONING THE APPLIANCE The dryer can either be free standing on the floor or, using the vacuum feet, on a washing machine of the same dimensions. – minimum width 517 mm, minimum depth 476 mm. The surface on which the dryer is placed should be clean and level. - Page 16 If the installation, test run and inspection of the tumble dryer are not carried out following this installation method, Panasonic will not be liable for any accident or damage caused. Never block the cool air opening (see dryer description).
-
Page 17: Installation
INSTALLATION Level the dryer front-back, and left- right, by rotating the adjustable feet which have a range of +/- 1 cm. Use a 22 mm spanner and a spirit level. The appliance must stand level and stable on a solid, clean dry level floor to prevent the unit sliding. -
Page 18: Condensate Discharge
CONDENSATE DISCHARGE The moisture from the laundry is extracted in the condenser unit and accumulated in the water container. During the drying process, an indicator light will warn you when the water container is full and which has to be emptied. Interruption of the drying cycle due to the water container being full can be avoided by running the condensate discharge tube, found at the back of the appliance, directly into a drain. -
Page 19: Electrical Connections
ELECTRICAL CONNECTIONS The dryer should be left to stand still for at least two hours before it is connected to the power mains to allow the system to stabilise. Plug the dryer's mains plug directly into a mains socket. Do not use an extension lead due the possible danger of overheating and fire. -
Page 20: Moving And Transport
MOVING AND TRANSPORT If the dryer cannot be transported in the upright position, tilt it to the left side. If the appliance was not transported in compliance with the instructions, the dryer should be left to stand still at least two hours before it is reconnected to the power mains. -
Page 21: Before The First Use
BEFORE THE FIRST USE Open the door on the left side. Clean the dryer drum before using the dryer for the first time. Use a damp cloth and a mild cleaning agent. NH-P8ER1_WGB_En.indd 2015/08/24 10:55:55... -
Page 22: Drying (Steps 1 - 6)
DRYING (STEPS 1 - 6) 1. CHECK THE TAGS ON YOUR LAUNDRY Normal wash Max. Max. Max. Max. Manual Washing Delicate wash washing washing washing washing washing allowed 95 °C 60 °C 40 °C 30 °C Whitening Whitening in cold water Whitening not allowed Dry cleaning Dry cleaning in... -
Page 23: 23 2. Preparing The Laundry
2. PREPARING THE LAUNDRY Sort the laundry by type and thickness of the fabric (see Programme Table). Close the buttons and zips, tie any ribbons, and turn the pockets inside out. Place very sensitive clothes in a special-purpose laundry washing bag. The following types of laundry may not be dried in the dryer as this may cause your garments to deform: •... -
Page 24: Switching On The Dryer
SWITCHING ON THE DRYER Connect the appliance to the power mains by plugging in the mains lead. To light up the drum, rotate the programme selector dial to any position. (The drum light is not suitable for other purpose.) LOADING THE DRYER Open the dryer door by pressing it on the left side towards the dryer. -
Page 25: 25 3. Selecting A Programme
3. SELECTING A PROGRAMME To select a programme, rotate the programme selector dial (6) to the left or to the right (according to the type of desired level of dryness of the laundry). During operation, the dial will not rotate automatically. NH-P8ER1_WGB_En.indd 2015/08/24 10:55:56... -
Page 26: Programme Table
PROGRAMME TABLE Programme Max. Laundry Extra functions Dryness levels load 8 kg Non-delicate cotton laundry (towels, • Start delay Cotton • Extra Dry terry towels, stockinette, T-shirts, Extra Dry • Anti-crease trousers, kitchen cloths etc.) Cupboard Dry+ Cupboard Dry Iron Dry 3.5 kg Clothing made of a mixture of fibres •... -
Page 27: 27 4. Additional Functions (Extra)
4. ADDITIONAL FUNCTIONS (EXTRA) Activate/deactivate the function by pressing the relevant key (before pressing the Start/Pause key). Extra Dry Each time the key is pressed (three levels), the final level of laundry dryness and drying time will change. Cool Air for refreshing clean clothes with cool air. -
Page 28: Start Delay
Start delay Use this function to start the drying cycle after a certain amount of time has elapsed. Delay time can be set to up to five hours in 30-minute steps and up to 24 hours in 1-hour steps. (4) The function is activated when the Start/Pause key is pressed. - Page 29 BEEP SOUND VOLUME Select the beep sound volume by simultaneously pressing a key (5a) and rotating the programme selector dial clockwise to the initial position. Each time the key (5a) is pressed, the volume level is changed (there are three levels), and the level is indicated on the display unit.
-
Page 30: 30 5. Starting A Programme
5. STARTING A PROGRAMME Press the Start/Pause key. The Start delay time (if selected), or the time remaining until the end of the programme will be shown on the display unit. Indicators next to the selected functions will be lit. 6. -
Page 31: Cleaning And Maintenance
CLEANING AND MAINTENANCE The dryer is fitted with a filtering system composed of several filters that prevent any impurities from entering the heat exchanger system. Net filter Heat pump filter The dryer should never be operated without the filters in place, or with damaged filters as excessive amount of accumulated fibres from the fabric could cause malfunction or failure of the dryer. -
Page 32: Cleaning The Net Filter In The Door
CLEANING THE NET FILTER IN THE DOOR Open the filter cover, and remove the net filter. Remove the accumulated dust and lint by gently rubbing the net filter. Replace the net filter, and close the filter cover. Always carefully close the filter cover in the door, taking care not to crush your fingers. -
Page 33: Cleaning The Heat Pump Filter
CLEANING THE HEAT PUMP FILTER Place an absorbent cloth on the floor in front of the dryer (possible water spill). Open the outer cover (hold the handle on the left side and pull downwards). Use the handle to remove the heat pump foam filter. -
Page 34: Emptying The Water Container
EMPTYING THE WATER CONTAINER Empty the water container after each drying cycle. Remove the water container. Turn the water container over and pour out the water. When empty, replace the container. Pull out the spout for easier emptying. Water from the water container is not potable. If thoroughly filtered, it can be used for ironing. -
Page 35: Cleaning The Dryer
CLEANING THE DRYER Wipe the dryer exterior using a damp cloth and mild detergent. Do not use detergents or cleaners that could damage the dryer (heed the recommendations and warnings given by the cleaner/detergent manufacturers). Use a soft cloth to wipe dry all parts of the dryer. Always disconnect the dryer from the mains power before cleaning. -
Page 36: Interrupting And Changing The Programme
INTERRUPTING AND CHANGING THE PROGRAMME INTERRUPTIONS CHANGING THE PROGRAMME/ FUNCTIONS Interrupting the programme process Press the Start/Pause key and rotate the programme selector dial to the "Off" Press the Start/Pause key to pause/ resume position. the programme. Select another programme/function and Open door press the Start/Pause key again. -
Page 37: What To Do
WHAT TO DO...? Disturbances from the environment (e.g. the power grid) may result in various error reports. (see Table on the next page) In such case: • switch off the appliance and wait at least one minute; • switch on the appliance and restart the drying programme. - Page 38 Problem/error Cause What to do ...? The dryer does not work. • No voltage from the mains • Check if the mains plug is socket. correctly inserted into the mains socket. • Check the fuse. There is voltage at the •...
-
Page 39: Tips And Recommendations For Drying And Economic Use Of Your Dryer
TIPS AND RECOMMENDATIONS FOR DRYING AND ECONOMIC USE OF YOUR DRYER The most economical way of drying is to dry the recommended amount of laundry in each batch (see Programme Table). Drying laundry made of particularly delicate fabrics that may be deformed is not recommended. -
Page 40: Consider The Environment
CONSIDER THE ENVIRONMENT Disposing of packaging The packaging used to protect the washing machine from damage during transportation is all recyclable. For information on recycling, contact your local authority. Disposal of Old Equipment Only for European Union and countries with recycling systems This symbol on the products, packaging, and/or accompanying documents means that used electrical and electronic products... -
Page 41: Electrical Connection (For Uk And Republic Of Ireland)
ELECTRICAL CONNECTION (For UK and Republic of Ireland) How to replace the fuse For your safety, please read the following text carefully. The location of the fuse differs depending This appliance is supplied with a moulded on the type of AC mains plug (Figures A 3-pin mains plug for your safety and and B). -
Page 42: Power Consumption
POWER CONSUMPTION Programme Load Power consumption Time Cotton Cupboard Dry 8 kg 1.40 kWh 4 kg 0.86 kWh 1) The results shown here comply with EN 61121. Each result indicates the value required until the end of each programme with the Anti-crease process ON set. Power consumption and time during Anti-crease process are not included. -
Page 43: Product Fiche
PRODUCT FICHE (EU) No.392/2012 Supplier’s name Panasonic Supplier’s model identifier NH-P8ER1 Rated capacity in kg of cotton laundry for the standard cotton At full load programme Condenser with Type of dryer heat pump Energy efficiency class A+++ Weighted annual energy consumption kWh/year 176.8... - Page 44 NH-P8ER1_WGB_En.indd 2015/08/24 10:55:59...
- Page 45 NH-P8ER1_WGB_En.indd 2015/08/24 10:55:59...
- Page 46 Den här produkten innehåller This product contains fluorinated fluorerade växthusgaser. greenhouse gases. Typ av köldmedel: R134a Type of refrigerant: R134a Mängd köldmedel: 0,45 kg Quantity of refrigerant: 0.45 kg Total faktor för global Total GWP: 1430 uppvärmningspotential: 1430 Hermetically sealed. Hermetiskt tillsluten.
- Page 47 Ez a termék fluortartalmú Ovaj proizvod sadrži fluorisane üvegházhatást okozó gázokat gasove koji izazivaju efekat tartalmaz. staklene bašte. A hűtőfolyadék típusa: R134a Vrsta rashladnog sredstva: R134a A hűtőfolyadék mennyisége: 0,45 kg Količina rashladnog sredstva: 0,45 kg Teljes globális felmelegedési Ukupni GWP: 1430 potenciál: 1430 Hermetički zaptiveno.
- Page 48 Monday to Friday 9:00 - 17:00 If calling from the Republic of Ireland, please call Excluding public holidays. 01 289 8333 SP10 CLASS HP A+++ en (01-16) 510549 Printed in Slovenia http://www.panasonic.com August 2015 © Panasonic Corporation 2015 (WGB)(WGN) NH-P8ER1_WGB_En.indd 2016/01/14 13:50:30...