Yamaha NS-SW300 Owner's Manual
Hide thumbs
Also See for NS-SW300:
- Owner's manual (164 pages) ,
- Service manual (47 pages) ,
- Owner's manual (40 pages)
Table of Contents
Advertisement
Available languages
Available languages
Advertisement
Chapters
Table of Contents

Related Manuals for Yamaha NS-SW300


Summary of Contents for Yamaha NS-SW300
- Page 1 Subwoofer NS-SW300/NS-SW200 OWNER’S MANUAL MANUAL DE INSTRUCCIONES...
- Page 2 • If you hear distortion (i.e., unnatural, intermittent “rapping” or “hammering” sounds) coming from this unit, reduce the Yamaha will not be held responsible for any damage and/or - Glass, china, small metallic, etc. If glass, etc., falls as a result of vibrations and breaks, it injury caused by not following the cautions below.
-
Page 3: Table Of Contents
CONTENTS WARNING TO REDUCE THE RISK OF FIRE OR ELECTRIC SHOCK, DO ADVANCED YAMAHA ACTIVE SERVO NOT EXPOSE THIS APPLIANCE TO RAIN OR MOISTURE. TECHNOLOGY II............1 Twisted Flare Port ............1 This unit is not disconnected from the AC power source as long as it is connected to the wall outlet, even if this unit FEATURES..............2... -
Page 4: Advanced Yamaha Active Servo Technology Ii
Servo Technology, allowing better control of the forces driving the amplifier and speaker. From the amplifier’s point of view, the speaker impedance changes depending on the sound The Twisted Flare Port developed by Yamaha changes the way in which the port widens frequency. Yamaha developed a new circuit design combining negative-impedance and toward its end, and also adds a “twist”... -
Page 5: Features
• The Automatic power-switching function saves you the trouble of pressing the STANDBY/ON button to turn the power on and off. • The subwoofer can be linked to a Yamaha component for simultaneous power on/off operation. Use the supplied system control cable to connect the subwoofer to a Yamaha component that features a system connector jack. -
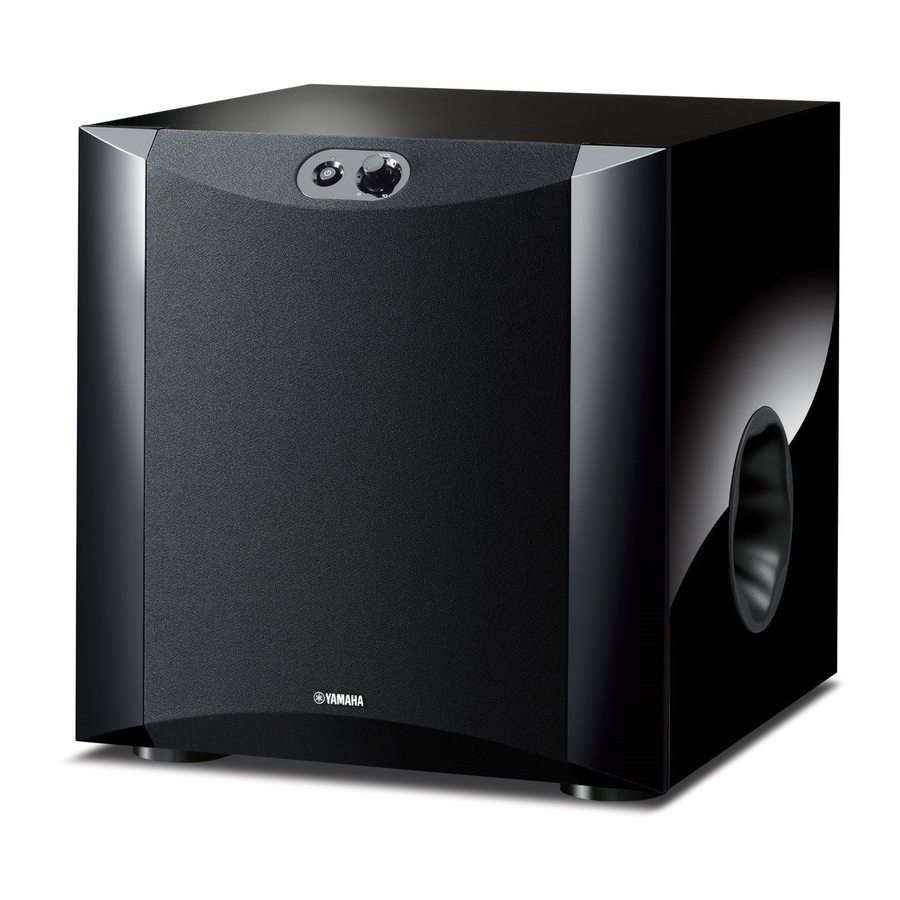
Page 6: Controls And Their Functions
CONTROLS AND THEIR FUNCTIONS Check the model number of your subwoofer on the label on the rear panel. NS-SW300 NS-SW200 Front < Front 7 8 < Rear Rear... - Page 7 Connect the supplied system control cable here. If you use the system control cable to 2 VOLUME control ( page 11) connect a subwoofer to a Yamaha component (that features a system connector jack), Adjusts the volume level. Turn the control clockwise to increase the volume, and turning on or off the power to the connected component automatically turns the counterclockwise to decrease the volume.
-
Page 8: Connections
• All connections must be correct, that is to say L (left) to L; R (right) to R; “+” to “+” and “–” to “–”. Connecting to line output (pin jack) terminal(s) of the amplifier Example: Connecting one subwoofer NS-SW300 NS-SW200 Subwoofer... - Page 9 Example: Connecting two subwoofers NS-SW200 NS-SW300 Subwoofer Subwoofer Subwoofer Subwoofer Amplifier or Amplifier or receiver Mono pin cable receiver Mono pin cable Connecting to the INPUT3 (LFE) terminal If your amplifier (or receiver) can cut off high frequencies from signals sent to the subwoofer, connect the...
-
Page 10: Connecting To Speaker Output Terminals Of The Amplifier
Use speaker cables to connect the speaker output terminals of the amplifier to the subwoofer’s INPUT 1 (FROM AMPLIFIER) terminals. Connect the front speakers to the subwoofer’s OUTPUT (TO SPEAKERS) terminals. Although the subwoofer is connected between the front speakers and the amplifier, the sound volume or quality will not be affected. Connecting one subwoofer NS-SW300 NS-SW200 Subwoofer... - Page 11 Connecting two subwoofers NS-SW200 NS-SW300 Right front Left front Left front Right front speaker speaker speaker speaker Speaker output Amplifier or terminals receiver Speaker output terminals Amplifier or receiver Subwoofer Subwoofer Subwoofer Subwoofer ■ Example: Connecting the subwoofer to an amplifier featuring two sets of speaker output terminals (A and B) that can output sound signals simultaneously Set the amplifier so that both sets of speaker output terminals (A and B) will output sound signals simultaneously.
-
Page 12: Connecting To The Input1/Output Terminals Of The Subwoofer
Remove the insulation at the tip of the speaker cable, then twist the core wires together so on the cable at the terminal. that they will not become disarrayed and short-circuited. ■ Connecting the banana plug (NS-SW300 only) 15 mm / NS-SW300 Remove about 15 mm (5/8") of insulation. 10 mm Tighten the terminal knob. -
Page 13: System Connections
System connections AUTOMATIC POWER-SWITCHING FUNCTION If you use the included system control cable to connect a subwoofer to a Yamaha This function automatically places the subwoofer in standby mode if the subwoofer does component (that features a system connector jack such as a YSP series component or not detect a signal from the amplifier for a certain period of time. -
Page 14: Adjusting The Balance
To achieve natural sound with an effective super-bass component, you must adjust the volume and tone balance between the subwoofer and the front speakers. Follow the procedure described below. If your amplifier or other component connected to the system features subwoofer settings, make the appropriate settings on that component. NS-SW300 NS-SW200... - Page 15 Set the PHASE switch to the position which yields the more natural (or preferable) phasing. Set the B.A.S.S. switch to “MOVIE” or “MUSIC” according to the played source. (NS-SW300 only) MOVIE: When a movie type source is played, the low-frequency effects are enhanced to allow listeners to enjoy a more powerful sound.
-
Page 16: Subwoofer Frequency Characteristics
The figures below show the optimum adjustment of each control and the frequency characteristics when the subwoofer is combined with a typical front speaker system. ■ ■ NS-SW300 When combined with 10 cm (4") or 13 cm (5") When combined with 20 cm (8") or 25 cm (10") -
Page 17: Troubleshooting
If the instructions given below do not help, or if the problem you are experiencing is not listed below, turn off the power to the unit, disconnect the power cord and contact an authorized Yamaha dealer or service center. Problem... -
Page 18: Specifications
SPECIFICATIONS NS-SW300 Type ............Advanced Yamaha Active Servo Technology II Driver....................25 cm (10") cone woofer Magnetic shielding type Amplifier Output (100 Hz, 5 ohms, 10% THD) ............ 250 W Frequency Response................... 20 Hz - 160 Hz Power Supply U.K. and Europe models ..............AC 230 V, 50 Hz Australia model ..................AC 240 V, 50 Hz... - Page 20 • La unidad podría averiarse si se escucharan continuamente ciertos sonidos en el nivel máximo de usar este aparato por primera vez. Yamaha no se - Cristal, porcelana, pequeños objetos metálicos, etc. volumen. Por ejemplo, si se escuchan ondas sinusoidales Se podrían producir lesiones personales si el cristal u...
- Page 21 ADVERTENCIA CONTENIDO PARA REDUCIR EL RIESGO DE INCENDIOS Y DESCARGAS ELÉCTRICAS, NO EXPONGA ESTA ADVANCED YAMAHA ACTIVE SERVO UNIDAD A LA LLUVIA O A LA HUMEDAD. TECHNOLOGY II............1 Twisted Flare Port ............1 Esta unidad no se desconecta de la fuente de alimentación de CA si está...
-
Page 22: Advanced Yamaha Active Servo Technology Ii
Desde el punto de El puerto abocinado trenzado desarrollado por Yamaha cambia la forma en la que el puerto vista del amplificador, la impedancia del altavoz cambia según la frecuencia de sonido. -
Page 23: Características
ángulo. (Figuras • El subwoofer también puede reproducir un sonido grave que sea adecuado para la fuente (solo NS-SW300). Presenta un interruptor B.A.S.S. que le permite Se puede dar el caso de que no se seleccionar un efecto de graves adecuado para la fuente. -
Page 24: Controles Y Sus Funciones
CONTROLES Y SUS FUNCIONES Compruebe el número de modelo de su subwoofer en la etiqueta del panel trasero. NS-SW300 NS-SW200 Superior Superior Delantero < Delantero 7 8 < Trasero Trasero... - Page 25 El indicador se apagará. Yamaha (que cuente con un terminal de conexión del sistema), el subwoofer se encenderá o apagará automáticamente cuando se encienda o se apague el componente El subwoofer utiliza una pequeña cantidad de energía en el modo de espera.
-
Page 26: Conexiones
• Todas las conexiones deben ser correctas, esto es, L (izquierdo) con L, R (derecho) con R, “+” con “+” y “–” con “–”. Conexión con los terminales (con clavija) de salida de línea del amplificador Ejemplo: Conexión de un subwoofer NS-SW300 NS-SW200 Subwoofer Subwoofer... - Page 27 Ejemplo: Conexión de dos subwoofers NS-SW200 NS-SW300 Subwoofer Subwoofer Subwoofer Subwoofer Amplificador o Amplificador o receptor Cable monoaural con clavija receptor Cable monoaural con clavija Conexión con el terminal INPUT3 (LFE) Si el amplificador (o el receptor) puede cortar las frecuencias altas de las señales enviadas al subwoofer,...
-
Page 28: Conexión Con Los Terminales De Salida De Los Altavoces Del Amplificador
Utilice cables para altavoces para conectar los terminales de salida de altavoces del amplificador con los terminales INPUT 1 (FROM AMPLIFIER) del subwoofer. Conecte los altavoces delanteros en los terminales OUTPUT (TO SPEAKERS) del subwoofer. Aunque el subwoofer esté conectado entre los altavoces delanteros y el amplificador, esto no afectará al volumen o calidad del sonido. Conexión de un subwoofer NS-SW300 NS-SW200 Altavoz Subwoofer... - Page 29 Conexión de dos subwoofers NS-SW200 NS-SW300 Altavoz Altavoz Altavoz Altavoz derecho derecho izquierdo izquierdo delantero delantero delantero delantero Terminales de Amplificador o salida de altavoces receptor Terminales de Amplificador o salida de altavoces receptor Subwoofer Subwoofer Subwoofer Subwoofer ■ Ejemplo: Conexión del subwoofer con un amplificador que cuenta con dos conjuntos de terminales de salida para altavoces (A y B) y que puede dar salida simultánea a las señales de sonido...
-
Page 30: Conexión Con Los Terminales Input1/Output Del Subwoofer
Retire el aislamiento en la punta del cable del altavoz y retuerza los cables centrales juntos verificar que está firmemente conectado. para que no se desorganicen ni provoquen un cortocircuito. ■ Conexión de la clavija tipo banana (solo NS-SW300) 15 mm / NS-SW300 Retire unos 15 mm de aislamiento. 10 mm Apriete la perilla del terminal. -
Page 31: Conexiones Del Sistema
El subwoofer componente de la serie YSP o un receptor Yamaha), el subwoofer se encenderá o apagará se enciende automáticamente tan pronto como detecta una señal desde el amplificador. -
Page 32: Ajuste Del Balance
Para conseguir un sonido natural con un componente efectivo de ultragraves, deberá ajustar el balance del volumen y el tono entre el subwoofer y los altavoces principales. Siga el procedimiento que se describe a continuación. Si el amplificador u otro componente conectado al sistema incluye ajustes de subwoofer, realice los ajustes necesarios en ese componente. NS-SW300 NS-SW200... - Page 33 Ponga el interruptor PHASE en la posición que produzca el ajuste de fases más natural o preferible. Coloque el interruptor B.A.S.S. en “MOVIE” o “MUSIC” en función de la fuente que se reproduzca. (solo NS-SW300) MOVIE: Cuándo se reproducen fuentes de películas, se mejoran los efectos de bajas frecuencias para que los oyentes puedan disfrutar de un sonido más potente.
-
Page 34: Características De Frecuencias Del Subwoofer
■ Cuando se usa en combinación con un sistema Cuando se usa en combinación con un sistema NS-SW300 de altavoces principales de 2 vías de de altavoces principales de 2 vías de suspensión acústica de 10 cm o 13 cm. -
Page 35: Resolución De Averías
Si las instrucciones facilitadas no ayudan a solucionar el problema, o si el problema no es uno de los que aparecen en la siguiente lista, apague la alimentación de la unidad, desenchufe el cable eléctrico y póngase en contacto con un distribuidor o centro de servicio autorizado de Yamaha. -
Page 36: Especificaciones
ESPECIFICACIONES NS-SW300 Tipo............Advanced Yamaha Active Servo Technology II (Tecnología avanzada de servo activo de Yamaha) Unidad ..................Altavoz cónico de 25 cm Tipo de blindaje magnético Salida de amplificador (100 Hz, 5 ohmios, 10% THD)......... 250 W Respuesta de frecuencia................20 Hz - 160 Hz Alimentación...